

EComposer App Dashboard Settings
These options from the App Settings menu allow you to fill in all your private store information, such as:
- Store details
- Theme management
- Subscription
- Usage
- Activity log
- Bulk import/export templates
To open the App Settings, go to App Dashboard -> Settings.
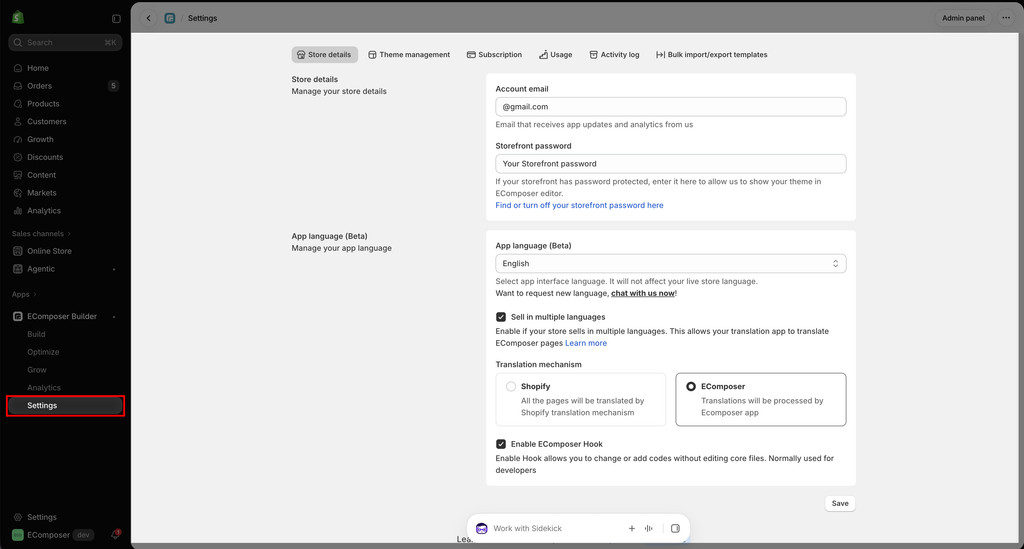
1. Store details
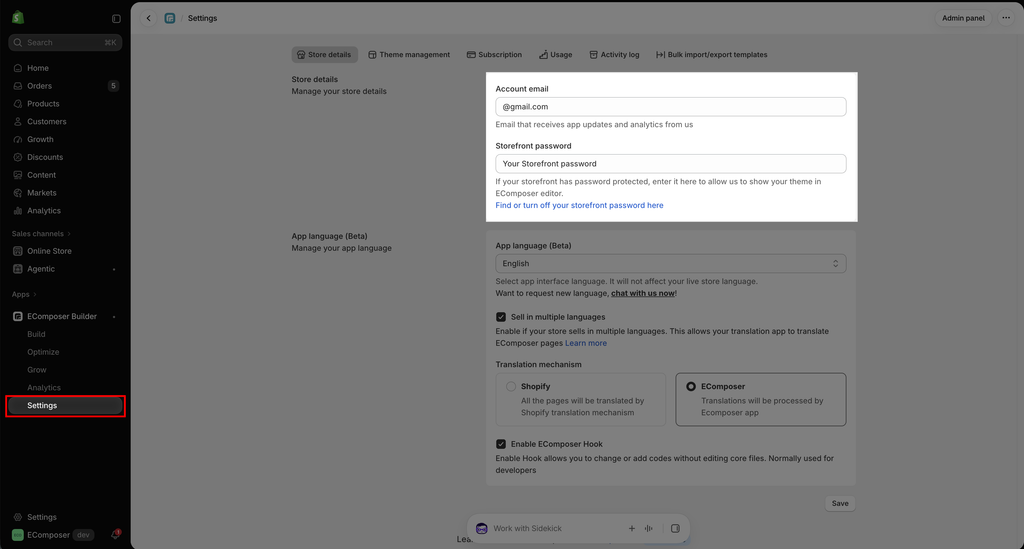
- Account email: Our support team will contact you using the email address you provide in the field.
- Storefront password: If you have a password, you have to fill in the blank to recognise your store’s theme in the App. Do not worry about information security; your retail outlet’s storefront password is password-protected.
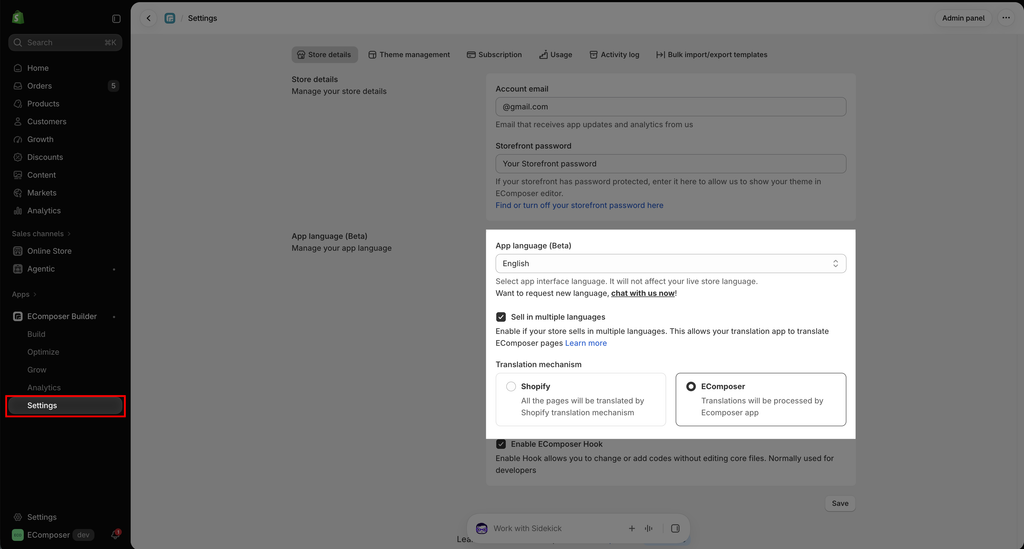
- App language (Beta): When you select one of those languages, you will see that type of language in the EComposer App Dashboard and the App Editor. Otherwise, English will be used as the default. Currently, we support English and Japanese.
- Sell in multiple languages: This option will help your store turn on various kinds of global customers who can easily get more business information. Do not select it if you want to keep turning on the original language. Click on this link to research extra details about this function. There are 2 translation mechanisms:
+ Shopify: All the pages will be translated by Shopify translation mechanism. You need to use a third-party translation app when this option is selected. This link might help you get more information.
+ EComposer: Translations will be processed by Ecomposer app. This feature allows you to translate the content of pages created with the EComposer app into different languages without needing to install additional apps. Visit this link for more details.
- Enable EComposer Hook: This will allow you to change or add code to elements like the product grid since you can’t drag and drop other elements between the title and price, for example, in the Product grid element.
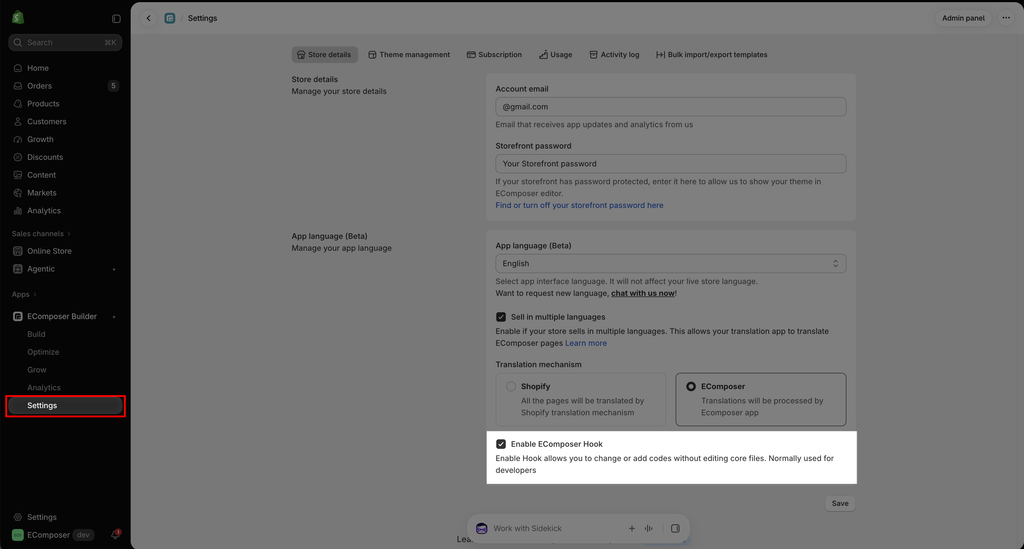
Here’s an example of the EComposer hook being used. These files can be located in the Snippets tab of the Theme. Go to Online store -> Theme -> Edit code -> Snippets. You can find the code file of the position to which you want to add custom code.
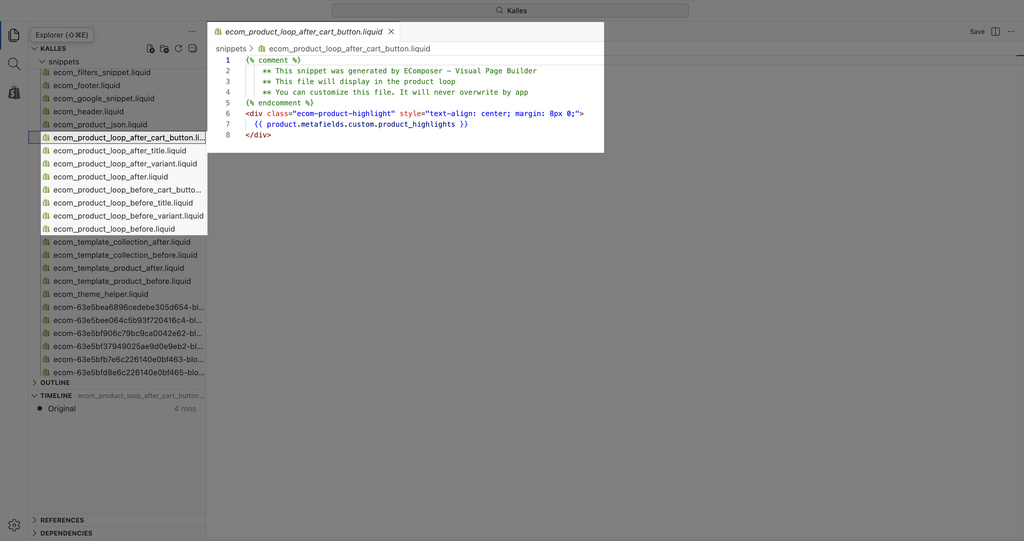
This document might help you have more details about that option
2. Theme management
- Theme working on: Select a theme to publish EComposer templates. By default, templates are added to your live theme.
- Layout sync: If you change your theme, you can sync all EComposer layouts to your new theme here.
- Clean theme code: This option will only remove all the EComposer code and asset file from the theme that being selected from our app. Your current pages, layouts, and EComposer’s data will NOT be deleted.
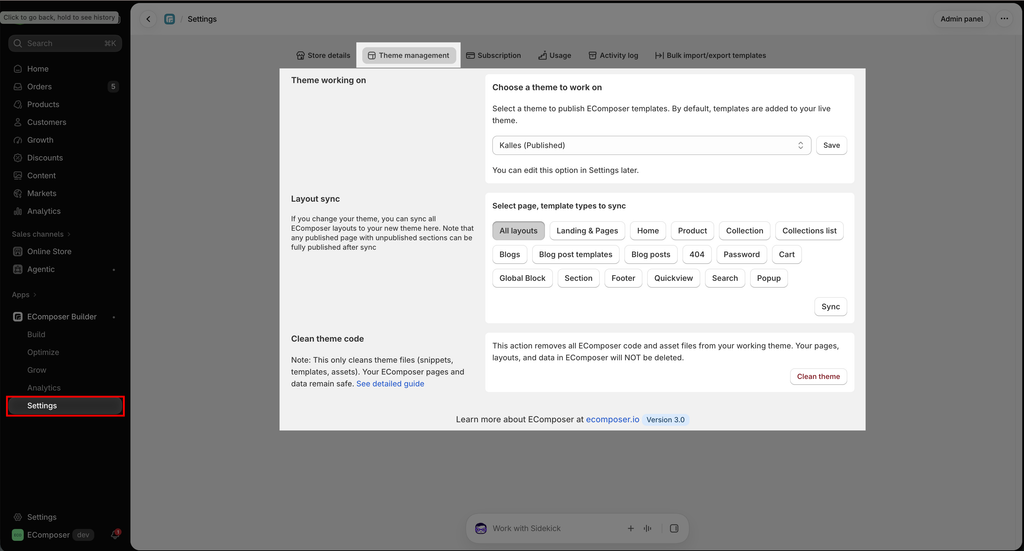
Note: Please consider deeply before removing/fixing in this stage of the process.
3. Subscription
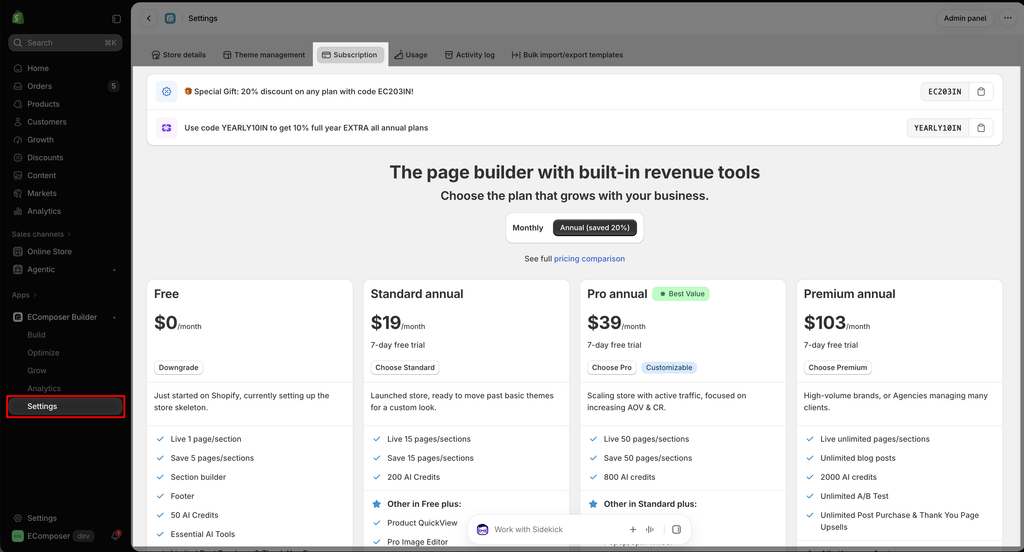
This board may help you to update which plan you are in and may also help you have more information to upgrade your App plan (also known as your App level).
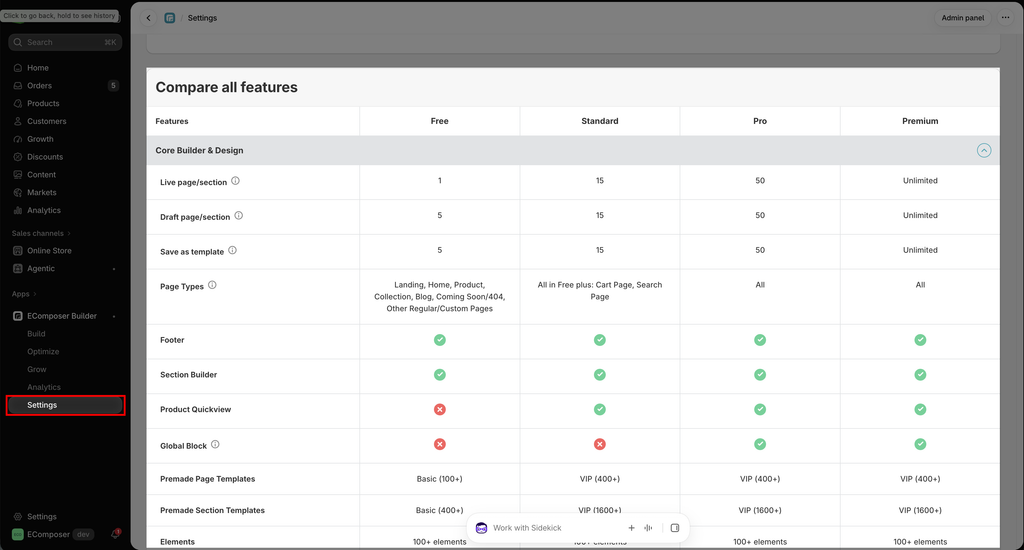
- EComposer offer 4 main plans: Free, Standard, Pro, and Premium, with both monthly and yearly billing options. Users who choose yearly billing can save up to 20% compared to monthly pricing. Please check the details of our pricing plan here.
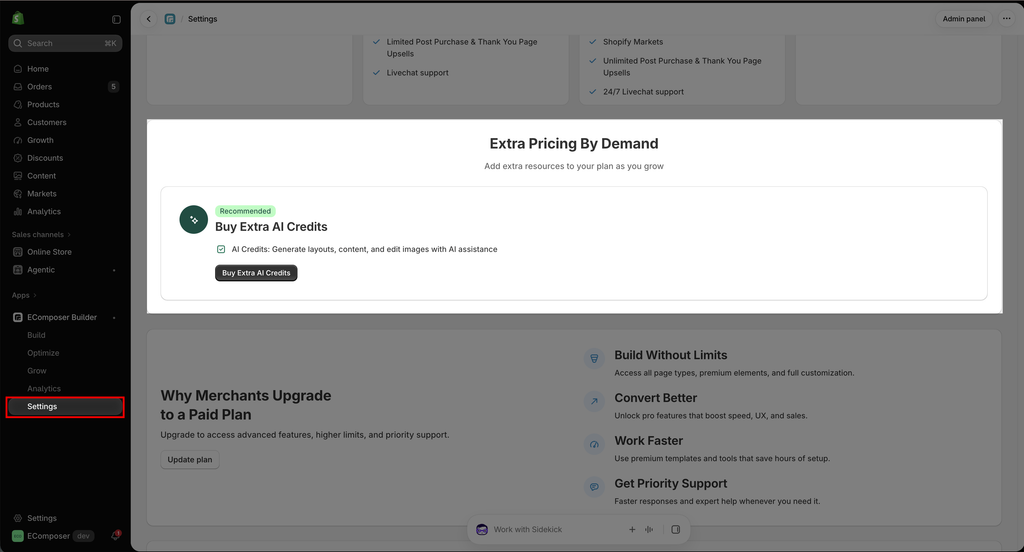
- Extra Pricing By Demand: We do support buying more AI Credits and Blog Posts if you need. If you would like more details, you can visit the document here for AI Credits and here for Blog Posts.
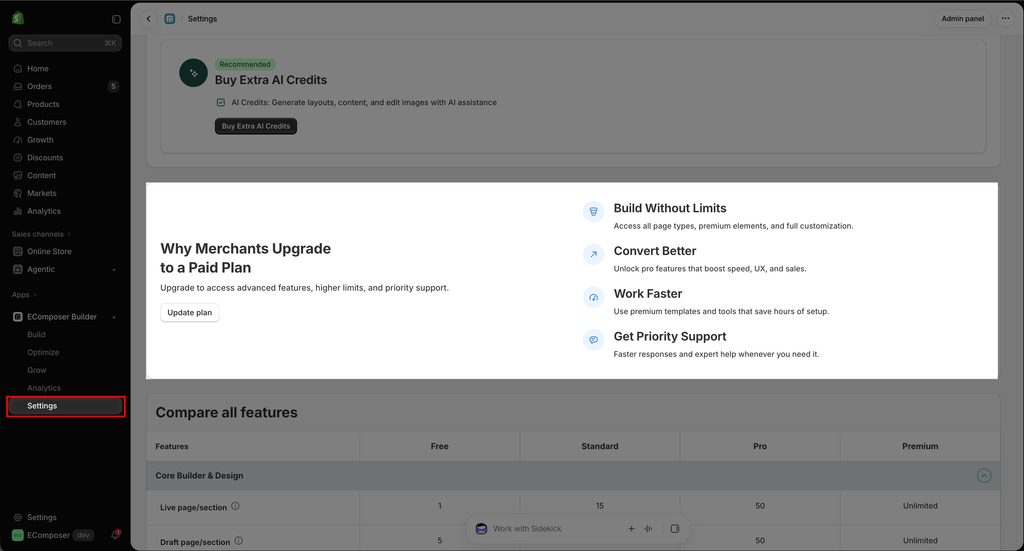
- Why Upgrade to a Paid Plan: Merchants need to upgrade to access advanced features, higher limits, and priority support.
- Compare all features: The table below shows the details of each plan with all features.
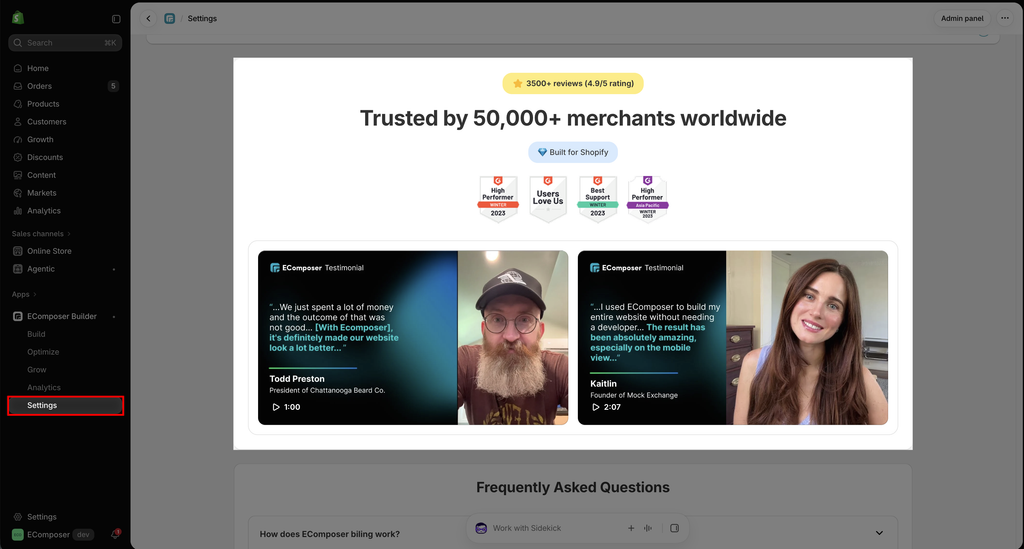
- Testimonials: This part will show trust and feedback from the merchant who is successful in EComposer
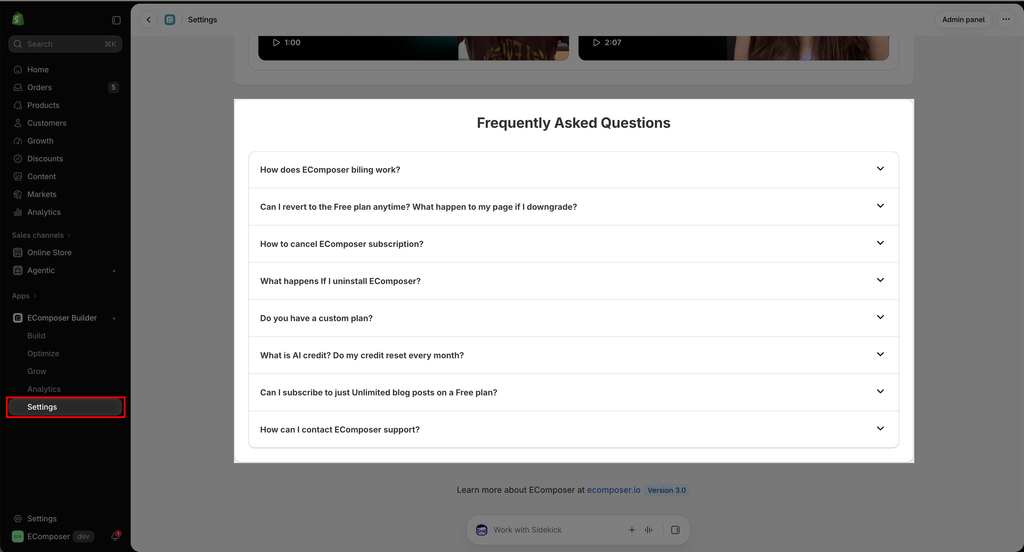
- Frequently Asked Questions: Show the most frequently asked information about EComposer.
4. Usage
This board may help you to update which plan you are in and may also help you to upgrade your App plan (also known as your App level).
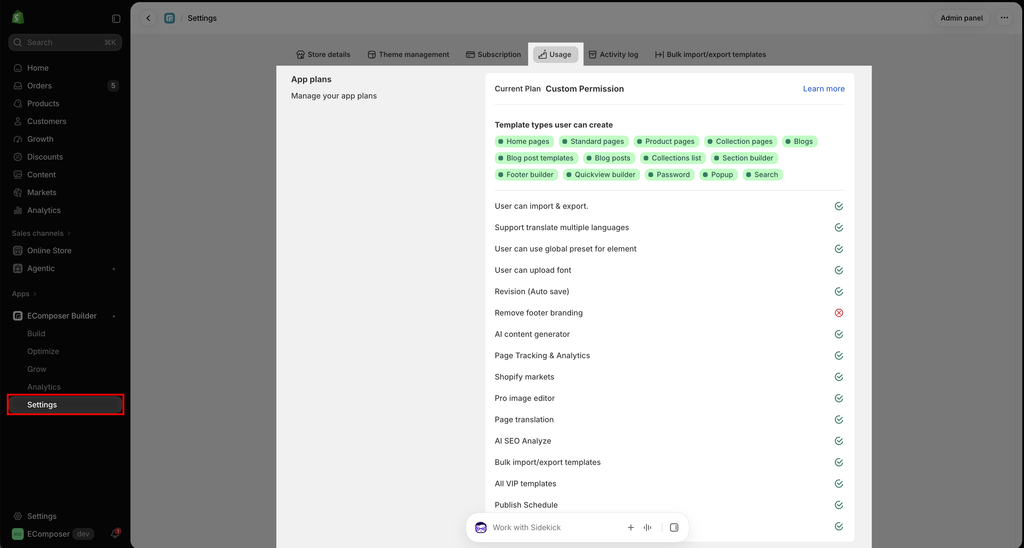
- Current Plan: This option will show the subscription that you are currently using.
- Template types the user can create: It will show all the pages/templates type that you can create on your current plan.
- User can import & export: The user will be able to export the layout from Store “A” and subsequently import it into Store “B” using this capability. On Free and Standard Plan, you can only import/export once at a time. Bulk import/export will be available on Pro and Premium.
- Support for translating multiple languages: Support for translating EComposer page content in multiple languages to accommodate global audiences by using a third-party translation app.
- User can use global preset for element: This means that you can use a global preset for the element.
- User can upload font: This means you can upload fonts to EComposer editor to use.
- Revision (Autosave ): This function automatically saves your edits on the page every 5 minutes.
- Remove footer branding: The EComposer branding will be removed and have a green ticked on the Paid plan.
- AI content generator: With EComposer, users can generate a wide range of content types, including product descriptions, blog posts, social media posts, email marketing content, and more… via AI.
- Page Tracking & Analytics: It allows users to track the number of page views, time spent on the page, bounce rate, and other key performance indicators (KPIs) for each piece of content. The data collected through page tracking can provide insights into the audience’s behaviour on the website, including which pieces of content are popular and which are not performing well.
- Shopify market: allows you to use many markets for your store, and helps you manage and expand your global sales. This document might help you have more information about that.
- Pro image editor: Edit the image in advance from EComposer’s editor.
- Page translation: Translate the EComposer page directly via EComposer. Visit this document for further information about this feature
- AI SEO Analyze: uses artificial intelligence to scan and assess your site’s SEO structure, keywords, backlinks, …
- Bulk import/export templates: export and import all the pages/templates in bulk.
- All library templates: access to all the templates in the EComposer’s library. If you’re in the Free plan, you can only access Free template in the library.
- Publish Schedule: Schedule the specific time to publish the page.
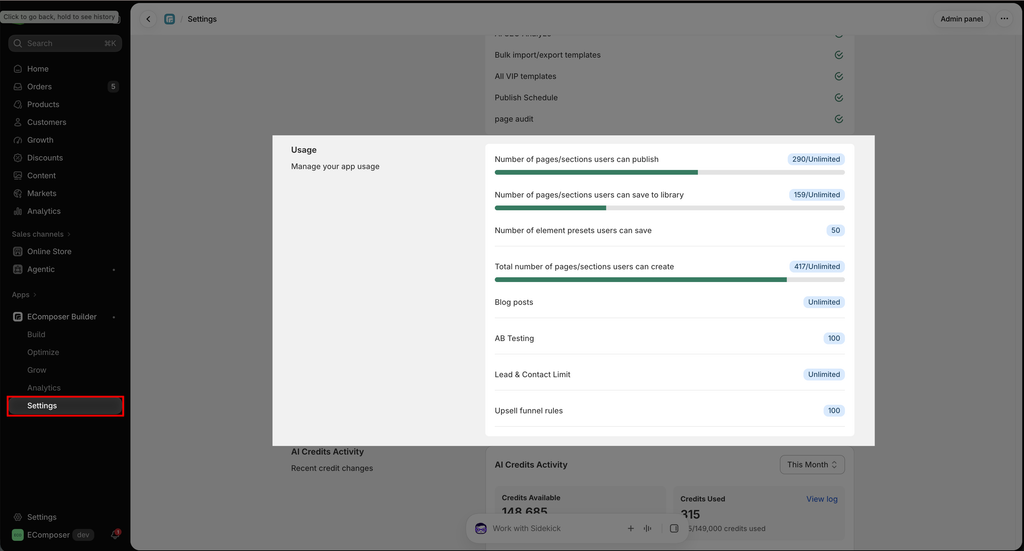
- Number of templates that the user can publish: Shows the published page limit and the number of pages you can create and publish on your current plan.
- Number of templates the user can save to the library: Number of templates that you can save under My templates. You can reuse them from the library anytime you want.
- Number of templates the user can create: Show the number of pages you can create in unpublish/draft mode.
- How many presets the user can save: Show the limit of presets you can save.
- Blog posts: will only show if you have upgraded to the Unlimited Blog Post plan.
- AB Testing: The limit shows how many active A/B tests you can run at the same time.
- Lead & Contact Limit: The number of leads and contacts you can store in your account. This is for the “Contact form by EC” element.
- Click on Change plan to research more features of higher plans that you would love to change and consider which plan is better for your business.
- Click on Cancel change to delete your current plan.
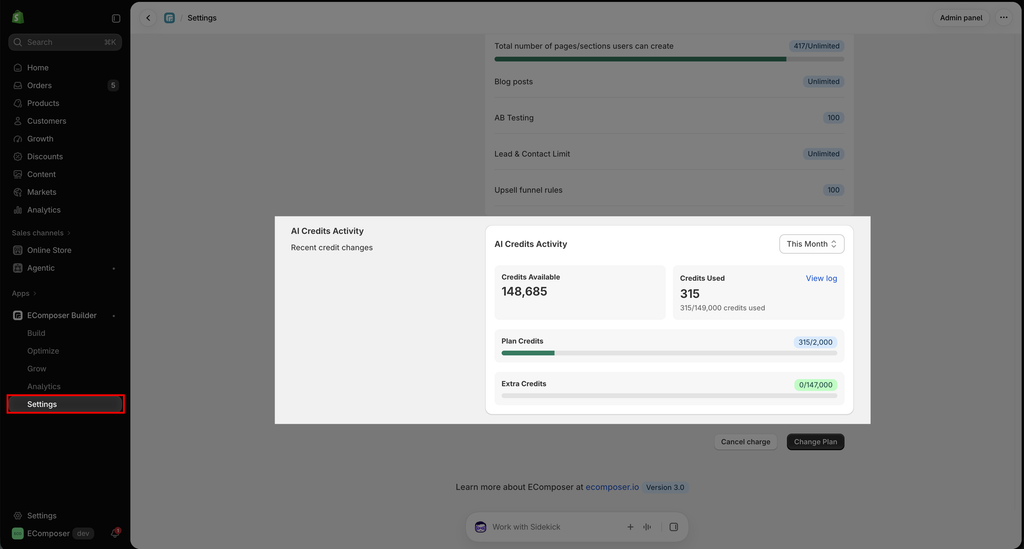
AI Credits Activity
Track your AI credit usage, including your available balance, credits consumed, and recent credit activity.
- Credit Available/ Plan Credits: Displays the total number of AI Credits currently available for use. This includes credits from your subscription plan as well as any Extra Credits you have purchased.
- Credits Used: Shows the total number of AI Credits consumed during the selected time period. Use the date filter (e.g., This Month) to monitor your AI credit usage over time.
- Extra Credits: Extra Credits are additional AI Credits that you can purchase whenever your plan credits are not sufficient. You can purchase Extra Credits at any time. Extra Credits never expire and remain available until they are fully used. They provide additional capacity, ensuring uninterrupted access to AI-powered features even after your plan credits are exhausted.
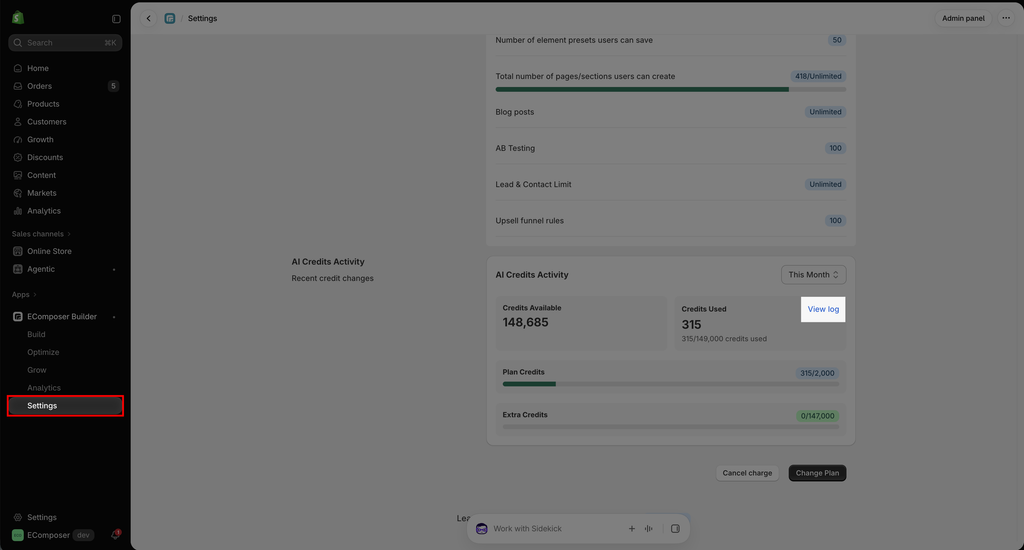
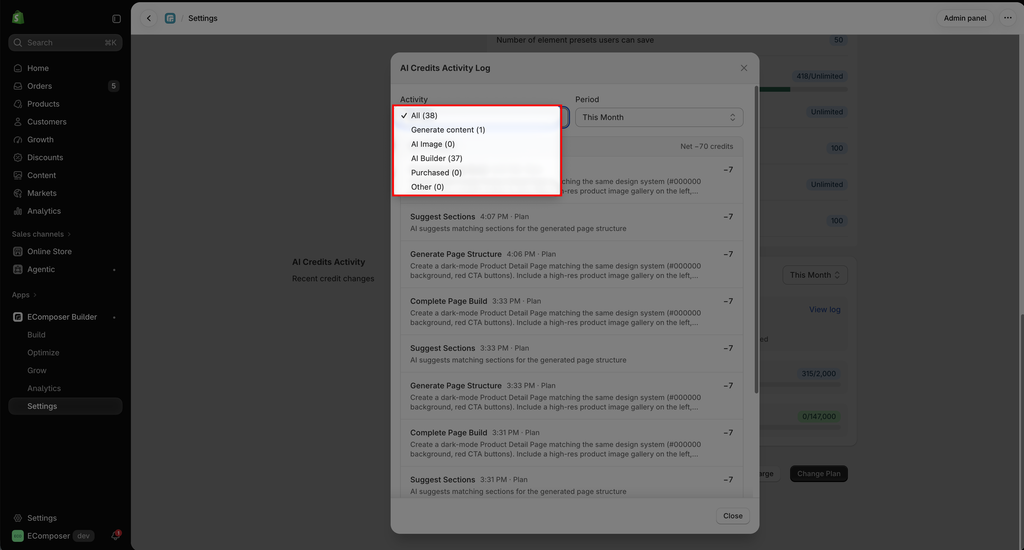
The AI Credits Activity also provides a detailed activity log, allowing you to track where your credits are being spent, including Generate Content, Image AI, AI Builder, Purchased activities. This helps you monitor and manage your AI credit consumption more effectively.
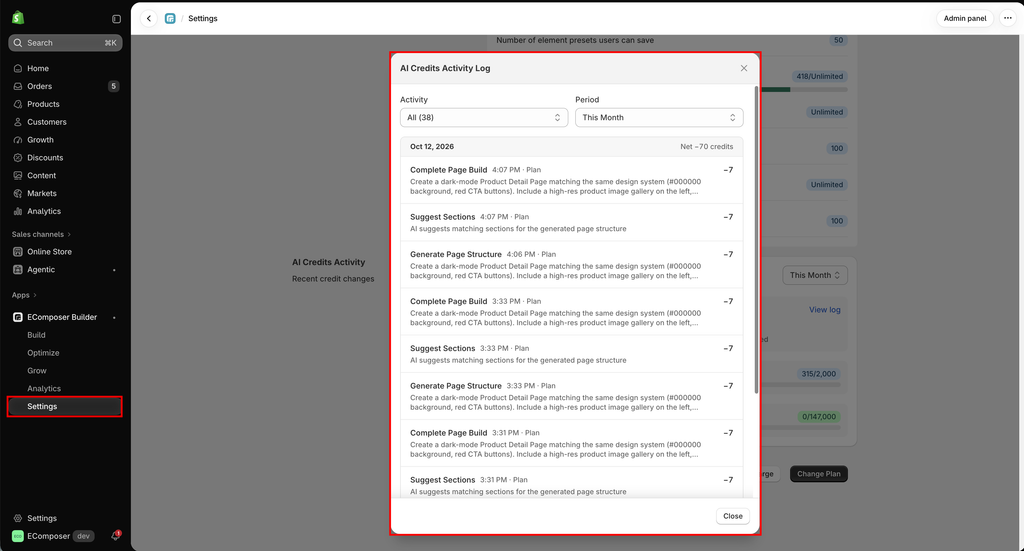
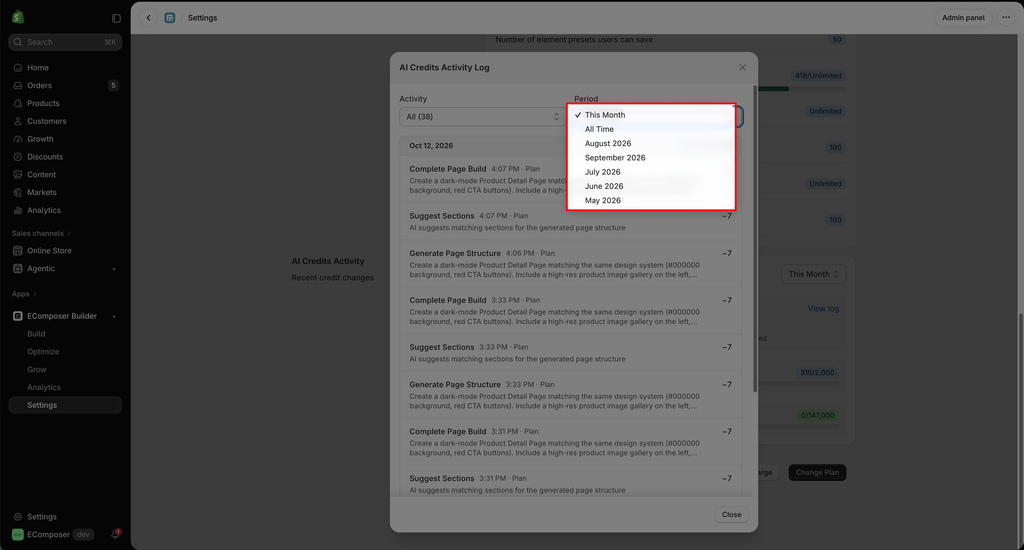
You can filter Actitivy of the AI usage, it includes Generate Content, AI Image, AI Builder, Purchases and Other as well as filtering Period
5. Activity log
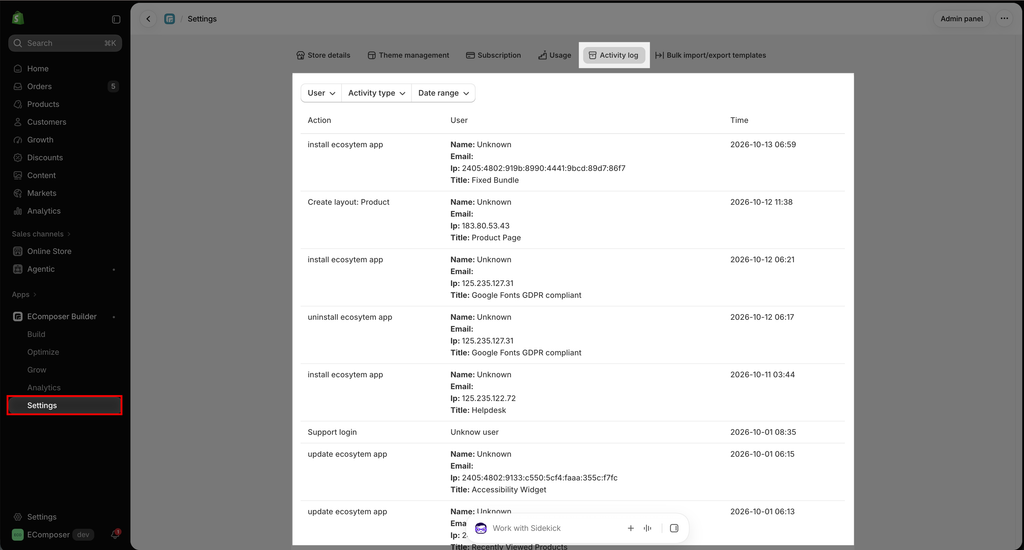
The activity log captures details such as the date and time of the action, the user who performed the action, and the type of action performed.
6. Bulk import/export templates
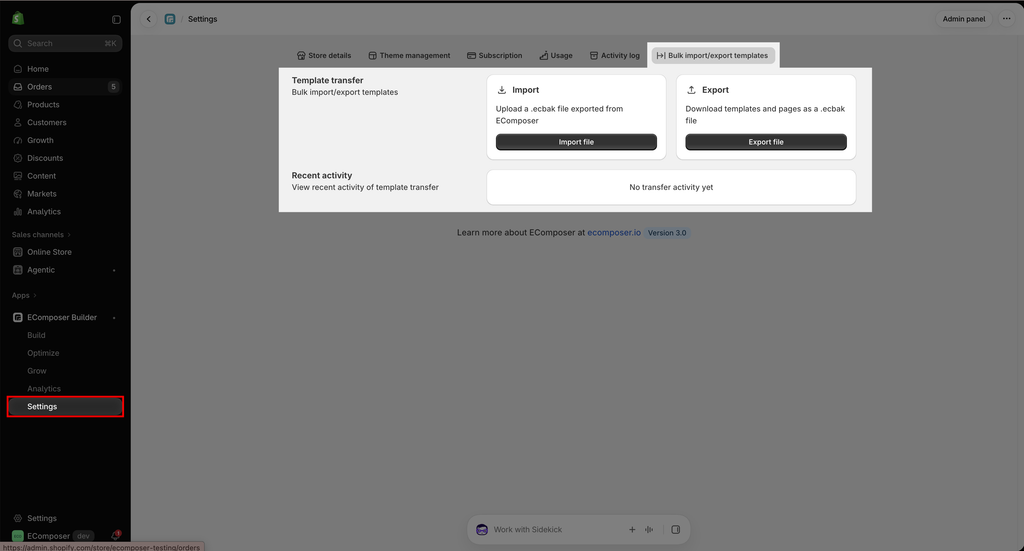
Bulk import/export templates is a powerful feature that allows you to easily copy all pages created with EComposer from one store to another in just a few simple steps. Instead of rebuilding each page manually, you can export all existing templates and quickly import them into a new store, saving time, maintaining design consistency, and improving your overall workflow efficiency.
6.1. Export
Follow these steps to export your templates or pages:
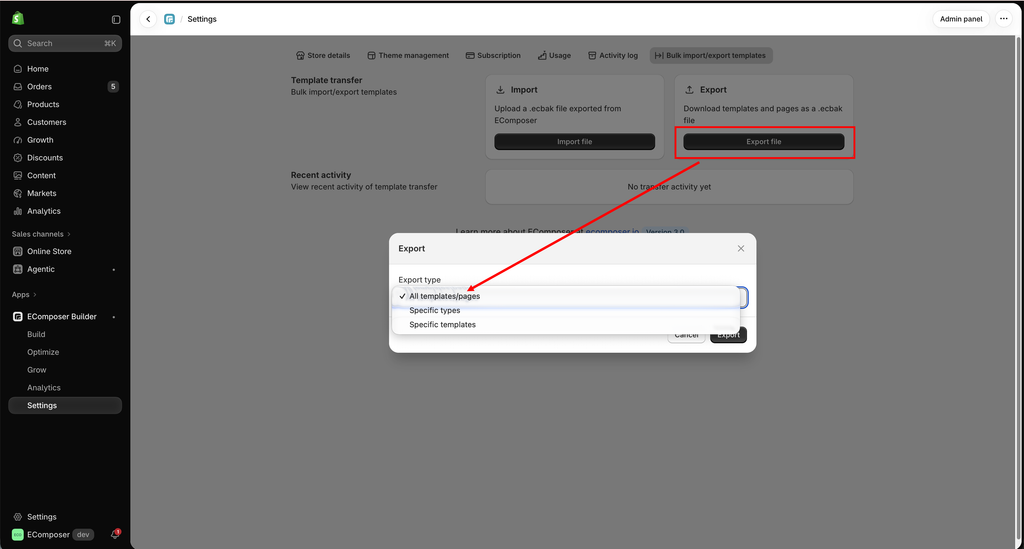
Step 1: Click on the Export file button to initiate the export process.
Step 2: In the dialog box, select whether to export all templates/pages or only specific types/templates.
Step 3: Click the Export button. An .ECBAk file will be generated and downloaded to your computer.
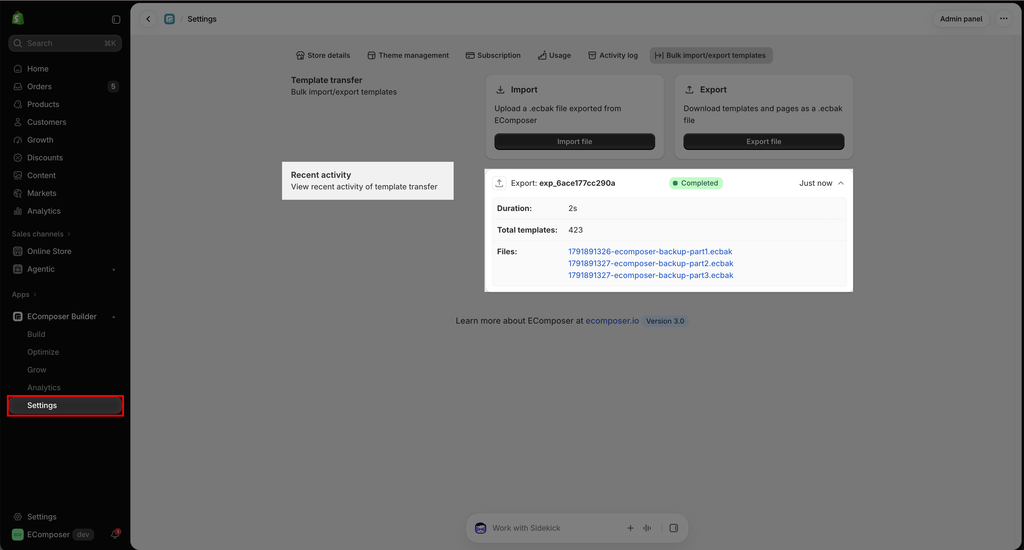
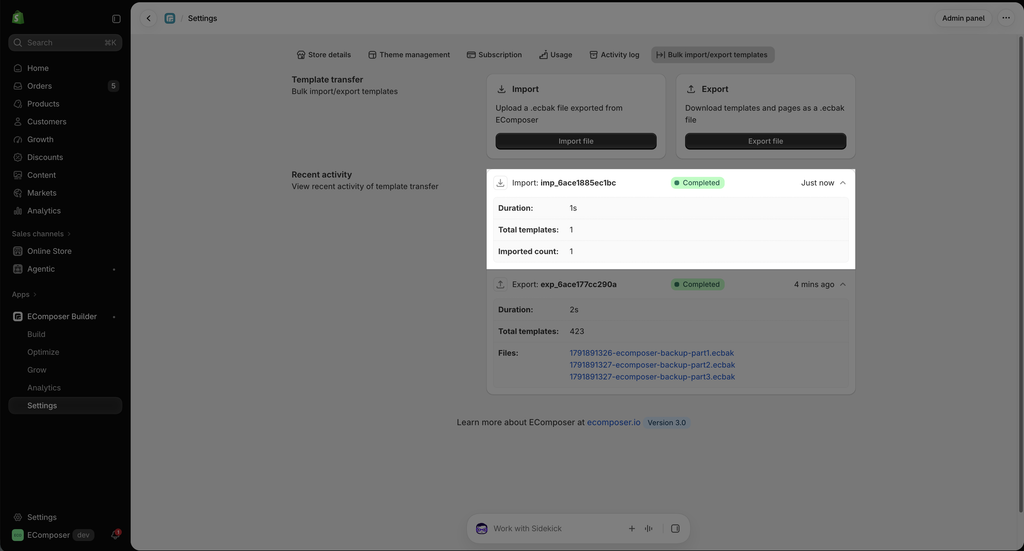
Recent activity: These logs typically show details of the duration, time, file format, and status of the export. If the status is Completed, that means you have exported successfully.
6.2. Import
Follow these steps to import templates or pages into another store:
Step 1: Click on the Import file button to start the import process.
Step 2: In the dialogue box, select the exported file from your computer.
Step 3: Click the Import button to import the files to your store.
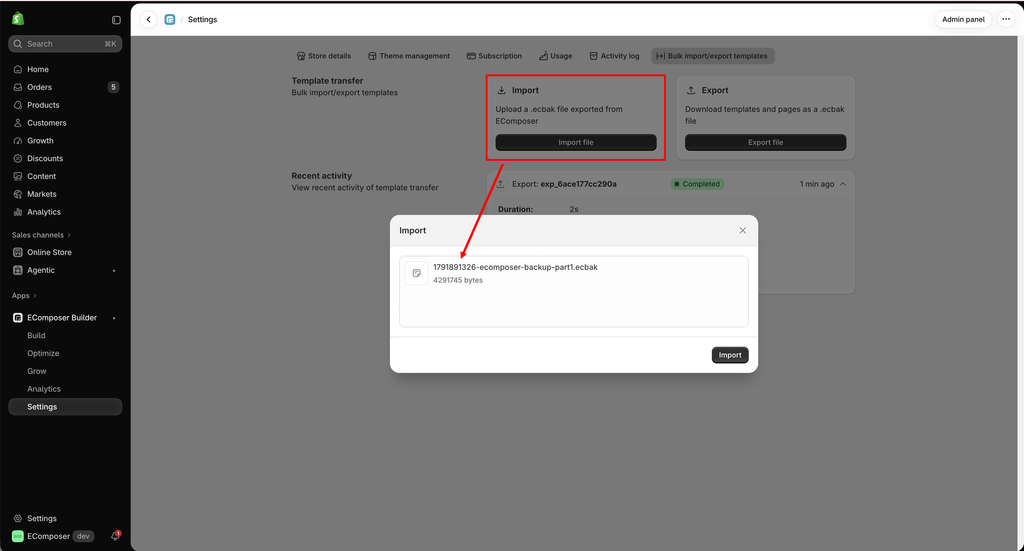
Recent activity: These logs show details such as duration, time, file format, and import status. If the status is Completed, your import has been successful.
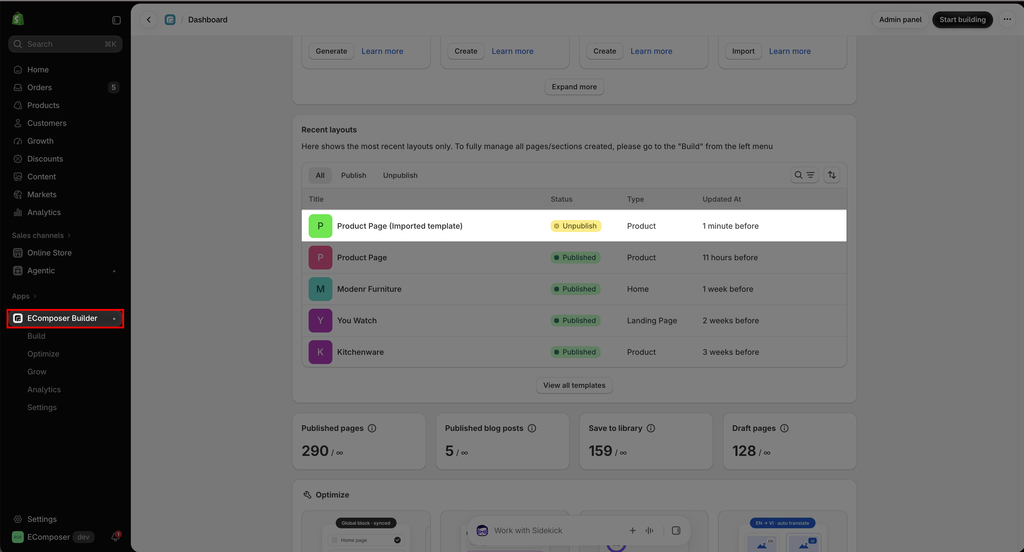
Result: After importing, go to the EComposer app dashboard to check your page or template list. All imported templates and pages will retain their original names from the source store, with an additional label Imported template displayed next to the name and their status set to Unpublish. You can open them in the editor to update the page name if needed, adjust the design, and then publish them as normal.
If there is anything that we could help with during the time that you get in trouble with the setting step, feel free to contact our support team. We are all ready to help.




