

How to create a Blog Post template in Shopify?
As you know, blog posts are a pretty important part of every store, but Shopify’s default template is too simple and does not meet your needs. If you are wanting to build a wonderful template, EComposer can help you out.
To build a Blog Post template, you simply need to Drop and Drag any element that belongs to create a Blog Post template. After finishing with a bunch of simple stages so you can end up with a cool Blog Post template created by yourself.
1. How to build a new Blog Post template (Built with EComposer)
By default, Shopify provides only one template for all Blog Post pages of your store. This template will overwrite your current theme template and the changes you made will apply to all your Blog Post Template.
In order to create a new Blog Post Template, please follow these steps:
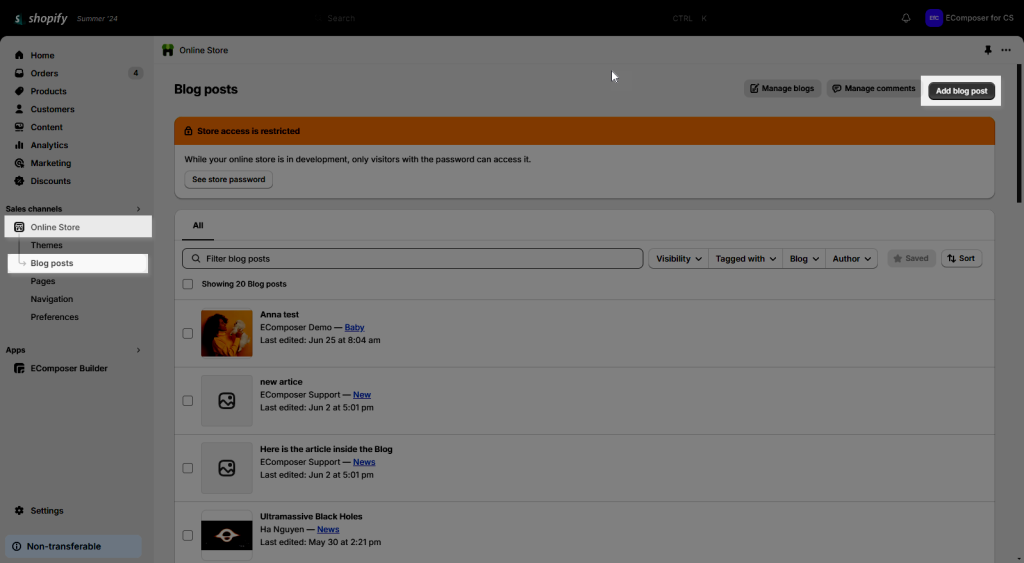
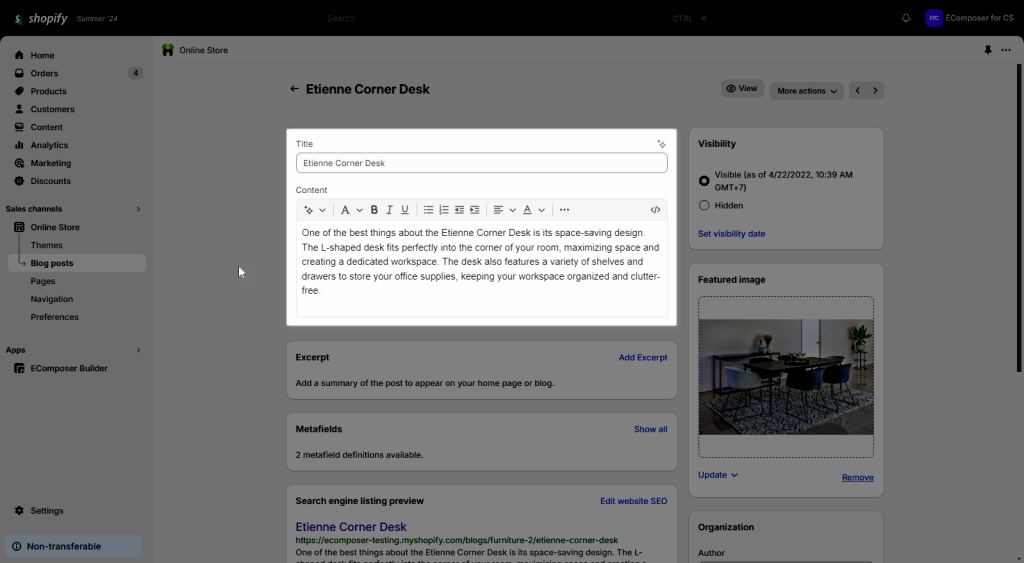
Step 1: Go to Shopify admin to create your Blog Post and publish it. EComposer will render the content of the Blog Post from Shopify to show. Learn more about Blog Post in Shopify here.
Write the Title and Content for your blog post in Shopify. You can also add the Featured image for your post and Save it.
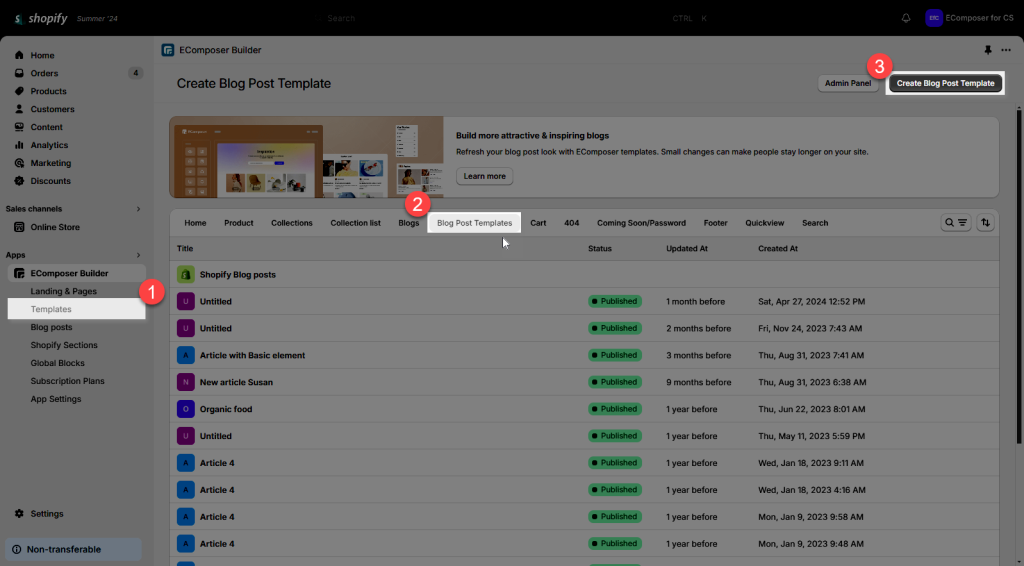
Step 2: Open the EComposer app, from the App dashboard –> open the Templates menu -> Click to open the Blog Post Templates tab –> Create Blog Post Template
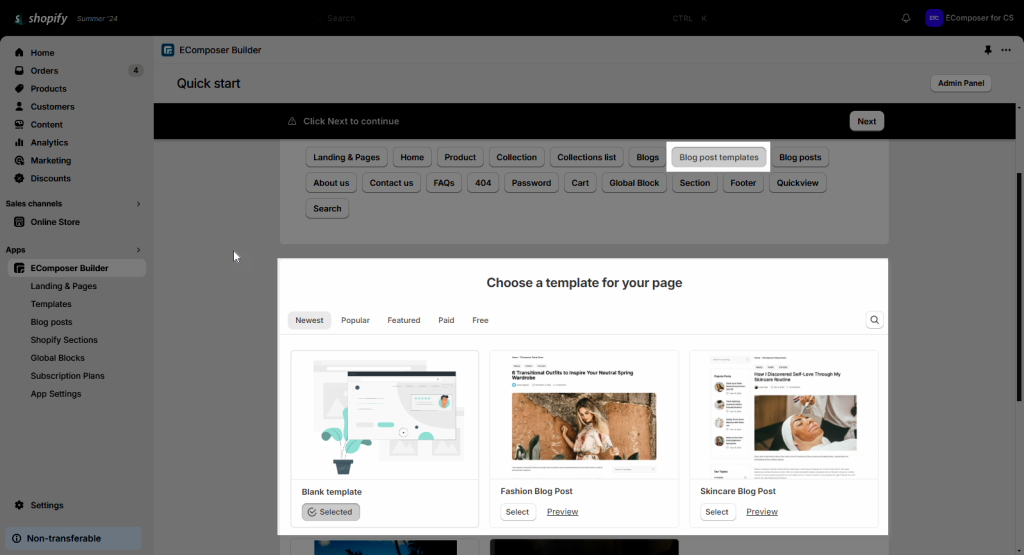
Step 3: You can select a Blank template to build your template from scratch or select a pre-build template to save time to build it. Then click the Next button.
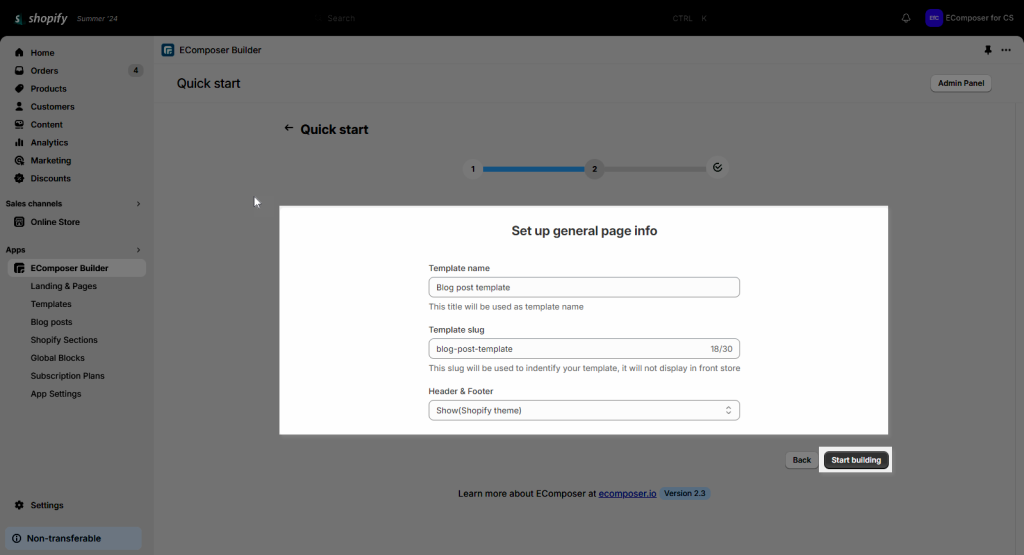
Step 4: Enter your template title and select to show or hide the Header and Footer on it. Click Start Building.
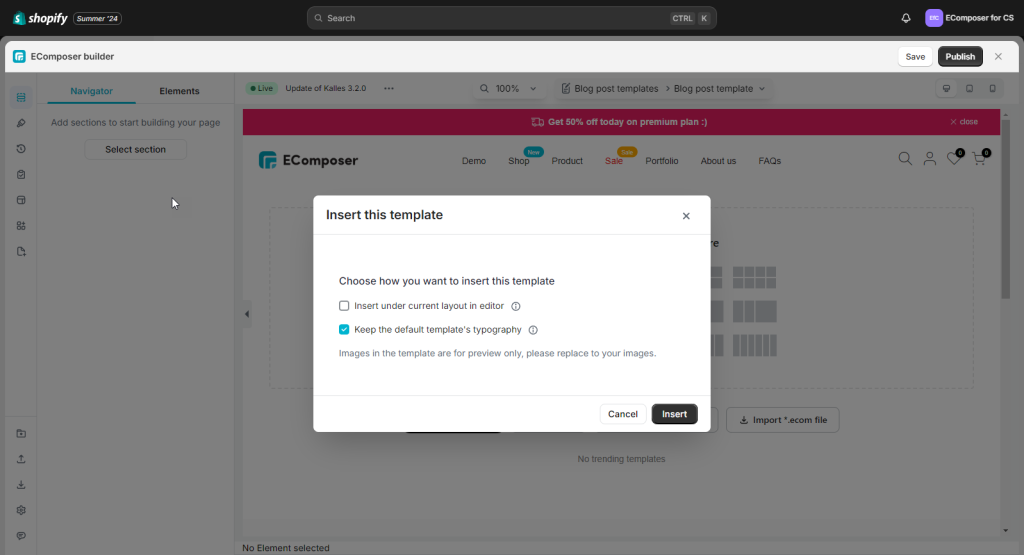
Step 5: You can choose how you want to insert it and click the Insert button to import the selected template to your page.
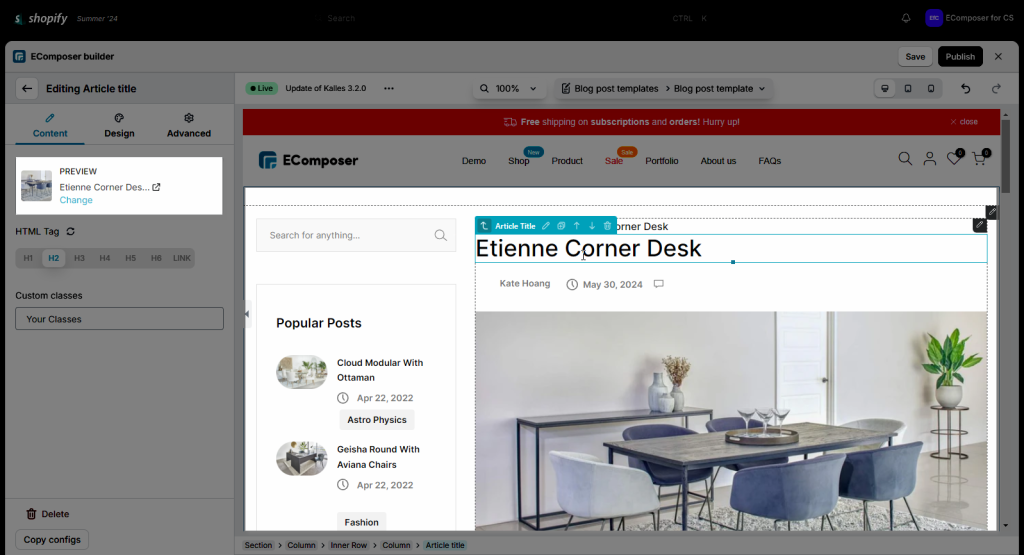
Step 6: You can click on any blog post element to select a post to show the content from Shopify to EComposer to preview.
If you want to create it from scratch, you can choose a structure first and then Drag any elements from the left-slider bar to configure. We recommend you use Blog Post elements to take the content from Shopify to show. So you can apply one template for all Blog posts in your store.
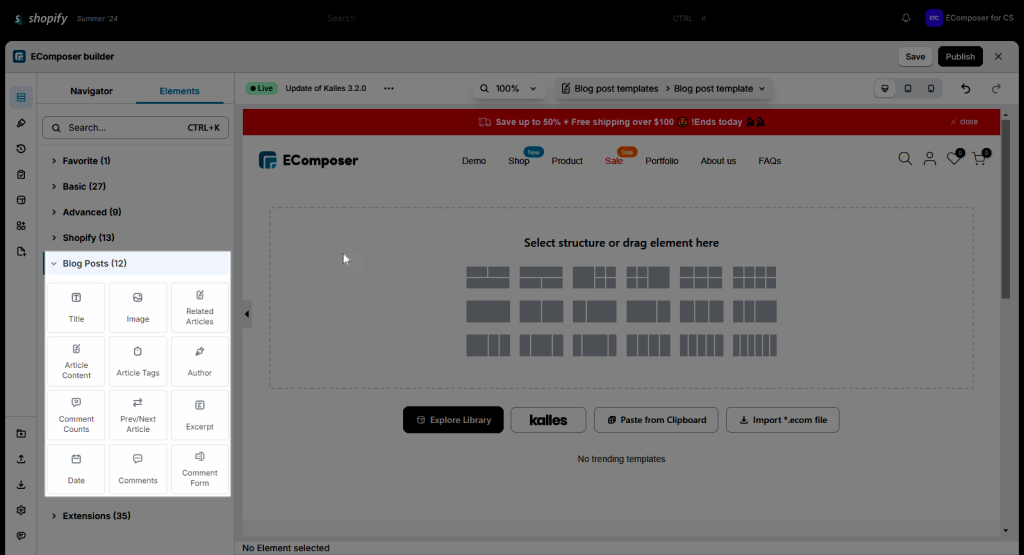
- Title: This element will take the title of your Blog Post from Shopify to show.
- Image: Whenever you want to add an image, please come to this element to do it. This will let your readers quickly get the point of your post via the picture.
- Related Article: The related blog post will display the post that has the same condition as the post you are reading, as well as the recommended post for the user to read further.
- Article Content: The post will not be perfect without this part, because you can write many main things to deliver to your readers through the content.
- Article Tags: This element will help you view the tag for the purpose of letting the reader easily search for your Blog Post.
- Author: Help you show the author’s name here.
- Comments, Comment count, Comment form: This element will present the comments from your customers. Including the number of comments, and so on.
- Prev/Next Article: This element will notify the user of the most latest post they have viewed while also displaying the following article in the same state for the user to explore further.
- Excerpt: It will allow you to include a brief synopsis of the article you are discussing on your blog post or homepage.
- Date: Come to this element the customers may update the date and time when you post it on your store.
2. How to assign the Blog Post template in EComposer to your Blog Post?
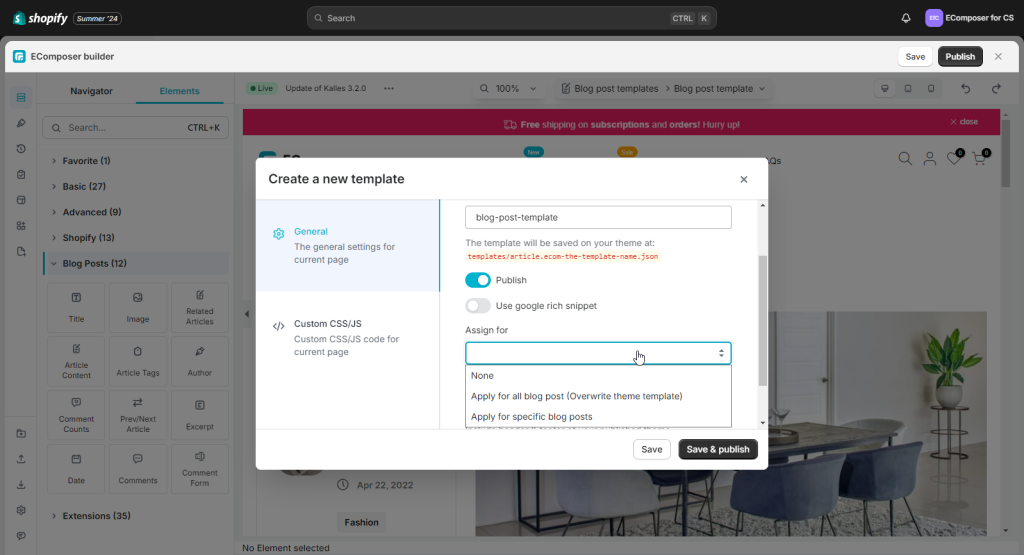
Please click on the Publish button at the top right corner to see the Publish popup. Turn on the Publish option and select the Assign for option. We have 3 choices:
- None: This means you apply for nowhere, just save it.
- Apply for all Blog Posts: This action will apply the Blog Post template from EComposer to all of your Blog Post. It will overwrite the Shopify default template.
- Specific Blog Posts: That means several Blog posts that you select, which will be applied.
3. How to restore to the Shopify default Blog Post template?
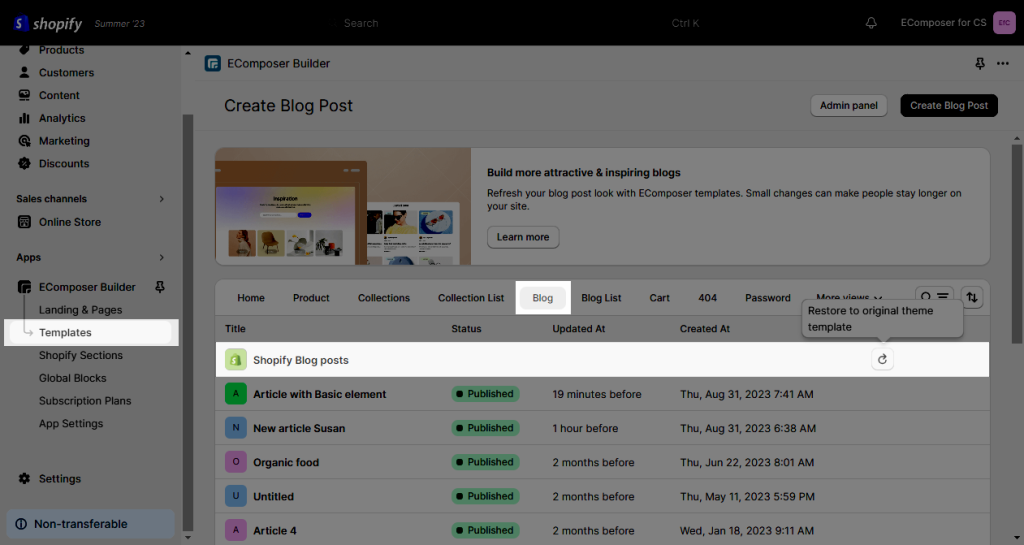
In case you don’t want to use the Blog Post template from EComposer and you want to restore to the Shopify default template, please follow the below steps:
- From the Ecomposer dashboard > Templates
- Click on Blog
- Hit on the icon Restore
4. How to delete a Blog Post template?
- The first way: Click on the dropdown menu Blog post -> Choose Trash icon.
- The second way: Go on Blog Dashboad –> Hover on the template –> More options –> Remove button
Note: The Default template could not be deleted immediately; however, you should read No.3 above to learn how to restore it first. This will enable you to delete the Blog post template in EComposer in the correct order.


