How to add the page created in EComposer to your website?
After you build a page with EComposer, you need to make it easy for customers to find. The most common ways are adding the page to your store menu (header or footer) or linking it from a button.
This guide shows you how to publish your page, add it to a Shopify menu, and link it to a button in EComposer.
1. Publish your page
First, make your page live. Only published pages can be added to your store menu or linked from other pages.
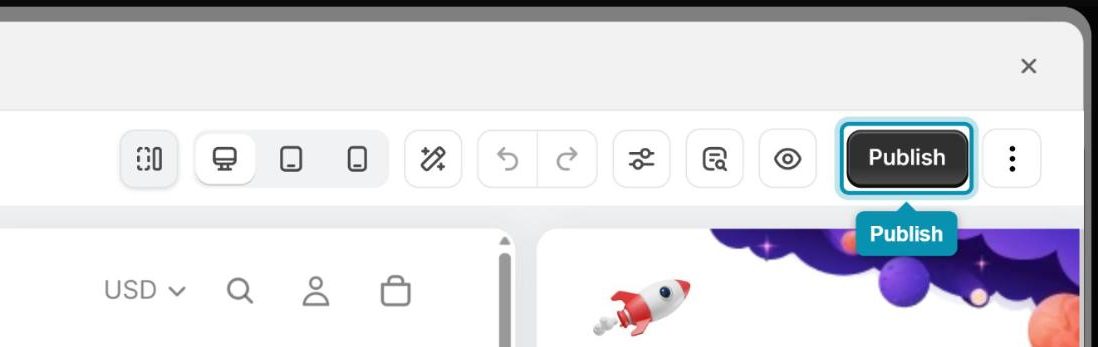
Step 1: Open your page in the EComposer editor and click Publish in the top-right corner.
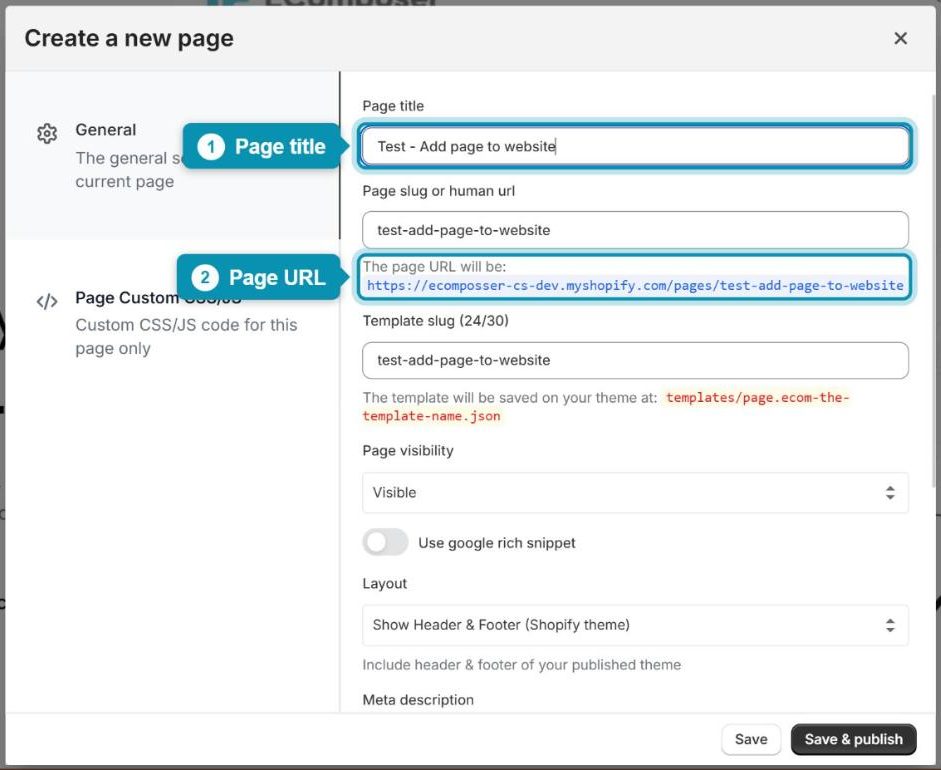
Step 2: Enter a Page title. EComposer creates the page URL from the title, and you can see the full address under The page URL will be.
Step 3: Click Save & publish.
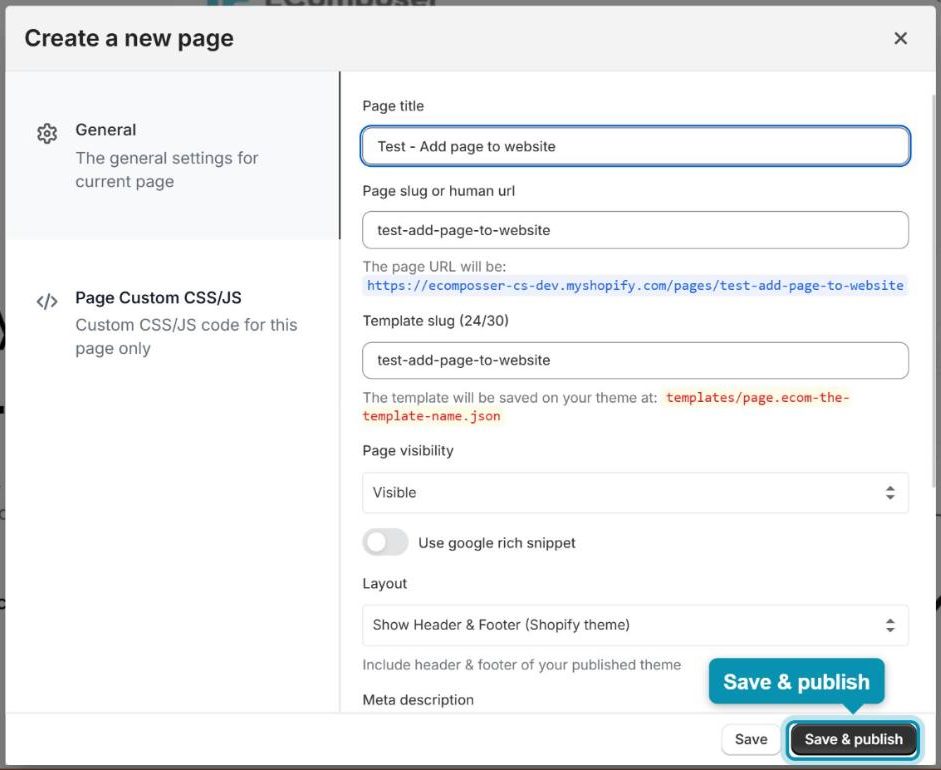
If your page is already published, clicking Publish updates the live page with your latest changes.
2. Add the page to your store menu
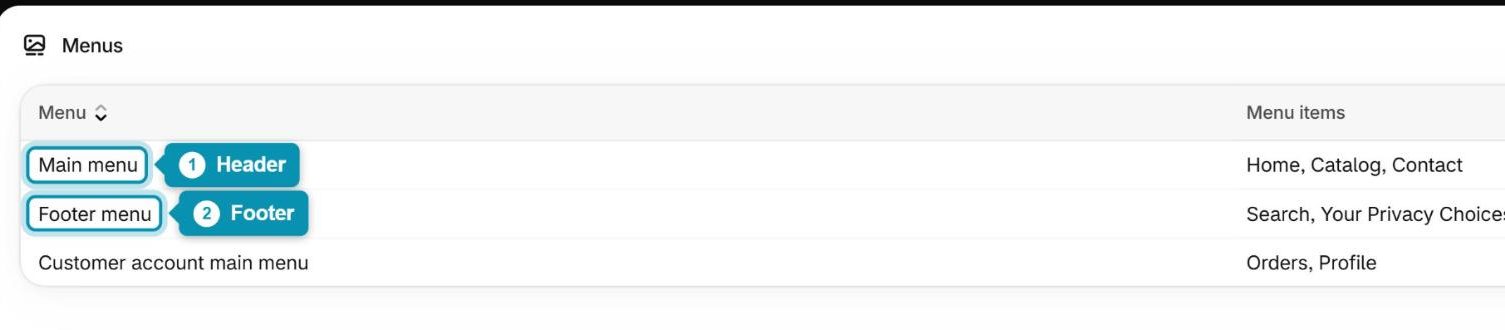
Add the page to the Main menu to show it in your header, or to the Footer menu to show it in your footer. You do this in your Shopify admin.
Step 1: In your Shopify admin, go to Content > Menus.
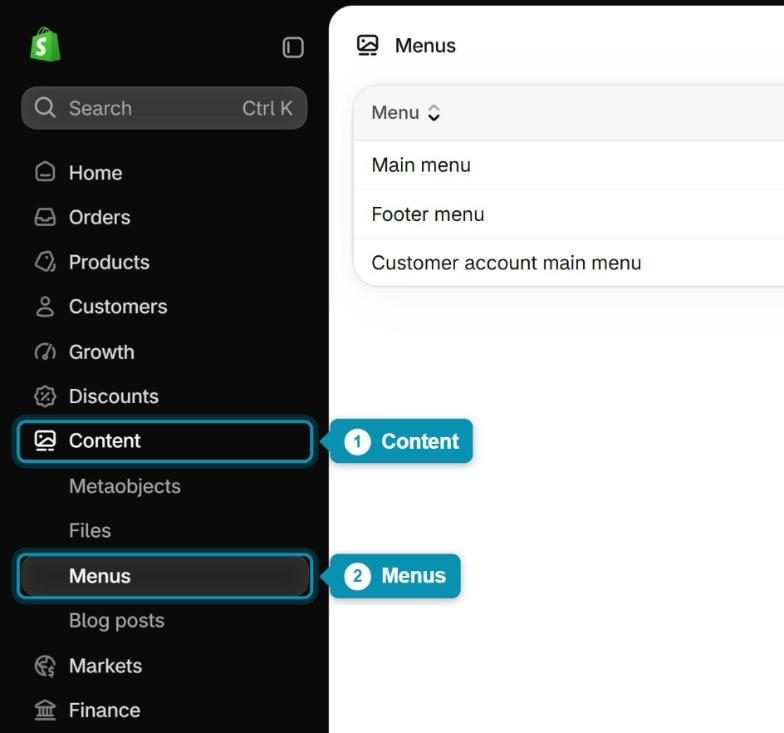
Step 2: Choose the menu you want to edit, for example Main menu for the header or Footer menu for the footer.
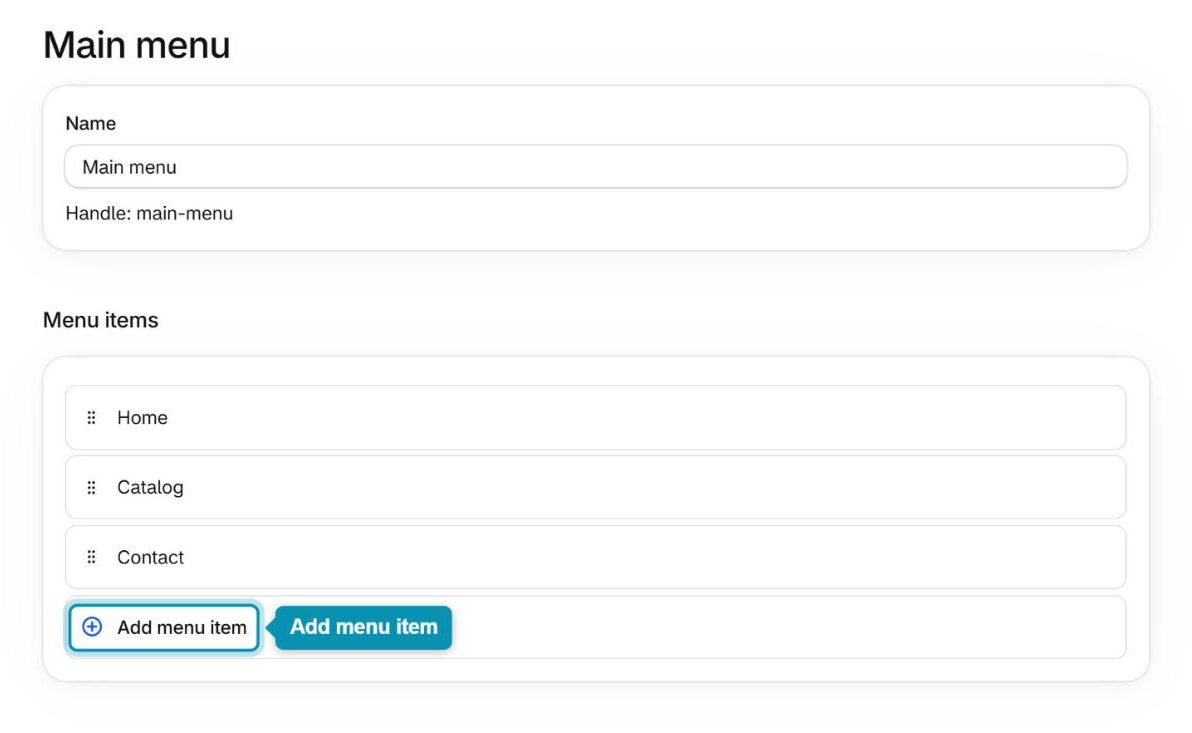
Step 3: Click Add menu item.
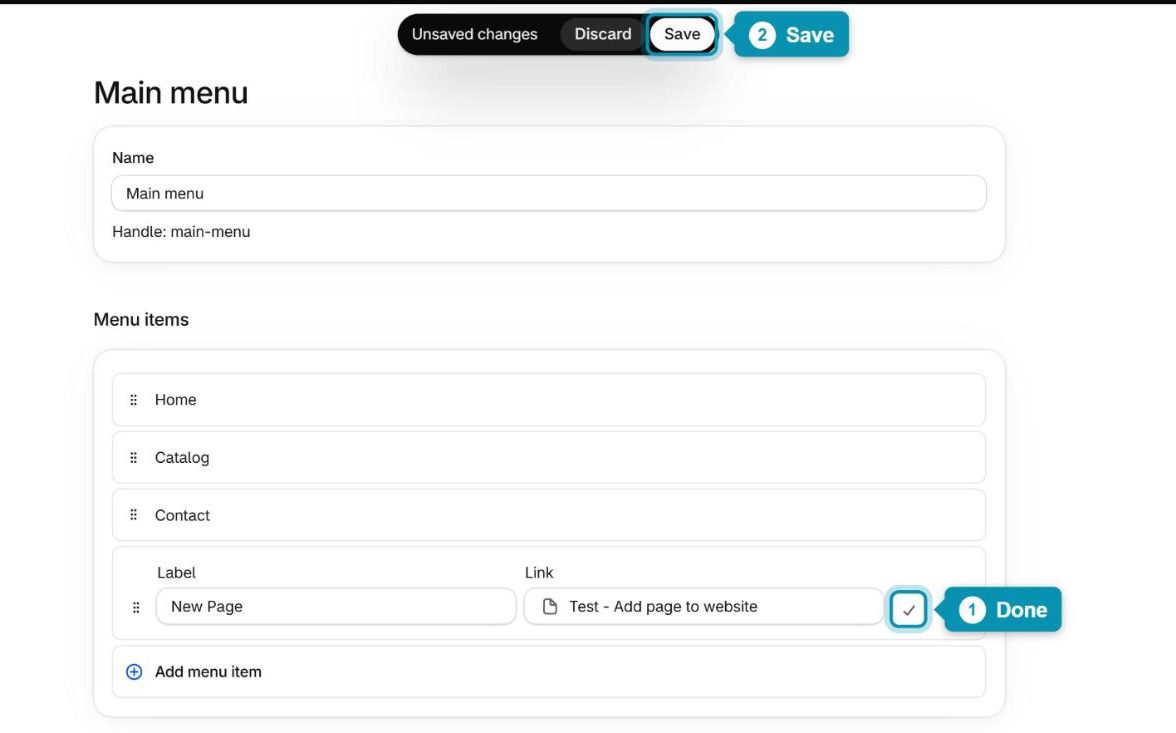
Step 4: Enter a Label for the menu item. Then click the Link field, select Pages, and choose the page you created in EComposer.
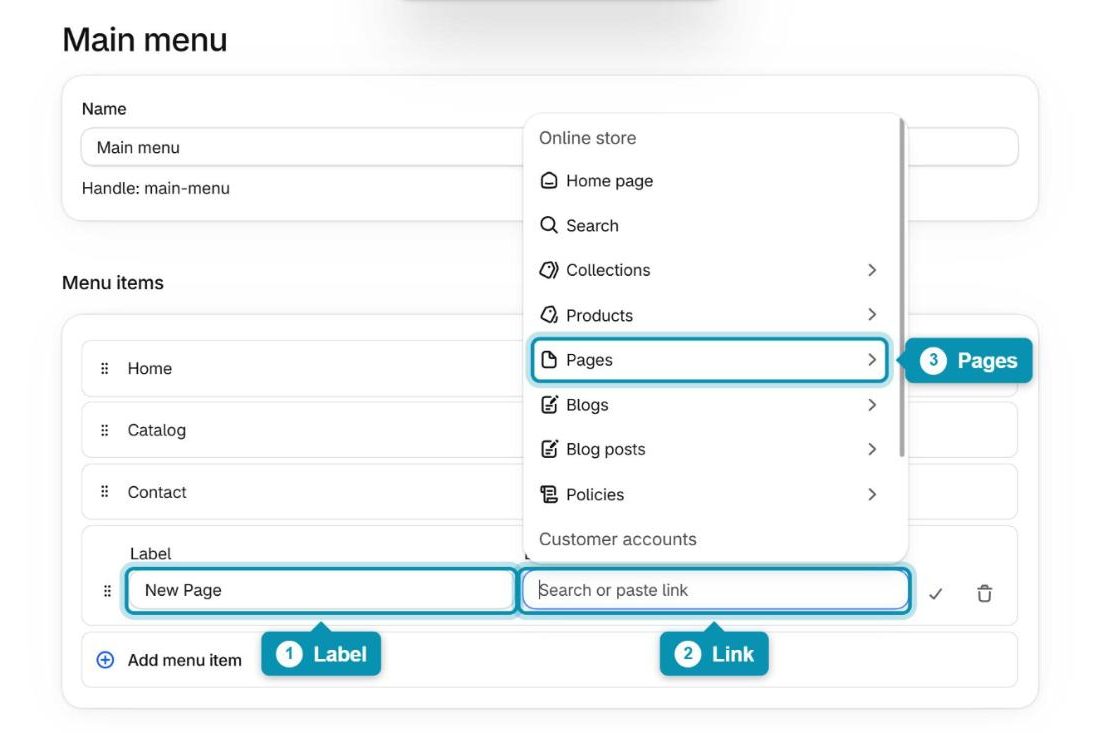
Step 5: Click the checkmark icon next to the link, then click Save. The page now appears in your store menu.
3. Link the page to a button
You can also send customers to your page from a button on another EComposer page. EComposer lets you pick the page directly from your store, so you do not need to copy its URL.
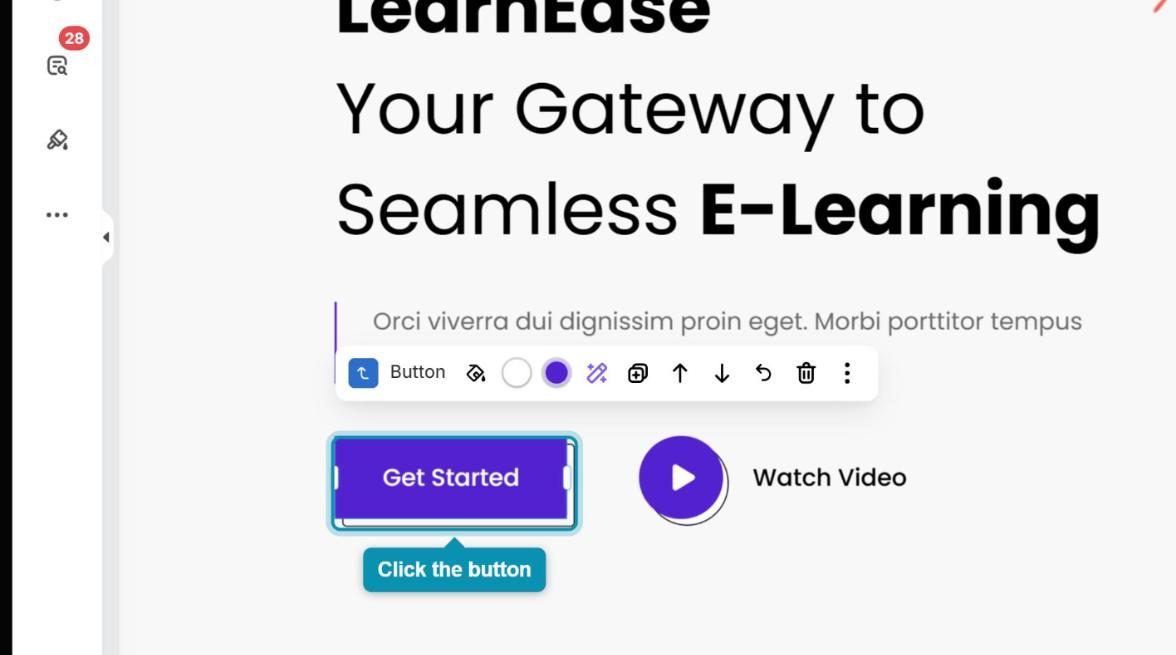
Step 1: In the EComposer editor, click the button you want to link.
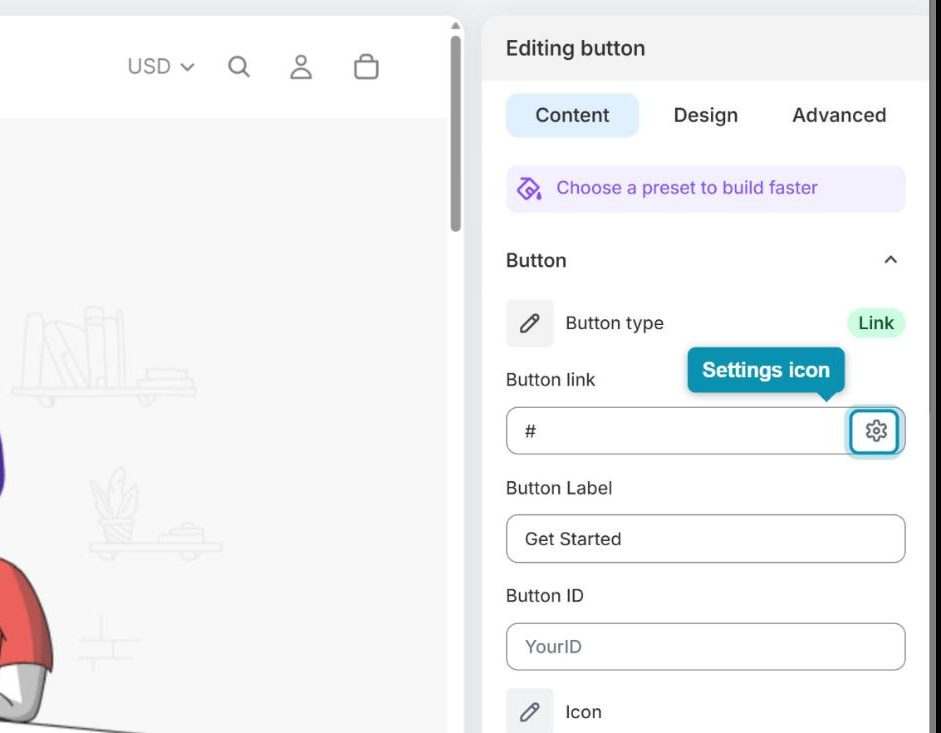
Step 2: In the settings panel on the right, click the settings icon in the Button link field to open Link settings.
Step 3: Click the Link field and select Pages.
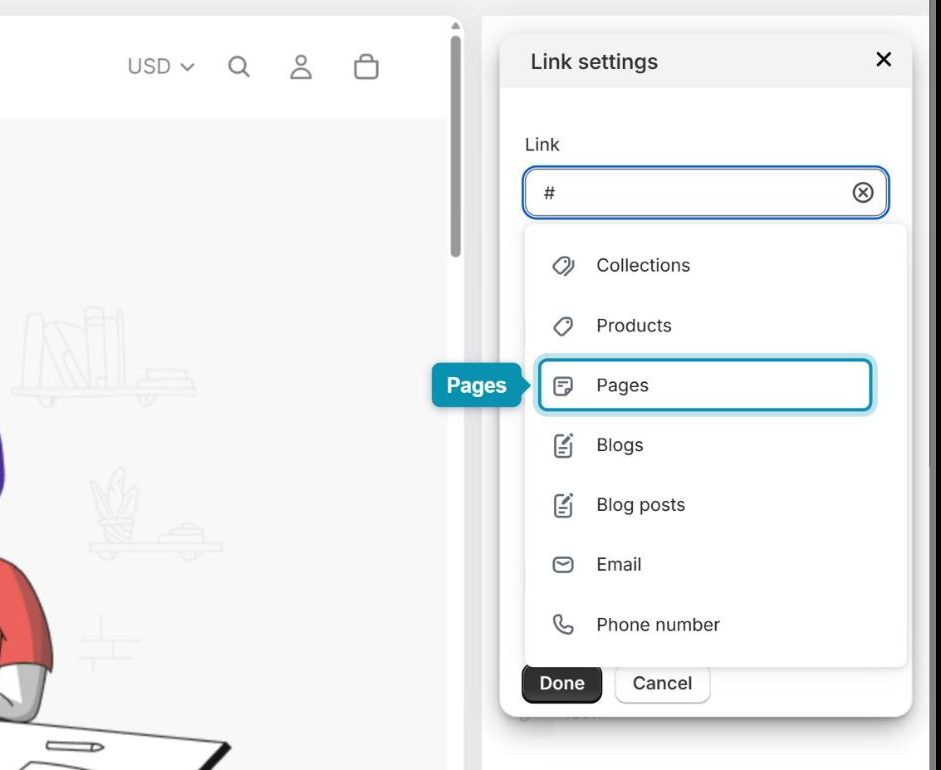
Step 4: Search for your page, select it, then click Done. Save and publish the page that contains the button.
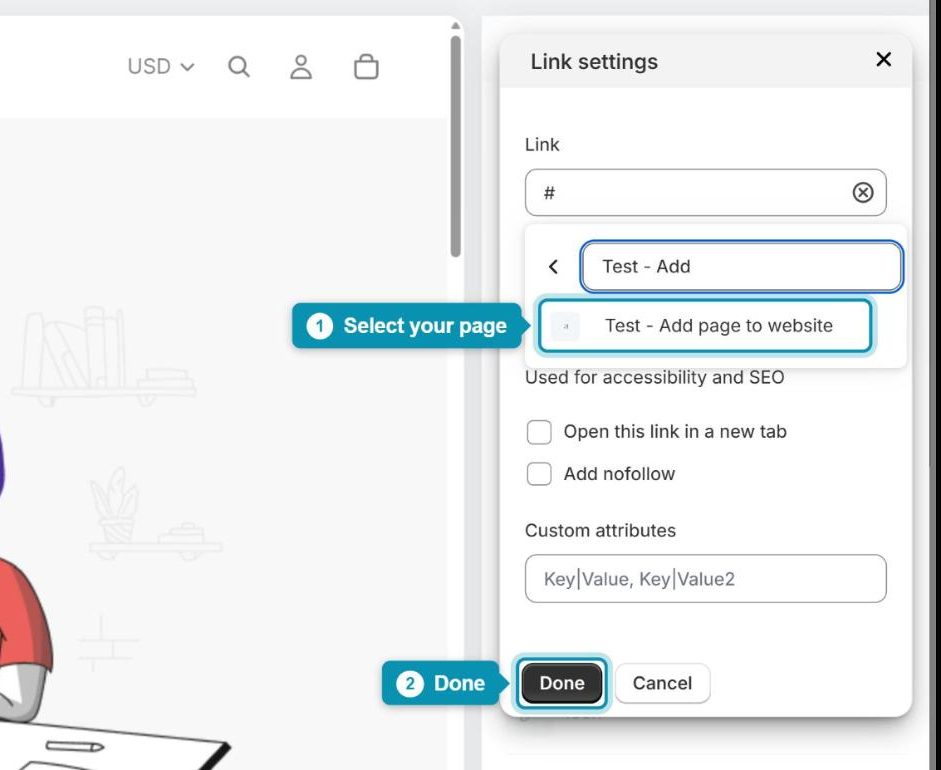
You can also paste the page URL into the Link field, for example /pages/your-page-slug.
If you want to replace an existing Shopify page in your navigation with a page created in EComposer, please follow this document.