What happens if you downgrade your plan?
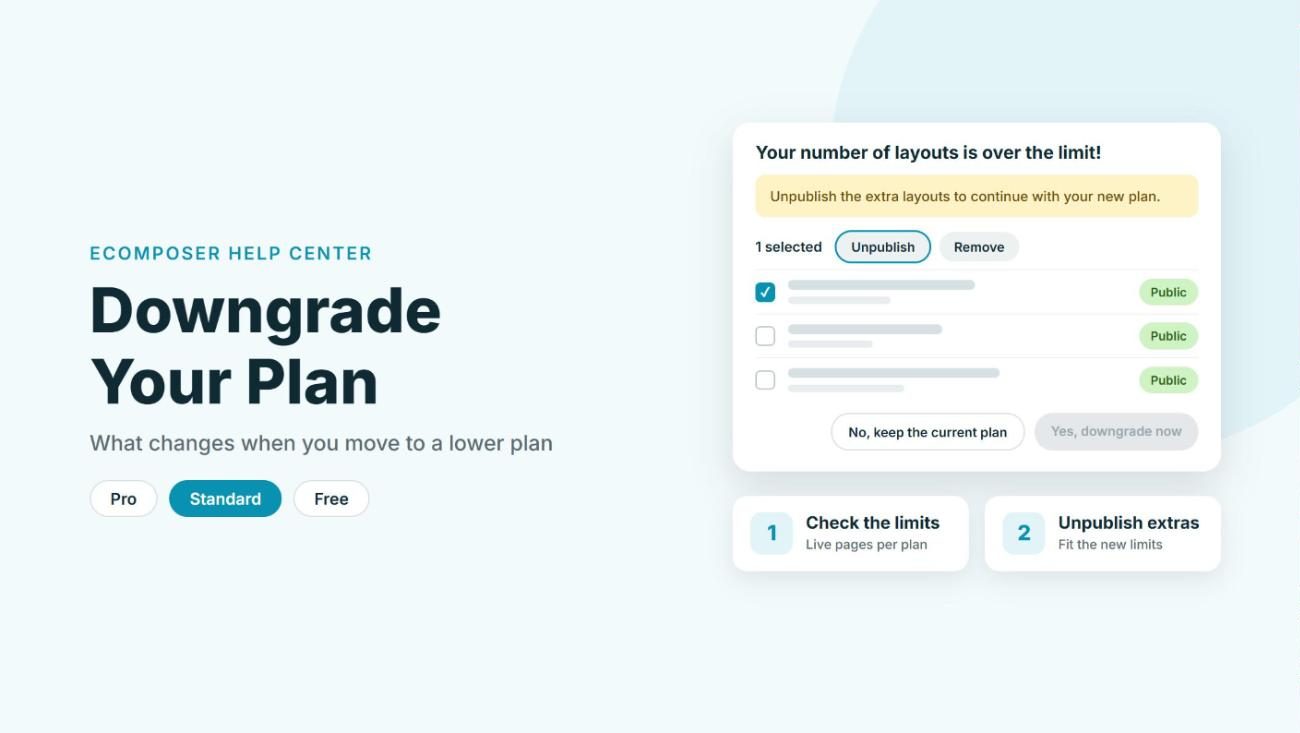
Downgrading moves your store to a plan with lower limits and fewer features, so EComposer first checks that your live pages fit inside the new plan before the change goes through. If you have more live pages than the new plan allows, you’ll be asked to unpublish the extras. This guide walks you through the whole process and shows which features you’ll lose along the way.
The steps below use the Standard plan as an example.
1. Check the limits of your new plan
Start by finding out how many pages and sections each plan lets you keep live, so you know how many you’ll need to unpublish.
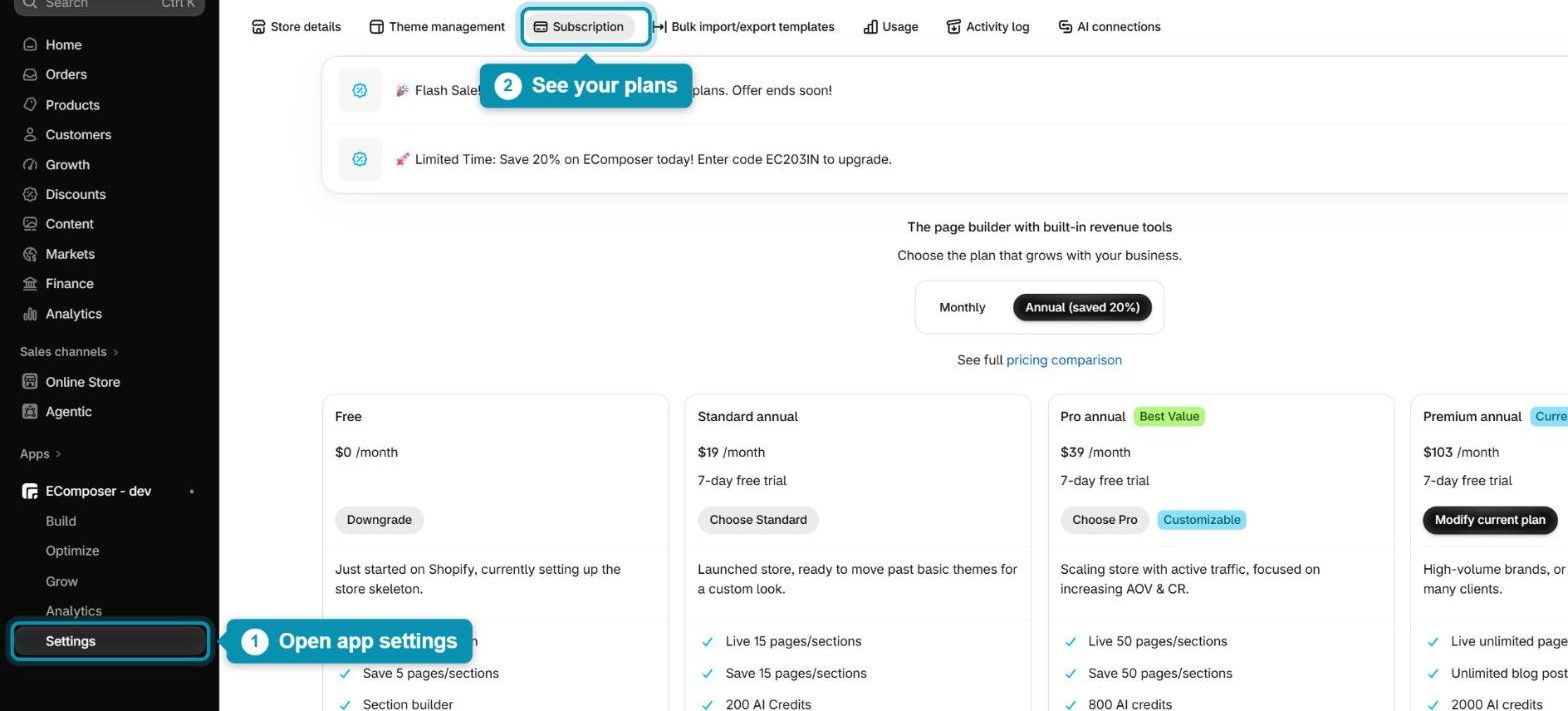
Step 1: In your Shopify admin, open EComposer, click Settings in the left menu, and then open the Subscription tab. Your current plan is marked with a Current Plan label.
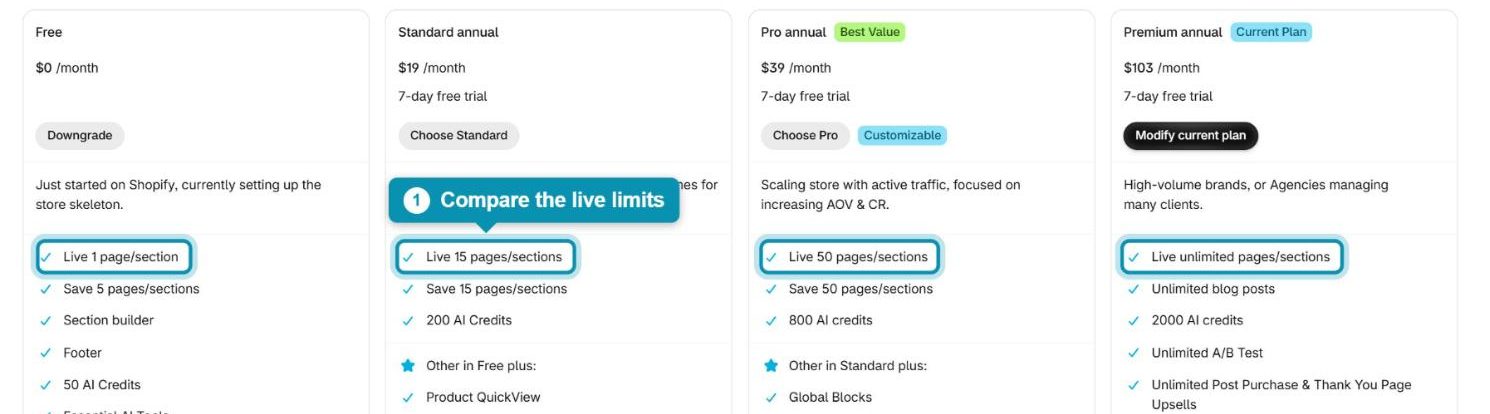
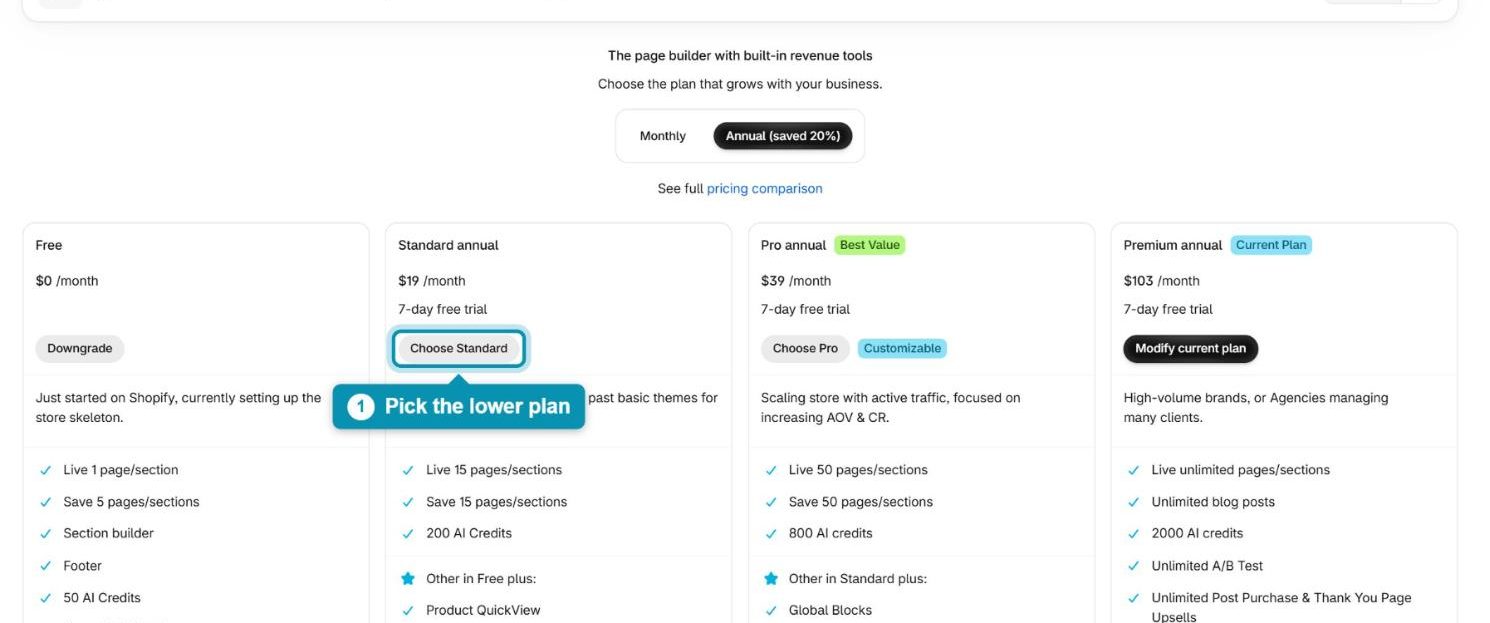
Step 2: Look at the Live line on each plan card. Free allows 1 live page/section, Standard allows 15, Pro allows 50, and Premium has no limit.
2. Start the downgrade
Once you know the limits, pick the lower plan you want to move to. We’ll use Standard here.
Step 1: On the Subscription tab, click the button on the plan you want to switch to. For Standard, that’s Choose Standard.
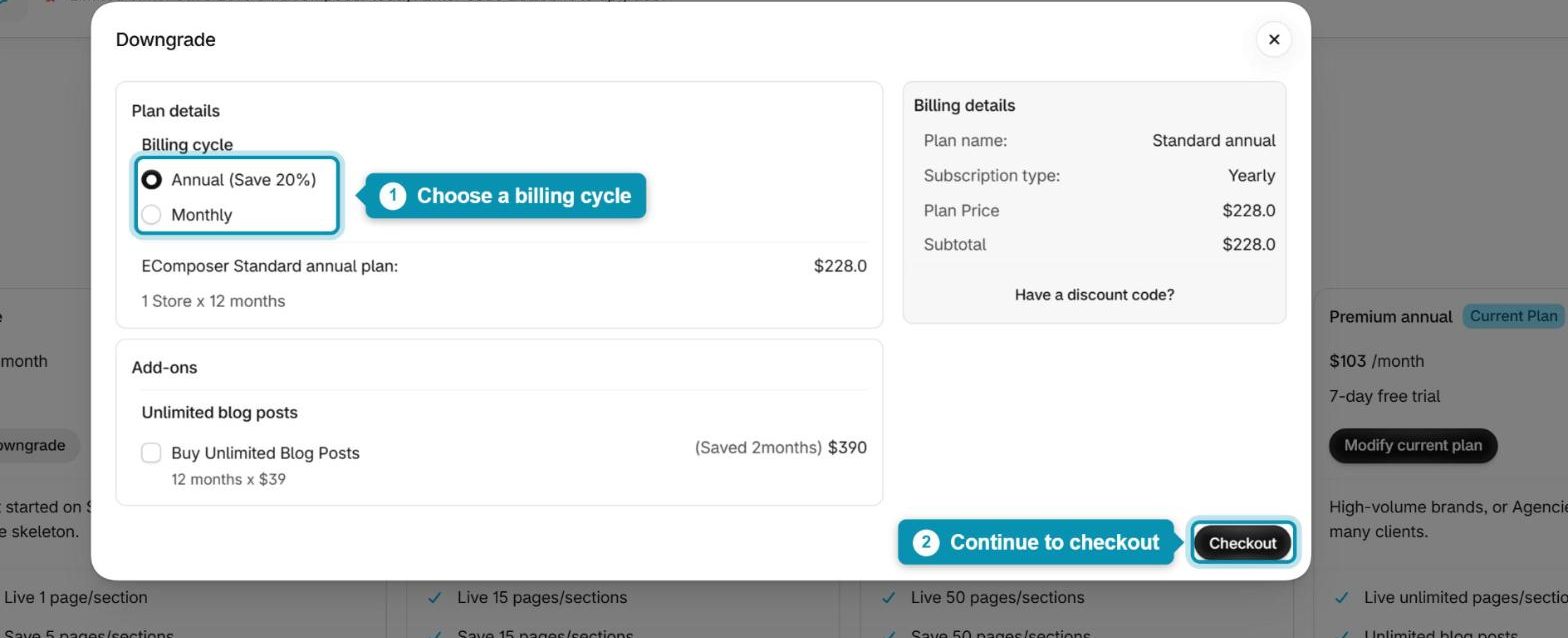
Step 2: In the Downgrade dialog, choose your billing cycle (Annual or Monthly), check the price under Billing details, and then click Checkout.
If you have more live pages than the new plan allows, EComposer stops here and shows a warning before anything changes. That’s what the next section is about.
3. Unpublish or remove the extra pages
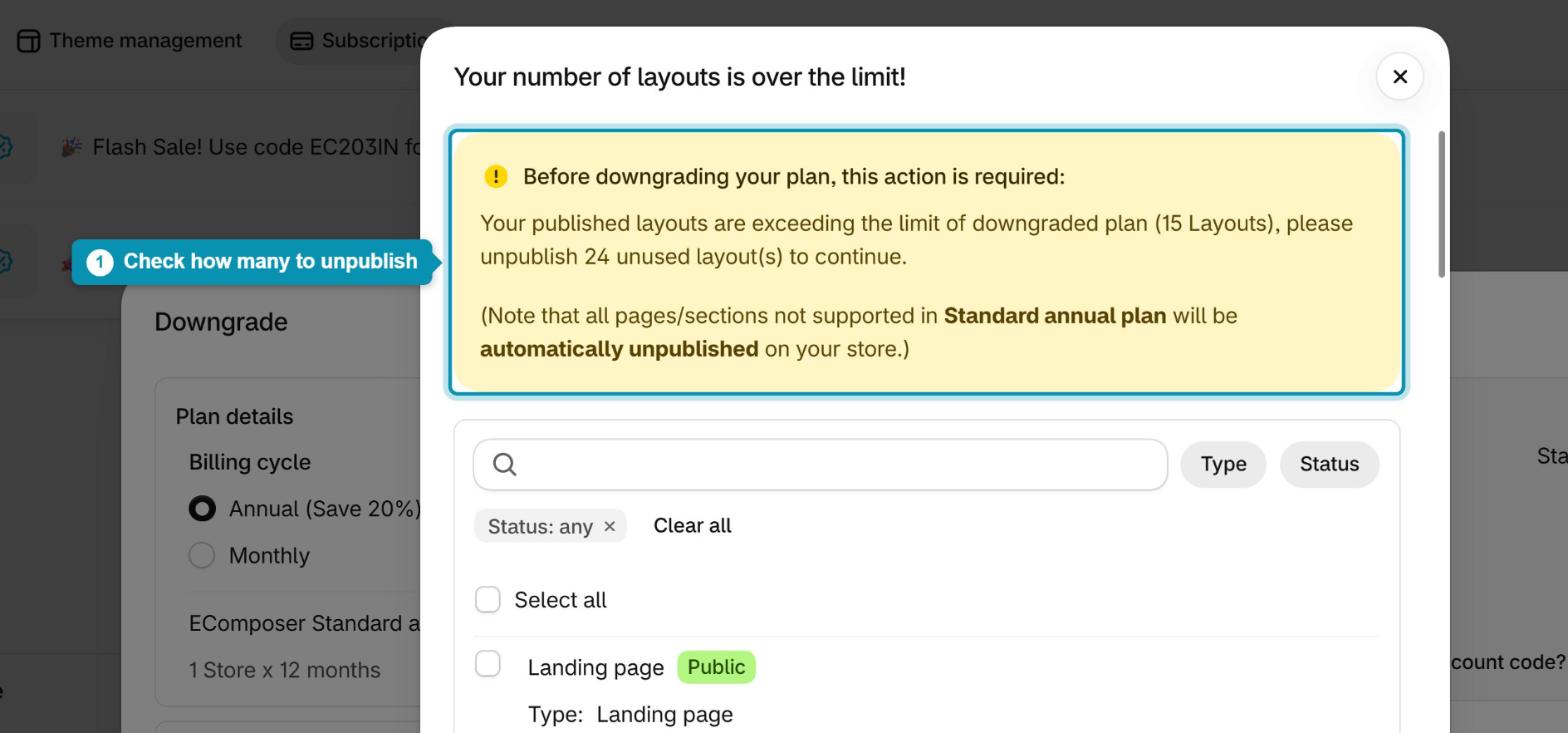
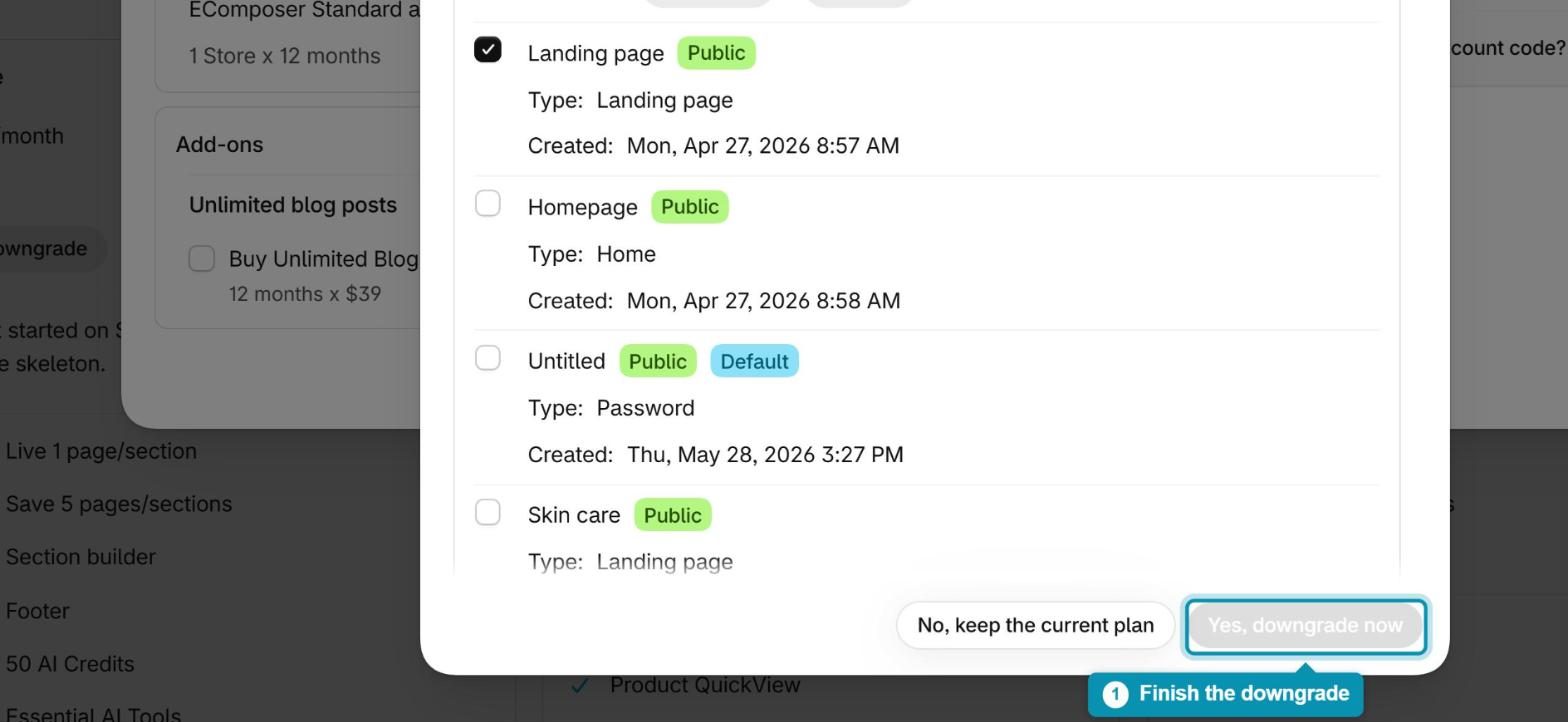
When you’re over the limit, the Your number of layouts is over the limit! window opens. Layouts are the pages and templates on your store, and the downgrade can’t be completed until enough of them are out of the way.
Step 1: Read the message at the top of the window. It shows the limit of the new plan (15 layouts for Standard) and how many layouts you need to unpublish. Any pages or sections the new plan doesn’t support are unpublished automatically.
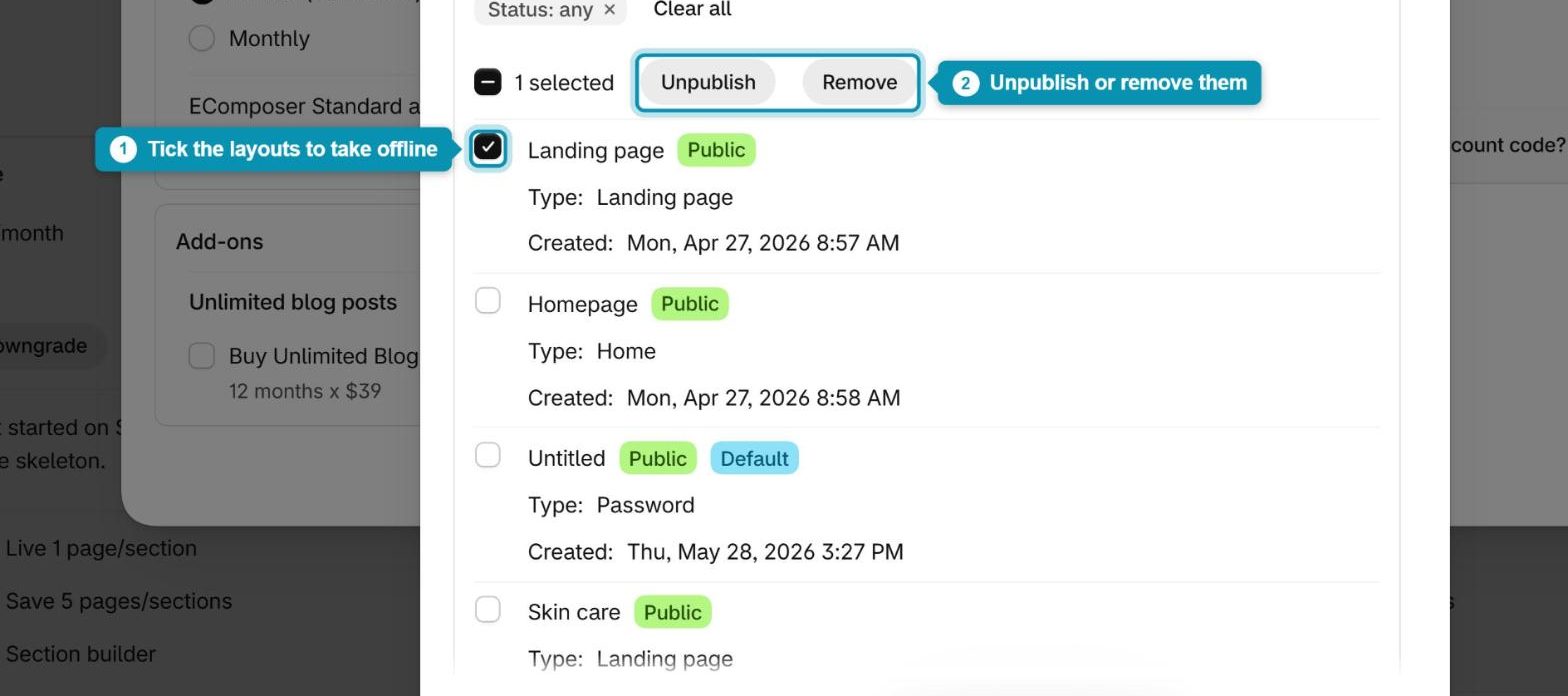
Step 2: Tick the layouts you want to take off your store, using the search box or the Type and Status filters to find them faster. Then click Unpublish to take them offline, or Remove if you no longer need them.
Step 3: Once you’re within the limit, the Yes, downgrade now button becomes available (it stays greyed out while you’re over the limit). Click it to finish the downgrade, or click No, keep the current plan if you change your mind.
4. Know which features you’ll lose
Some features only come with higher plans, so they stop being available once you downgrade.
Premium to Pro: you lose unlimited live pages/sections (Pro allows 50), unlimited blog posts, unlimited A/B tests and priority support, and your AI credits drop from 2000 to 800.
Pro to Standard: you lose Global Blocks, Popup/Spin Wheel, A/B Testing, Bulk Import/Export, Shopify Markets, the Premium AI tools and the full extensions library. Live pages/sections go from 50 to 15, and AI credits from 800 to 200.
Standard to Free: you lose Product QuickView, the Pro Image Editor, VIP templates, Advanced AI tools, Page Analytics and the extra extensions. Live pages/sections go from 15 to 1, and AI credits from 200 to 50.
Changed your mind later? You can move back up at any time from the same Subscription tab by choosing a higher plan.