How to build a stunning table with EComposer
Tables are one of the cleanest ways to compare products, list specs, or show pricing plans side by side. In EComposer, you can get a good-looking table onto your page in two ways: insert a ready-made table section from the library, or build your own from scratch with the Table element.
Let’s go through both methods, and then check how your table looks on mobile.
1. Insert a pre-built table from the Sections library
We’ve already designed plenty of table sections, so you can use one right away instead of starting from zero. Just find a design you like and drop it onto your page.
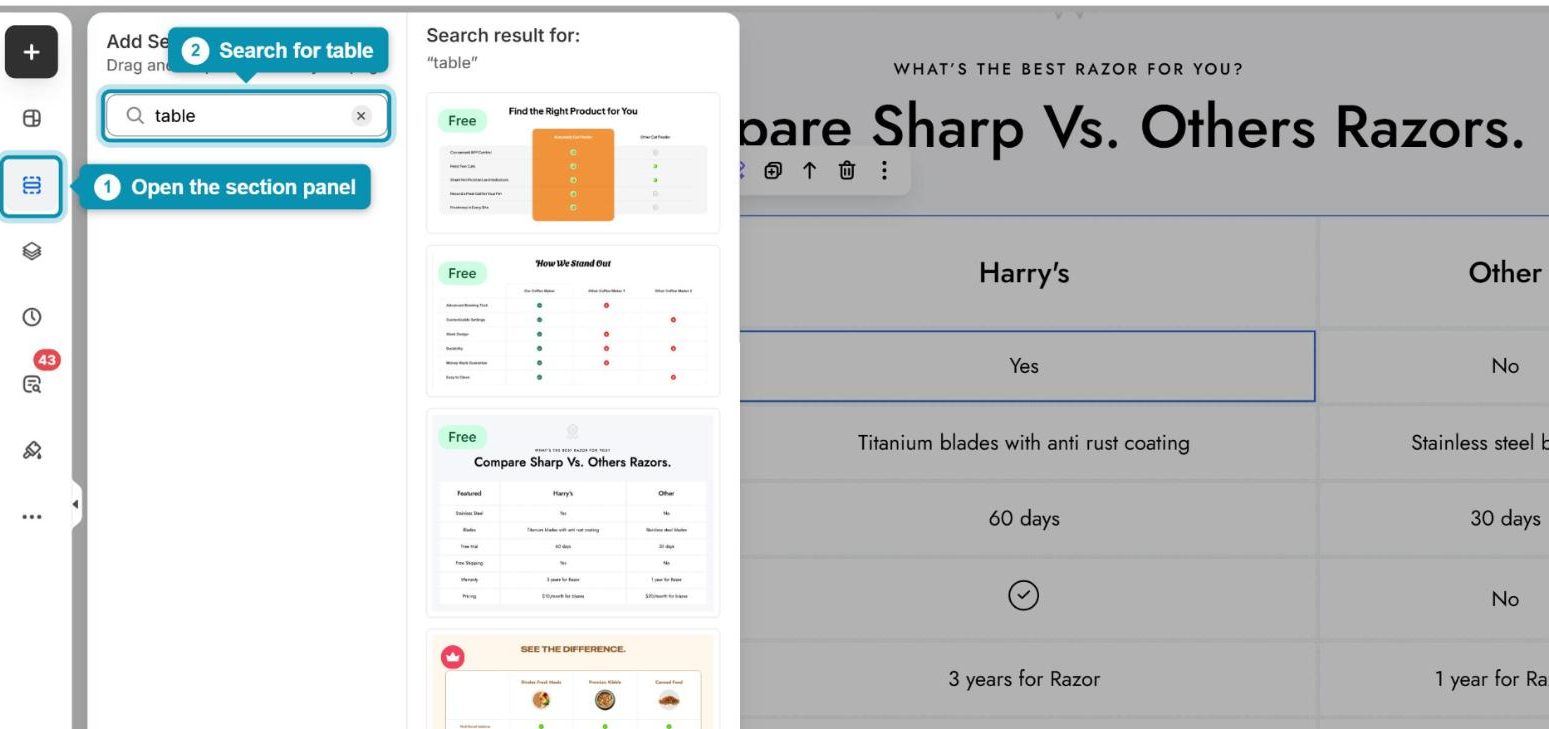
Step 1: Click the Sections icon on the left sidebar to open the section panel, then type table into the search box and press Enter.
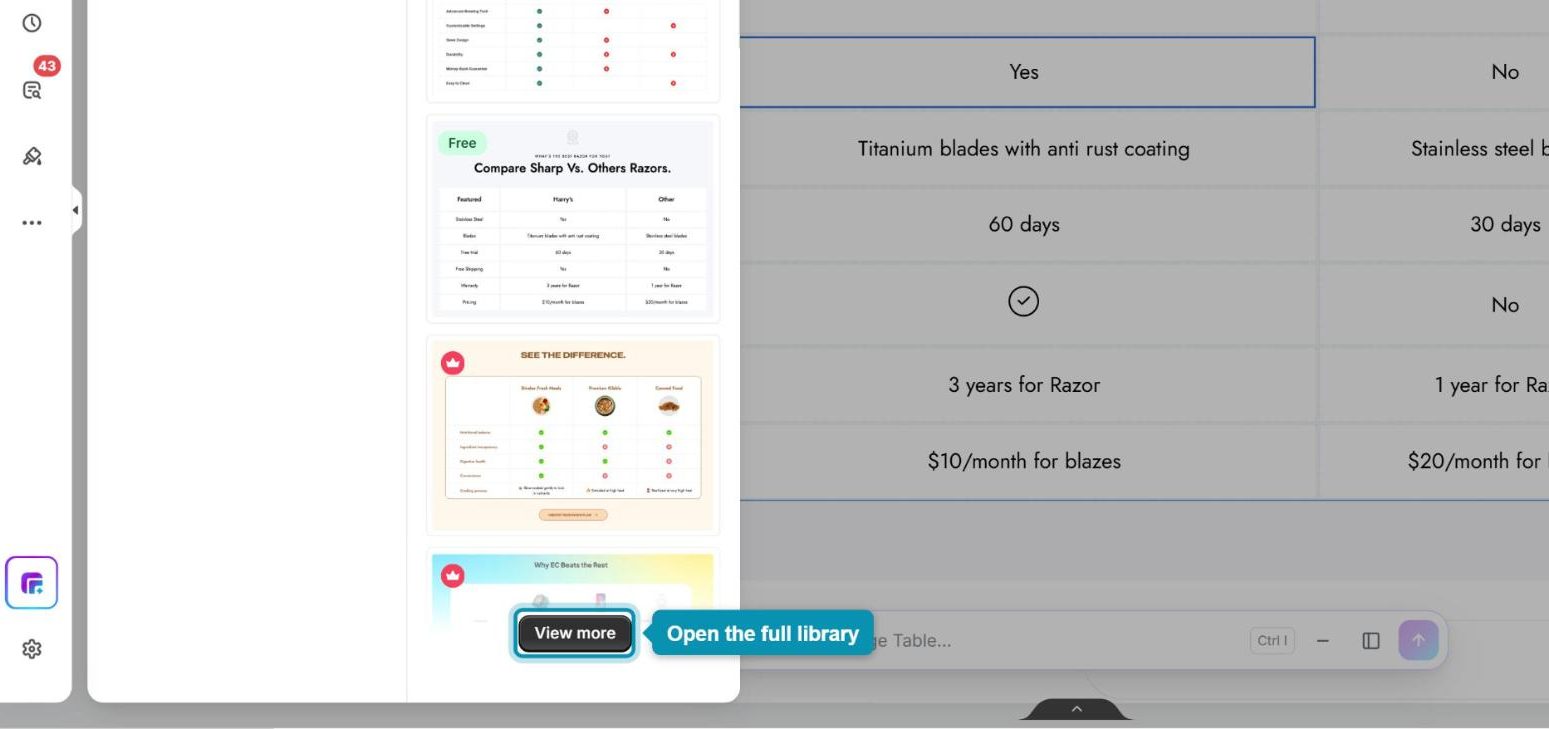
Step 2: Click View more at the bottom of the results to open the full library, where you can see every table design.
Step 3: Hover over the table you like and click the Insert icon, which is the first icon in the row that appears at the bottom of the preview.

Step 4: In the Insert this template window, keep the default options and click Insert. The table section is added to your page right away.
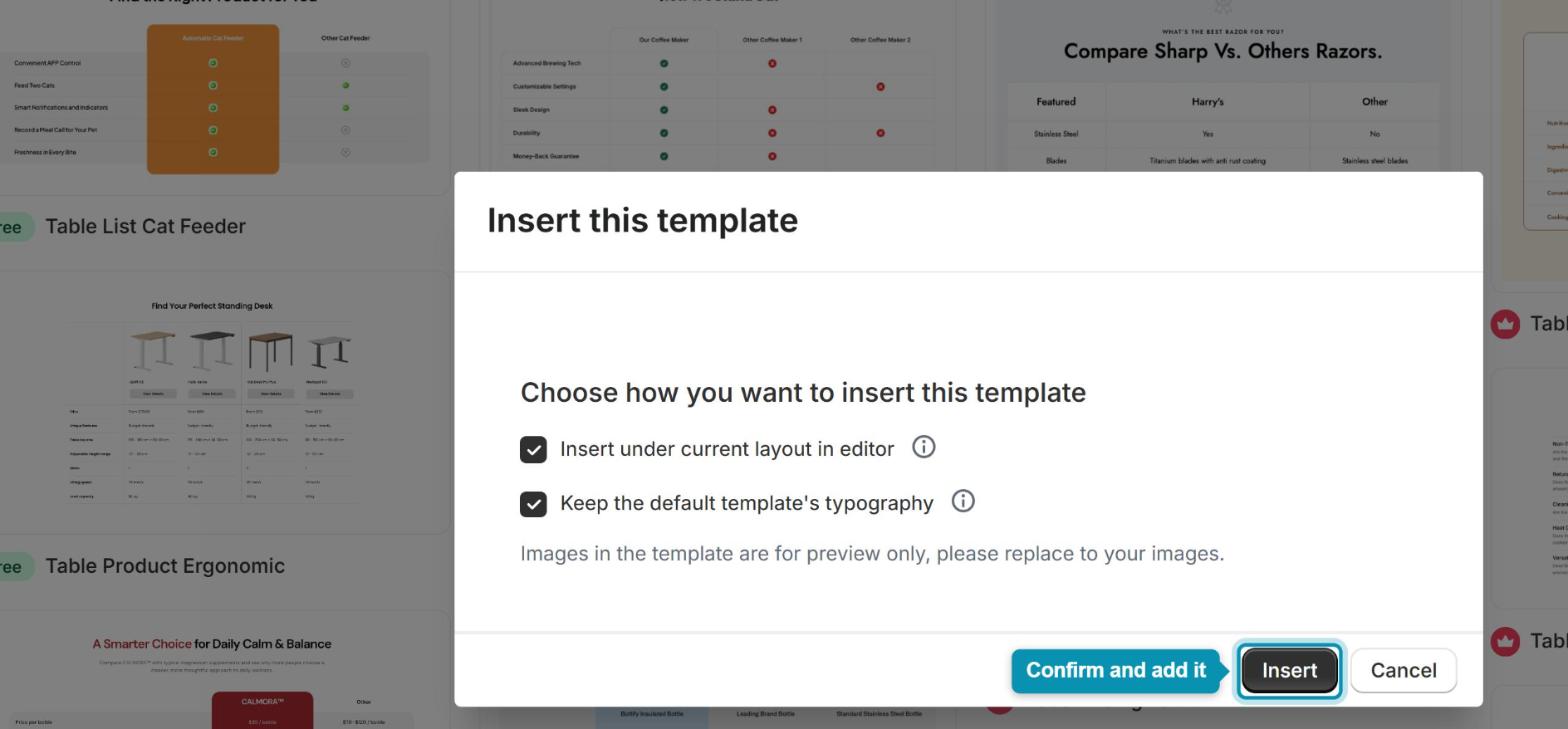
The images in a template are for preview only, so remember to replace them with your own and update the table text to match your products.
2. Build your own table with the Table element
If you’d rather start from a blank table, the Table element lets you set the number of rows and columns, type in your own content, and even add icons, images, or buttons inside the cells.
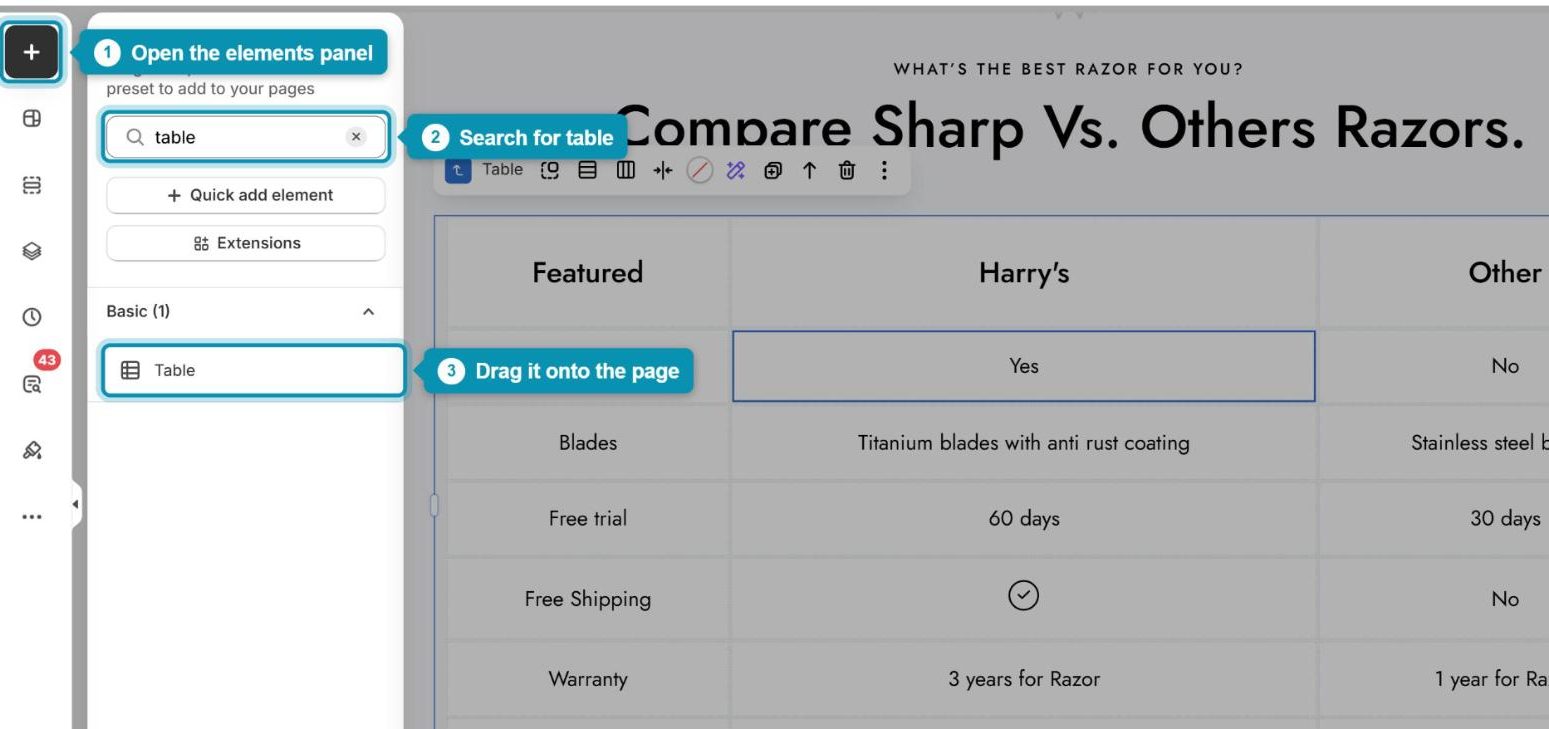
Step 1: Click the + icon on the left sidebar, search for table, and drag the Table element (it’s in the Basic group) to the spot on your page where you want it.
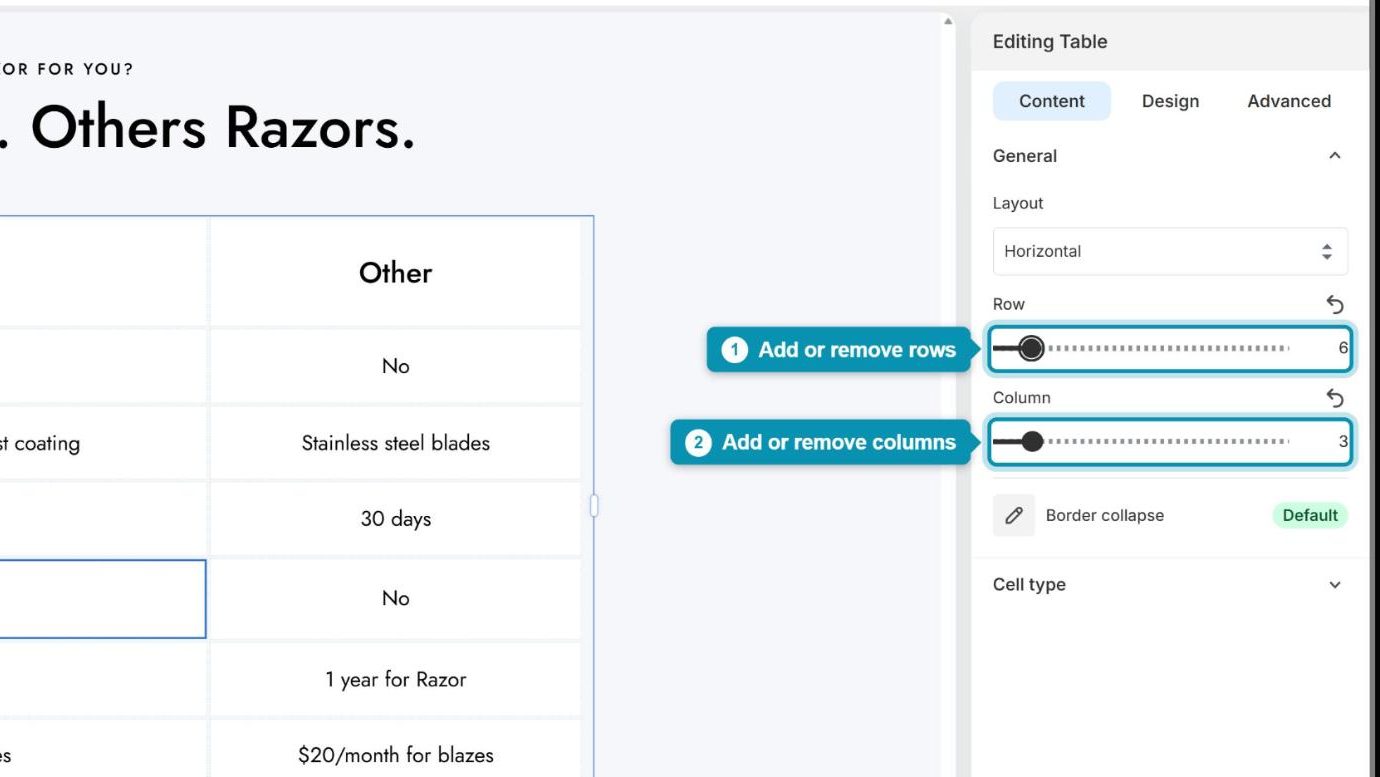
Step 2: Select the table, then in the Content tab drag the Row and Column sliders to set how many rows and columns you need. The table updates on the canvas as you drag.
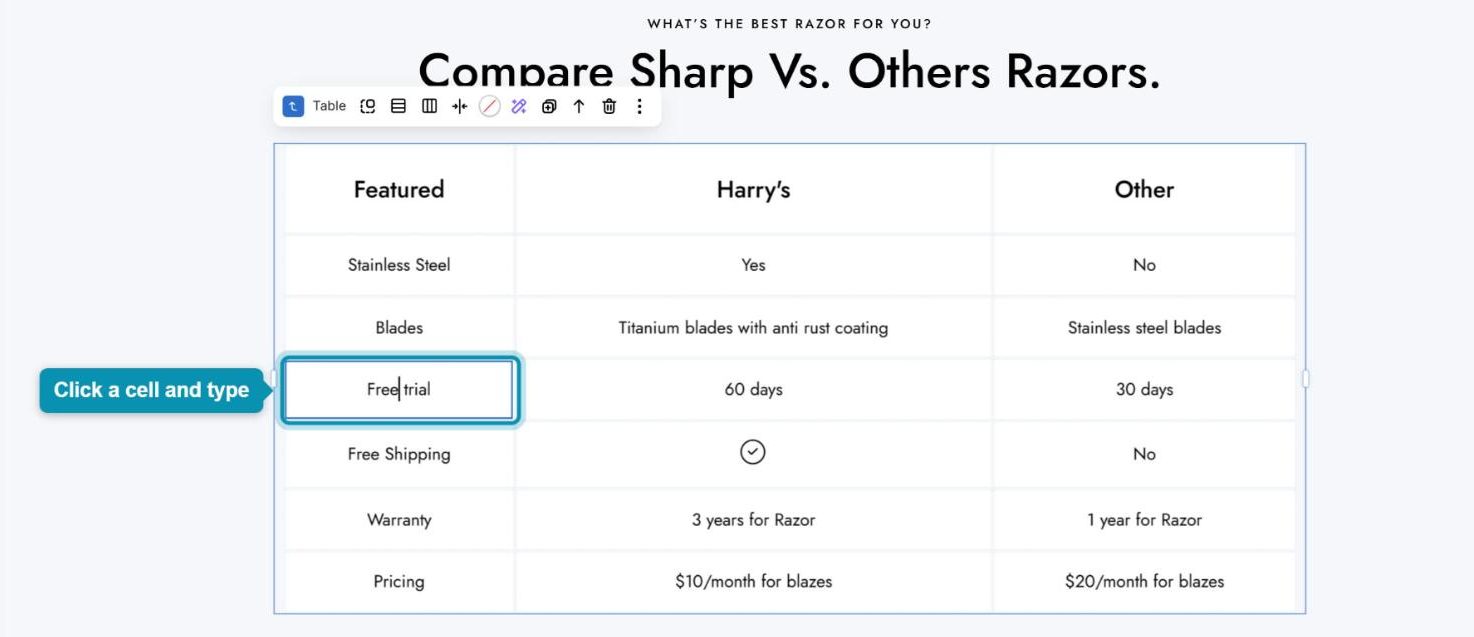
Step 3: Click any cell on the canvas and type your text straight into it.
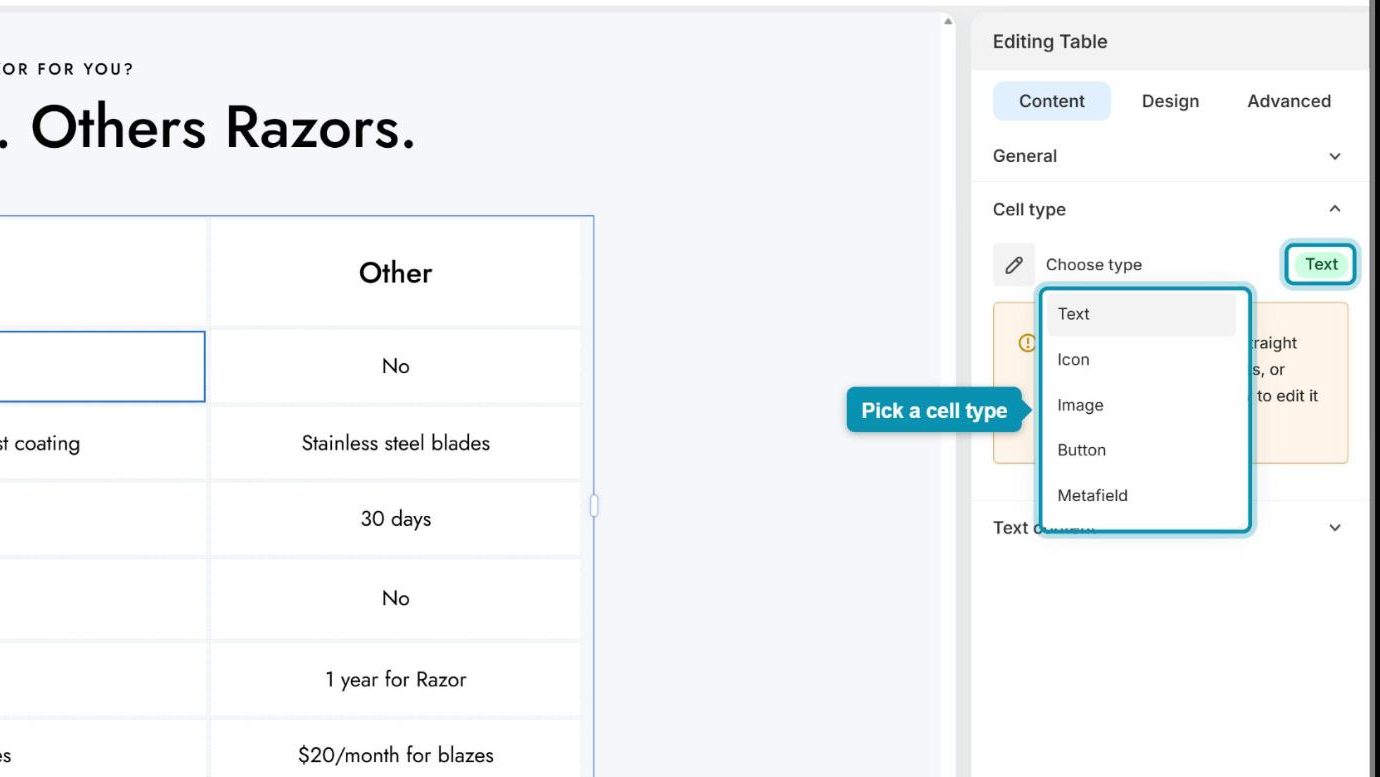
Step 4: Need something other than text? Select a cell, open Cell type, and choose Icon, Image, Button, or Metafield. For example, pick Icon and then choose a check mark from the library, which is perfect for yes/no rows in a comparison table.
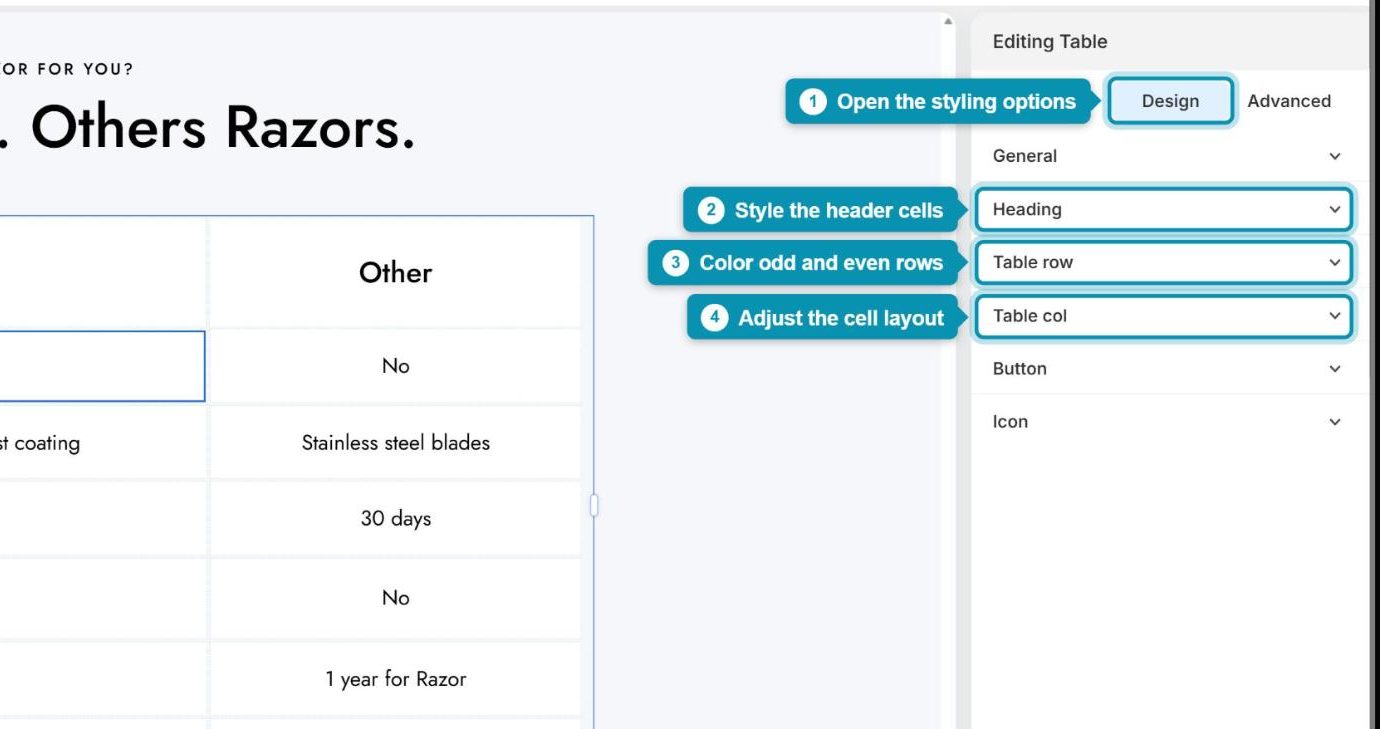
Step 5: Open the Design tab to style your table. Heading controls the header cells, Table row lets you give odd and even rows different colors, and Table col controls alignment, padding, and borders for the cells.
3. Check how your table looks on mobile
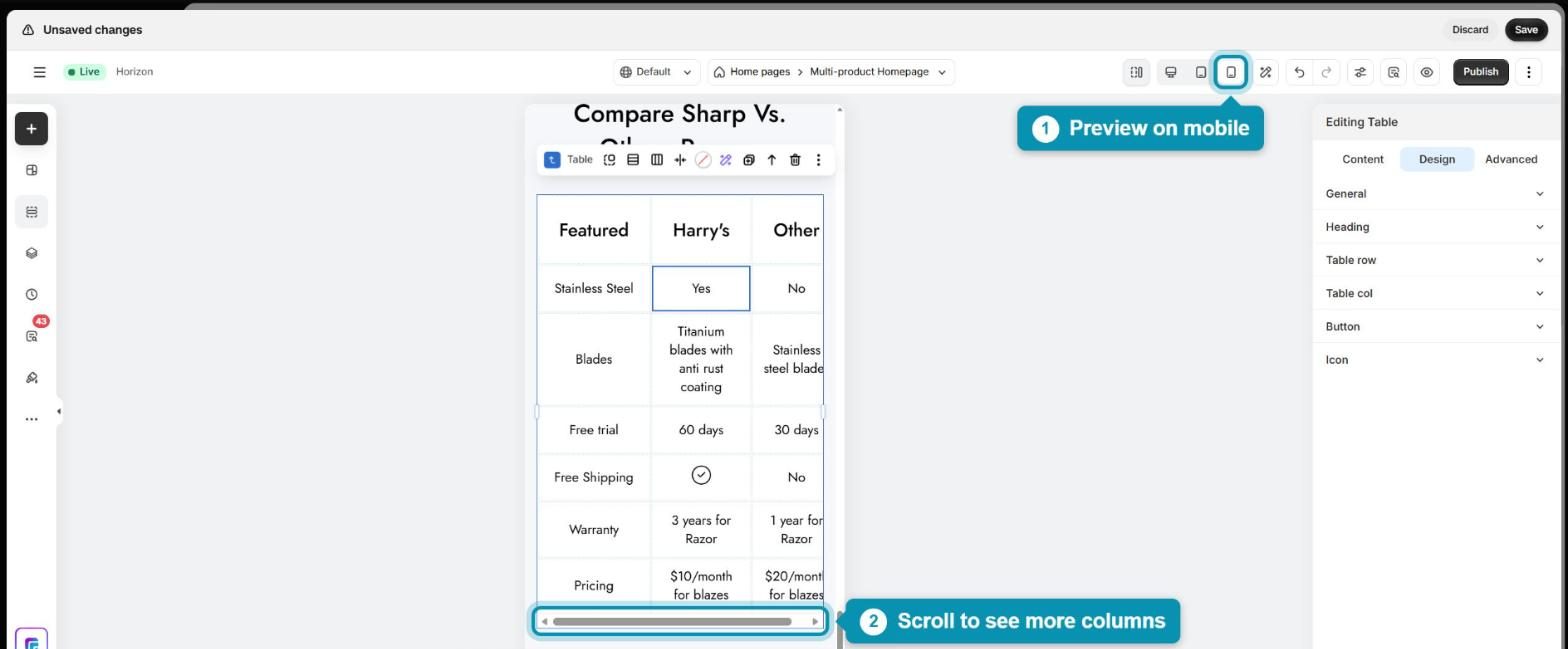
Click the Mobile icon at the top of the builder to preview your page on a phone. When a table is wider than the screen, a horizontal scroll bar appears under it, so your visitors can scroll sideways to read every column. To keep scrolling to a minimum, try to use fewer columns and shorter text in your cells.