Add to cart
This is an indispensable element on the product page because it allows customers to add to the cart. With the EComposer, you will have some options to select after adding to your cart. For example, “Show cart popup, Show a message,…”
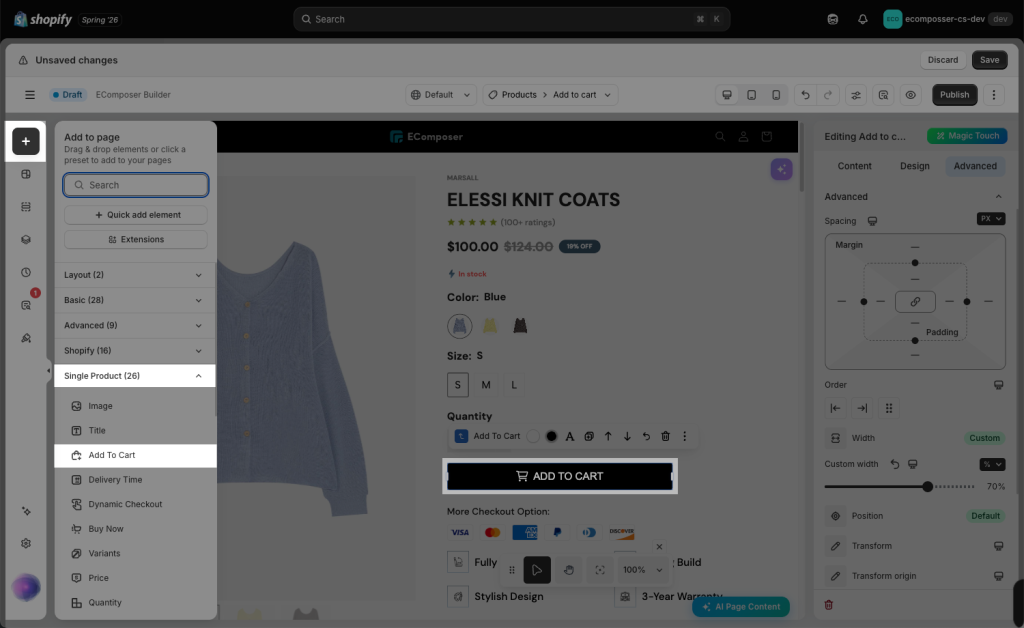
From the Single Product tab, you can drag and drop the Add To Cart button to any position you would like.
1. Content
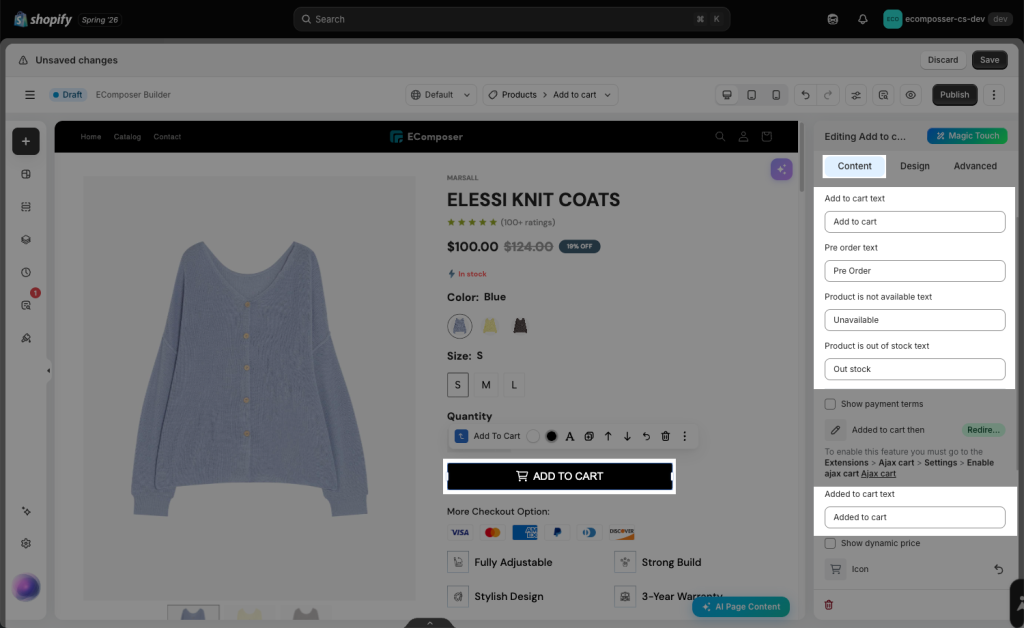
1.1 Edit button texts and icon
You can alter the name of the button. If the product is still available, it will show “Add to Cart“. The name of the button will be shown as “Out of Stock” if it has sold out. If the product is unavailable, it will show “Unavailable“. All of the statuses will be obtained from Shopify.
Added to cart text: is the name of the button after adding a product to the cart.
- Show payment terms: Turn on this option to show the payment information that you set up in Shopify Admin -> Settings -> Payment
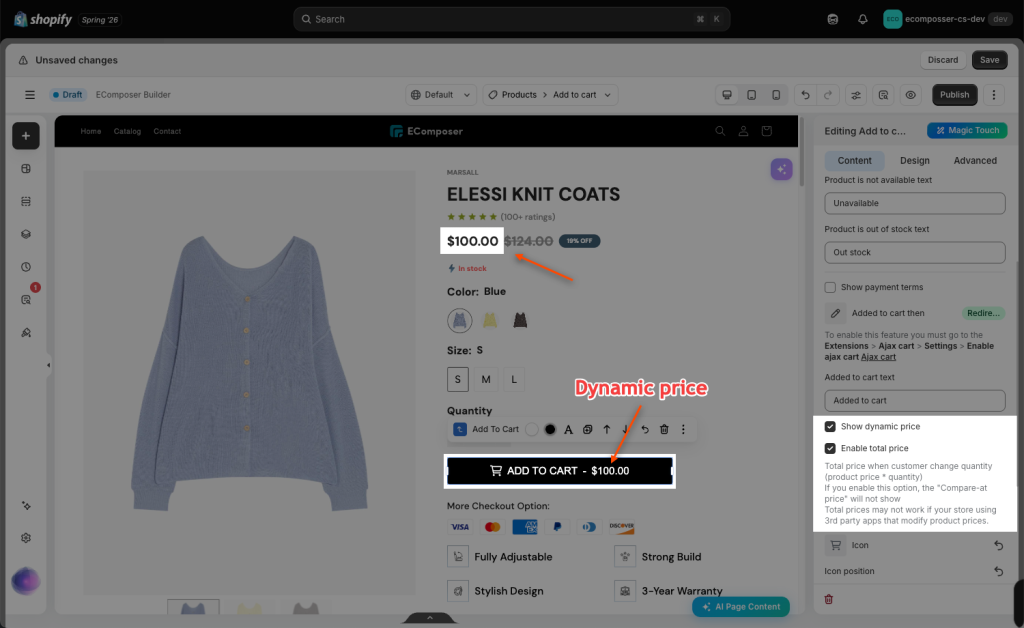
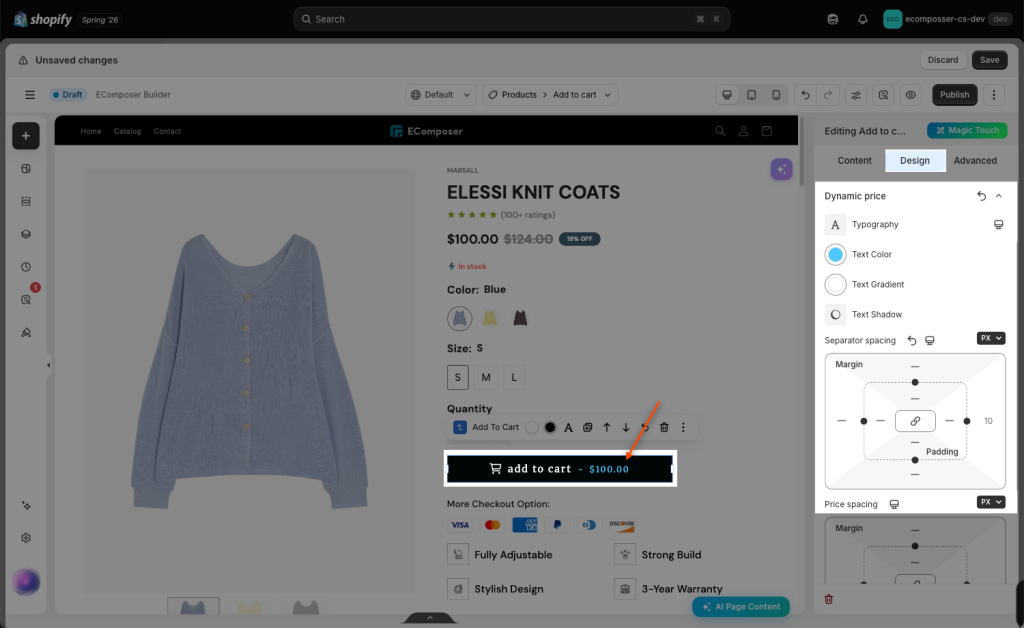
- Show Dynamic price: Enable this option to display the dynamic price inside the button.
+ Enable total price: Total price when the customer changes the quantity (product price * quantity). If you enable this option, the “Compare-at price” will not show
Total prices may not work if your store uses 3rd party apps that modify product prices.
- Icon: Set the icon for the button
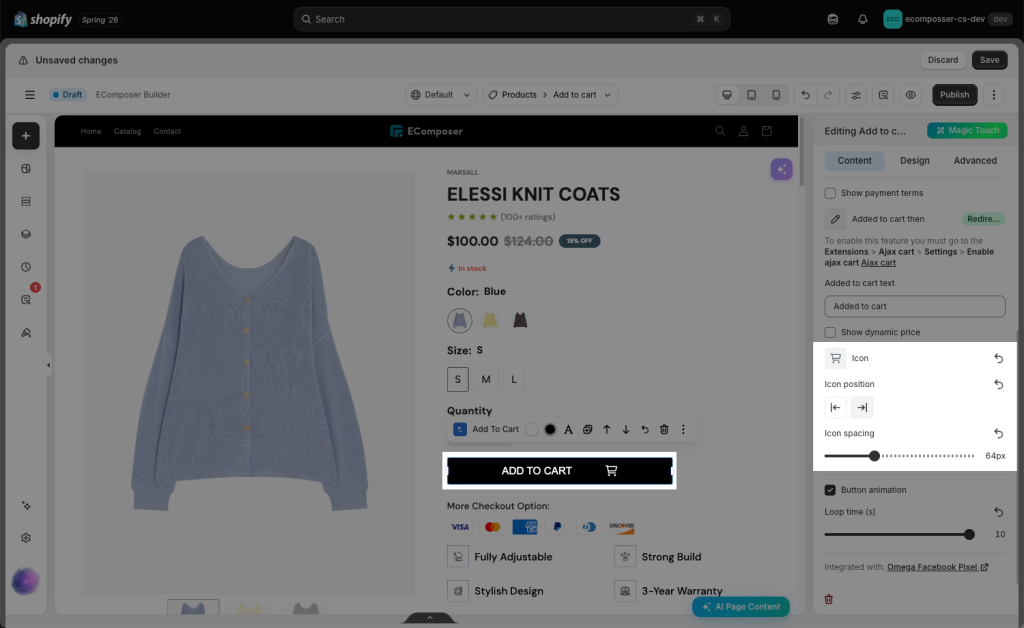
- Button animation: This allows you to set an animation for the button.
1.2 Choose an Action after Clicking Add to Cart
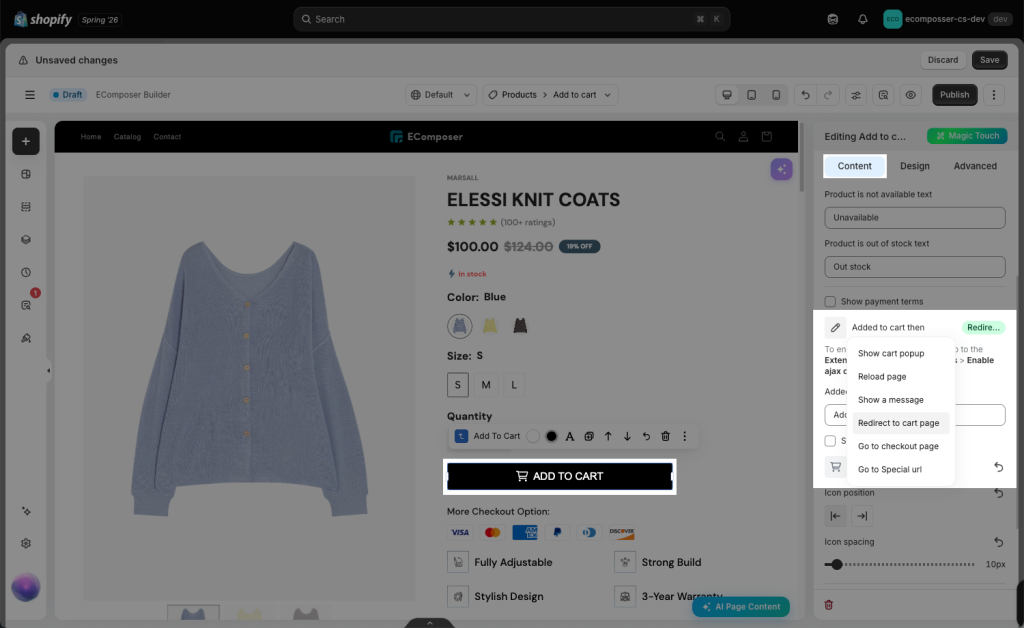
You can choose an action after adding a product to the cart. There are many options for you:
- Show cart popup: The popup will display when you click to add the product to the cart.
- Show a message: A message will display when you click to add the product to the cart. You can adjust the content message in the “Added to cart message” box.
- Redirect to cart page: You will be taken directly to the cart page.
- Go to the checkout page: You will be taken directly to the checkout page.
- Go to a special URL: You will be taken directly to the special URL. You can input the special URL in the Target URL box.
To make these actions run properly, you must install the Ajax cart extension. For more details, please go here.
2. Design
2.1 Add to cart
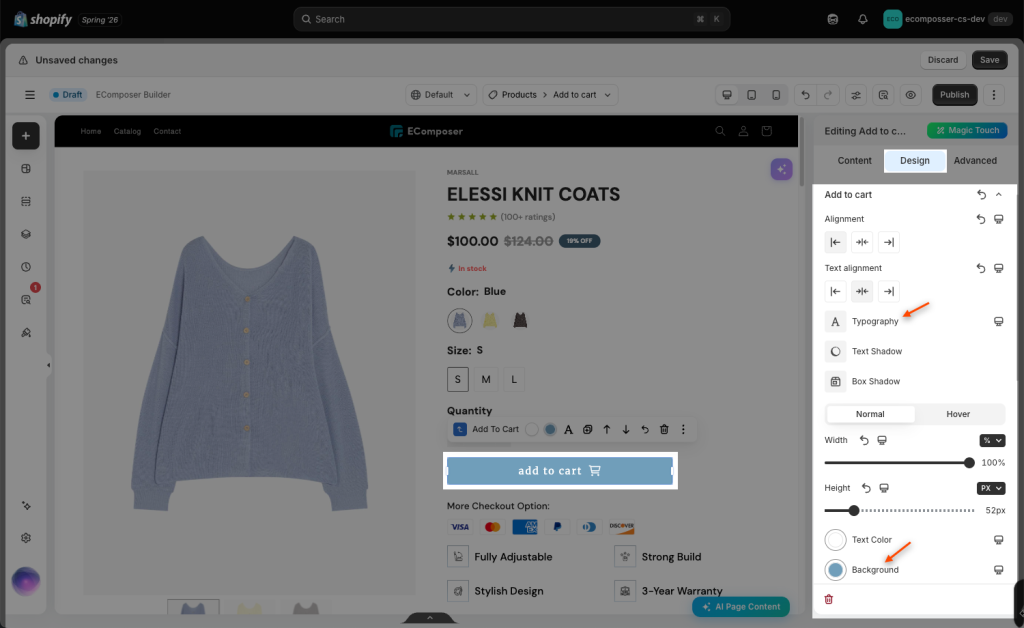
You can set up Alignment, Text Alignment, Typography, Text Shadow, and Box Shadow. These options can be set for both NORMAL and HOVER modes: Width, Text Color, Background, Border, Border Radius, and Spacing.
2.2 Pre-order button
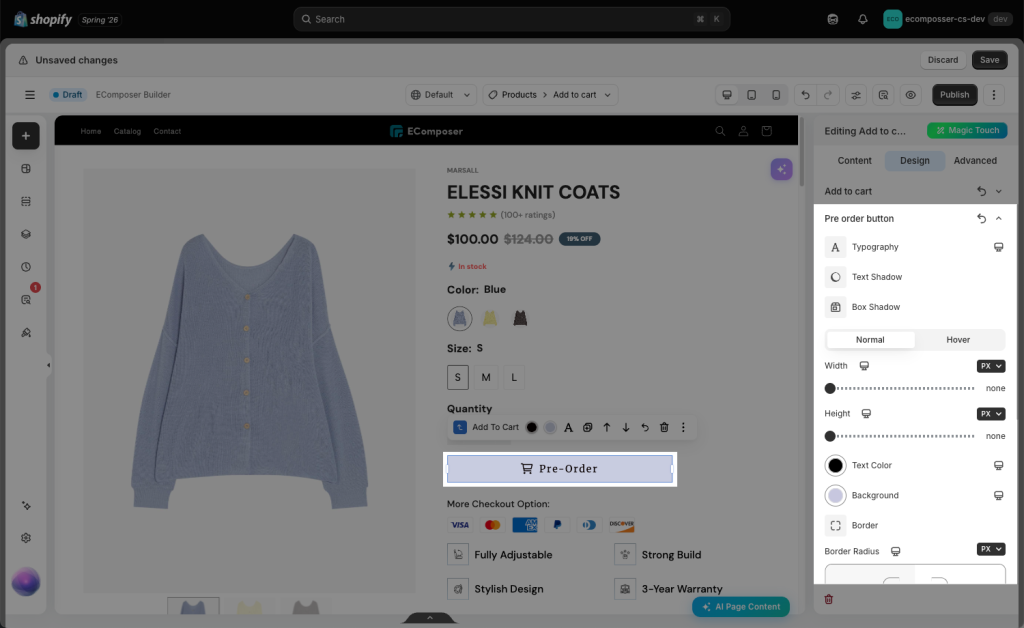
This button will appear when product inventory is 0 and “Continue selling when out of stock” is enabled. Typically, change the text color and button color here.
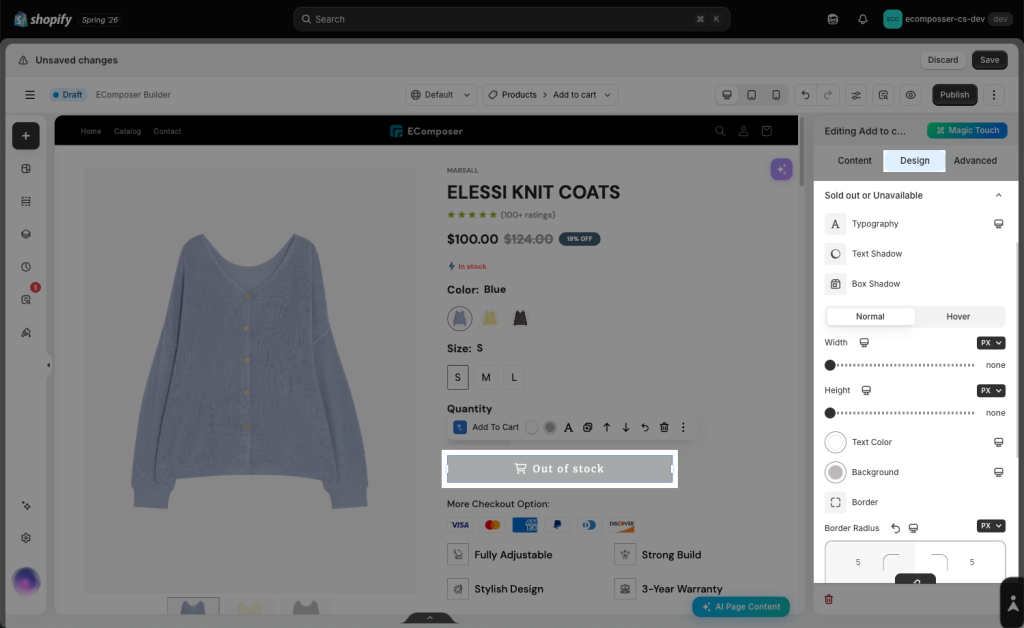
2.3 Sold out and unavailable
This text changes dynamically based on product settings.
Sold out appears when the selected variant exists, but it is not available for purchase. The variant exists, but its inventory is 0, and “Continue selling when out of stock” is disabled.
Unavailable appears when the selected variant combination does not exist. Example:
The product has these variants:
- Red / S
- Red / M
- Blue / M
But it does not have:
- Blue / S
So when the customer selects Blue / S, the button shows Unavailable.
2.4 Dynamic price
You can set up Typography, Text Color, Text Shadow, Hyphen spacing, and Price spacing for the Dynamic price on Normal and Hover.
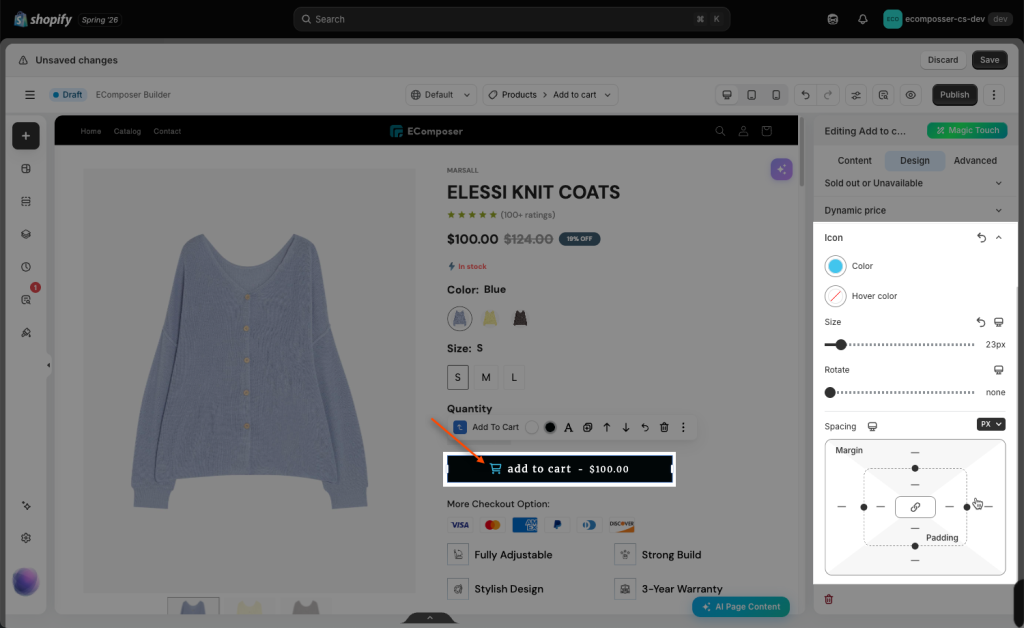
2.5 Icon
You can set up Color, Size, Rotate, and Spacing for the icon.