Cart Attribute
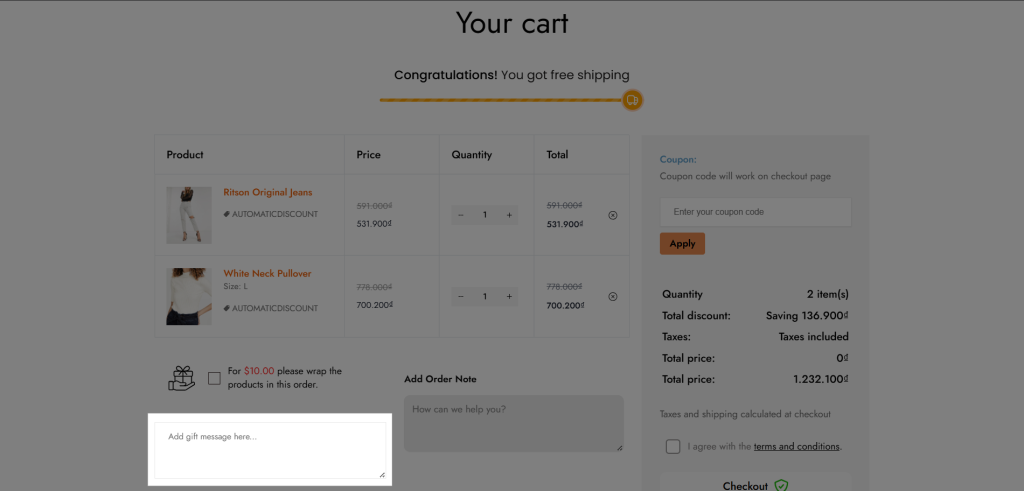
On the default Checkout page, Shopify does not allow you to enter additional information or leave notes for your order. This element will be a solution in this case.
The Cart attributes element is used to collect additional information about the order, allowing customers to add their personal touch right on the Cart page.
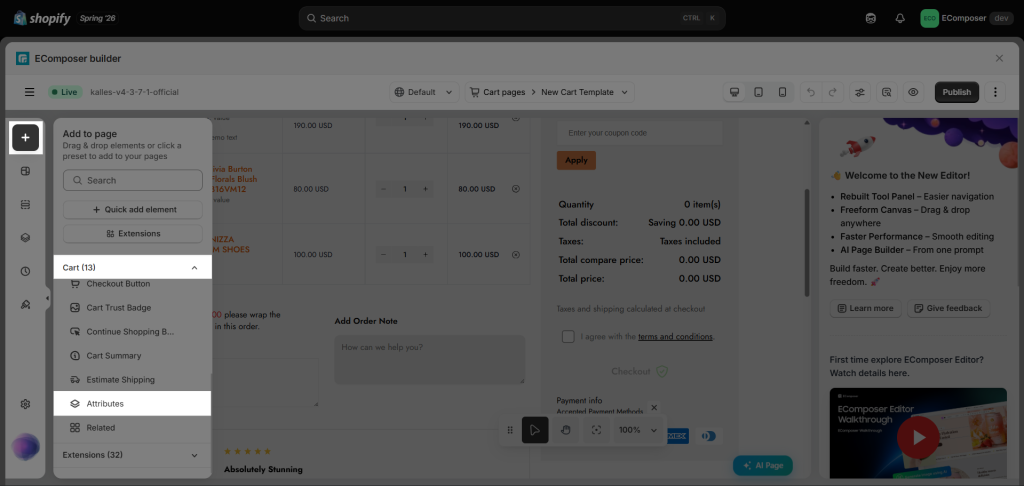
You can find it in the Elements panel => Cart => Attributes:
1. Content
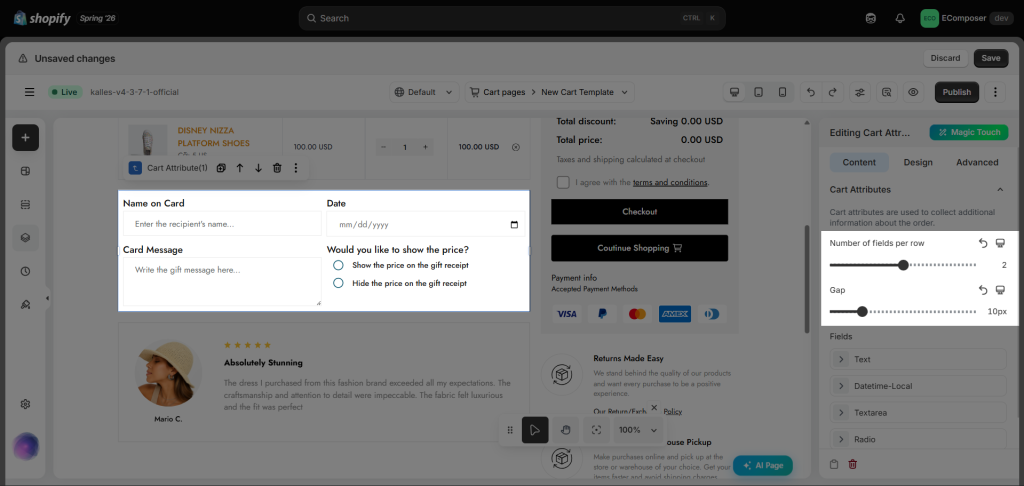
This element includes 7 field types that allow you to collect additional customer information in various formats, such as text, email, date & time, and more. Each field comes with common settings, including Field Label, Field Name, Field Description, Field Width, and a Required Field option, making it easy to customize your form and control how information is collected. These flexible field options help customers complete the form more easily and ensure all necessary information is provided.
- Number of fields per row: basically controls how many columns you want to show.
- Gap: this is an option to adjust the spacing between the text and input fields.
- Text Field: When present, it specifies that only pure text format can be filled out.
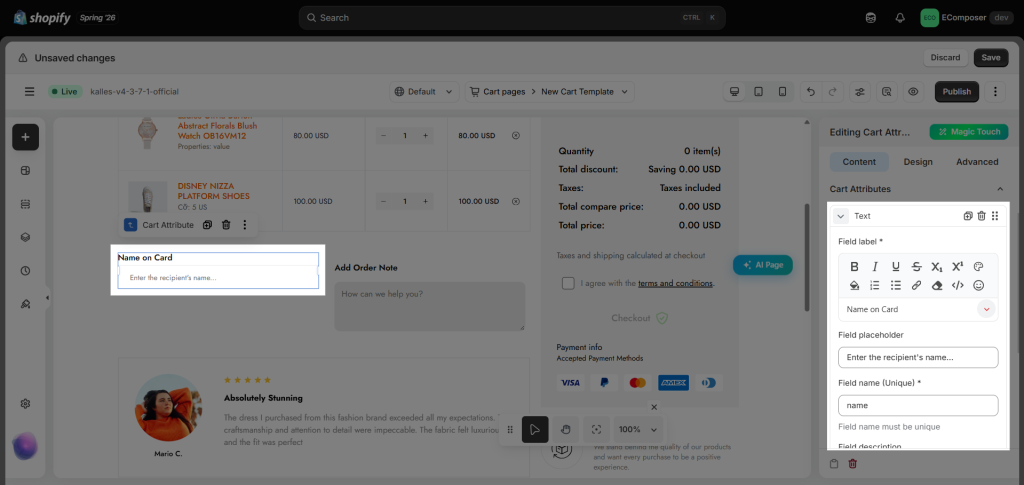
Note: The Field name must be unique for each field and cannot be left blank. You can also choose whether a field is required or optional by enabling the Required field option at the bottom of each field’s settings.
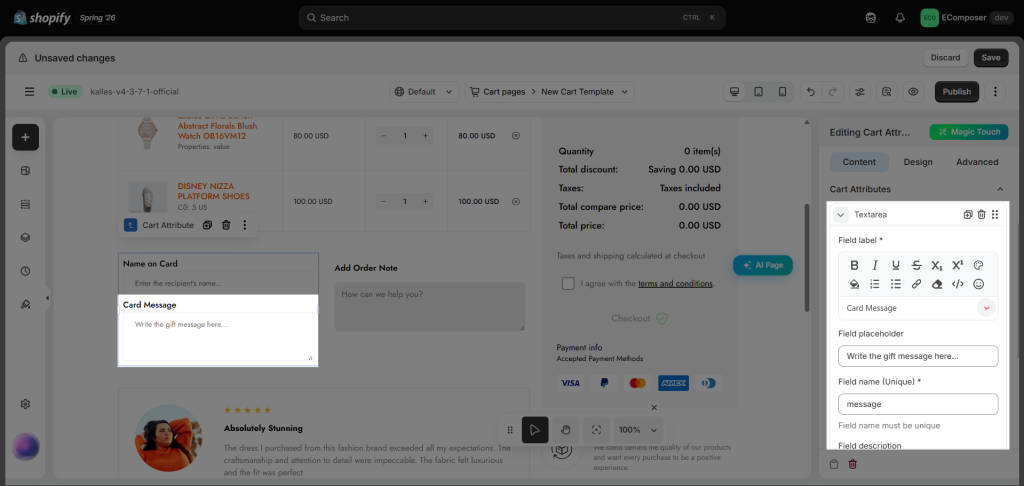
- Long Text Field: A Long Text field can be useful for storing large amounts of information, such as notes, comments, and descriptions.
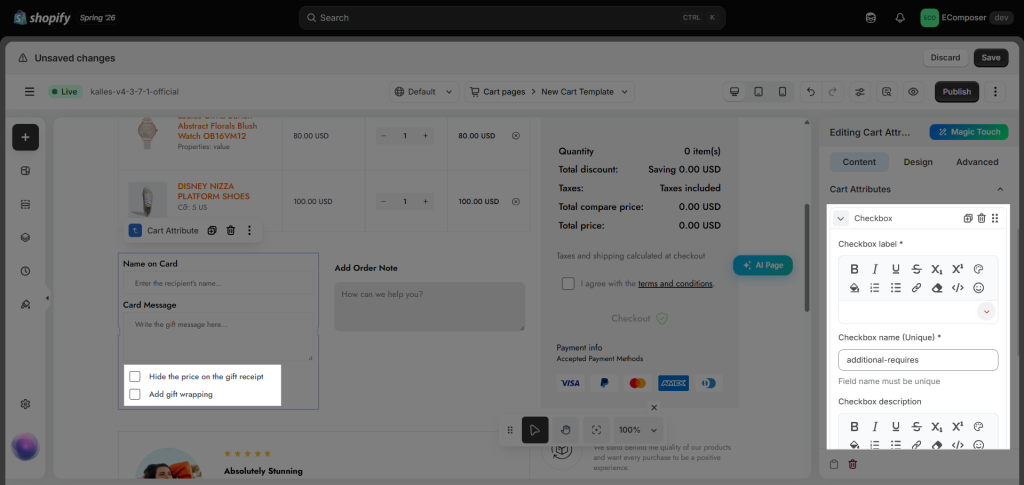
- Checkbox Field: The Checkbox field allows you to create customizable options for customers on the Cart page. It is useful for adding additional requests or preferences that will be saved with the order details.
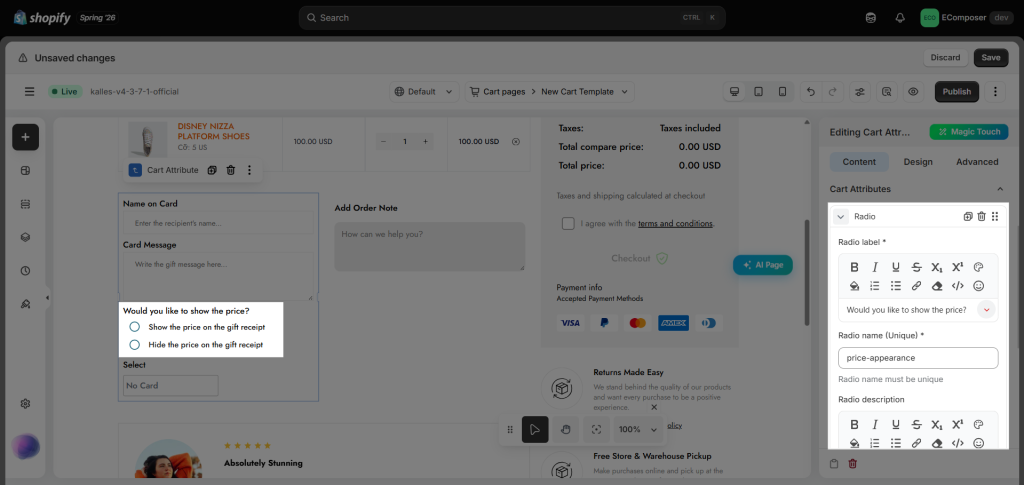
- Radio Field: It is used to select one of many given choices. Radio buttons are shown in radio groups to show a set of related options, only one of which can be selected.
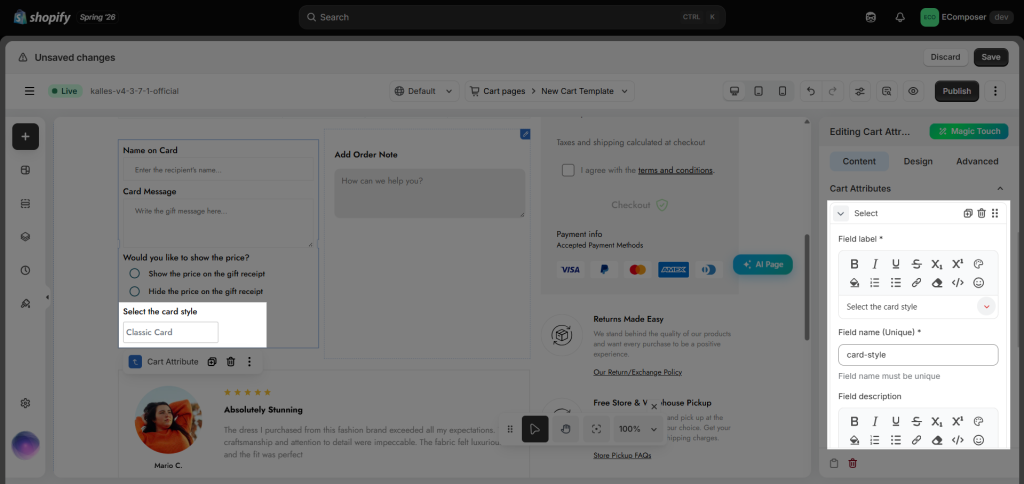
- Select Dropdown Field: Creating a dropdown list of options that can be selected.
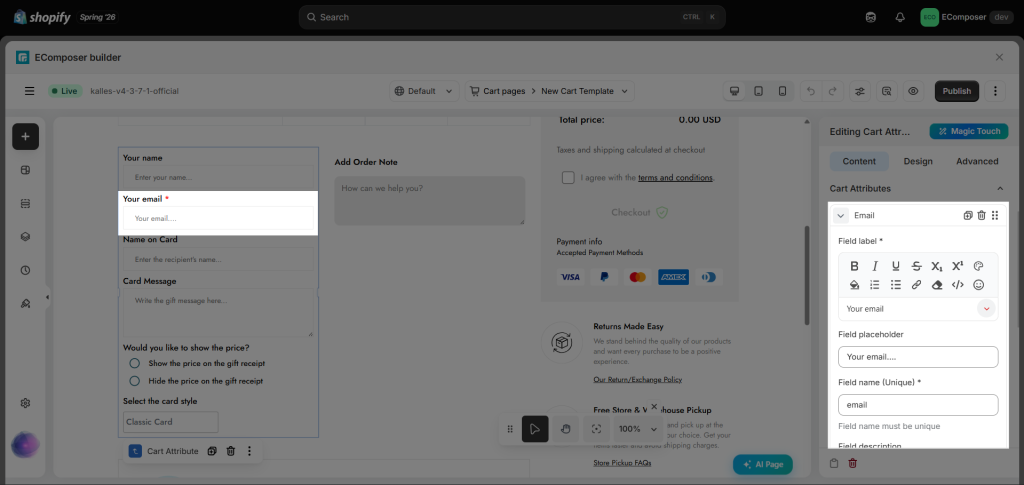
- Email Field: Only validated email addresses can be filled out.
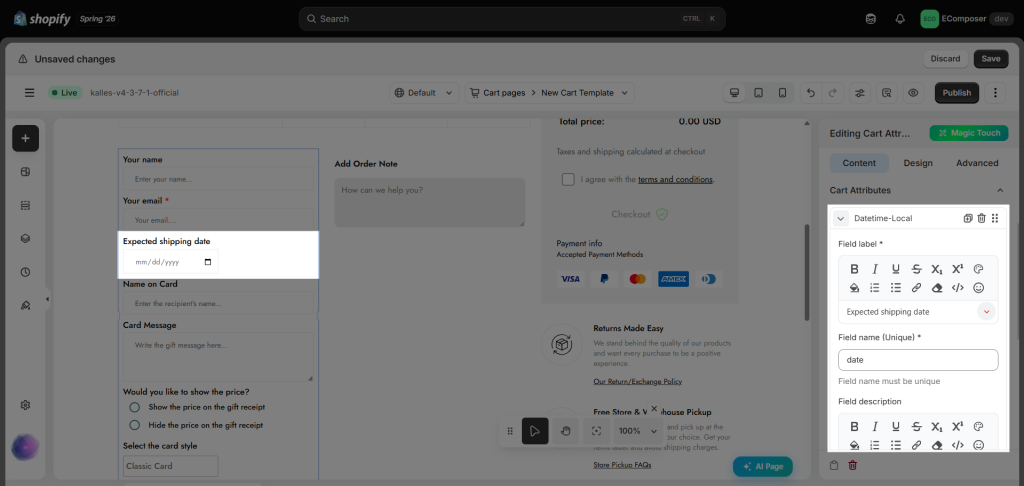
- Datetime Local Field: This field is used to store datetime values only. You can limit the input date by ticking the Enable limit date option in the field settings and adding the Min date limit or Max date limit.
2. Design
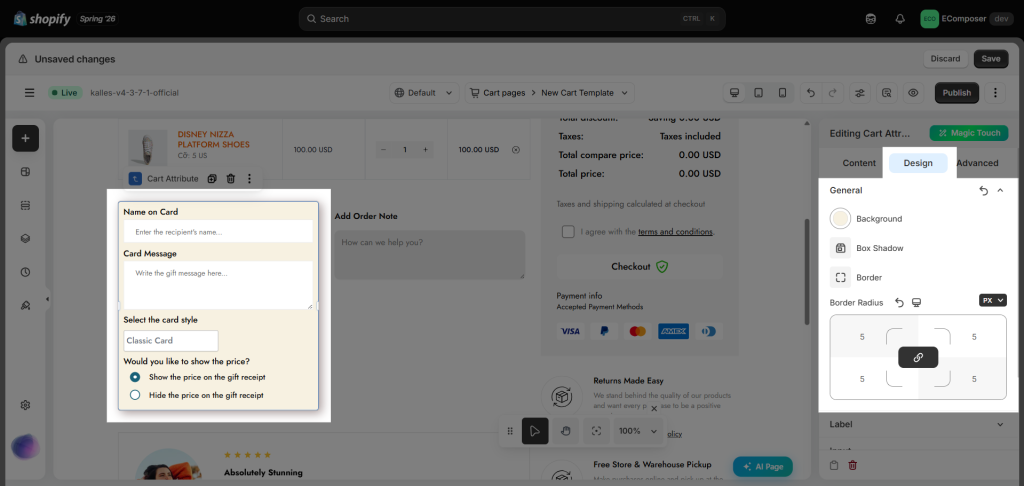
- General: Change the Background color, Box Shadow, Border, Border Radius, and Spacing of the entire cart attribute table area.
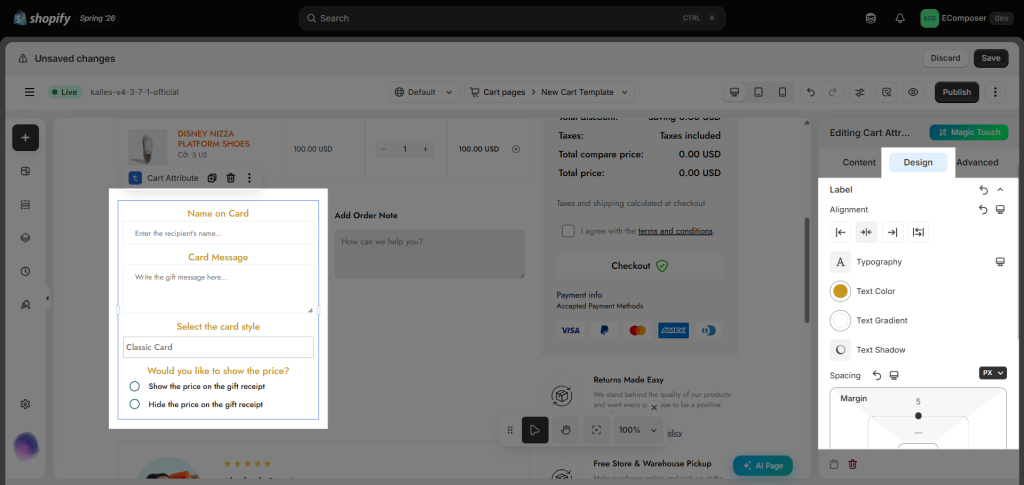
- Label: You can change the Alignment, Typography, Text Color, and Spacing of the labels.
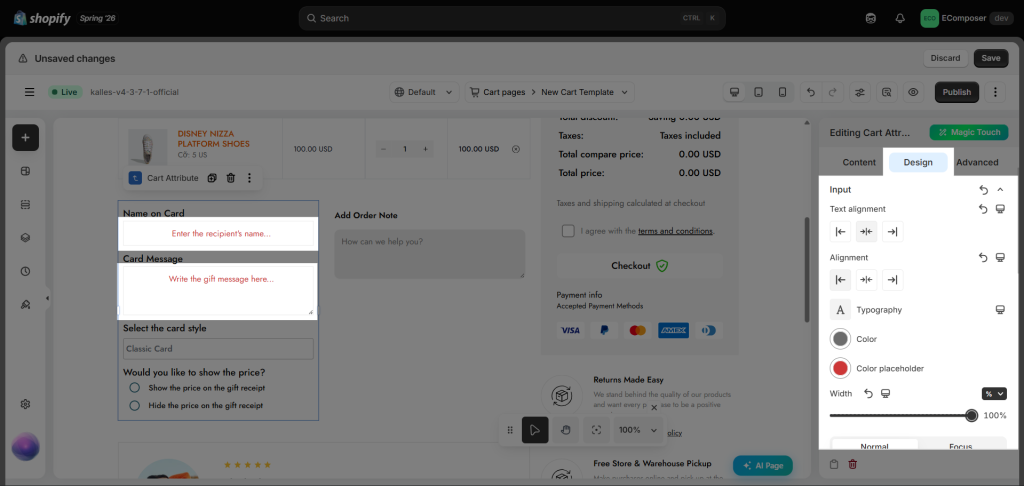
- Input: You can change the Text Alignment, Alignment, Typography, Color, Color Placeholder, Width, and Spacing of the input fields. Inside the Normal and Focus tabs, you can change the Background, Box Shadow, Border, Border Radius, and Outline of the inputs.
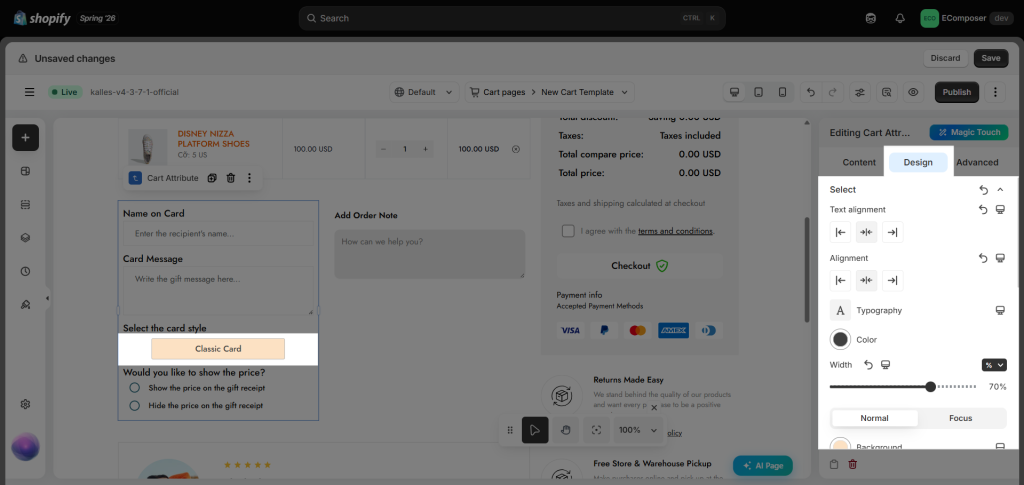
- Select: You can style the Text Alignment, Alignment, Typography, Color, Width, and Spacing of the select field. Under the Normal and Focus tabs, you can style the Background, Box Shadow, Border, Border Radius, and Outline of the selects.
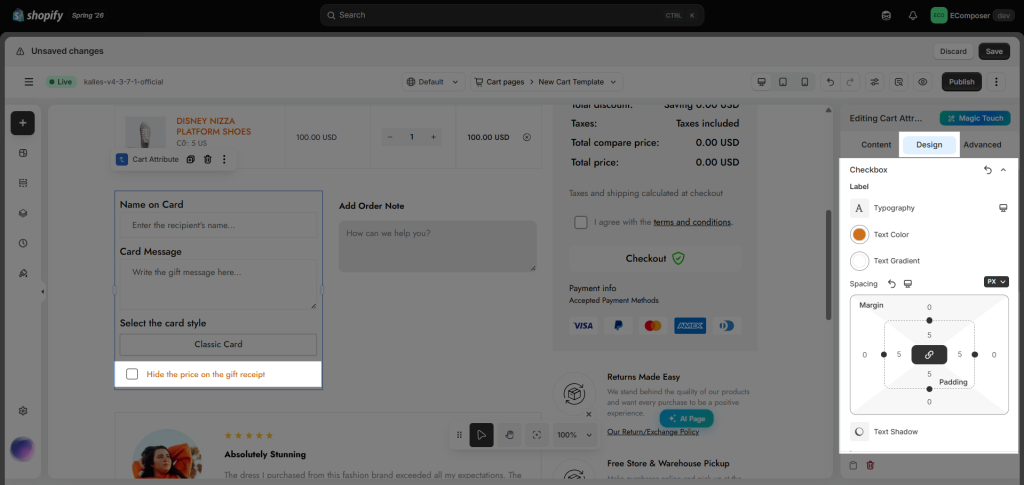
- Checkbox: You can style the Label of the checkbox field via Typography, Text color, and Spacing settings. With the inputs, you can change the Size and Spacing. Inside the Normal, Hover and Active tabs, you can change the Background, Border, and Border Radius settings. You can make the checkbox square or circle using Border radius option
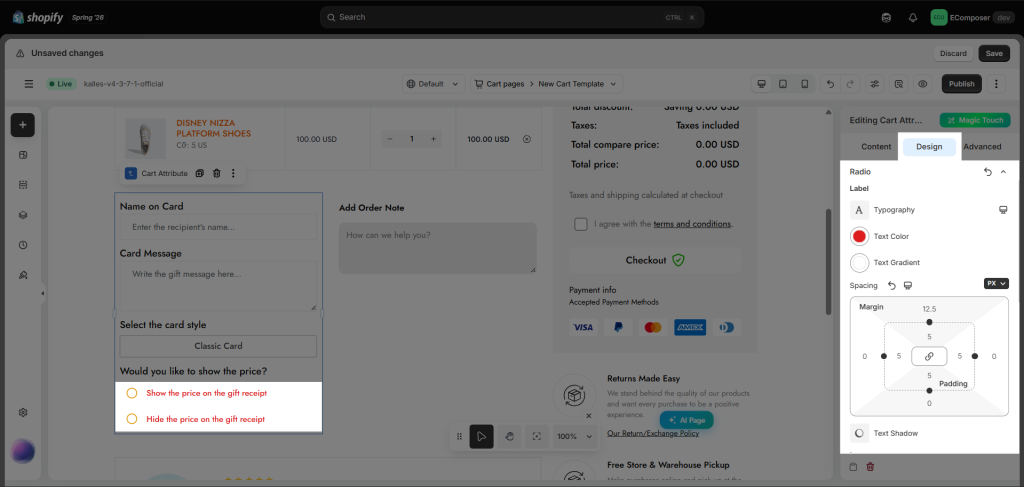
- Radio: You can style the Label of the radio field via Typography, Text color, and Spacing settings. With the inputs, you can change the Size and Spacing. Inside the Normal, Hover and Active tabs, you can change the Background, Border, and Border Radius settings. You can make the radio box square or circle using Border radius option
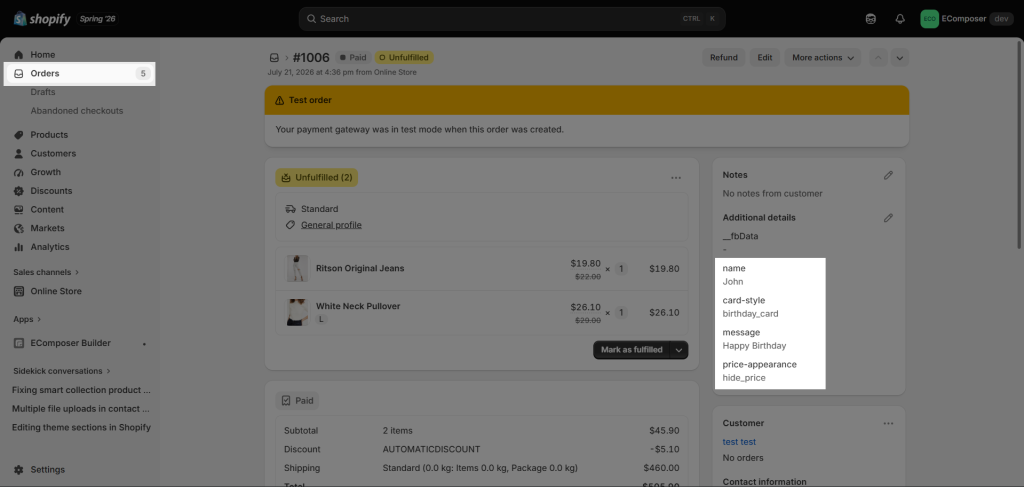
Where does this Cart Attribute data go?
You can find it out in your Shopify Admin => Orders => Order details => Additional details. It’s shown up only when your customer has completed an order.