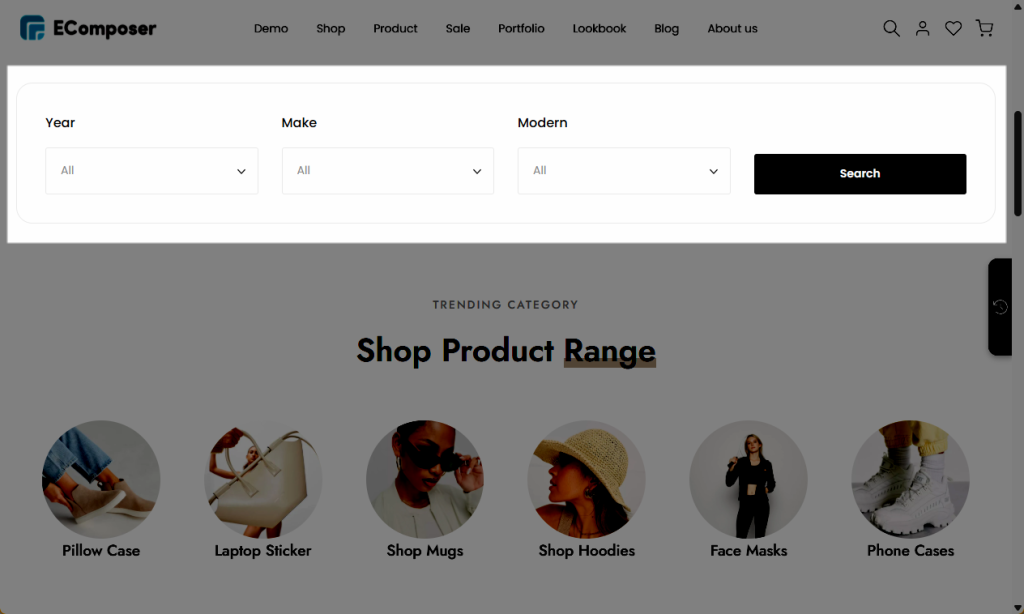
The Product Filter Element is a tool that allows customers to easily find the products they need quickly and efficiently. With intelligent filtering options based on criteria such as availability, collection, vendor, product type,…, and more, the Product Filter Element enhances the shopping experience, helping customers conveniently discover the right products.
Note: This element can be active on all pages and the results will be displayed on the Collection page.
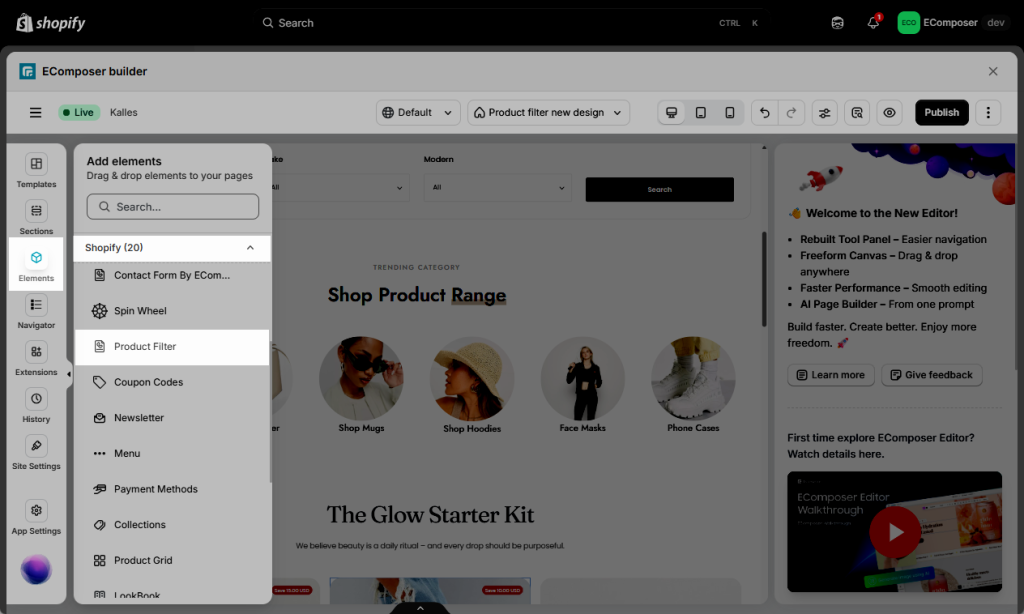
Step 1: Click into Elements > Shopify > Product Filter
Step 2:Drag/Drop the ProductFilter element wherever you want it to stay.
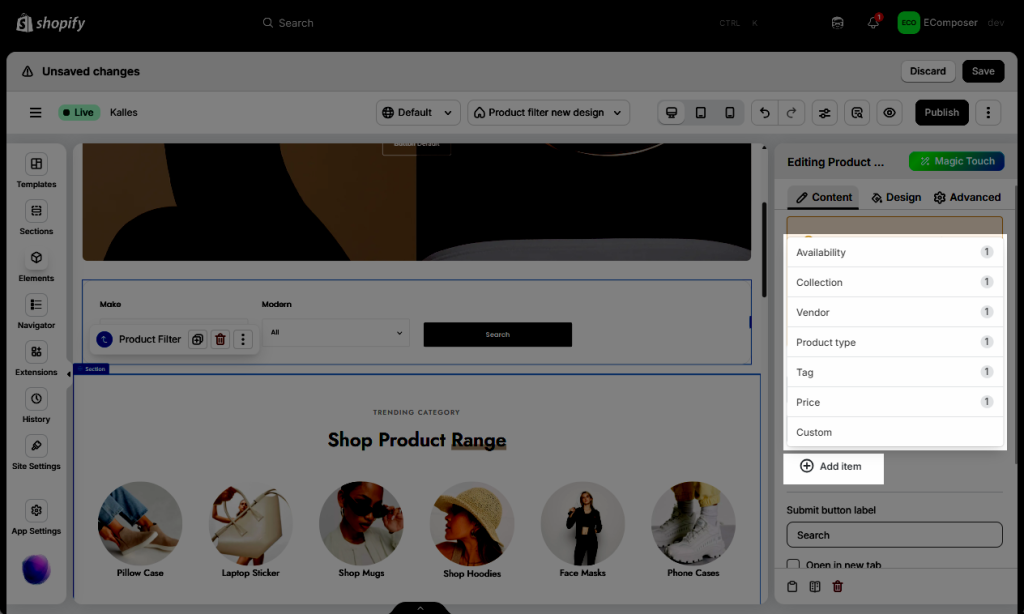
1. Content
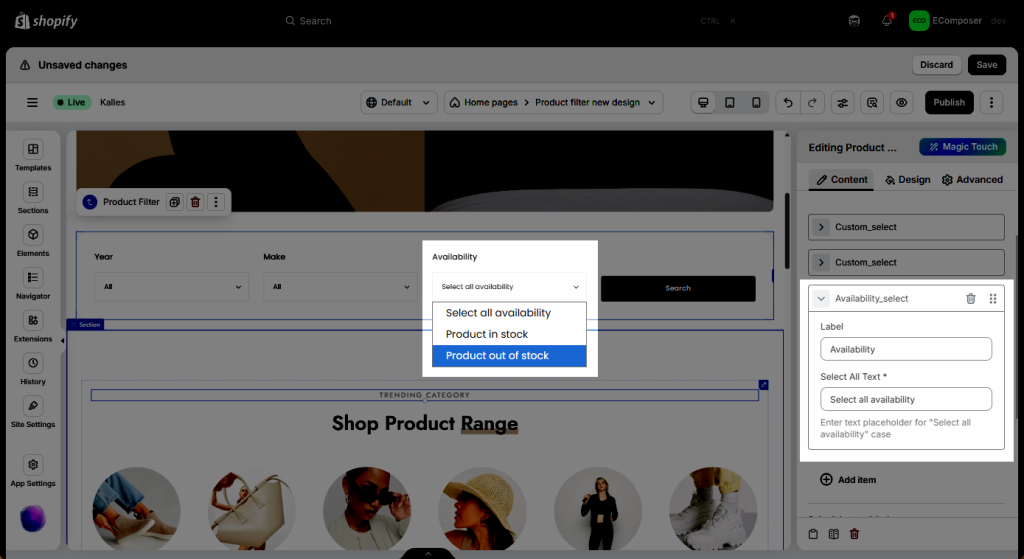
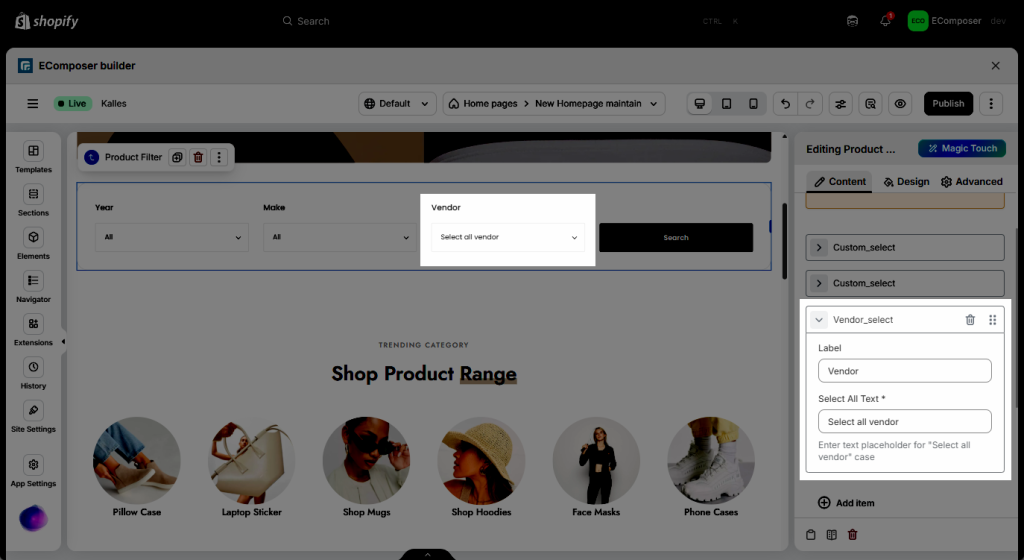
Please note that each item can only be used once. Also, you should enter the Select All Text field, as that is required.
Add item: It is the “building block” of your storefront navigation. Instead of showing every possible filter at once, this allows you to manually select which specific categories or attributes your customers can use to narrow down their search.
Availability: It gives the user simple dropdown options, such as Product in stock and Product out of stock. Also, you should enter the Select All Text field, as that is required.
Collection: This allows Displays a list of your Shopify Collections. There are 2 Collection sources you can choose to show:
For All Collection, will show all collections in your Shopify store.
For the Specific Collection, you can choose to show 1 or more collections to display.
Vendor/Tag/Type: It will show the options by rendering all vendors (all tags, all types) of products in the Shopify store.
Note: Display by other filters, for example by each filtered collection
Price: Adds a price slider or price range checkboxes. There are 2 Price filter types:
Custom segment steps: This is the automatic way to break down your prices. Instead of you typing in every range, you tell the app to do the math for you.
Custom price for segment: This is the manual way to group your prices. It gives you total control over the specific “range” you want to show. The currency will be based on the store’s currency.
Custom: Metafields are used for custom data. Suppose your products have special characteristics such as Year, Country, etc. You create a Metafield for them in Shopify, and then use this option in EComposer to show them in the Product Filter to use. Please follow the steps and guide video below: – Step 1: Go to Shopify admin -> Settings -> Metafields and Metaobjects > Products. – Step 2: Click Add definition to create -> Enter the namespace and key -> choose Single line text to use. – Step 3: Enable Filter on the product list and in the Admin API. – Step 4: Go to the Products -> Open the product -> Find the Metafield that you made. – Step 5: Enter the value (ex, 2024, 2025, etc) – Step 6: Go to the Search & Discovery app -> View the metafield values that you added to the products. – Step 7: Open your page in the EComposer app -> Enter the namespace and key + add the metafield values. custom.year will be changed based on what you namespace and key in the Metafield in Shopify from Step 2.
Note: Namespace and key used to fill in Product metafield name in element can get data
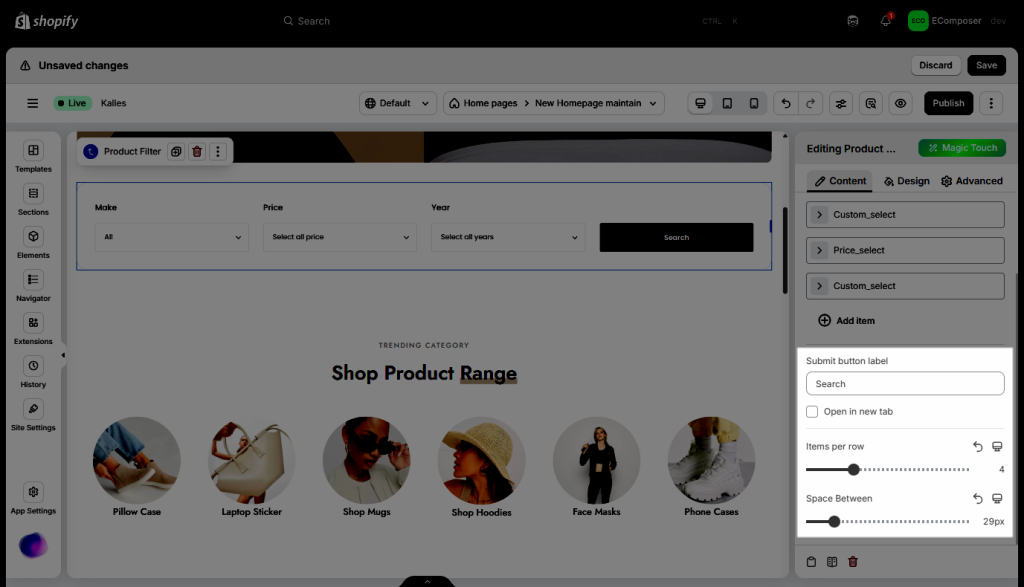
Submit button label: This field lets you customise the text on that button. Instead of just saying Search, you can make it clearer, like Apply Filters, Show Results, etc.
Open in new tab: This is helpful if you want customers to keep their original browsing page open while they explore a specific filtered search in a separate window.
Items per row: This determines how many filter options sit side-by-side horizontally.
Space between: It controls the gap between each individual filter option.
2. Design
Product Filter allows you to configure the design for General, Label, Select, Submit button
In each main option, there are so many options inside to change Color, Background color, Border, Border radius, Width, Spacing, etc. Please go here to figure them out.