How to use Variant metafield on your Product template?
Metafields allows you to customize the functionality and appearance of your Shopify store by letting you save specialized information that isn’t usually captured in the Shopify admin. You can use Metafields for internal tracking, or to display specialized information on your online store in a variety of ways.
With variant metafield, you can add the information for each variant. The details below might help you get more information.
1. Add the Metafield definitions
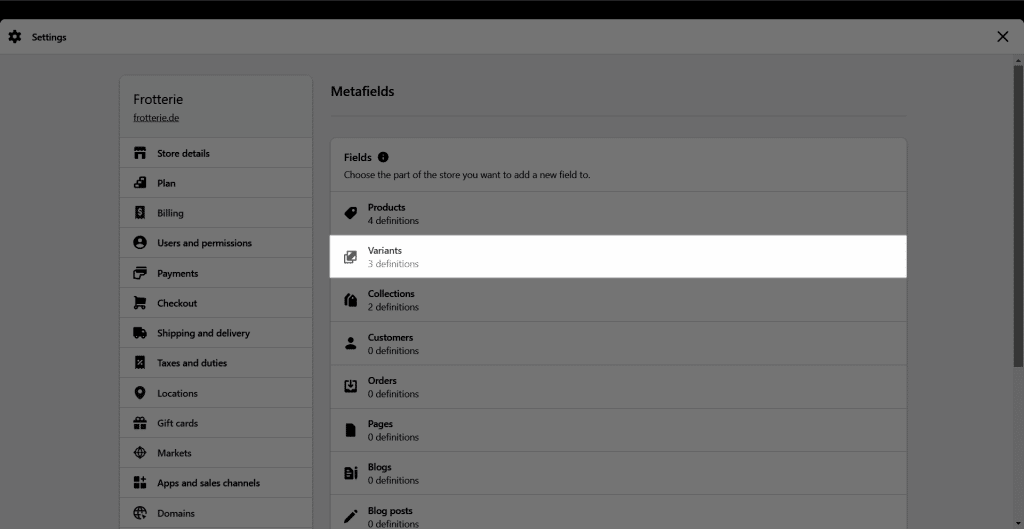
- From Shopify Dashboard > Settings > Metafield
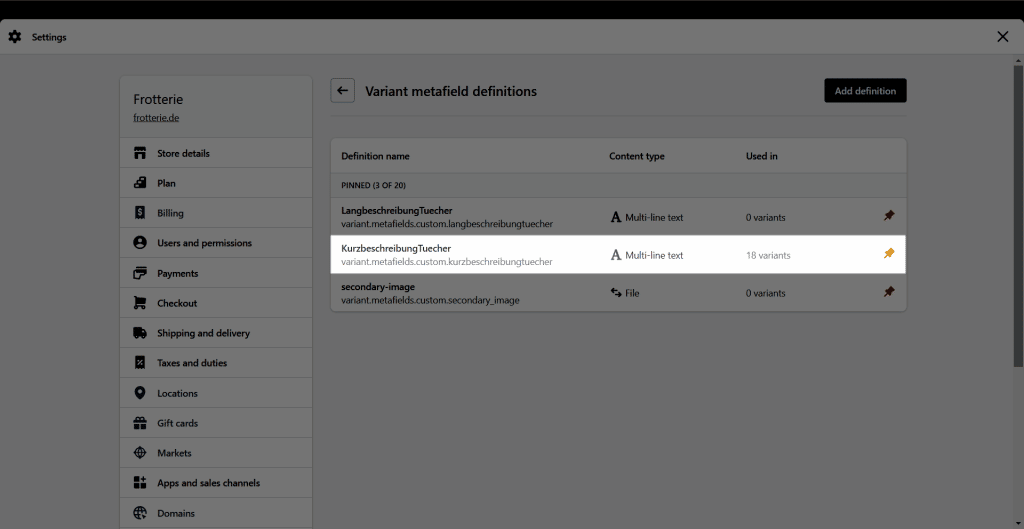
- Then choose Variant > Add definition and fill the information for metafield
2. Adding values to metafields
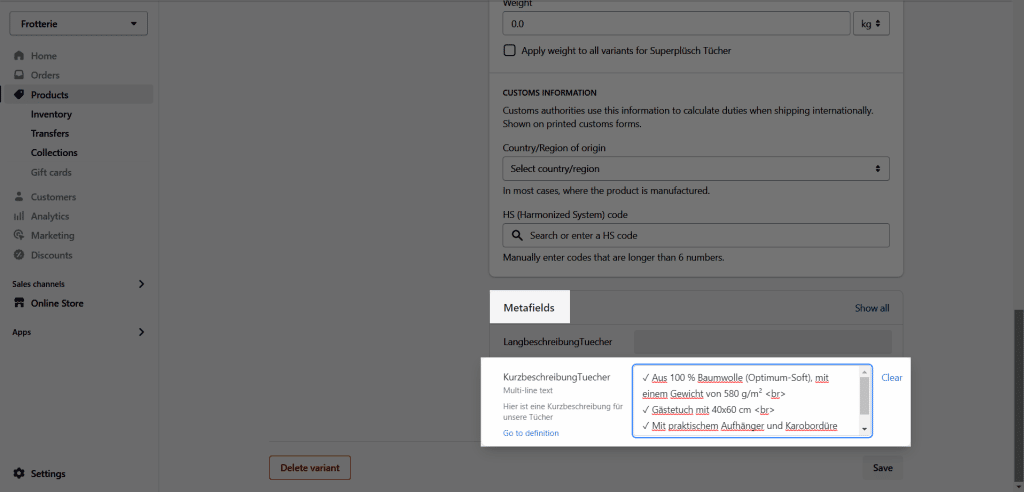
- Go to Shopify Admin > Products > All Products > Select a certain product that you want to display on the metafields content.
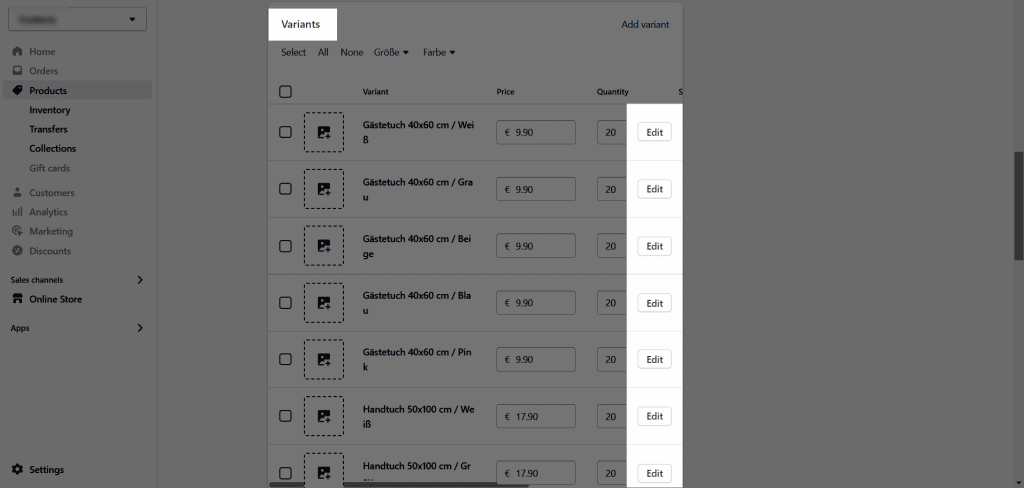
- Scroll down and edit each variant of that product
- Scroll down to the bottom and fill your desired content to metafield part
3. How to show variant metafield on the Product page?
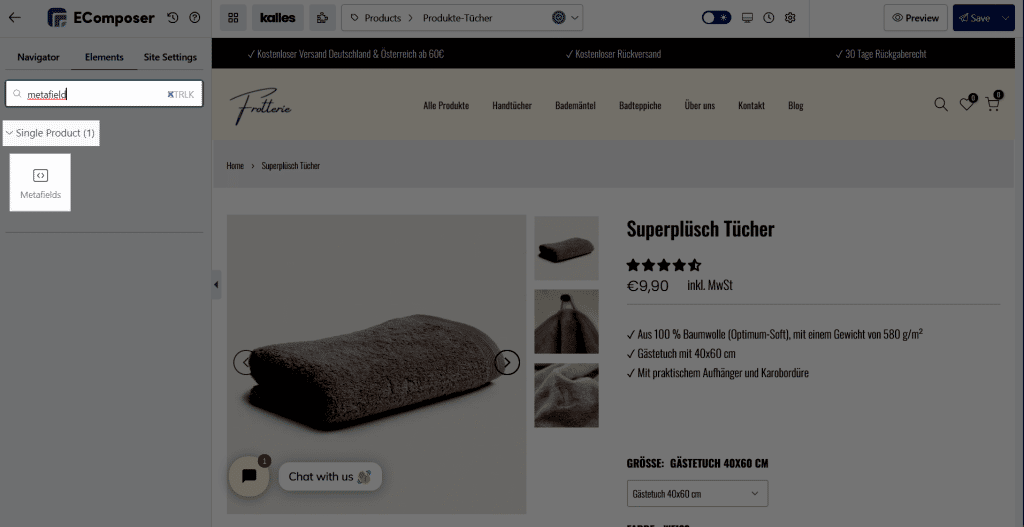
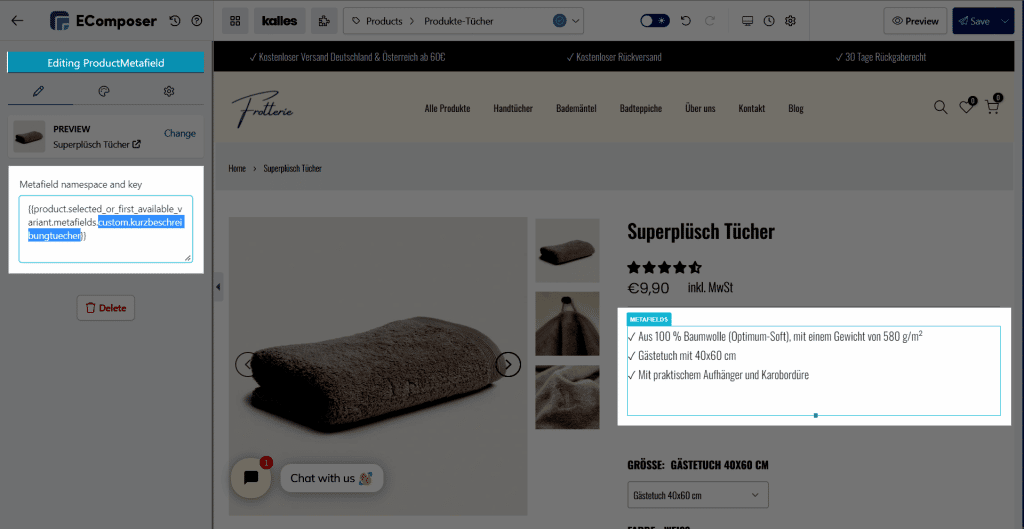
You need to drag and drop the metafield element to your desired position on the page and paste the following sample code to show the metafield content to EComposer.
The below code is for metafield Single line text type:
{{ product.selected_or_first_available_variant.metafields.NAMESPACE.KEY }}And this code is for metafield Rich text type:
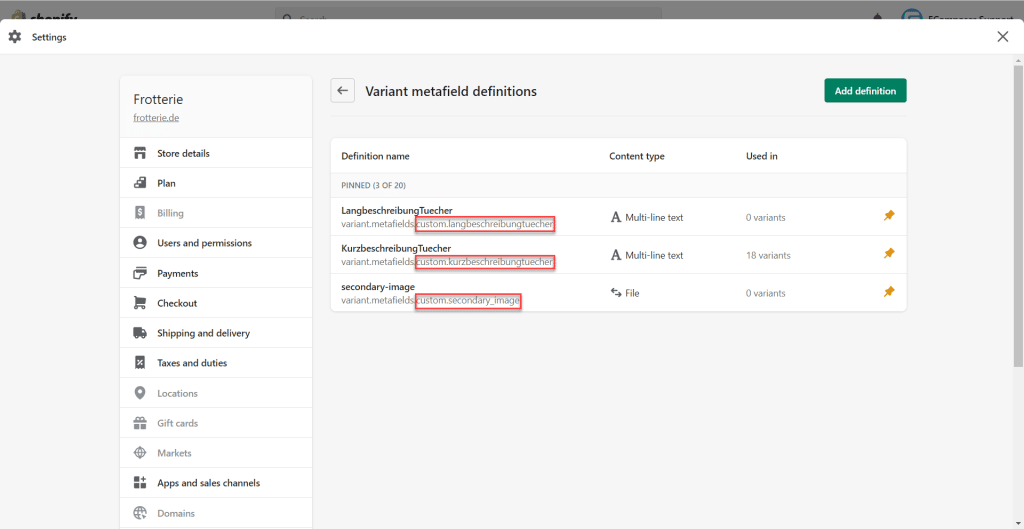
{{product.selected_or_first_available_variant.metafields.custom.NAMESPACE.KEY | metafield_tag }}Note: You can get the NAMESPACE.KEY value from Variant metafield which is set from here
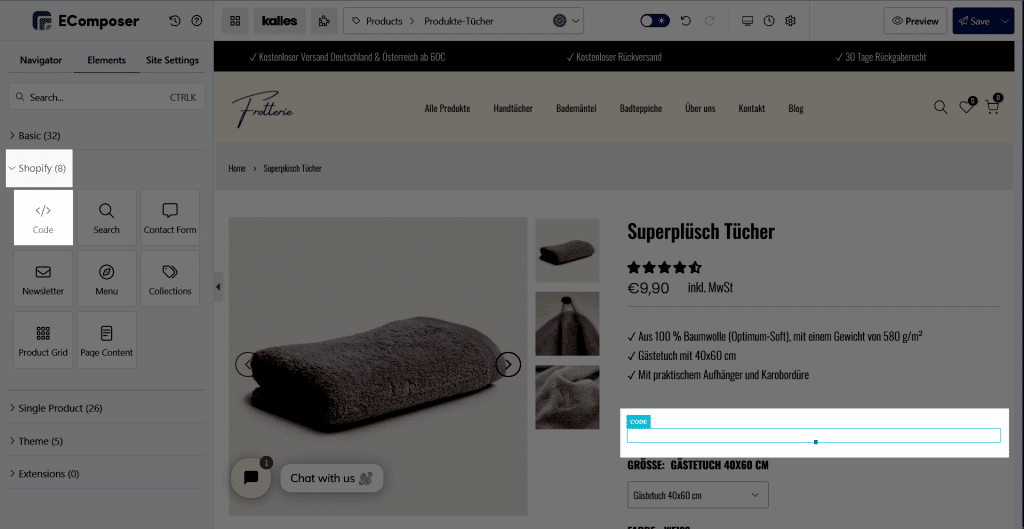
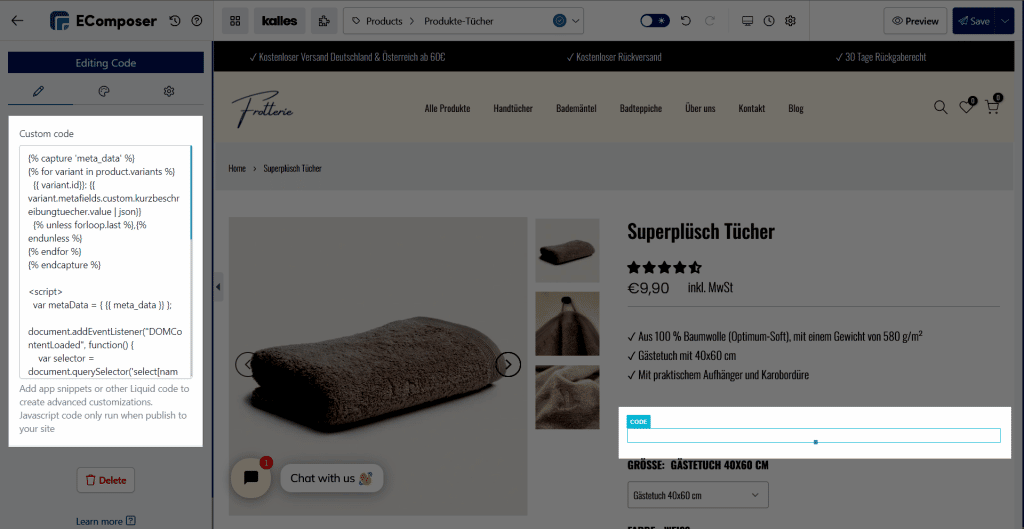
We need to customize a bit of code to make it change when the customer changes the variant. So you just need to use the Code element and paste the following code:
The below code is for metafield Single line text type:
{% capture 'meta_data' %}
{% for variant in product.variants %}
  {{ variant.id}}: {{ variant.metafields.custom.kurzbeschreibungtuecher.value | json}} {%- comment -%} Replace it with your NAMESPACE.KEY value {%- endcomment -%}
  {% unless forloop.last %},{% endunless %}
{% endfor %}
{% endcapture %}

<script>
  let metaData = { {{ meta_data }} };
  document.addEventListener("DOMContentLoaded", function() {
    var selector = document.querySelector('select[name=id]');
    if(selector) {
      selector.addEventListener('change', function() {
        let variant_id = this.value;
          if(!variant_id) return;
          var material = metaData[variant_id],
            meta = document.querySelector('.ecom-2t1qughe1hz .ecom-product-single__metafield-container'); // Find your class which has metafiled or set the ID for the metafield element like a below guide
          if(material && meta && material != null) {
            meta.innerHTML = material;
          }
          else {meta.innerHTML = ""}
      })
    }
  });

</script>
And this code is for metafield Rich text type:
{% capture 'meta_data' %}
{% for variant in product.variants %}
  {{ variant.id}}: '{{ variant.metafields.custom.include | metafield_tag }}' {%- comment -%} Replace it with your NAMESPACE.KEY value {%- endcomment -%}
  {% unless forloop.last %},{% endunless %}
{% endfor %}
{% endcapture %}

<script>
  let metaData = { {{ meta_data }} };
  document.addEventListener("DOMContentLoaded", function() {
    var selector = document.querySelector('select[name=id]');
    if(selector) {
      selector.addEventListener('change', function() {
        let variant_id = this.value;
          if(!variant_id) return;
          var material = metaData[variant_id],
            meta = document.querySelector('#include .ecom-product-single__metafield-container'); // Find your class which has metafiled or set the ID for the metafield element like a below guide
          if(material && meta && material != null) {
            meta.innerHTML = material;
          }
          else {meta.innerHTML = ""}
      })
    }
  });

</script>
If the value has a special character like “” or ”, you have to use this code:
{% for variant in product.variants %}
  <span style="display: none;" id="custom-meta-{{variant.id}}">{{ variant.metafields.custom.include | metafield_tag }}</span>
{% endfor %}

<script>
  document.addEventListener("DOMContentLoaded", function() {
    var selector = document.querySelector('select[name=id]');
    if(selector) {
      selector.addEventListener('change', function() {
        let variant_id = this.value;
          if(!variant_id) return;
          var material = document.querySelector('#custom-meta-' + variant_id),
            meta = document.querySelector('#include .metafield-rich_text_field'); // Find your class which has metafiled or set the ID for the metafield element like a below guide
          if(material && meta) {
            meta.innerHTML = material.innerHTML;
          }
          else {meta.innerHTML = ""}
      })
    }
  });

</script>
The result will be shown correctly on the live page
If you are building the Quickview template, please use the below code
{% capture 'variant_product_description' %}
{% for variant in product.variants %}
  {{ variant.id}}: {{ variant.metafields.custom.variant_product_description.value | json}} {%- comment -%} Replace it with your NAMESPACE.KEY value {%- endcomment -%}
  {% unless forloop.last %},{% endunless %}
{% endfor %}
{% endcapture %}

<script>
    (function() {
        let metaData3 = { {{ variant_product_description }} };

            var selector = document.querySelector('select[name=id]');
            if(selector) {
            selector.addEventListener('change', function() {
                let variant_id = this.value;
                if(!variant_id) return;
                var material = metaData3[variant_id],
                    meta = document.querySelector('#qvincludes .ecom-product-single__metafield-container'); // Find your class which has metafiled or set the ID for the metafield element like a below guide
                if(material != null && meta != null && material != null) {
                    meta.innerHTML = material;
                }
                else {meta.innerHTML = ""}
            })
            }

    })()

</script>
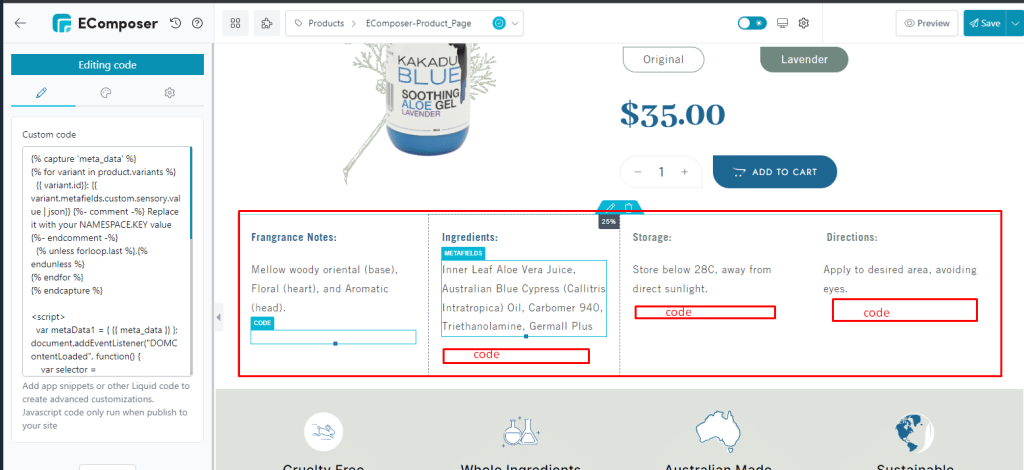
4. Adding multiple variant metafield to the product page
When each variant has a lot of information and you want to show all those, you need to add multiple metafield elements as well as the code element. The picture below will help you get more details:
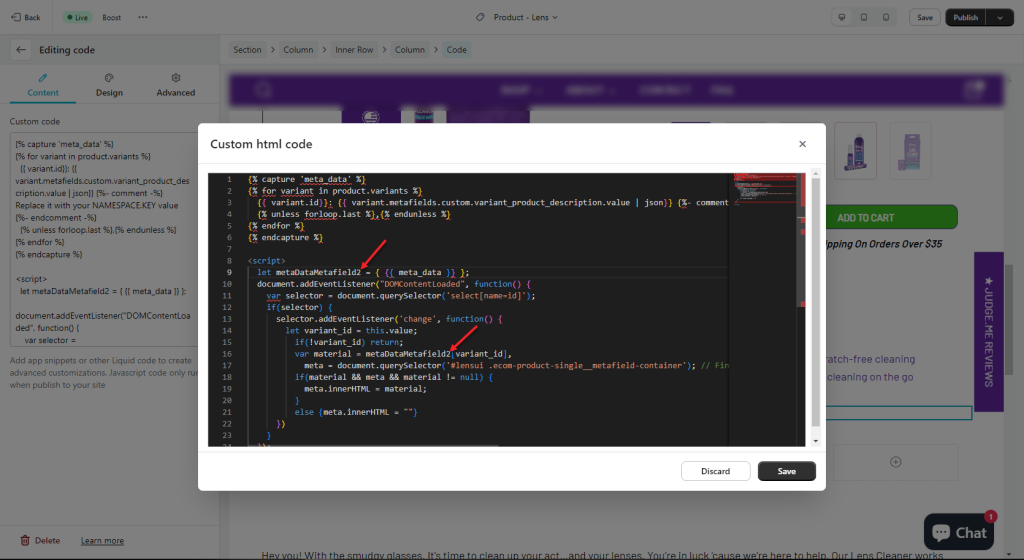
Note: If you use more than one metafield on your page, please add the number to the code elements like this. Just to make the code in each element are different.
If you can not do it by yourself, don’t hesitate to get in touch with us via live chat, and we will help you check and solve the problem.


3 Comments
michael
Hi,
Hopefully you can help. I have gone through it all and tried multiple times.
I have tested a few scenarios and it works perfectly, however. The JSON is constantly returning “undefined” when doing the metaData[variant_id] part.
ReplyAnna Nguyen
Hi Michael,
Please contact our support team via live chat to get help from them for that.
Best Regards,
ReplyAnna
Tyson
I would like to do same with the product image gallery should change based on variant change using variant metafiled.
Reply