

How to create Gradient Backgrounds for Buttons and Sections?
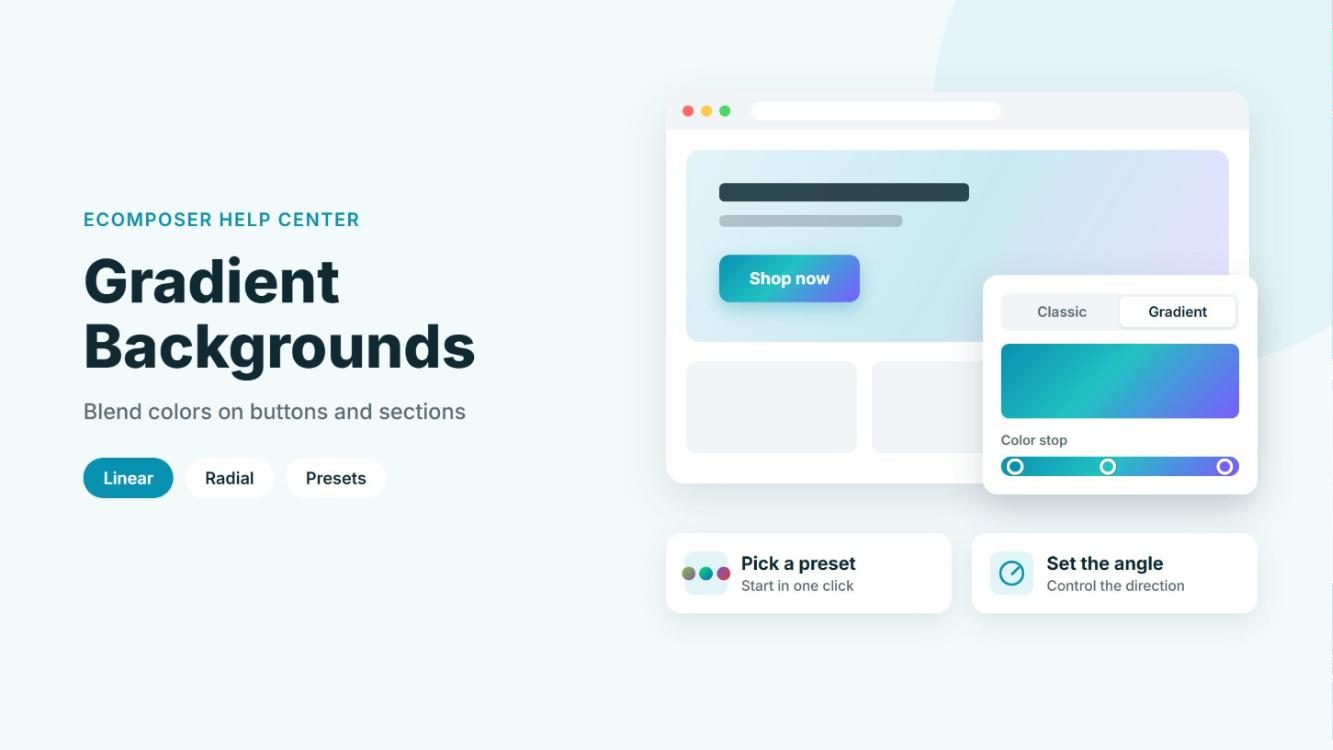
A gradient background blends two or more colors into each other, so your button or section gets a smooth color transition instead of one flat color. It’s an easy way to make a call-to-action stand out or give a section more depth. In EComposer, you can set it up right from the Background option, either by picking a ready-made preset or by building your own colors, type and direction.
1. Open the Gradient options for your button
First, let’s get to the background settings of the button you want to style.
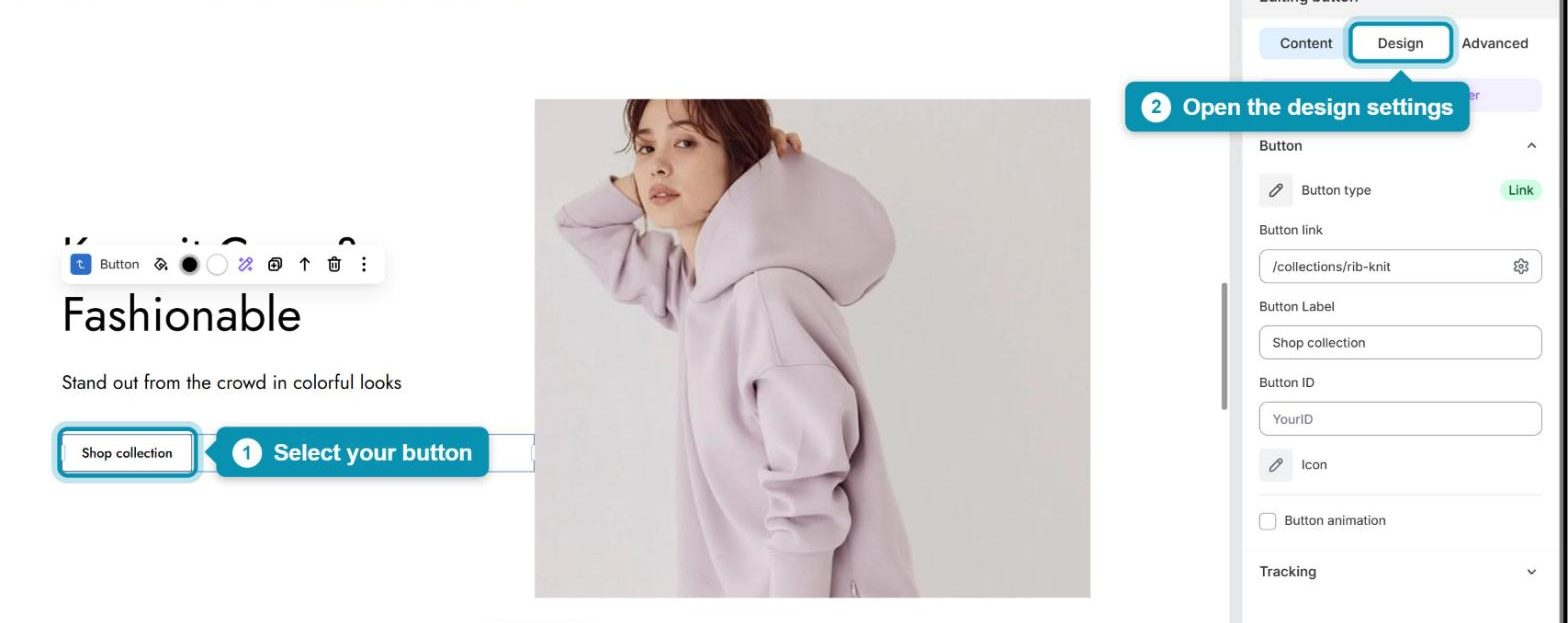
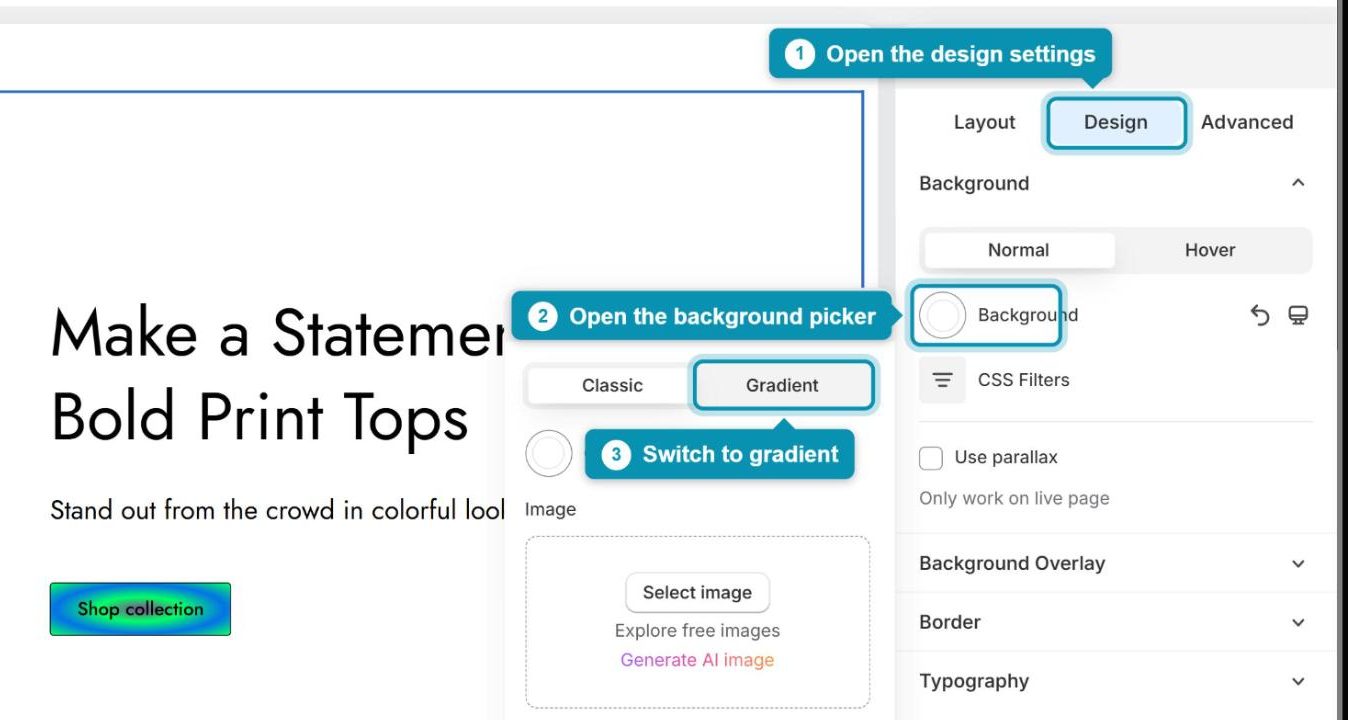
Step 1: Click the button on the canvas to select it, then open the Design tab in the settings panel on the right.
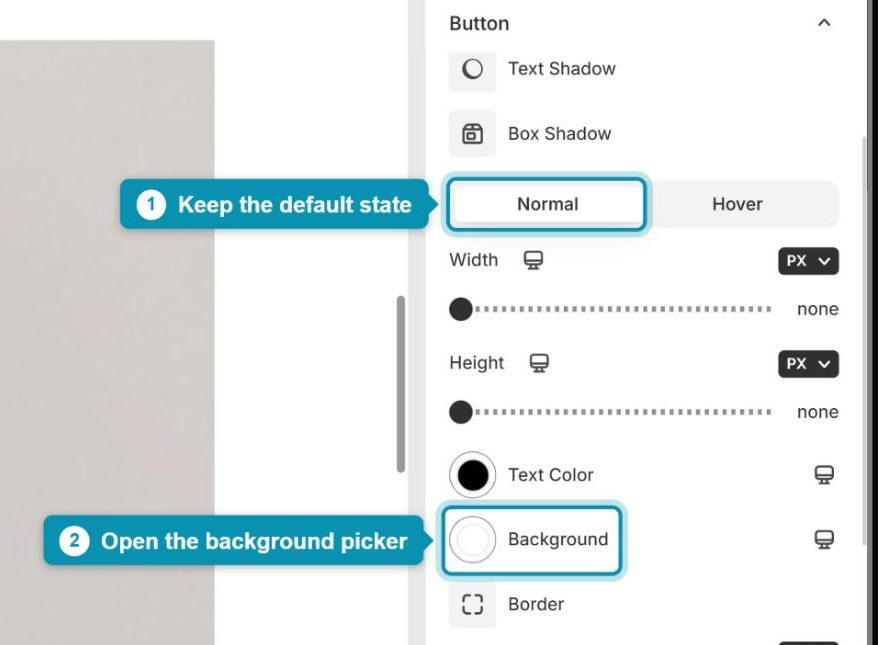
Step 2: In the Button group, click the color circle next to Background. Keep the Normal tab selected above it, so the gradient shows on the button by default.
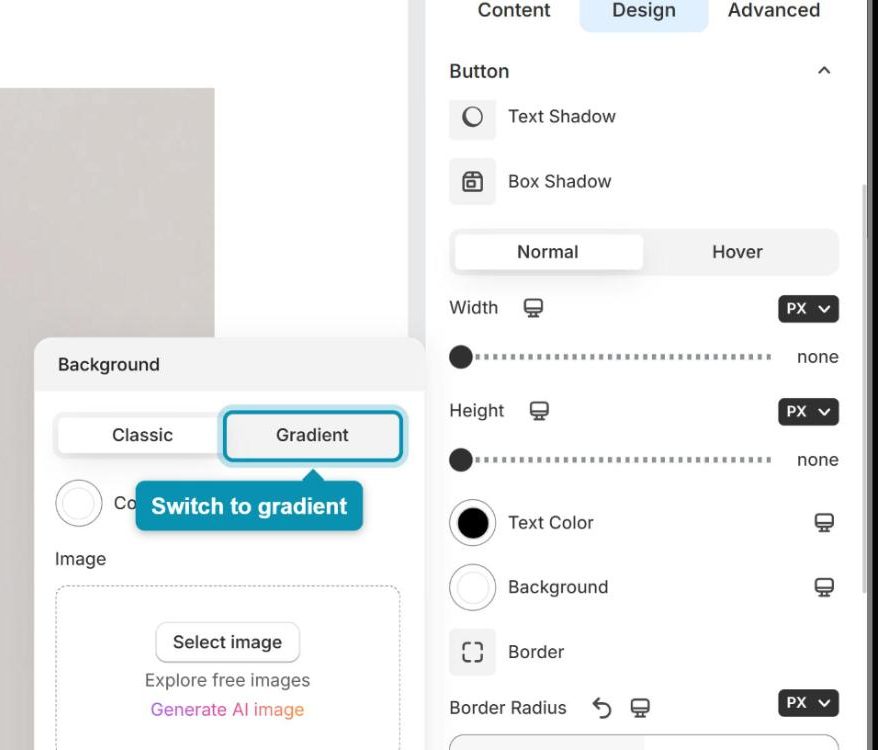
Step 3: In the Background popup, switch to the Gradient tab.
Want the gradient to appear only when visitors hover over the button? Simply open the Hover tab in the Button group first, then set up the gradient there.
2. Customize your gradient
Now you can shape the gradient: choose the colors, how they blend and which direction they flow. Every change shows up on the canvas right away, so you can keep adjusting until it looks right.
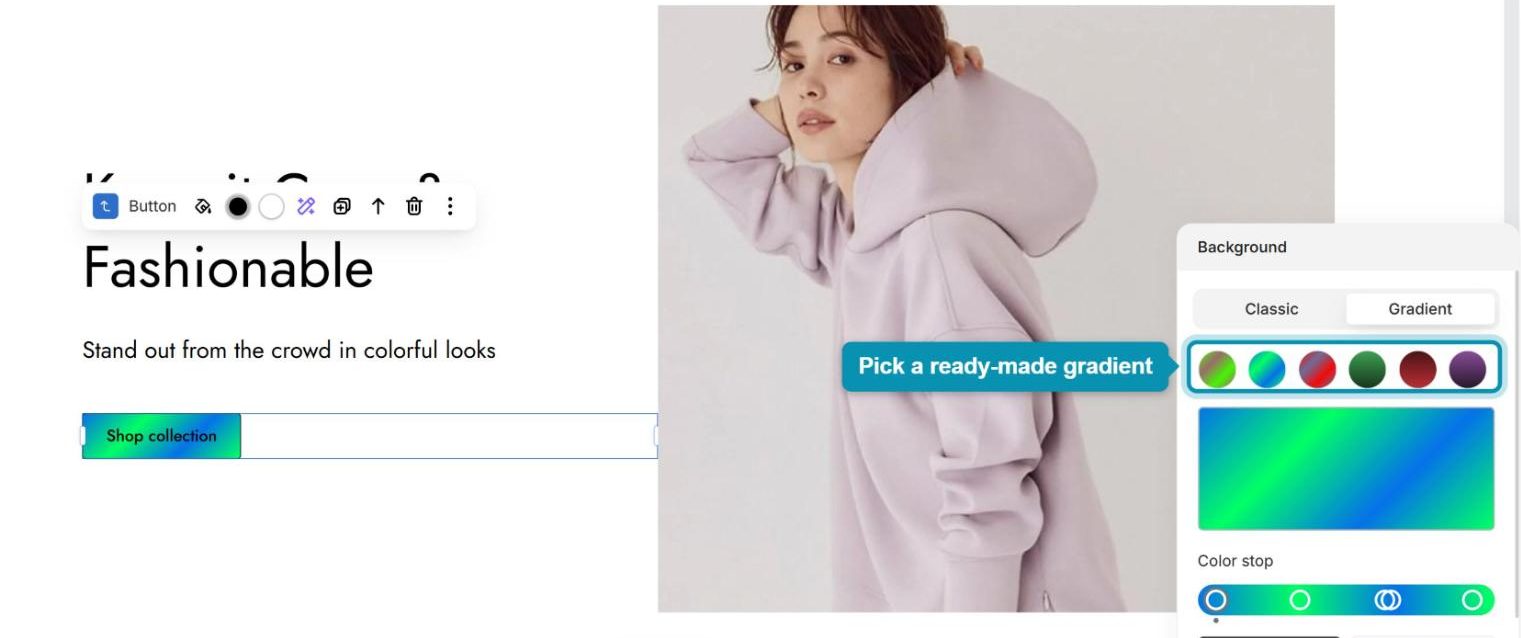
Step 1: For a quick start, click one of the preset gradients at the top of the popup. The preview box below shows the result, and you can still fine-tune it in the next steps.
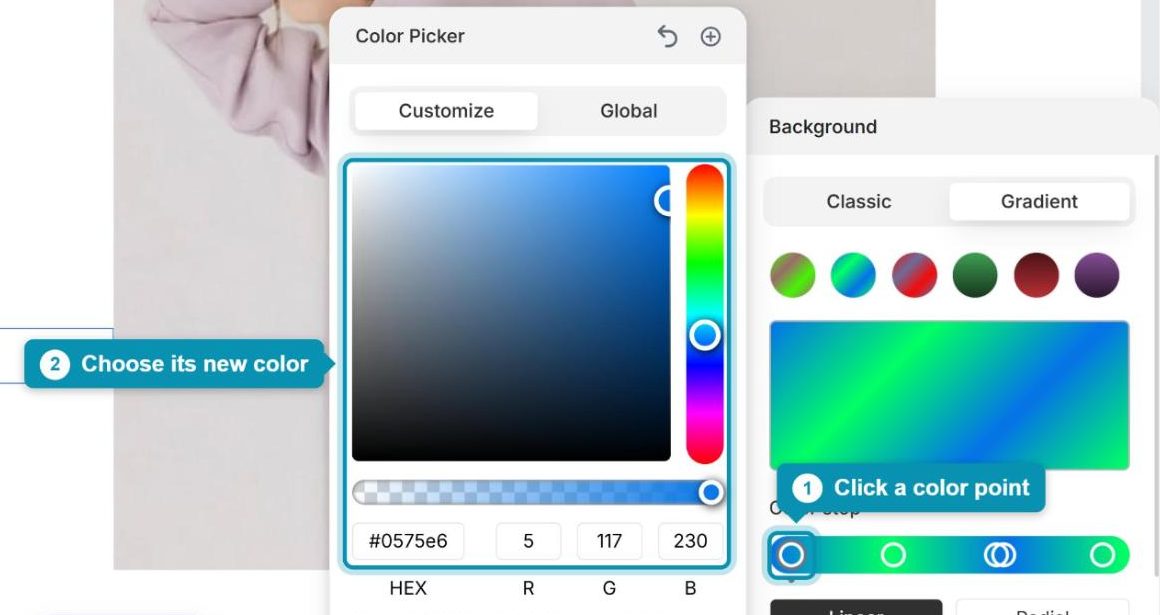
Step 2: To change a color, click a point on the Color stop bar, then pick a new color in the Color Picker or type a HEX code. Need another color? Click an empty spot on the bar to add a new point.
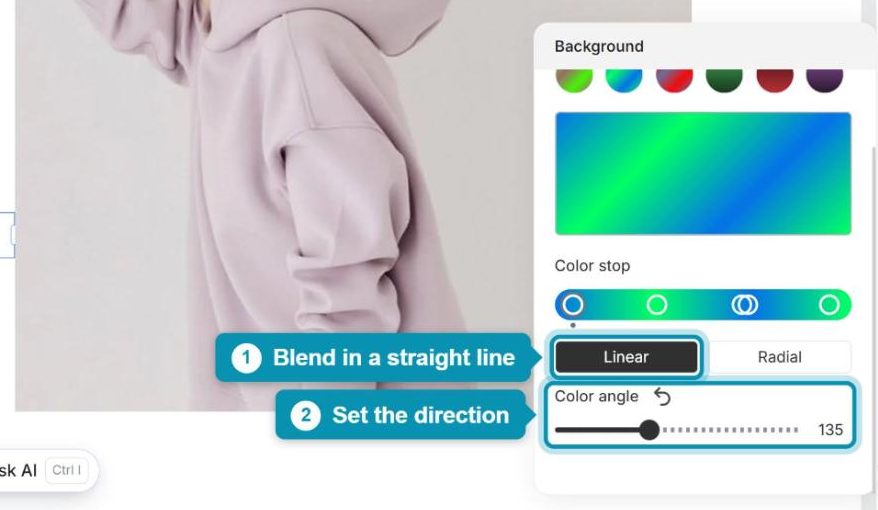
Step 3: Choose Linear if you want the colors to blend in a straight line, then drag the Color angle slider to set the direction. For example, 90 flows from left to right, while 180 flows from top to bottom.
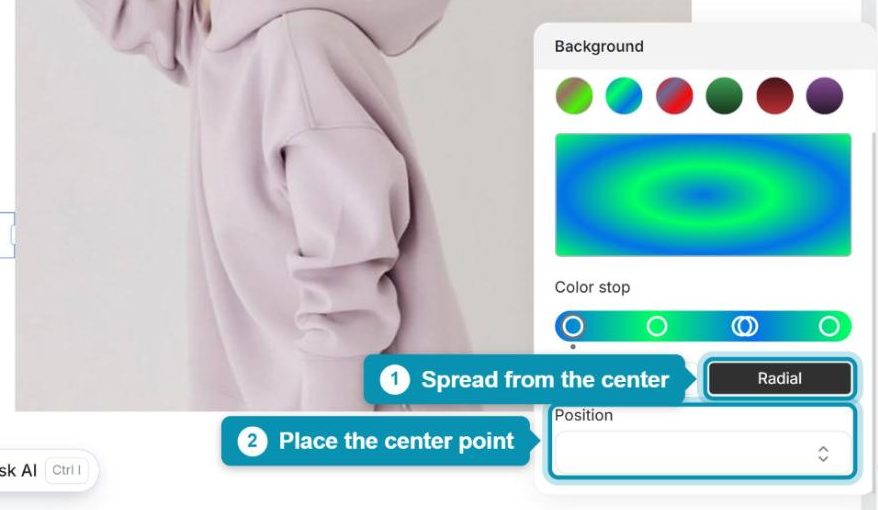
Step 4: Choose Radial if you’d rather have the colors spread out from a center point toward the edges. Use the Position option that appears to decide where that center sits.
3. Add a gradient background to a section
Sections work the same way. Select the section (the Navigator, Ctrl + Shift + U, makes this easy), open the Design tab, click the color circle next to Background in the Background group, and then switch to the Gradient tab. From there, set up your colors, type and direction just like in step 2.
4. Save your changes
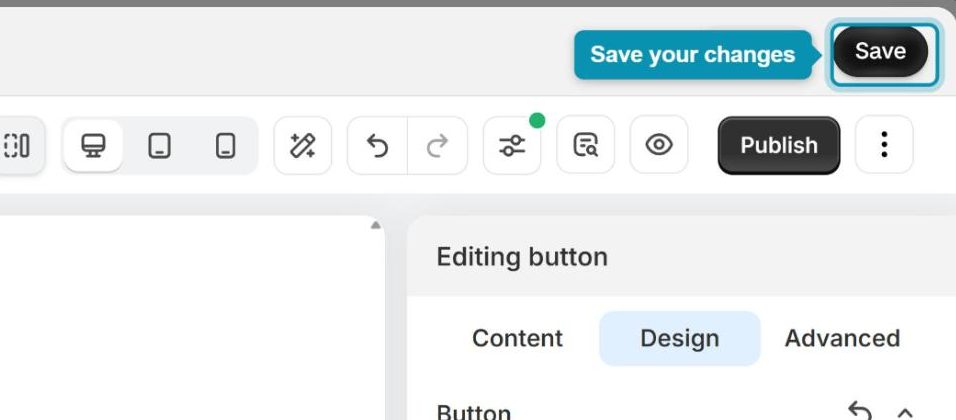
Once you’re happy with how it looks, click Save in the top bar to keep your gradient. When you’re ready for customers to see it, publish the page as usual.





2 Comments
Humaira zubair
kindly be supportive for me
Anna Nguyen
Hi Humaira,
I’m so sorry for my late reply. If you need any help, please ping us via live chat in the app. Our support team work 24/7 to assist you with any problem.
Thank you!