How to change the name for the Dynamic Checkout button
If you’ve added the Dynamic Checkout element to your product page, you’ve probably noticed that it shows a Buy it now button and that the element settings don’t let you rename it. That’s because Shopify renders the button itself, so EComposer can’t edit its text directly. The good news is that a short piece of custom CSS can swap the label for any text you like, and this guide shows you how. To learn more about the element itself, please refer to the Dynamic Checkout guide.
Which checkout button your customers see depends on a few things: your payment settings, whether Shop Promise is active (it prioritizes Shop Pay over other checkouts), the customer’s browser and device, and even their personal payment history.
Shopify shows two kinds of dynamic checkout buttons. Unbranded buttons display the Buy it now text, and when a customer clicks one, they skip the cart and go straight to the Shopify checkout. Branded buttons include the logo of a third-party accelerated checkout method, and clicking one completes the payment with that method.
This guide changes the text of the unbranded button only. A branded button shows the payment method’s logo as an image, so there’s no text to edit. If you’d like to customize one, please contact Shopify to ask whether there’s a way.
1. Add the Dynamic Checkout element
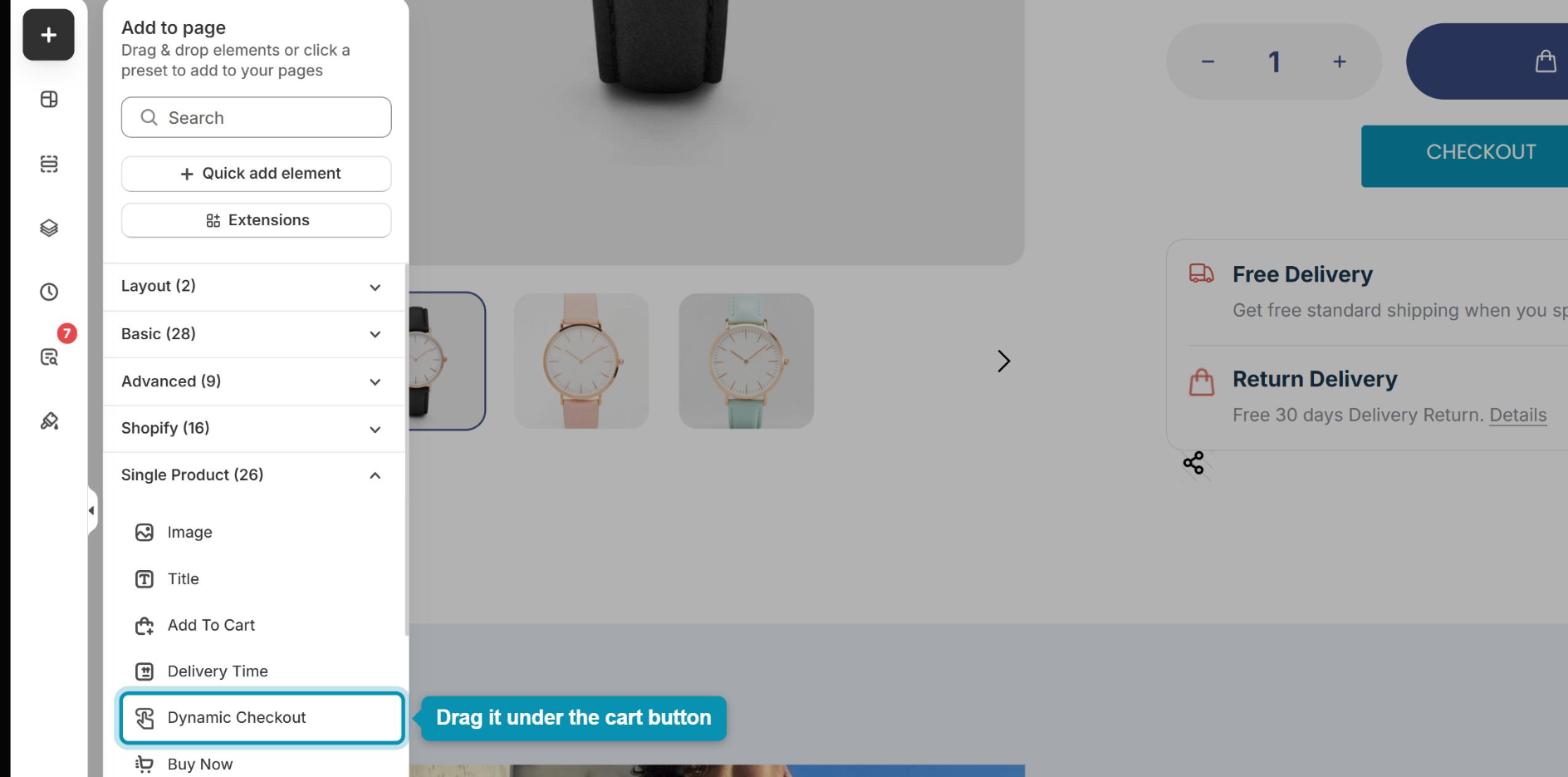
The Dynamic Checkout button usually lives on the product page, right below the Add to cart button. Click the + icon on the left and drag Dynamic Checkout from the Single Product group onto your page. If the element is already there, you can skip to the next section.
2. Open the Custom CSS box
The code goes into the Custom CSS box of your template, which you’ll find in the publish window.
Step 1: Click the Publish button in the top right corner of the builder.

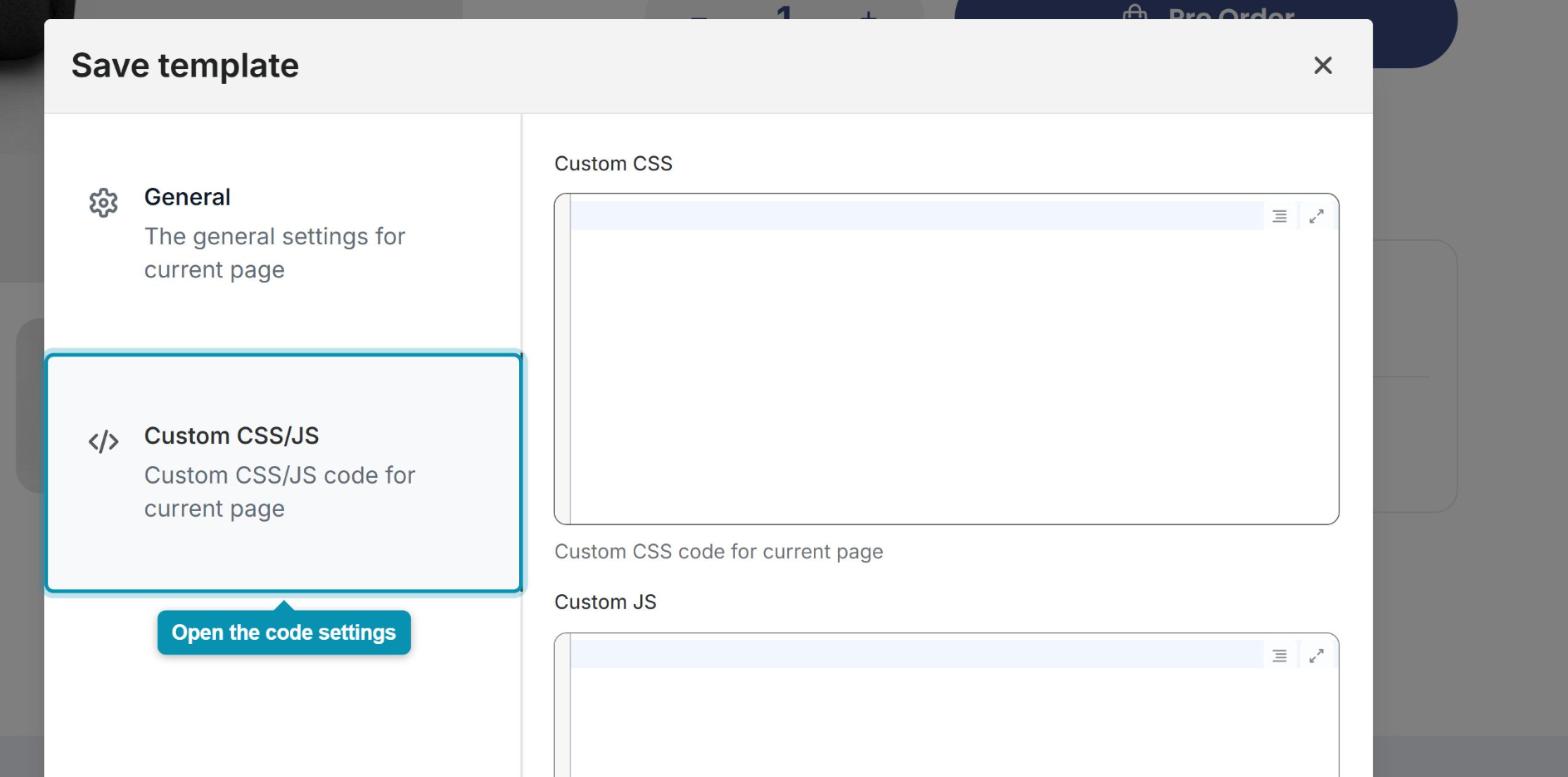
Step 2: In the window that opens, switch to the Custom CSS/JS tab to find the Custom CSS box.
3. Add the code and publish
Now you’ll paste the code that replaces the button text, then publish the template so the change goes live.
Step 1: Copy the code below and paste it into the Custom CSS box.
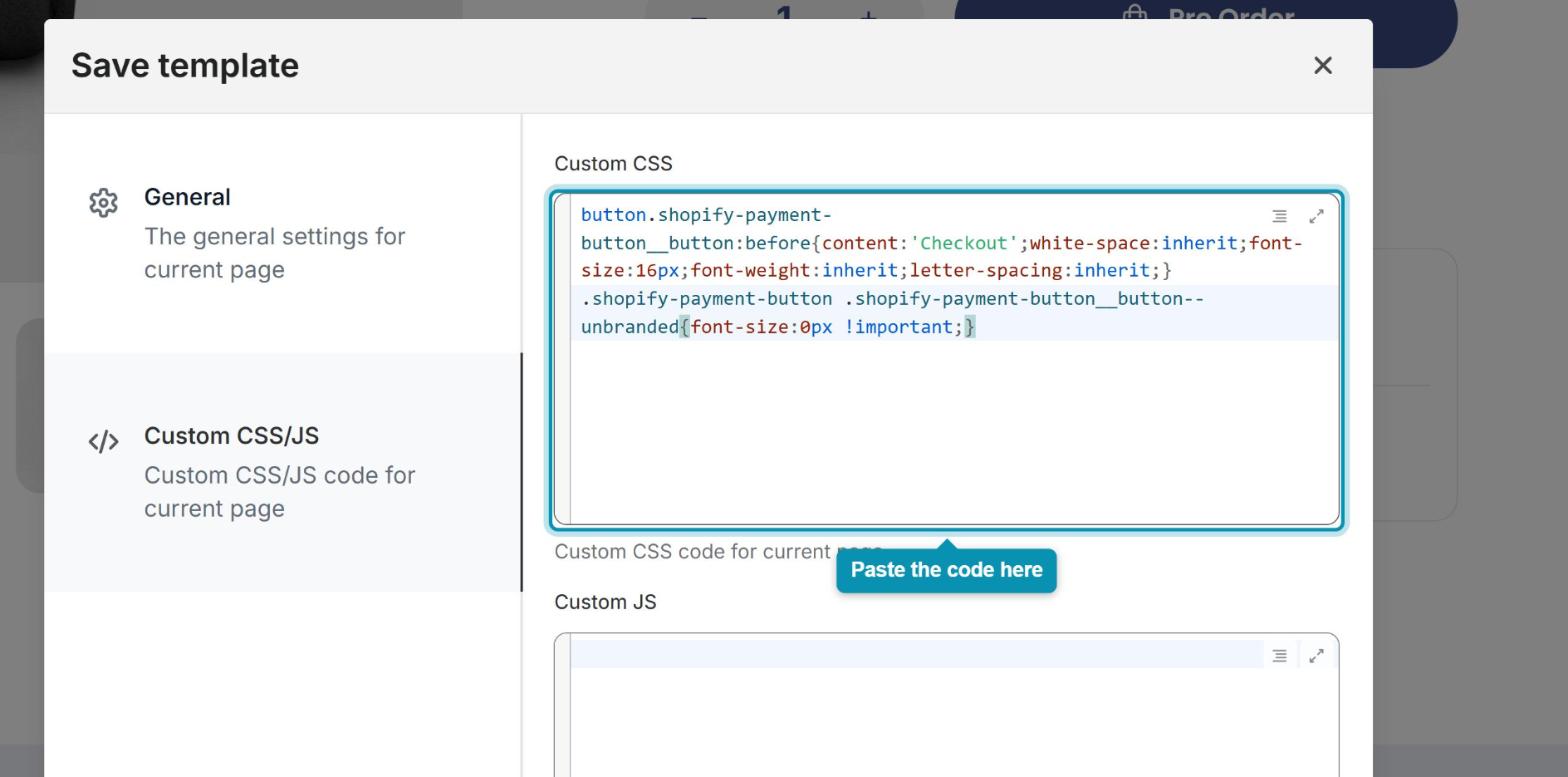
button.shopify-payment-button__button:before {
  content: 'YOUR_BUTTON_NAME';
  white-space: inherit;
  font-size: 16px;
  font-weight: inherit;
  letter-spacing: inherit;
}
.shopify-payment-button .shopify-payment-button__button--unbranded {
  font-size: 0px !important;
}
Replace YOUR_BUTTON_NAME with the text you want on your button. In our example, we used Checkout.
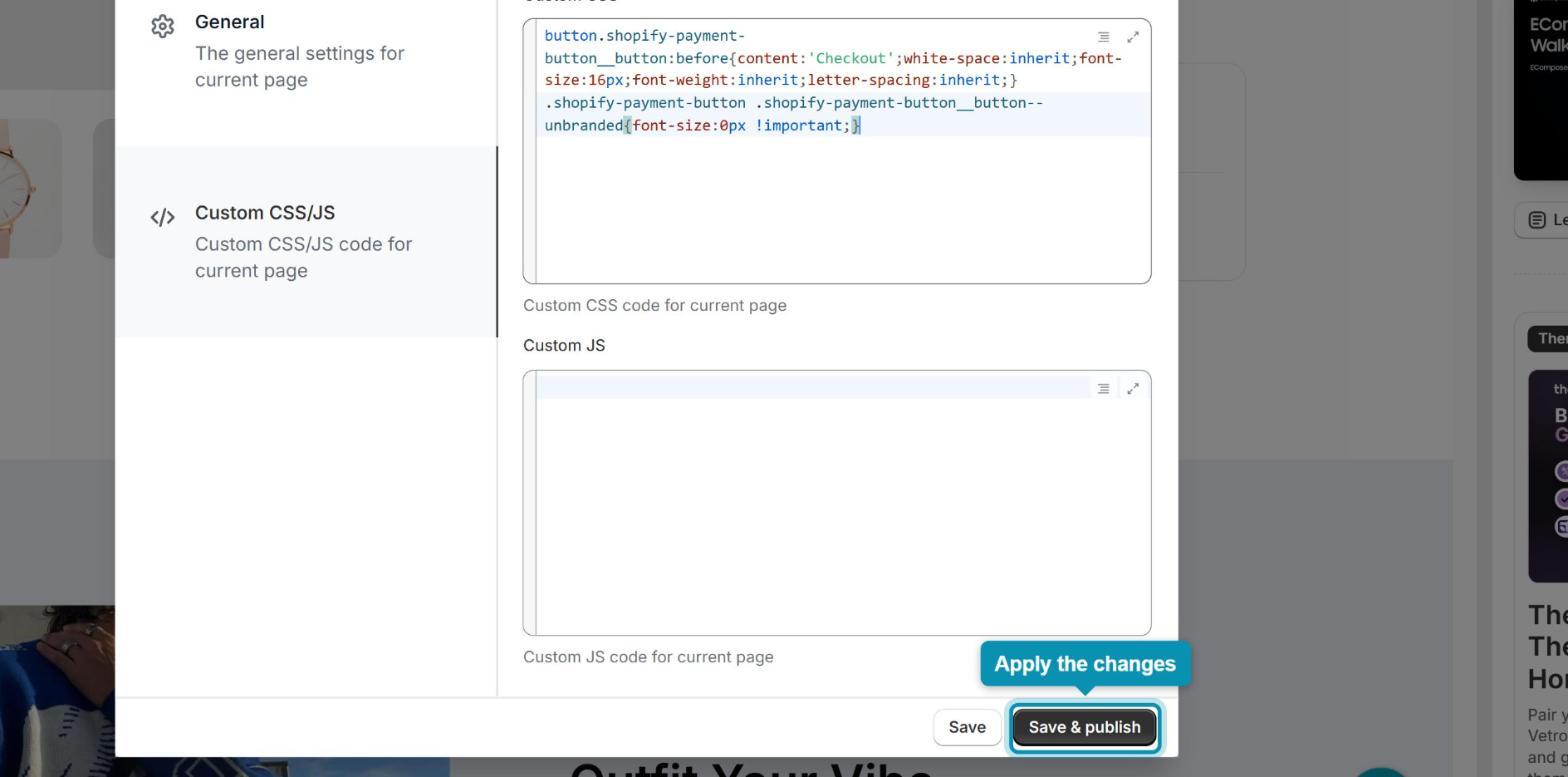
Step 2: Click Save & publish to apply your changes.
4. Check the result on your live page
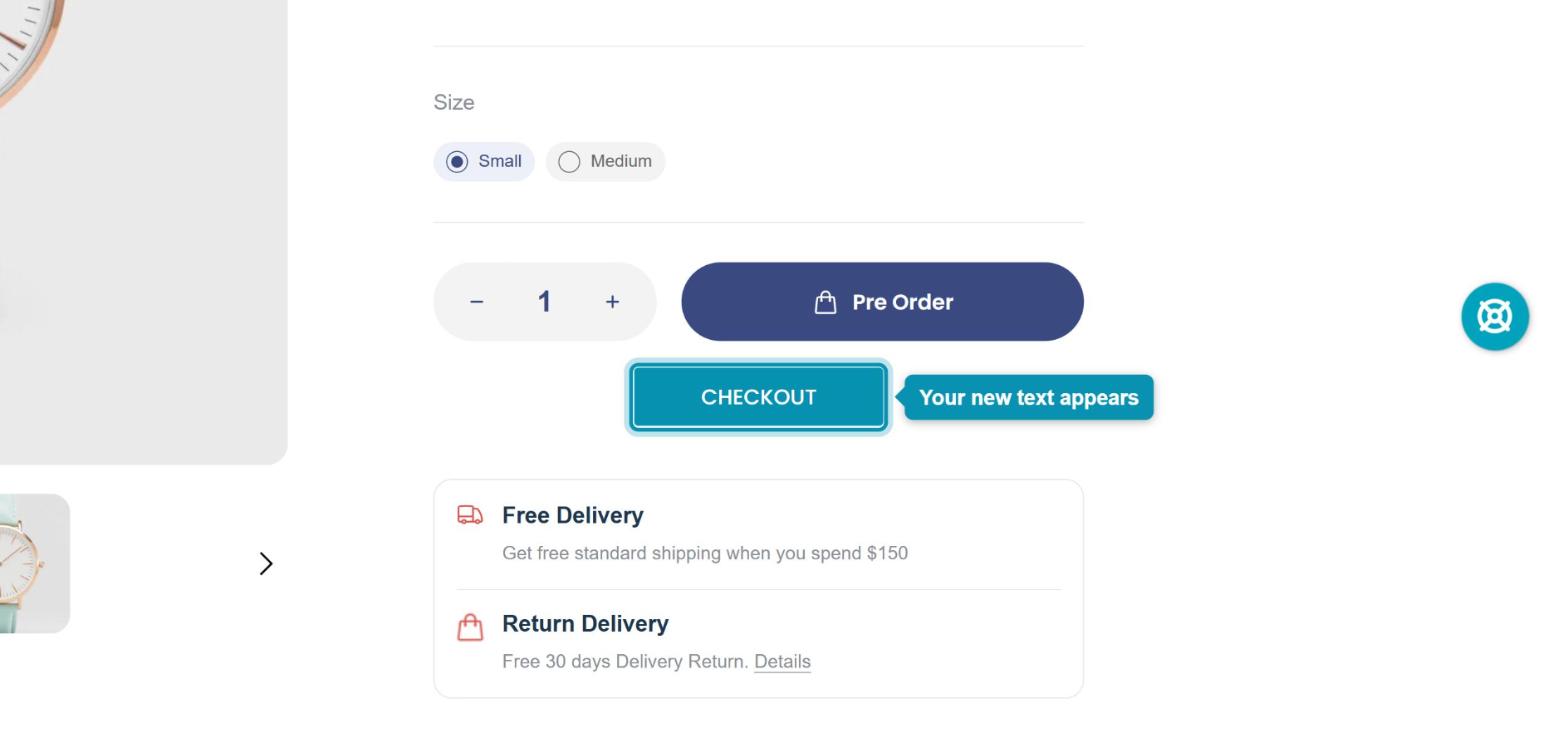
Open your product page on the storefront. The Buy it now text is now replaced with your own, and in our example the button reads Checkout.