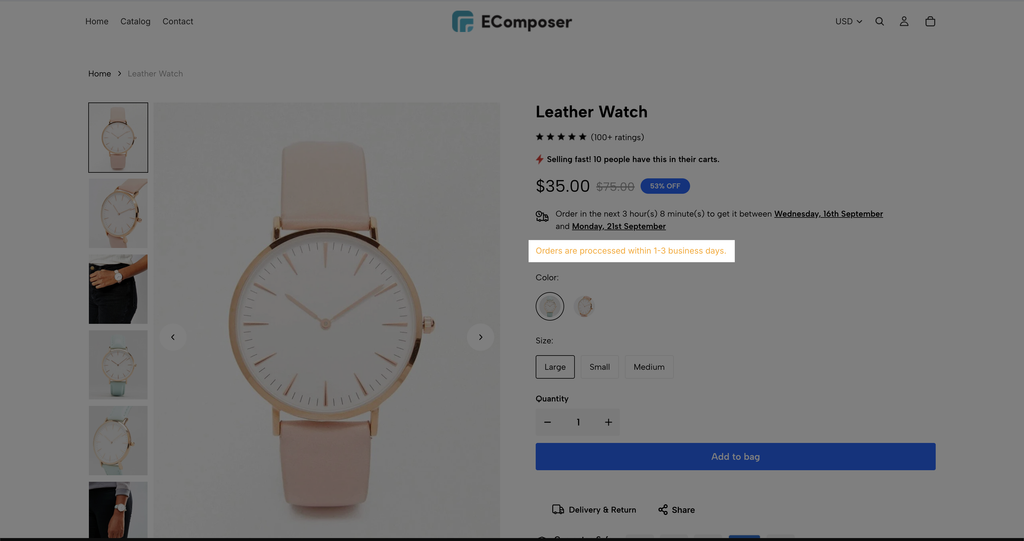
Show Text from Metafield in EComposer
In this guide, we will show you how to create a Shopify metafield, add your content, and then display that text on a page built with EComposer using custom code or the available options.
1. Create Metafields in Shopify
To create one new metafield, please follow the steps below:
Step 1: In the Shopify admin, navigate to Settings -> Metafields and Metaobjects -> Products to create your metafield.
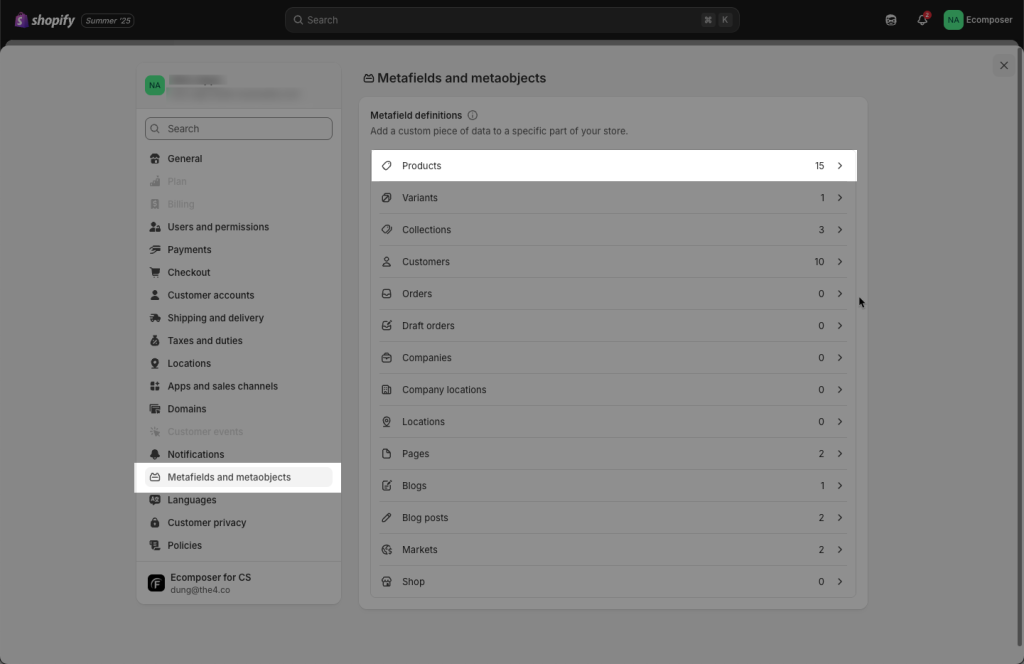
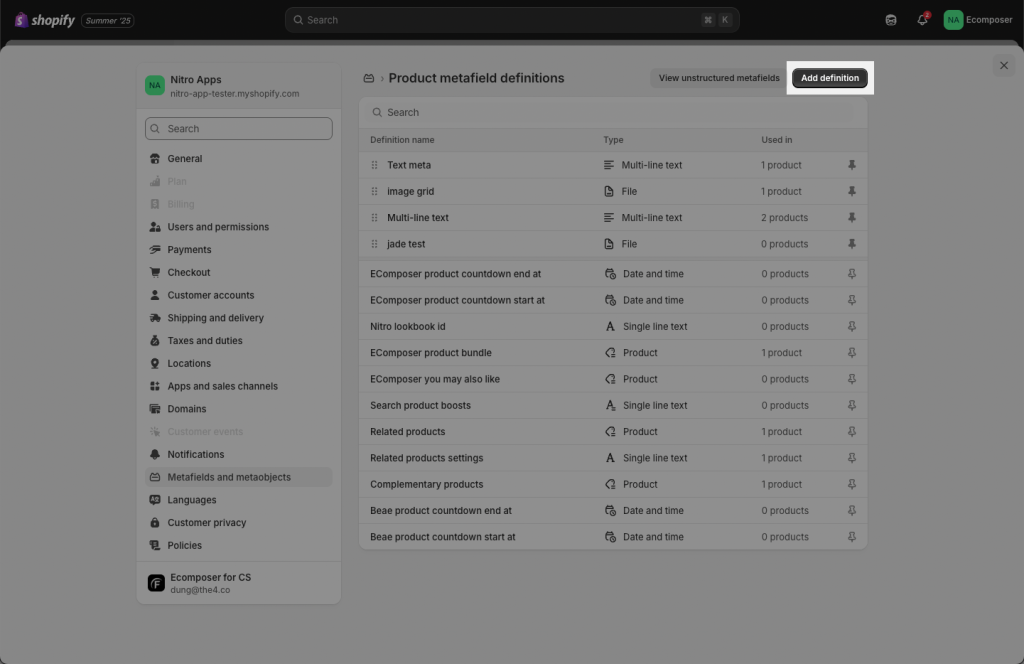
Click Add definition to create a new metafield or metaobject.
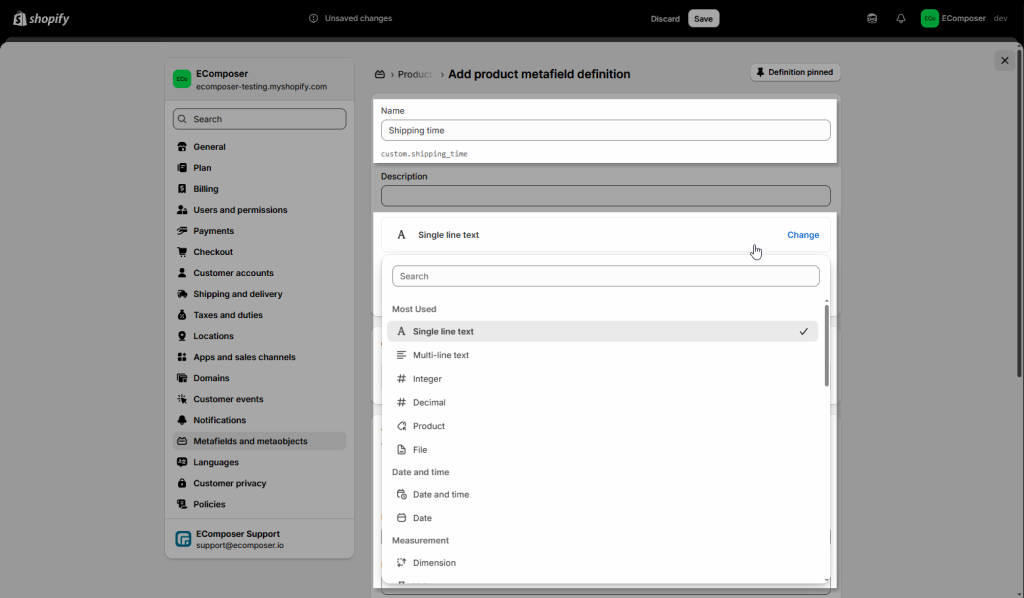
Enter the Name, and choose the type for your metafield. With a metafield for text, you can choose Single line text, Multi-line text, or Rich text type.
Step 2: Enter the metafield content. Go to the specific product, collection, page, or other resource where you want to add dynamic content -> Enter the input data for that specific item. This data will be dynamically pulled and displayed on the storefront.
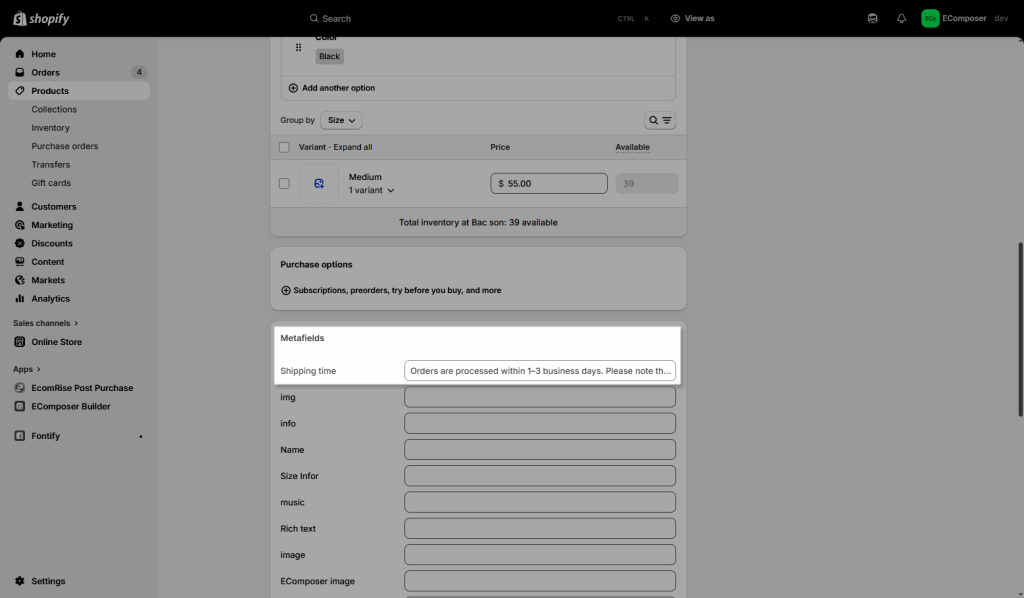
2. Display the Metafield in EComposer
After creating the metafield, you can display its content from Shopify on your EComposer page in 3 ways: by selecting the metafield definition inside our app, using custom code or by using the built-in Dynamic Content option via Text element.
2.1 Select Metafield from List
Open your page in EComposer, and you can drag and drop Metafield element to the position you want to show it.
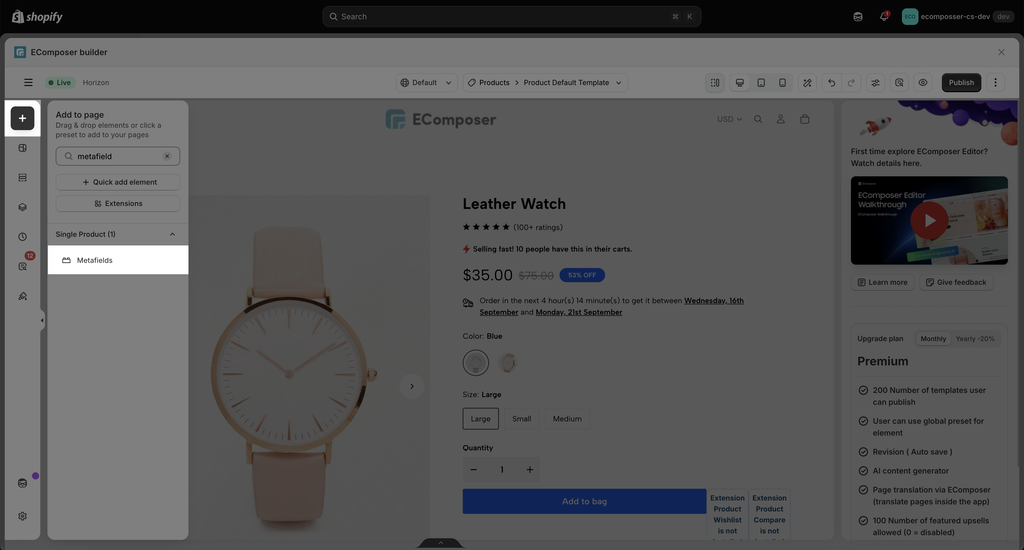
On the Content tab -> Metafield Source, choose Select from list, then scroll down to find and select the metafield you just created:
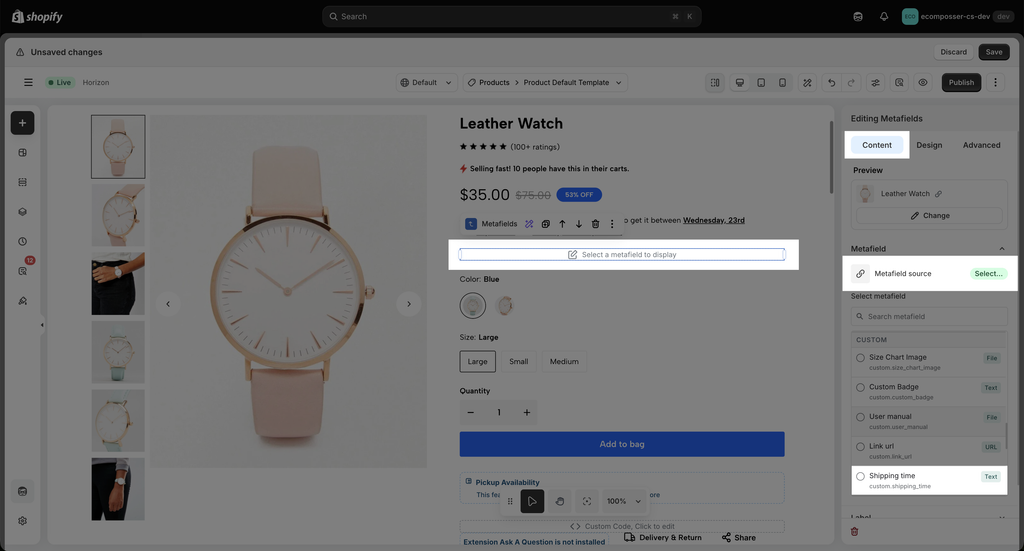
The result will be shown directly in the EComposer’s editor to let you view and edit the style of it
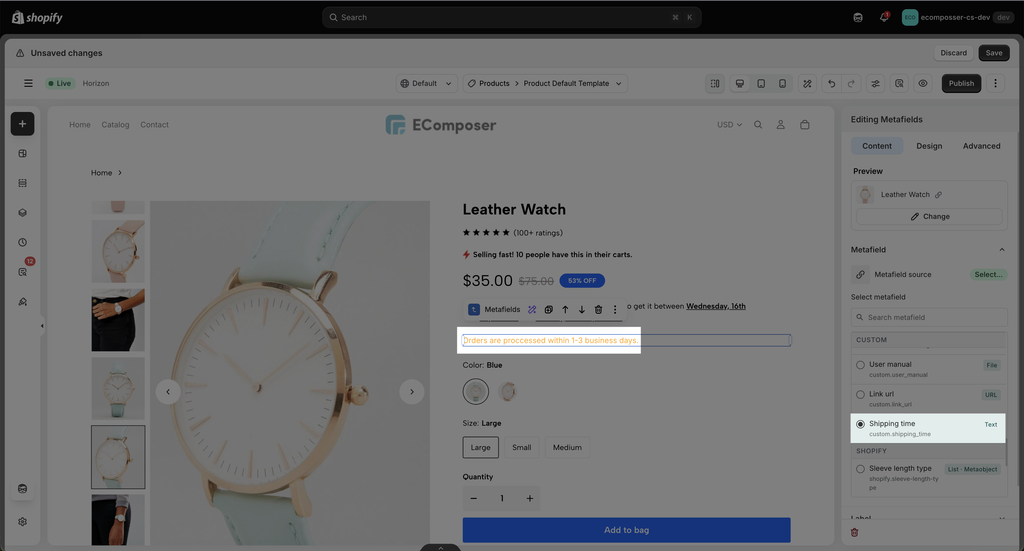
2.2 Using metafield code
Open your page in EComposer, and you can drag and drop Metafield element to the position you want to show it.
Next step, open your metafield in Shopify admin to copy the metafield key.
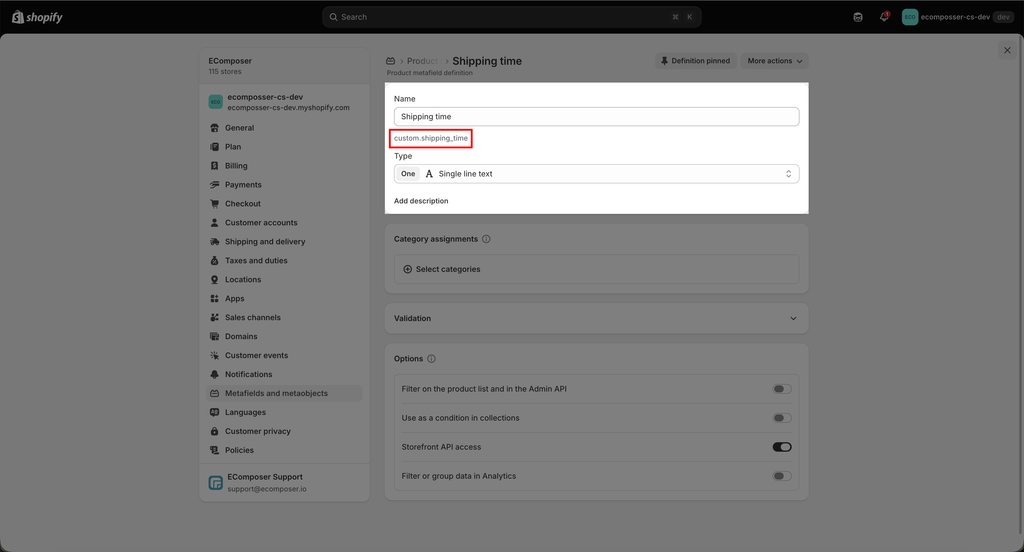
Paste your metafield code to replace the red bold text with your metafield in the code below. This is the code for the text type:
{{ product.metafields.custom.shipping_time | metafield_tag }}Inside EComposer’s editor, on the Metafield Source, choose Custom Liquid and paste your metafield code inside
Result:
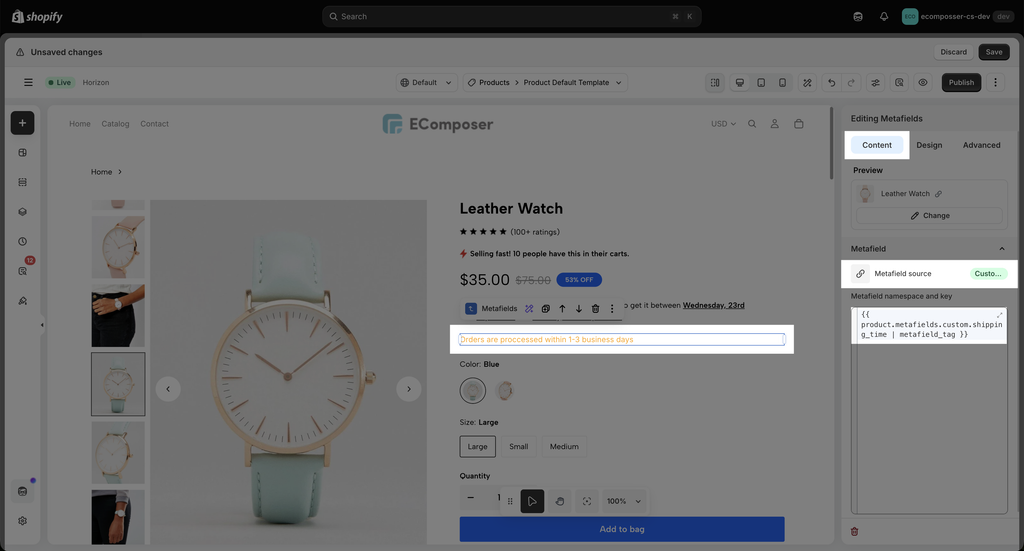
Note: You can use the same format code above for all the metafield Text types
2.3 Using the Dynamic content option
Dynamic Source allows merchants to connect input settings to data coming from metafield types such as Single line Text/ Multi-line texts/ Rich text type. We don’t support Product list, URL, File type… only text types. Dynamic Source updates automatically when metafield configurations change.
This option let you combine metafield text with static text to make the content more flexible.
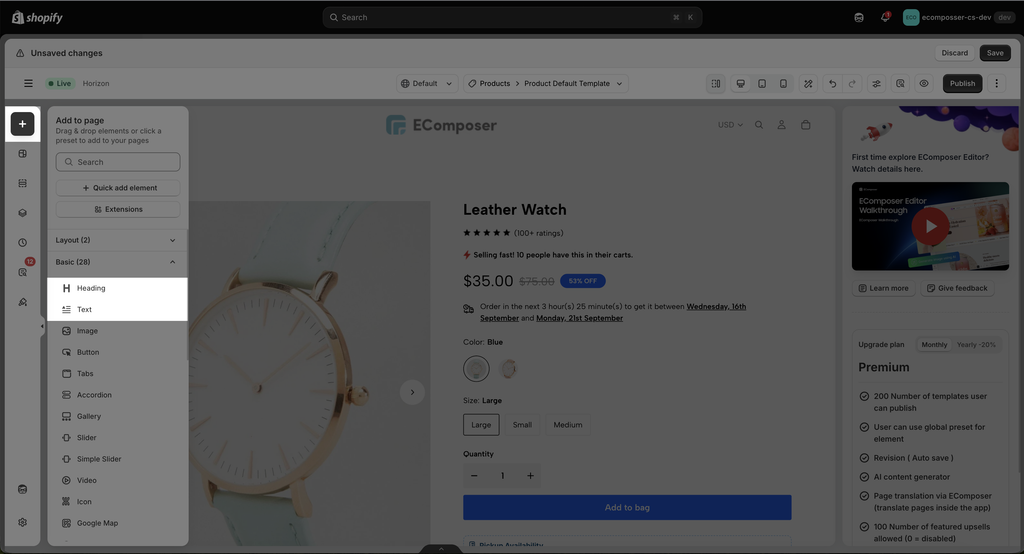
Drag and drop a Text/ Heading element from the left sidebar.
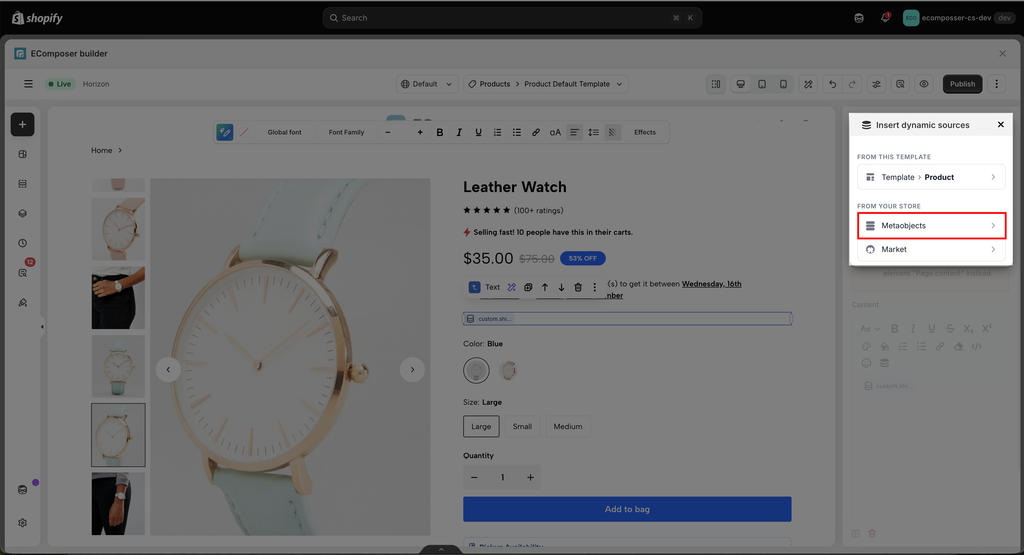
Click the dynamic source icon.
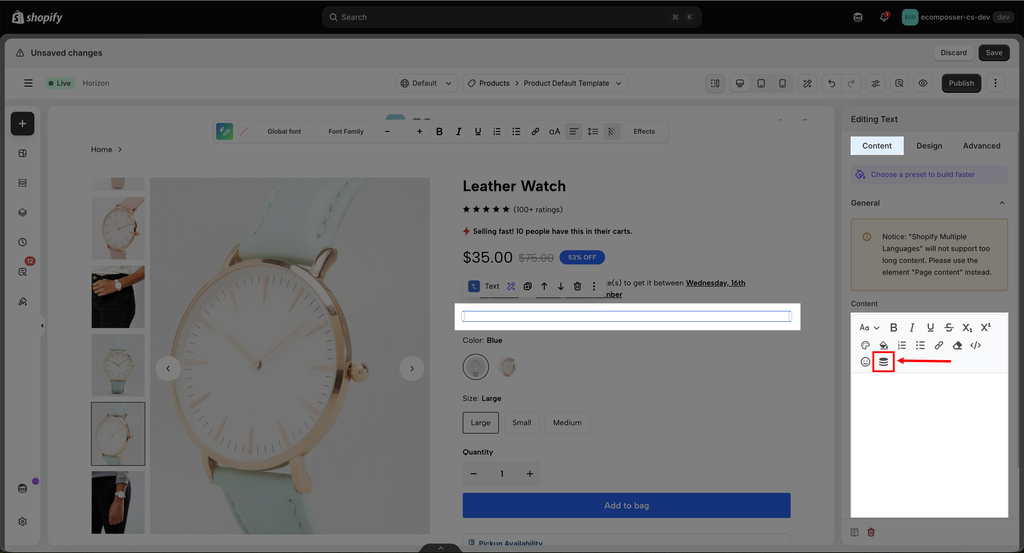
This will display a dropdown list of the metafield names associated with the current product. Select the metafield name you defined in Step 1, choose the Type, and then click Select.
Please note that dynamic content does not appear in the Editor view, so you’ll need to publish the page to see the result. You can also refer to the video below for a step-by-step guide on how to insert a dynamic source from a Metafield.
You can also insert the content from Metaobject here
Result: the dynamic data is displayed correctly on the live page. Adding more input data to other products to have different heading text per product.