

How to set up Metafield Badge in Product Grid element
In the Product Grid element, default badges such as Sale, Hot, and Sold-out will display the same for all product cards. But we can show a unique badge for each product card by using Shopify product metafields.
A metafield allows the merchant to add custom information to each product in Shopify Admin. For example, one product can show “Best Seller”, another can show “New Arrival”, and another can show “Limited Offer”. The app will read the metafield value from each product and display a corresponding badge on the product card. Products without a badge value will simply not display any badge.
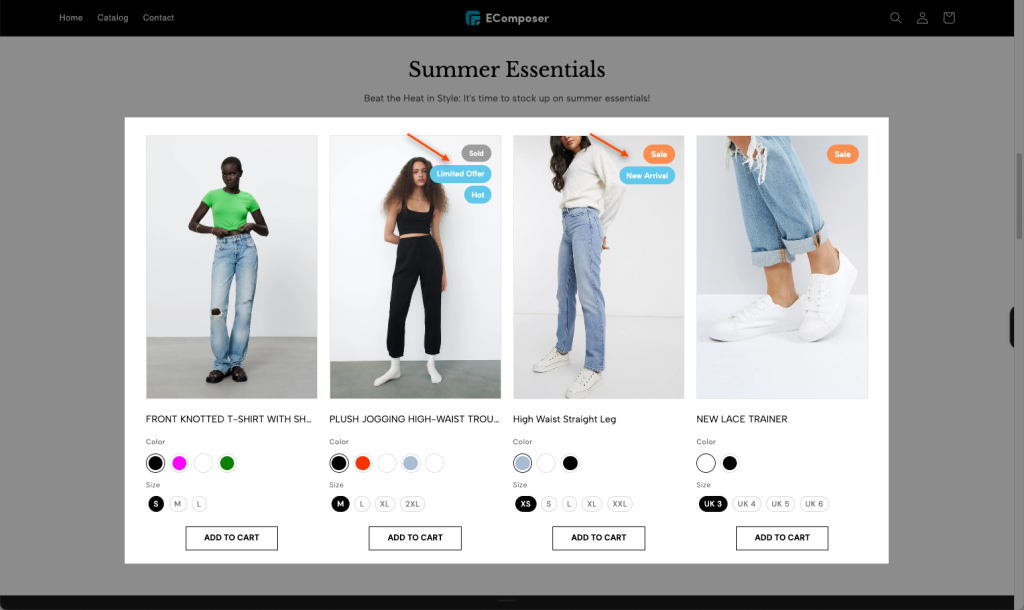
This metafield badge feature can also be used in the Collection Product and Related Product elements. You can apply the same configuration steps for those elements as well.
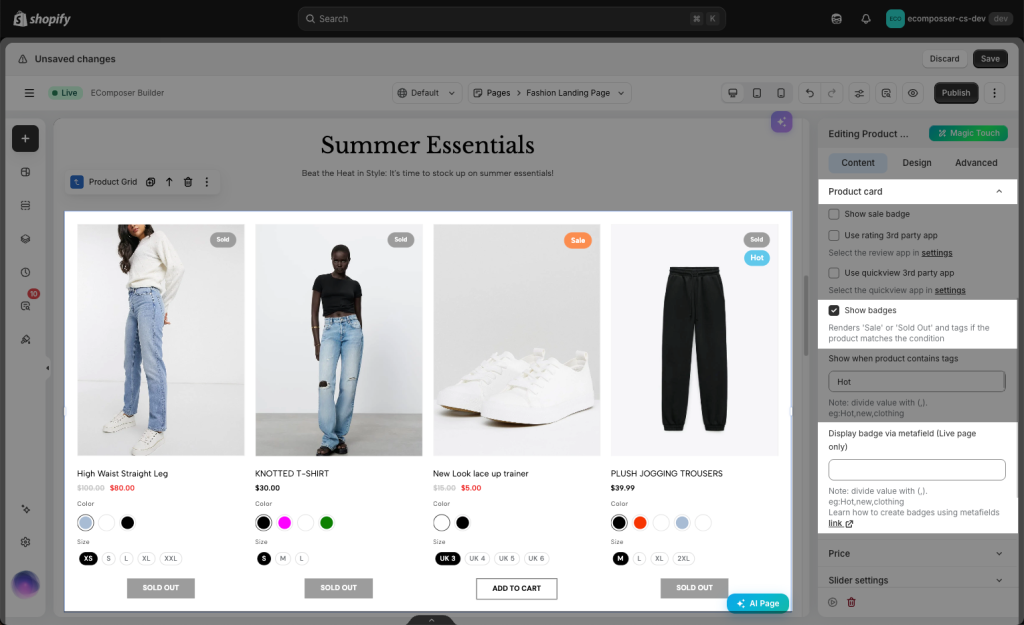
Step 1: Open your page in EComposer, find the Product grid element -> Product card tab -> Turn on the Custom badge by ticking the Show badges checkbox. Now, you need to fill in the Display badge via metafield box.
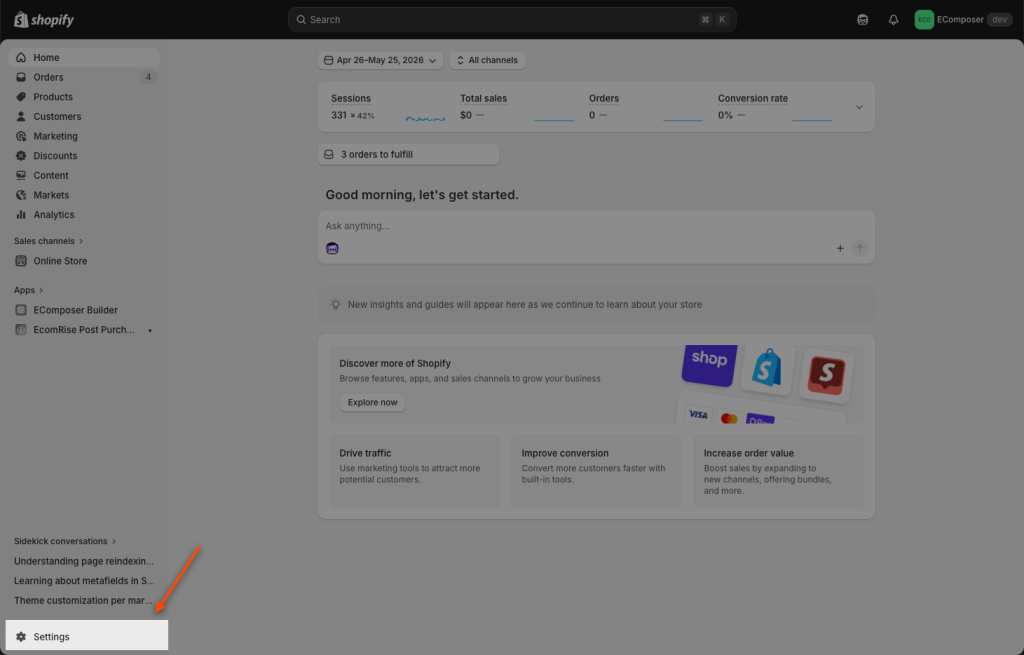
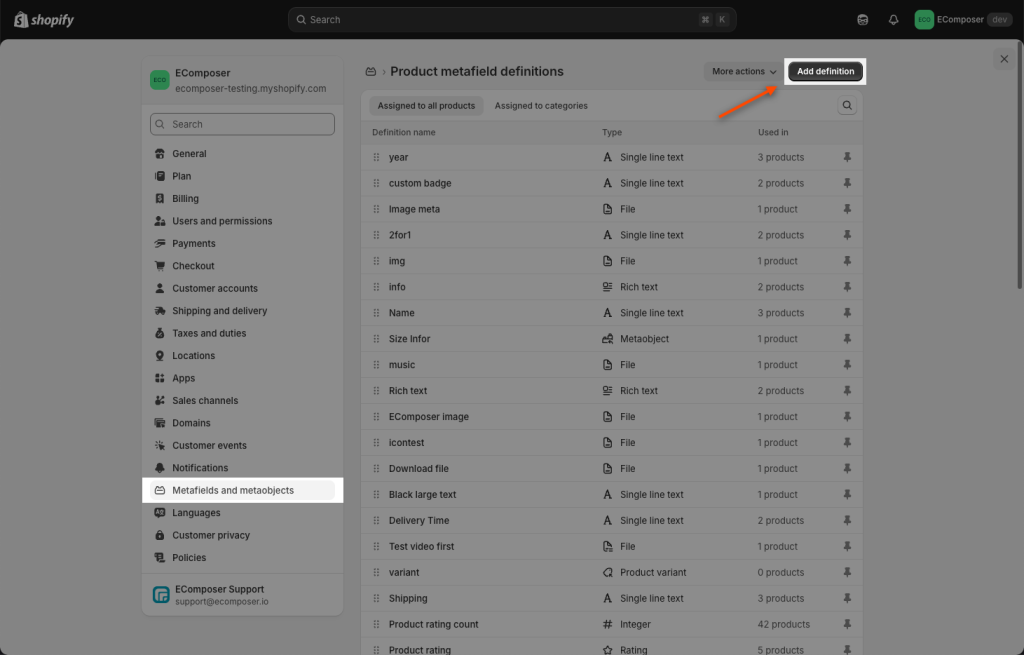
Step 2: Go to Shopify Admin -> Settings to create metafield for your product.
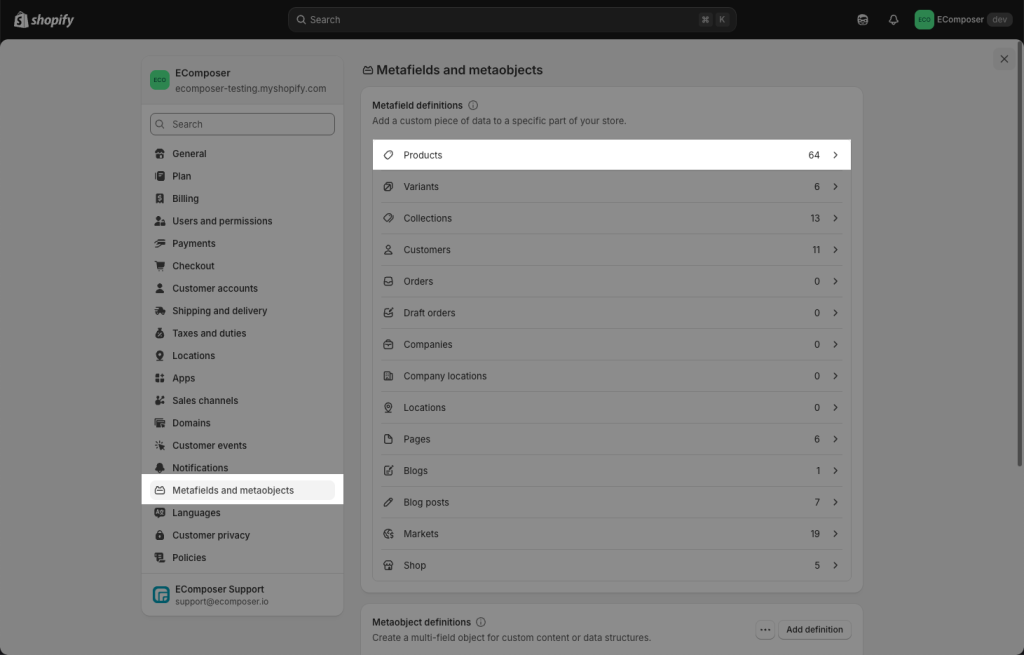
Click Metafields and metaobjects -> Products
Step 3: Then click Add definition
Enter a name for this new metafield -> choose type Single line text, then copy the metafield code:
custom.custom_badge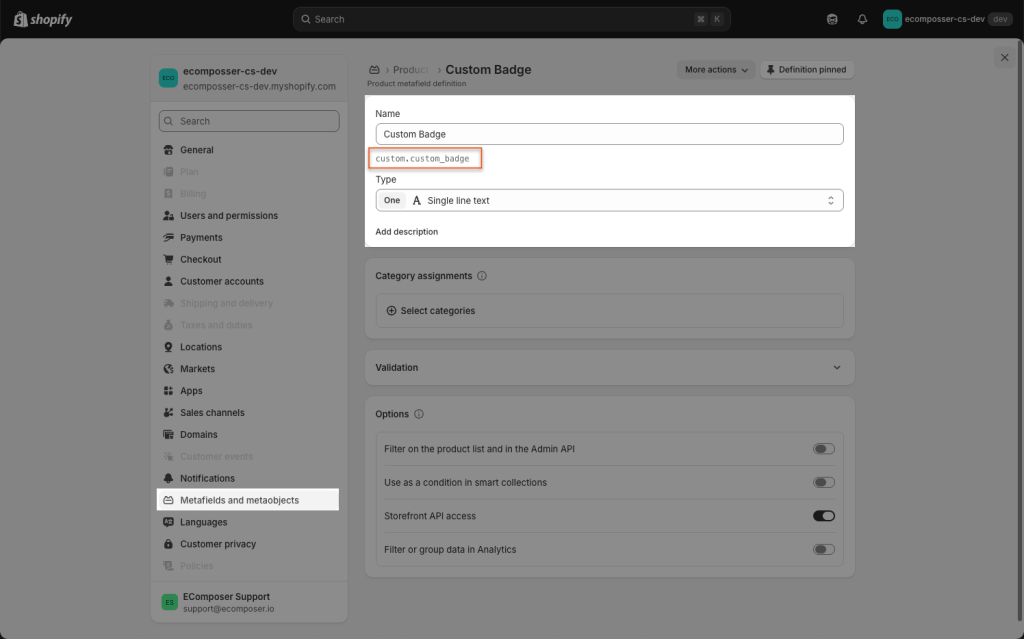
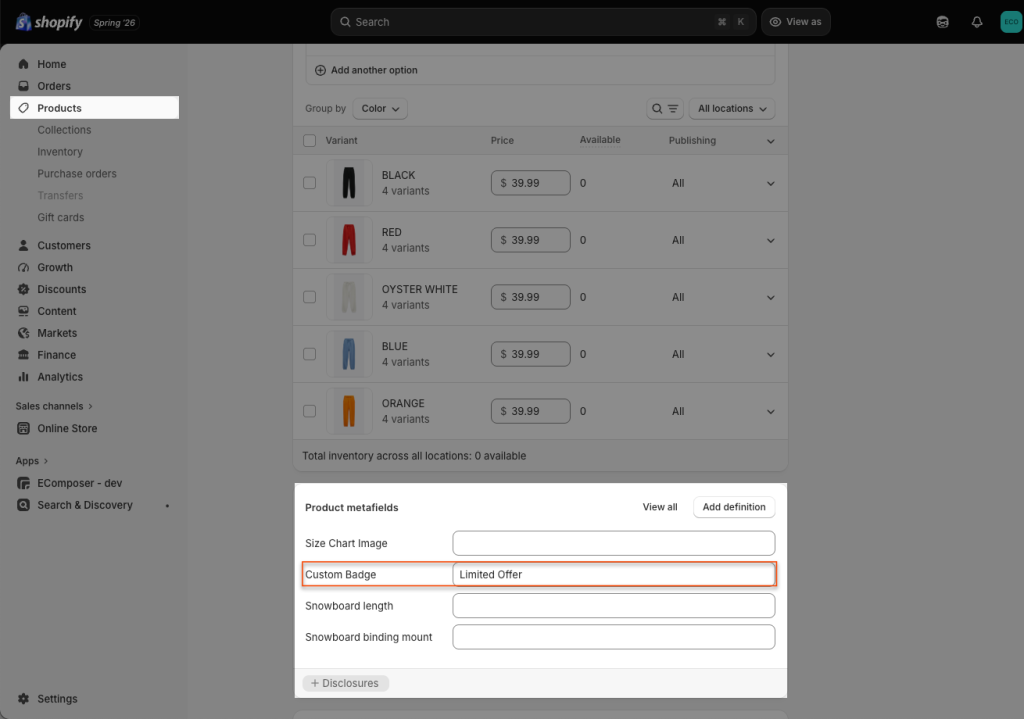
Step 4: Navigate to Products -> Edit the Product -> Enter metafield content. For example, you can enter “Limited Offer“. Repeat this to add more badges to other products.
Step 5: Finally, go back to your page in EComposer -> Open the Product grid element -> fill in the metafield value in the box. The final code should be:
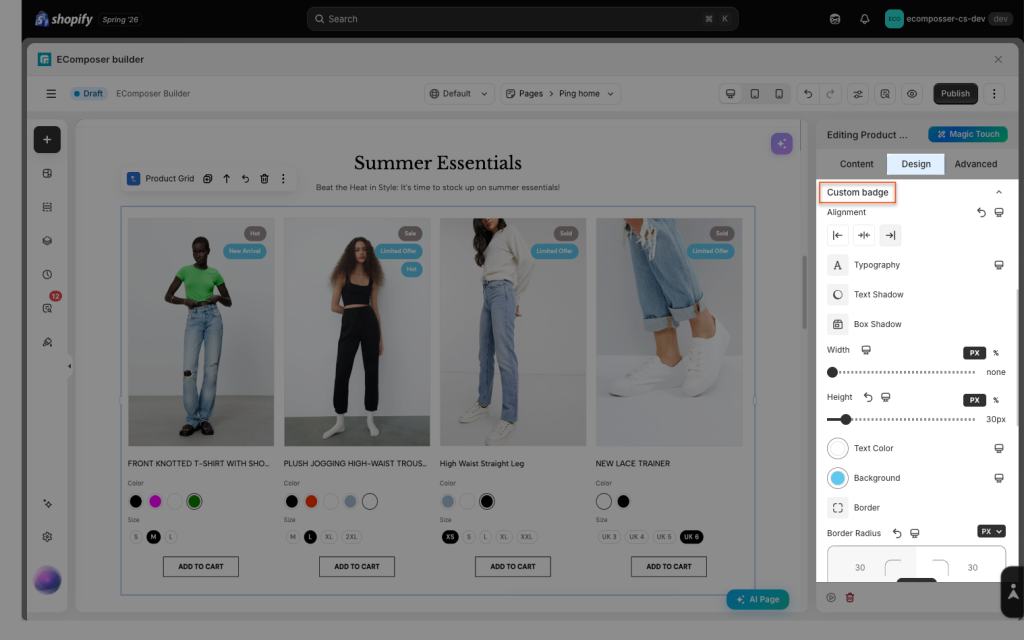
product.metafields.custom.custom_badgeAs a result, the custom badge is showing up on top of the product image and it takes the content from your metafield in Shopify to display.
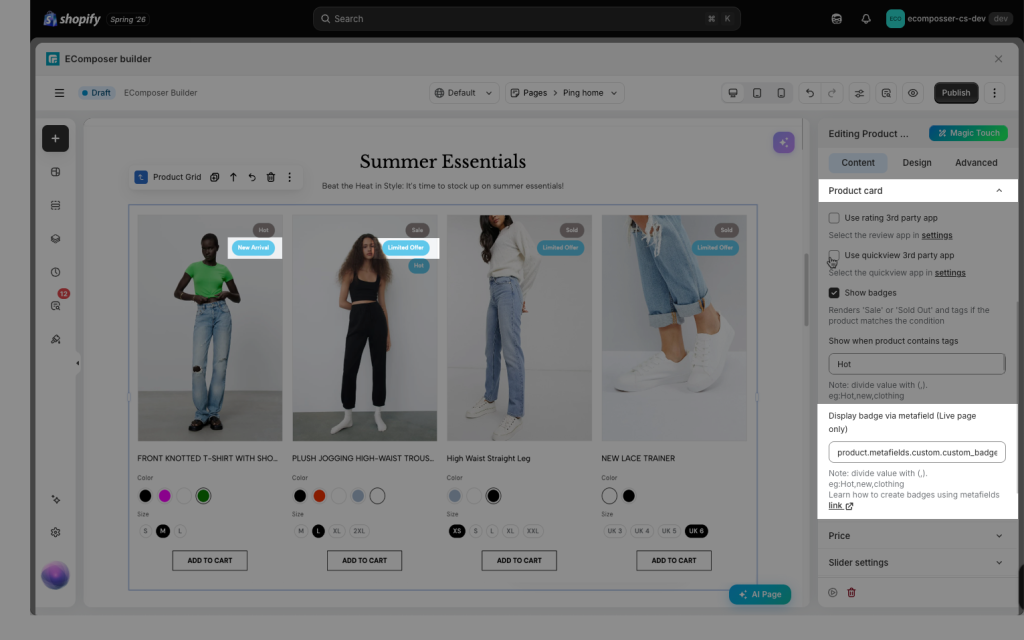
You can customize the design of the badge, such as color, text size, fonts,… under the Design tab. -> Custom badge
If you can’t follow the steps above, please check this video:




