Helpdesk
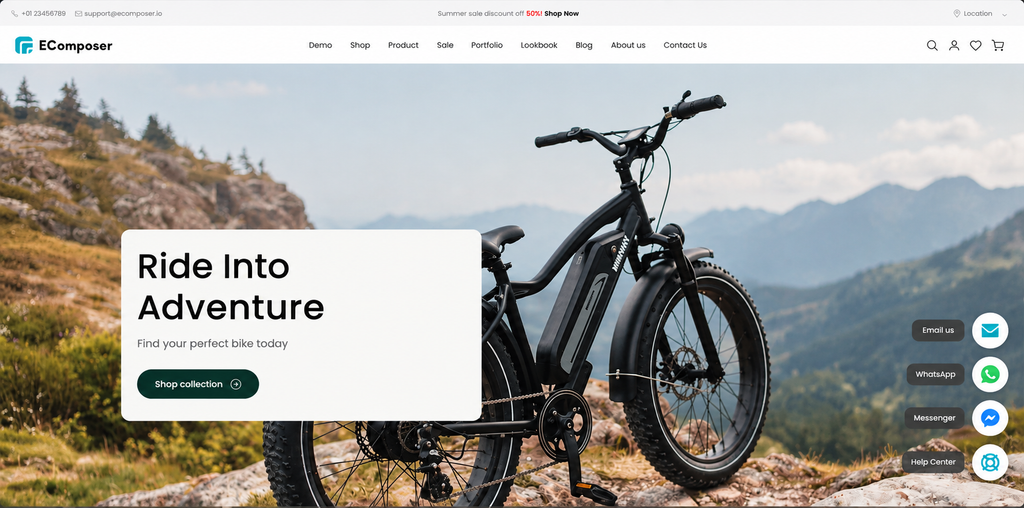
The Helpdesk extension allows you to add customizable support buttons to your Shopify store, making it easier for customers to access helpful resources, social media, or other support channels. You can customize the button icons, colors, positions, and tooltips to match your store’s design.
1. How to install the Helpdesk extension?
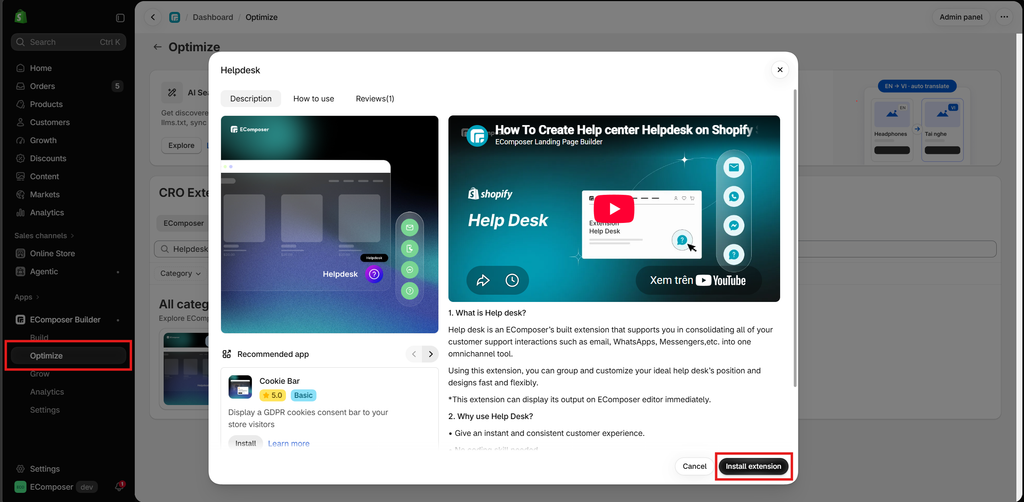
Step 1: From your EComposer dashboard, go to CRO Extensions from the left sidebar menu.
Step 2: Search for the Helpdesk extension.
Step 3: Click Details and install the extension on your store.
Note: When you finish installing the Helpdesk and finish configuration, it will automatically show when you publish. You can use this extension on EComposer Pro and Premium plans. Upgrade now to unlock
2. Configuring the extension
2.1 General
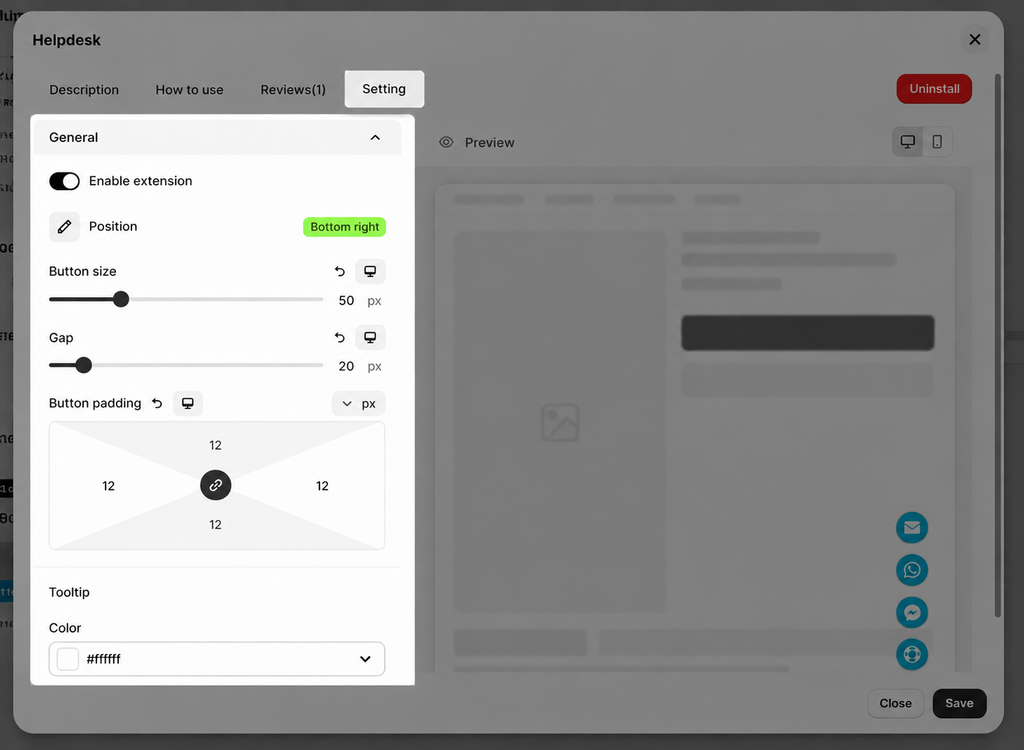
The General settings allow you to enable the Helpdesk extension and configure the basic layout of your support buttons. You can adjust their position, size, spacing, and padding, as well as customize the tooltip appearance to match your store’s design.
- Enable extension: Turn the Helpdesk extension on or off.
- Position: Choose where the Helpdesk buttons appear on your storefront.
- Button size: Adjust the size of the buttons.
- Gap: Set the spacing between buttons.
- Button padding: Customize the space around the button content.
- Tooltip: Customize the tooltip’s appearance, including its text color and background color.
2.2 Button
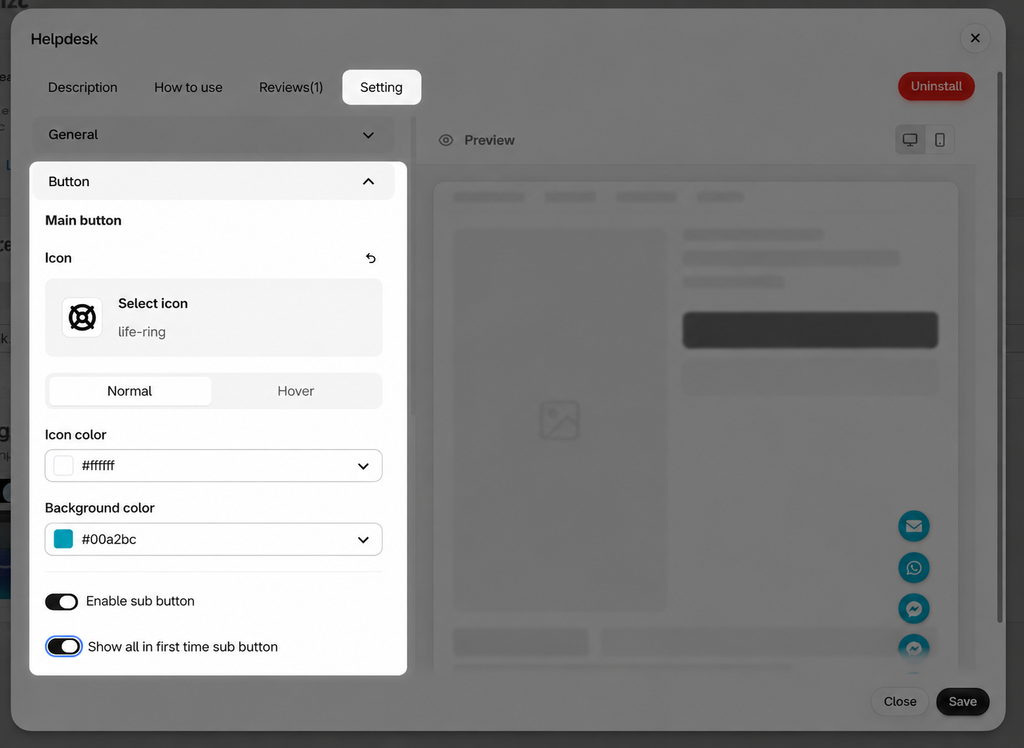
The Button settings allow you to customize the appearance and behavior of the main Helpdesk button. You can choose an icon, adjust its colors for normal and hover states, and enable sub-buttons to provide customers with quick access to different support channels.
- Main button: Customize the main Helpdesk button.
- Icon: Select an icon for the main button.
- Normal / Hover: Configure the button’s appearance in normal and hover states.
- Icon color: Set the icon color.
- Background color: Set the button’s background color.
- Enable sub button: Enable or disable additional support buttons.
- Show all in first time sub button: Display all sub-buttons the first time customers open the Helpdesk.
2.3 Sub buttons
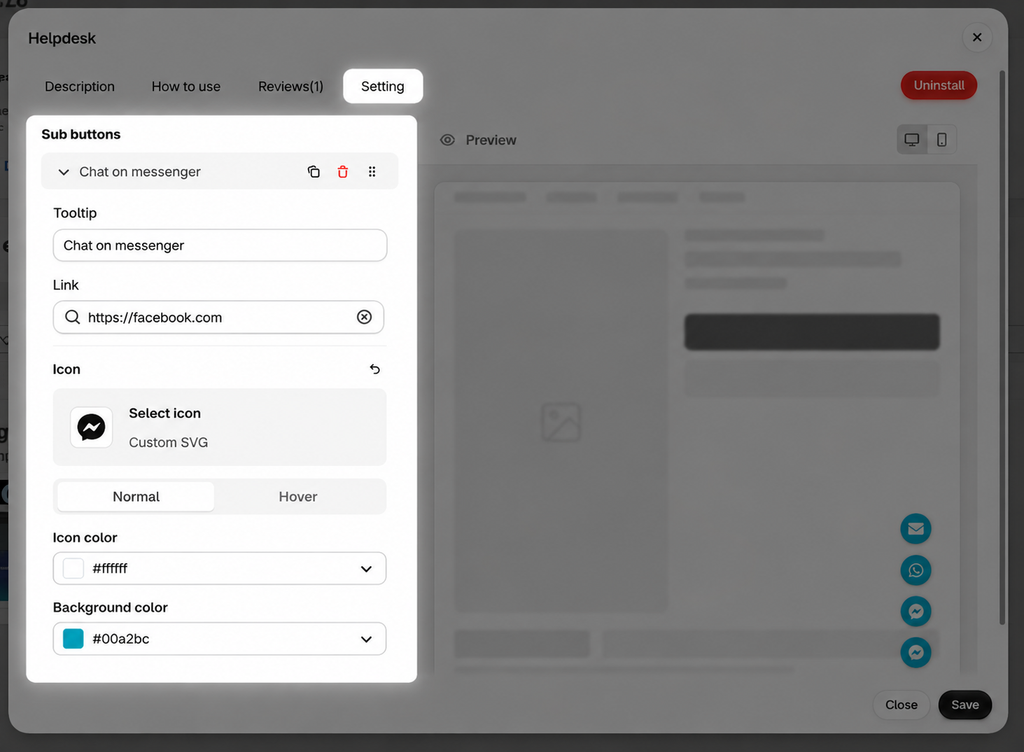
Sub-buttons allow you to add multiple support channels to the Helpdesk extension, making it easier for customers to contact you through their preferred platforms. You can customize each sub-button’s tooltip, destination link, icon, and colors for normal and hover states.
- Sub buttons: Add, duplicate, delete, or reorder sub-buttons.
- Tooltip: Enter the text displayed when customers hover over a sub-button.
- Link: Add the URL that customers will be redirected to when clicking the sub-button.
- Icon: Select an icon or upload a custom SVG for the sub-button.
- Normal / Hover: Customize the sub-button’s appearance in its normal and hover states.
- Icon color: Set the icon color.
- Background color: Set the button’s background color.