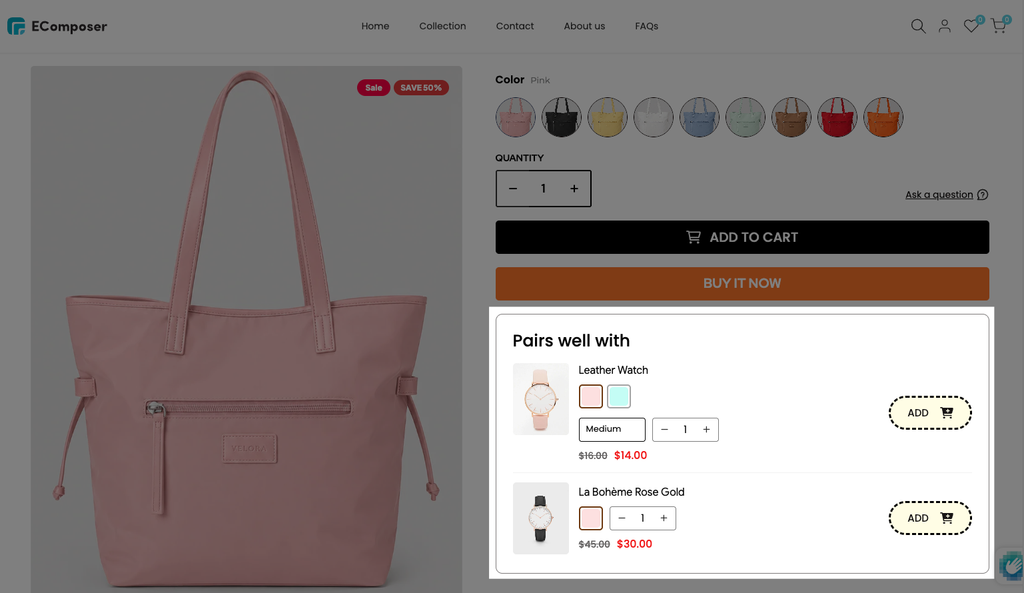
Cross Selling Product
Cross-selling encourages customers to purchase products or services in addition to the original items they intended to purchase. One of the best ways to increase your store’s revenue without increasing traffic is by boosting your store’s average order value. Let’s take a look at the features that this extension gives us.
Key features of the extension:
- Show up to 15 items and more per page to cross-sell.
- 1-click the “Add To Cart” button for cross-sell.
- Highly customizable text/images, items box, product price and more.
- Multiple options for “Add To Cart” button.
- Allow products with variants.
Note: You can use this extension on Pro & Premium. Upgrade now to unlock
1. How to install the Cross Selling Product extension?
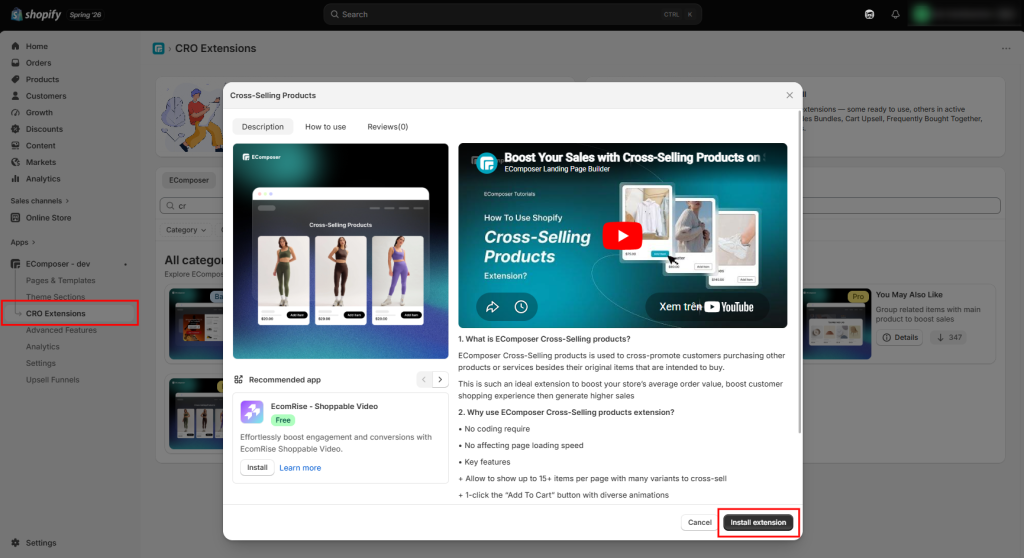
Step 1: From your EComposer dashboard, go to CRO Extensions from the left sidebar menu.
Step 2: Search for the Cross-Selling Product extension.
Step 3: Click Details and install the extension on your store.
2. Call the Extension to the Editor & Customize
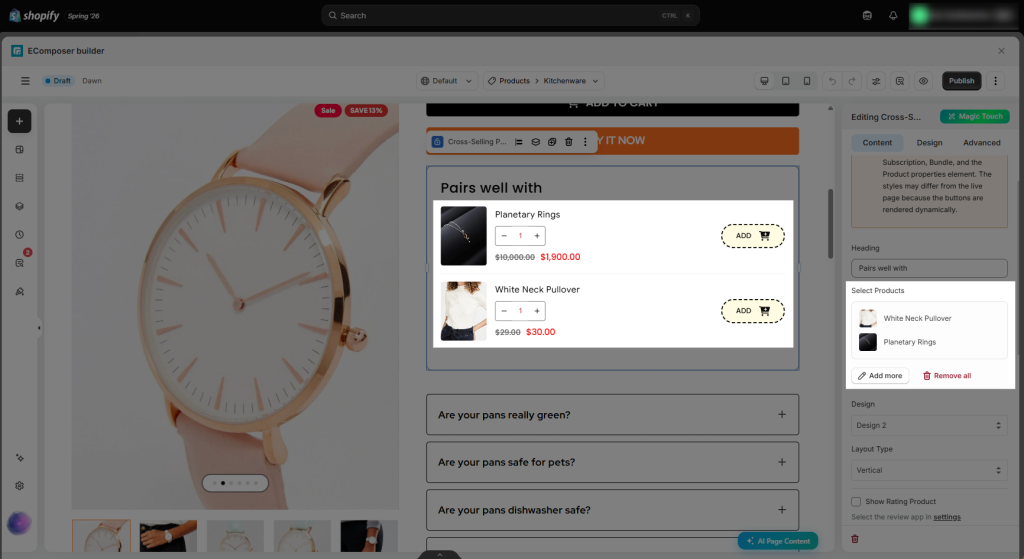
Inside the EComposer editor, open the Extensions tab from the left sidebar, then find the Cross-Selling Product extension from the installed extensions list and drag it into your desired position on the page. After adding it successfully, you can start customizing the extension settings and style.
2.1. Show certain products
Select product: Manually pick which products appear in the Cross-Selling Product extension. The products selected in the Editor will be applied across all product pages and cannot be set dynamically for individual products.
If you’re using a single product template for all products, we recommend using Shopify metafields to pull product data instead.
Note: If you select certain products in Ecomposer Editor, they will show as a priority. If not, it will show the products that you had picked in Product Metafield.
2.2. Show Metafield products
By using the metafield selector, you’ll be able to choose different products to display for each product page individually. This means the same selected products won’t be shown across all product pages.
After installing the extension, the “EComposer product cross-sell” metafield will be added to Shopify: product.metafields.ecomposer.product_upsell
Please go to Shopify Settings -> Metafields and metaobjects -> Products to check if the Metafield is there or not.
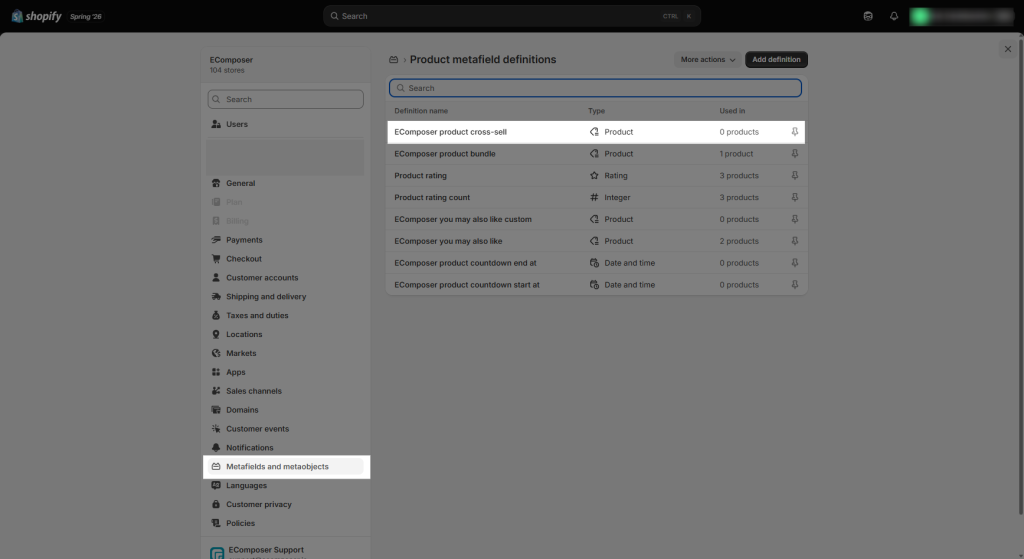
=> If you’re using a single product template for all products, we recommend using Metafields to assign different selections for each product. For more details, please refer to the guideline below.
- Step 1: Open the Main Product.
- Step 2: Scroll to Metafield → click Show All.
- Step 3: Find the EComposer product cross-sell metafield.
- Step 4: Select the relevant products and drag & drop to reorder the display list.
As a result, you don’t need to select any products manually. It will automatically display the products (in order) based on what you selected in the EComposer product cross-sell.
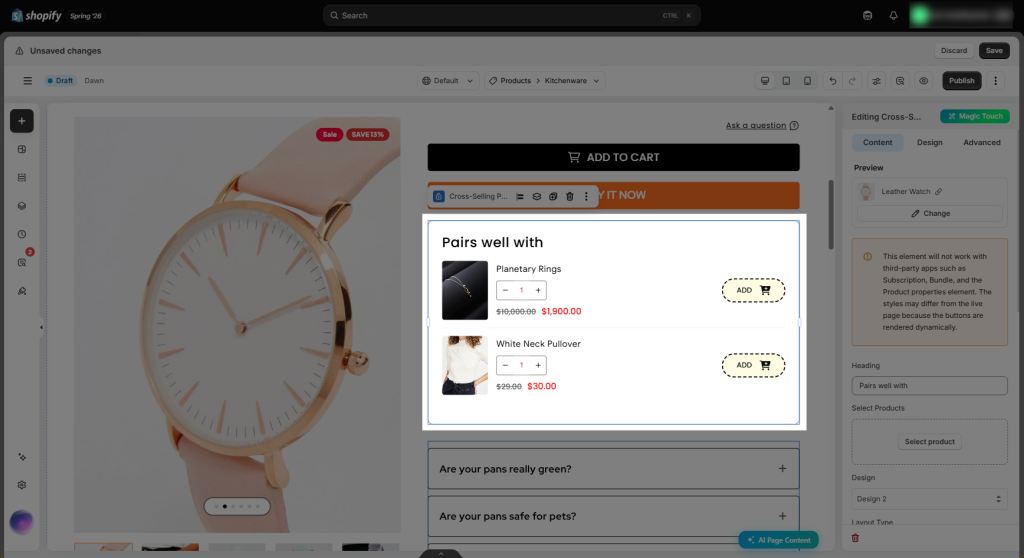
3. How to configure the Cross-Selling Product extension
3.1. Content
The Content tab is mainly used to configure what the extension displays and its basic behavior/layout, while the Design tab controls how it looks.
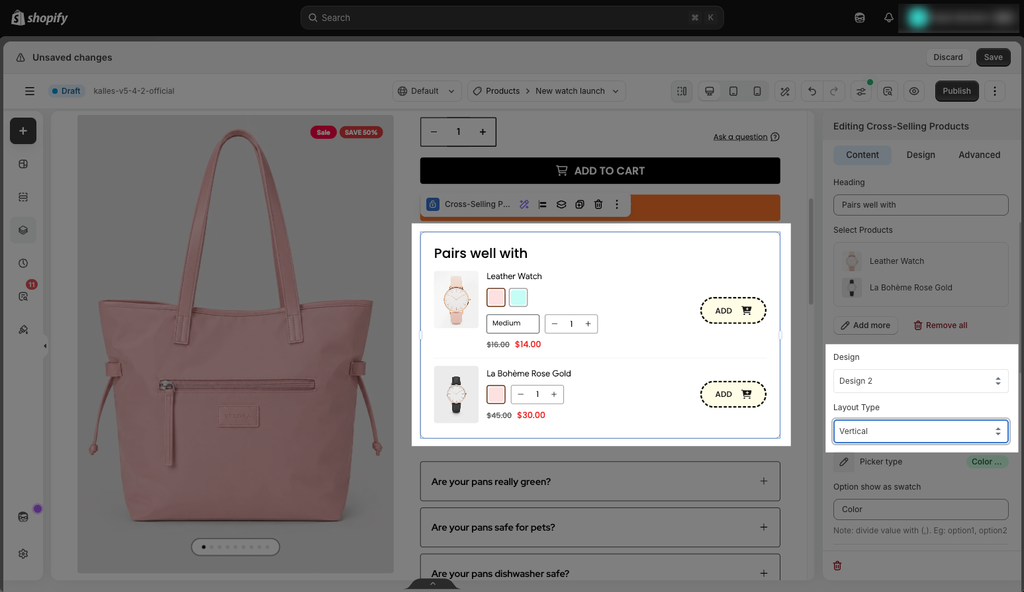
- Heading: Customize the label text such as “Pairs well with”
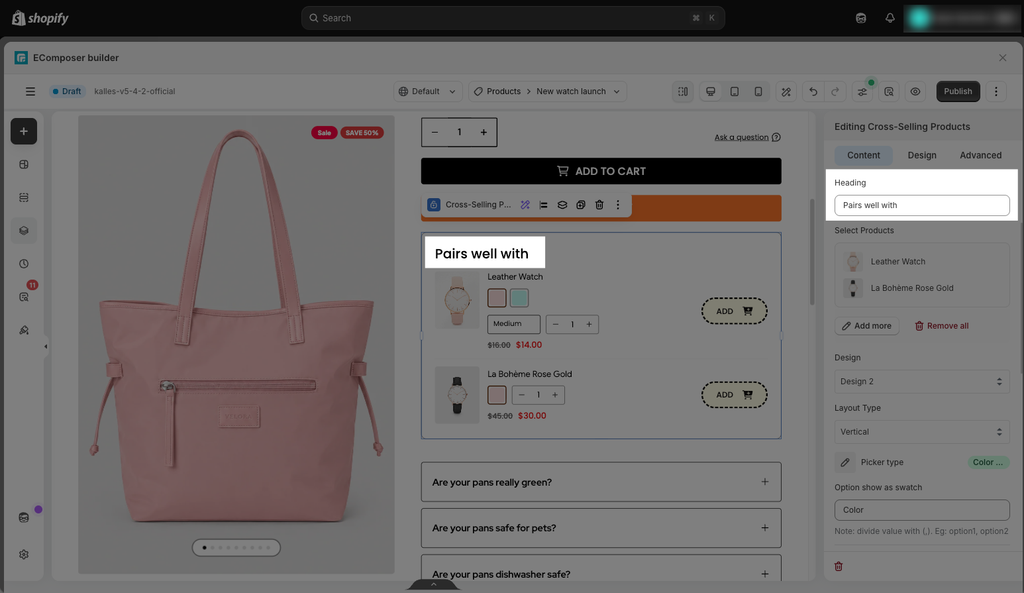
- Design: Choose between 2 pre-made designs for the Cross-Selling Product extension.
- Layout Type: Display the extension in horizontal or vertical layout.
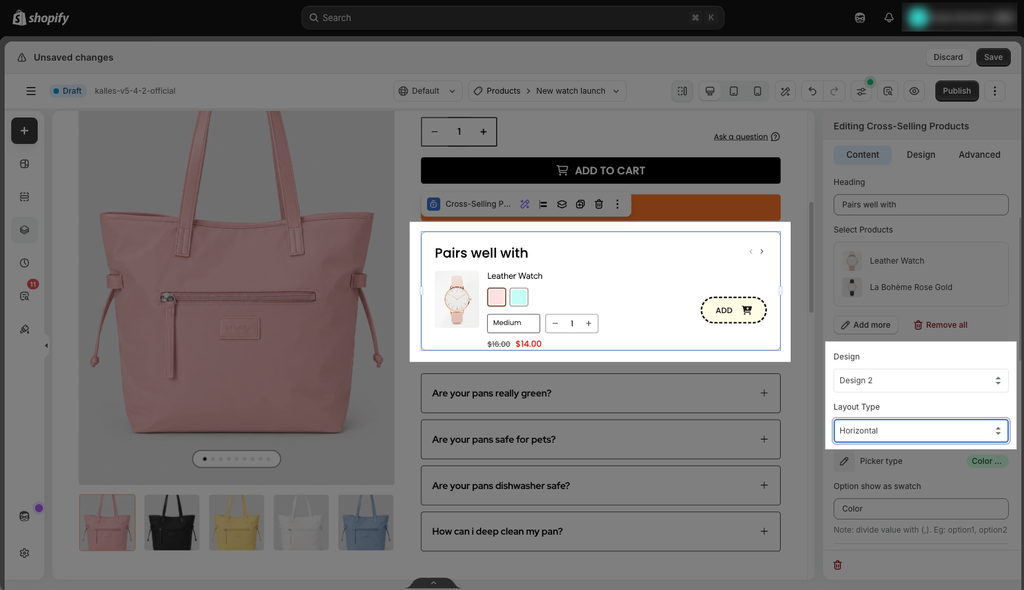
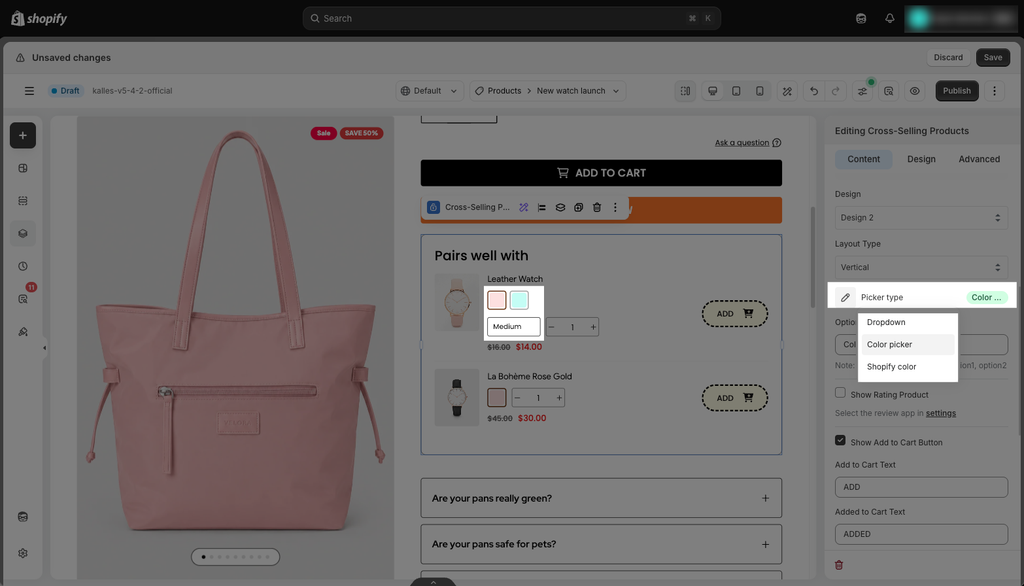
- Picker Type: There are three picker types available known as Dropdown, Color Picker, and Shopify Color.
- Dropdown: Displays the available options as a dropdown variant list.
- Color Picker: This requires the Color Swatch Extension from EComposer to be configured before you can continue with the setup. Please refer to the Custom Color Swatch Extension guideline for detailed instructions.
- Shopify Color: Renders the color selected from Shopify if you have set from Shopify > Product
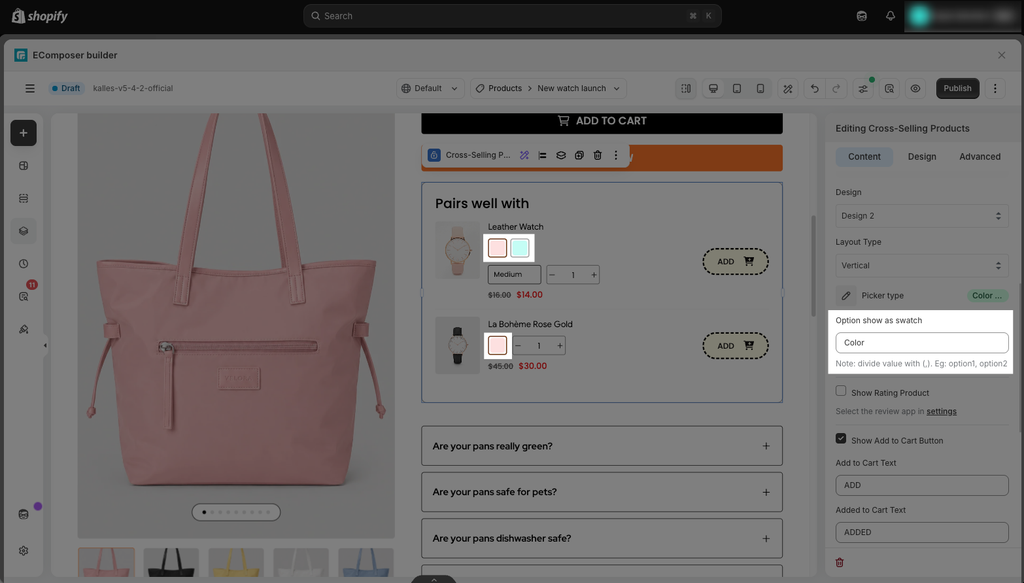
- Option show as swatch: Enter the variant name of your product that you wanna show as a swatch here. Example: Color. If you have multiple variants of your products, you can enter this option with more than one name. For example, “Color, Size”
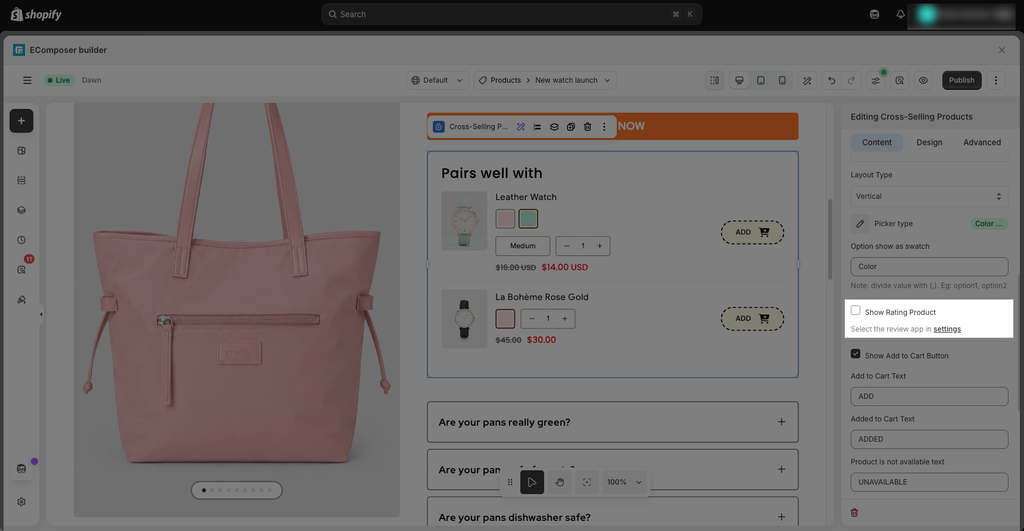
- Show Rating Product: This option allows you to display the product rating for products shown in the Cross Selling extension.
- Click Settings to select the review app you are using. The product ratings will then be displayed based on the selected review app.
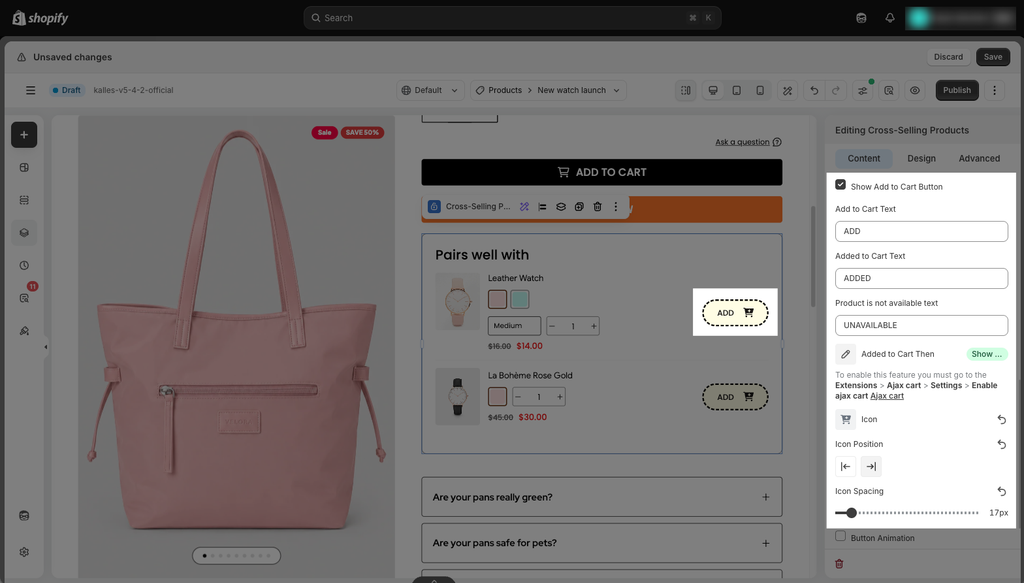
- Show Add to Cart Button: When you enable this setting, an Add to Cart button will be displayed for customers. You’ll also be able to customize the button labels, including the Add to Cart, Added to Cart and Product Unavailable text.
- Add to Cart Then (This option is only available when Show Add to Cart Button is enabled): Choose what happens after a customer clicks the Add to Cart button. You can select different actions, such as showing the cart popup, reloading the page, and more. For a detailed explanation of each option, please refer to this guide before using the feature.
- Icon: This setting allows you to upload an icon to display alongside the cart button, making it easier for customers to recognize. You can also customize the icon’s position and spacing to match your design.
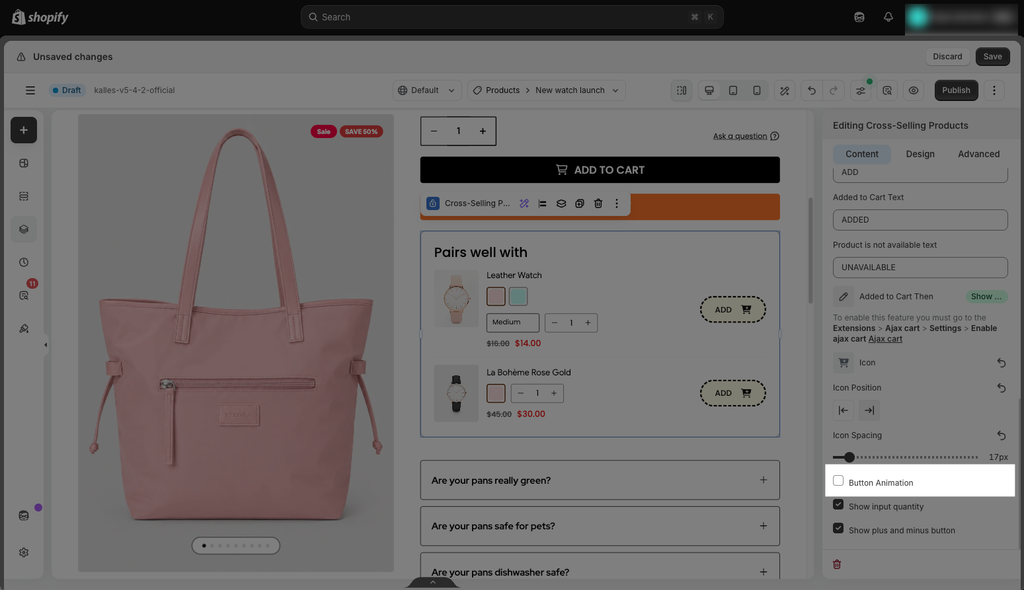
- Button Animation: Enable this option to add an eye-catching animation to the Add to Cart button, helping attract customers’ attention.
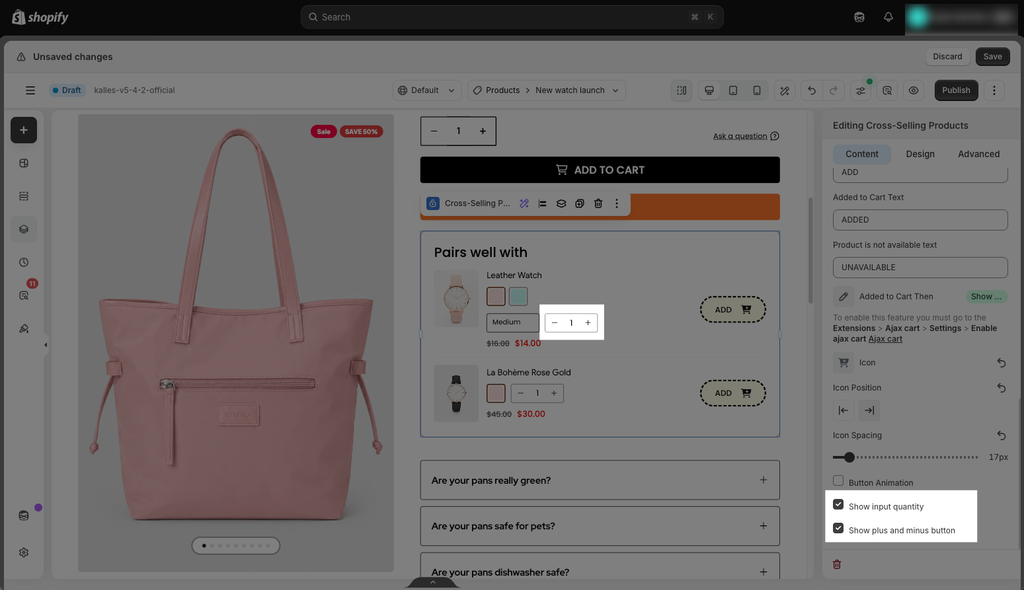
- Show Quantity Input / Show Plus and Minus Buttons: This option displays a quantity selector with plus and minus buttons, allowing customers to easily adjust the number of items they want to add to their cart.
3.2. Design
The Design settings allow you to customize the visual appearance of the widget without affecting its content or functionality. Here, you can adjust fonts, colors, backgrounds, as well as the width and height of buttons and other parts.
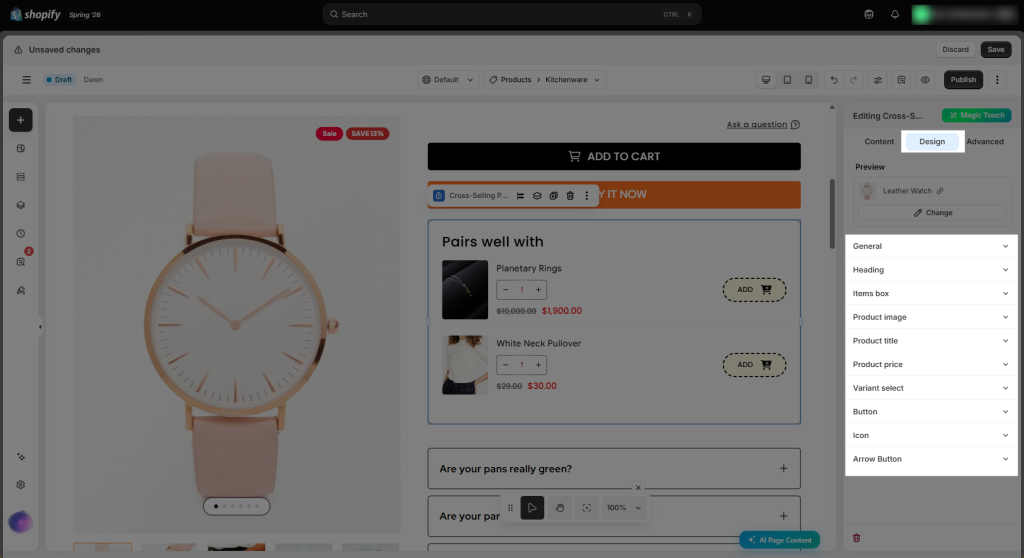
- General: Customize the overall appearance of the extension, including the background, spacing, borders, and other general styling options.
- Heading / Product Title: Customize the alignment, typography (font family, size, weight, etc.), and text color for the heading and product titles.
- Items Box / Product Image: Adjust the width of the items box or product image, and customize its border, border radius, spacing, and related styling options. For the Product Image, you can also adjust its height.
- Product Price: Customize the typography (such as font family, size, weight, and style) and text color for these price-related elements.
- Variant Select / Button: Configure the alignment, width, height, typography (font family, size, weight, etc.), colors, and other available styling options for the variant selector and the button.
- Icon: Customize the appearance of icons used within the extension, such as their size, color, spacing, and alignment (depending on the available settings).
4. Translate the extension content
If your store supports multiple languages, you can follow the steps below to translate the Cross Selling extension content in your translation app.
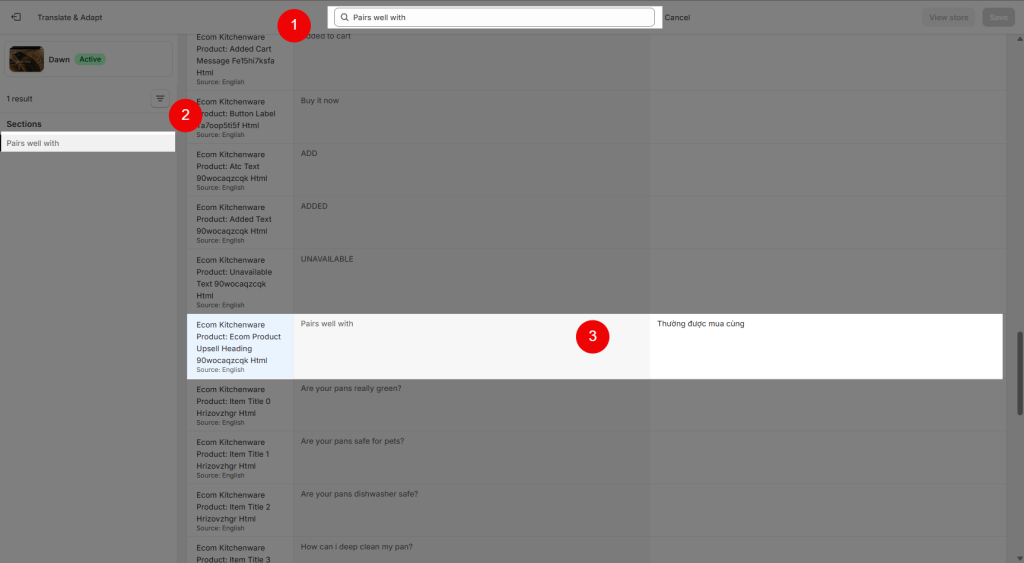
Step 1: In your translation app (for example, the Translate & Adapt app shown in the screenshot), go to Default Theme Content.
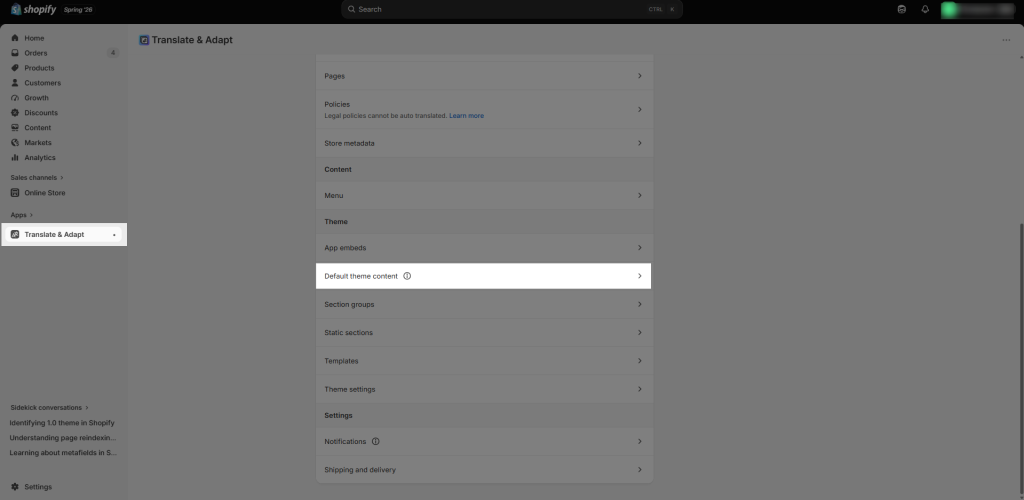
Step 2: Then, search for the extension title “Pairs well with” and continue until you find the part you want to translate.