How to Create a Collection Template in Shopify?
A collection template will display the products on it. There is a limit to what you can change with the default Collection Template of your theme. If you want to make more significant changes or you want to be able to fully customize your collection templates, but you don’t know how to code, the EComposer page builder is a great idea. The question is, how do you do this in the Ecomposer page builder app? We’ll show you how much customization EComposer gives you for your Collection pages.
1. How to build a new Collection template in EComposer?
Note: Usually Shopify theme provides only one template for all collections in your store. EComposer default collection template will overwrite your current theme template and the changes you made on this template will apply to all your collection pages.
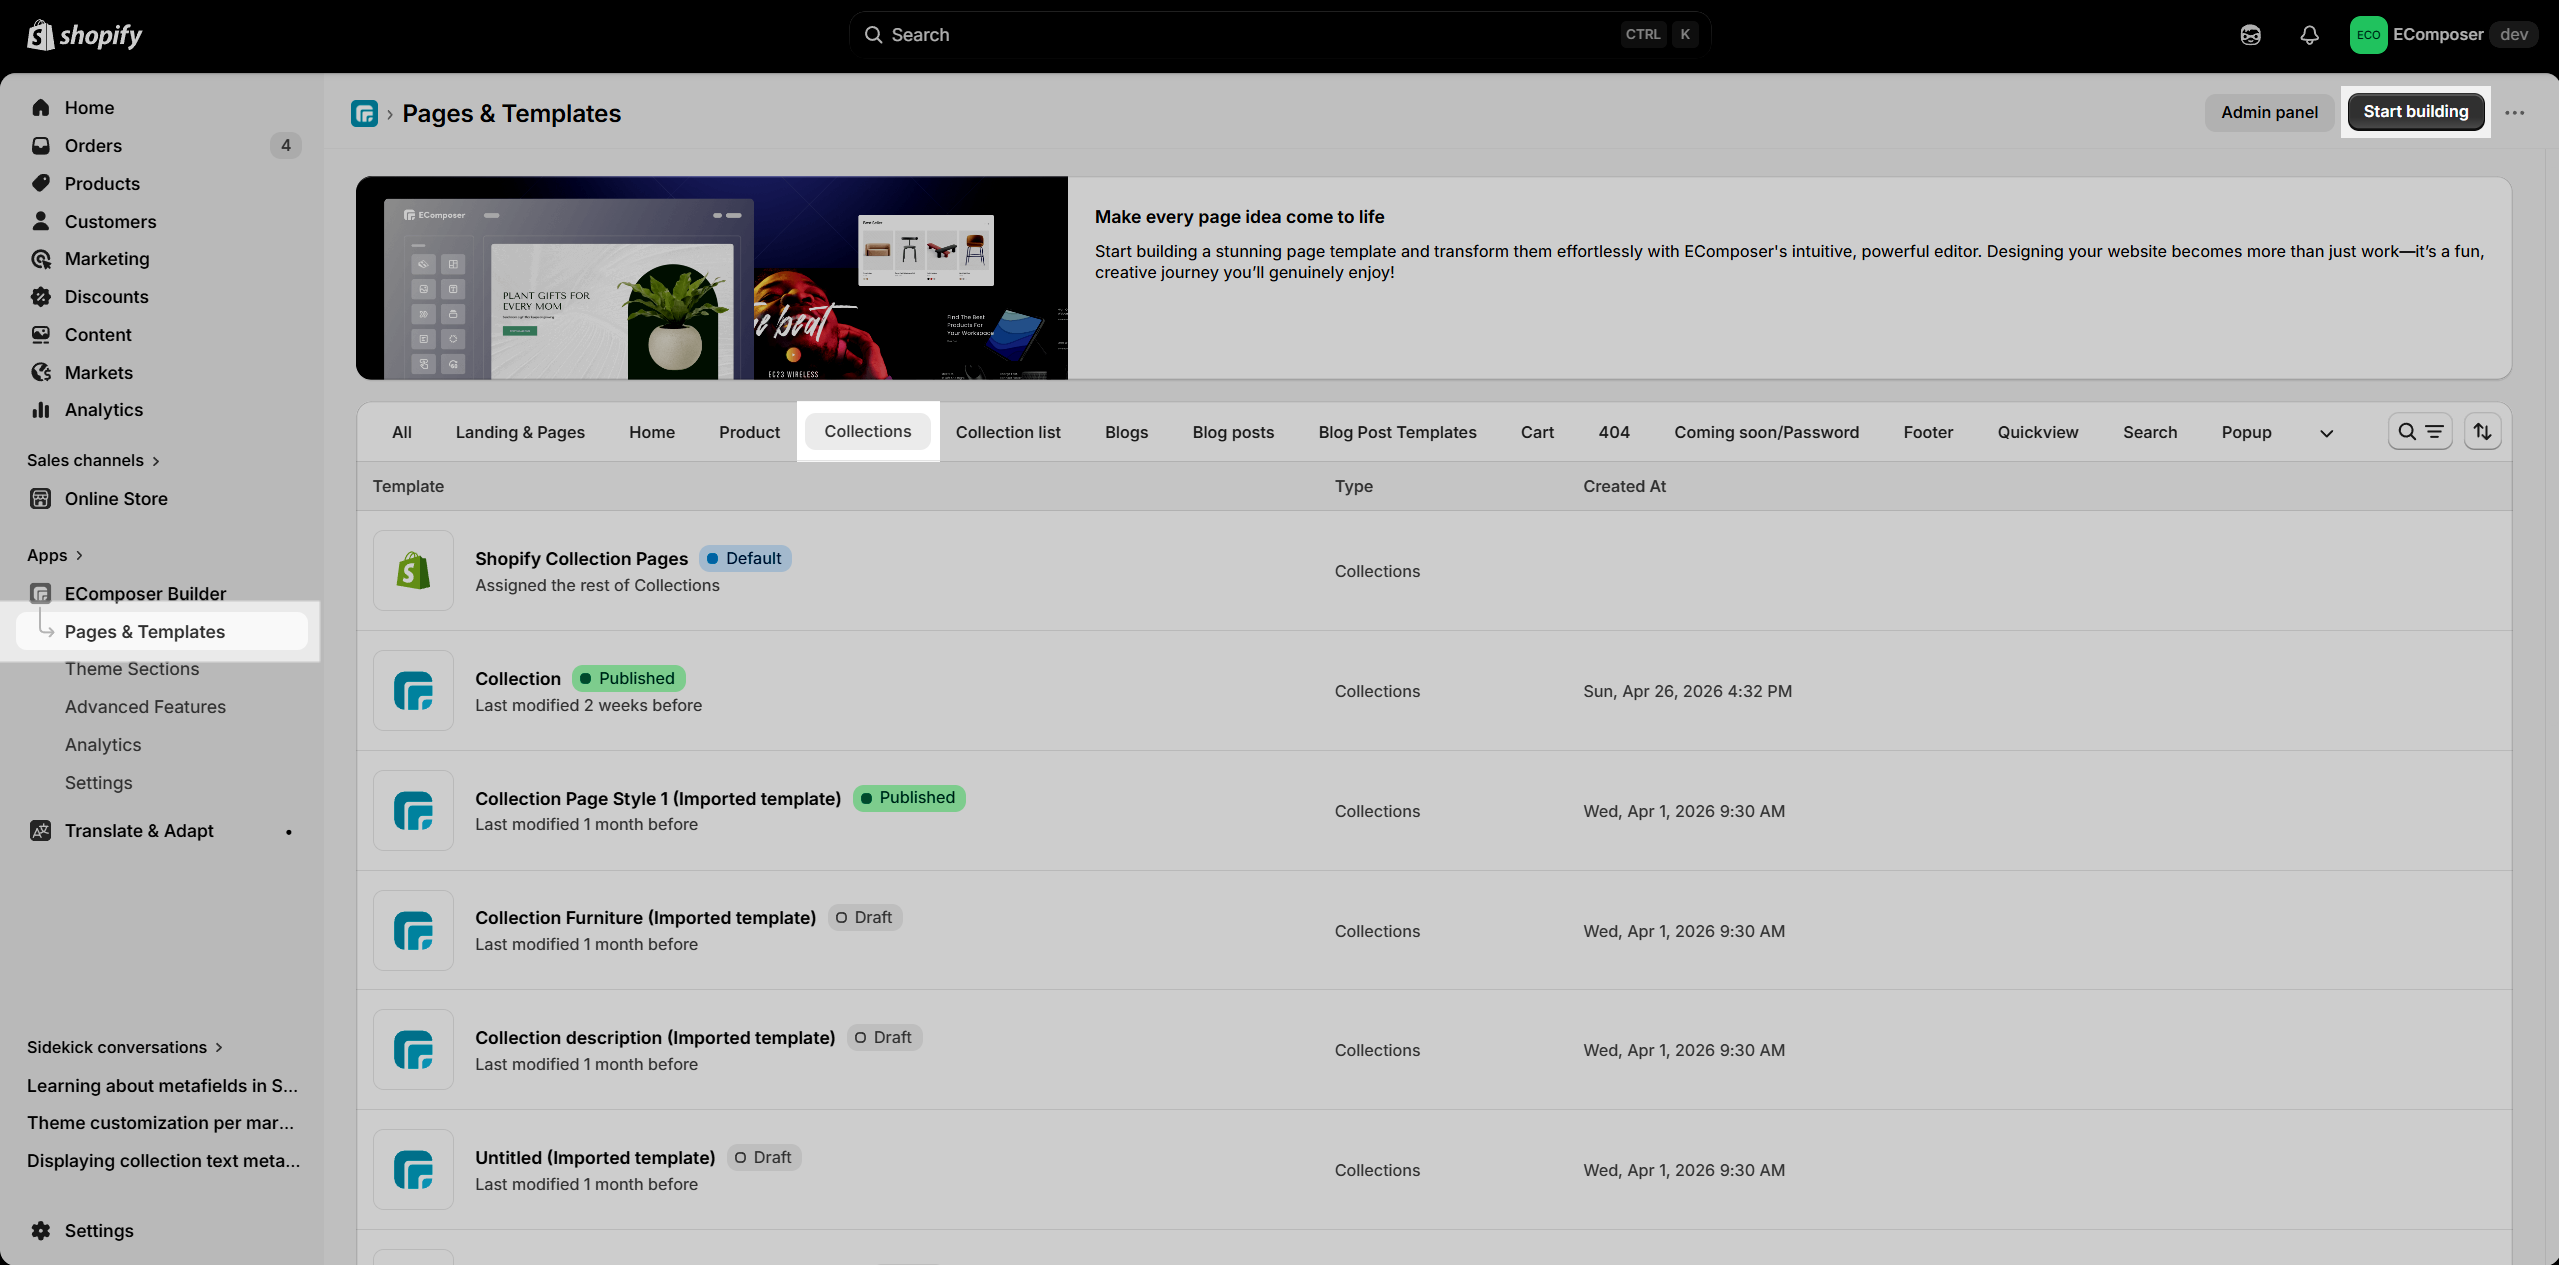
In EComposer, you can create a new Collection template by going to Pages & Templates → Collections and clicking Start building. Customize your page using a blank layout or a pre-built template, then save and publish it. Your changes will apply to all collection pages in your store.
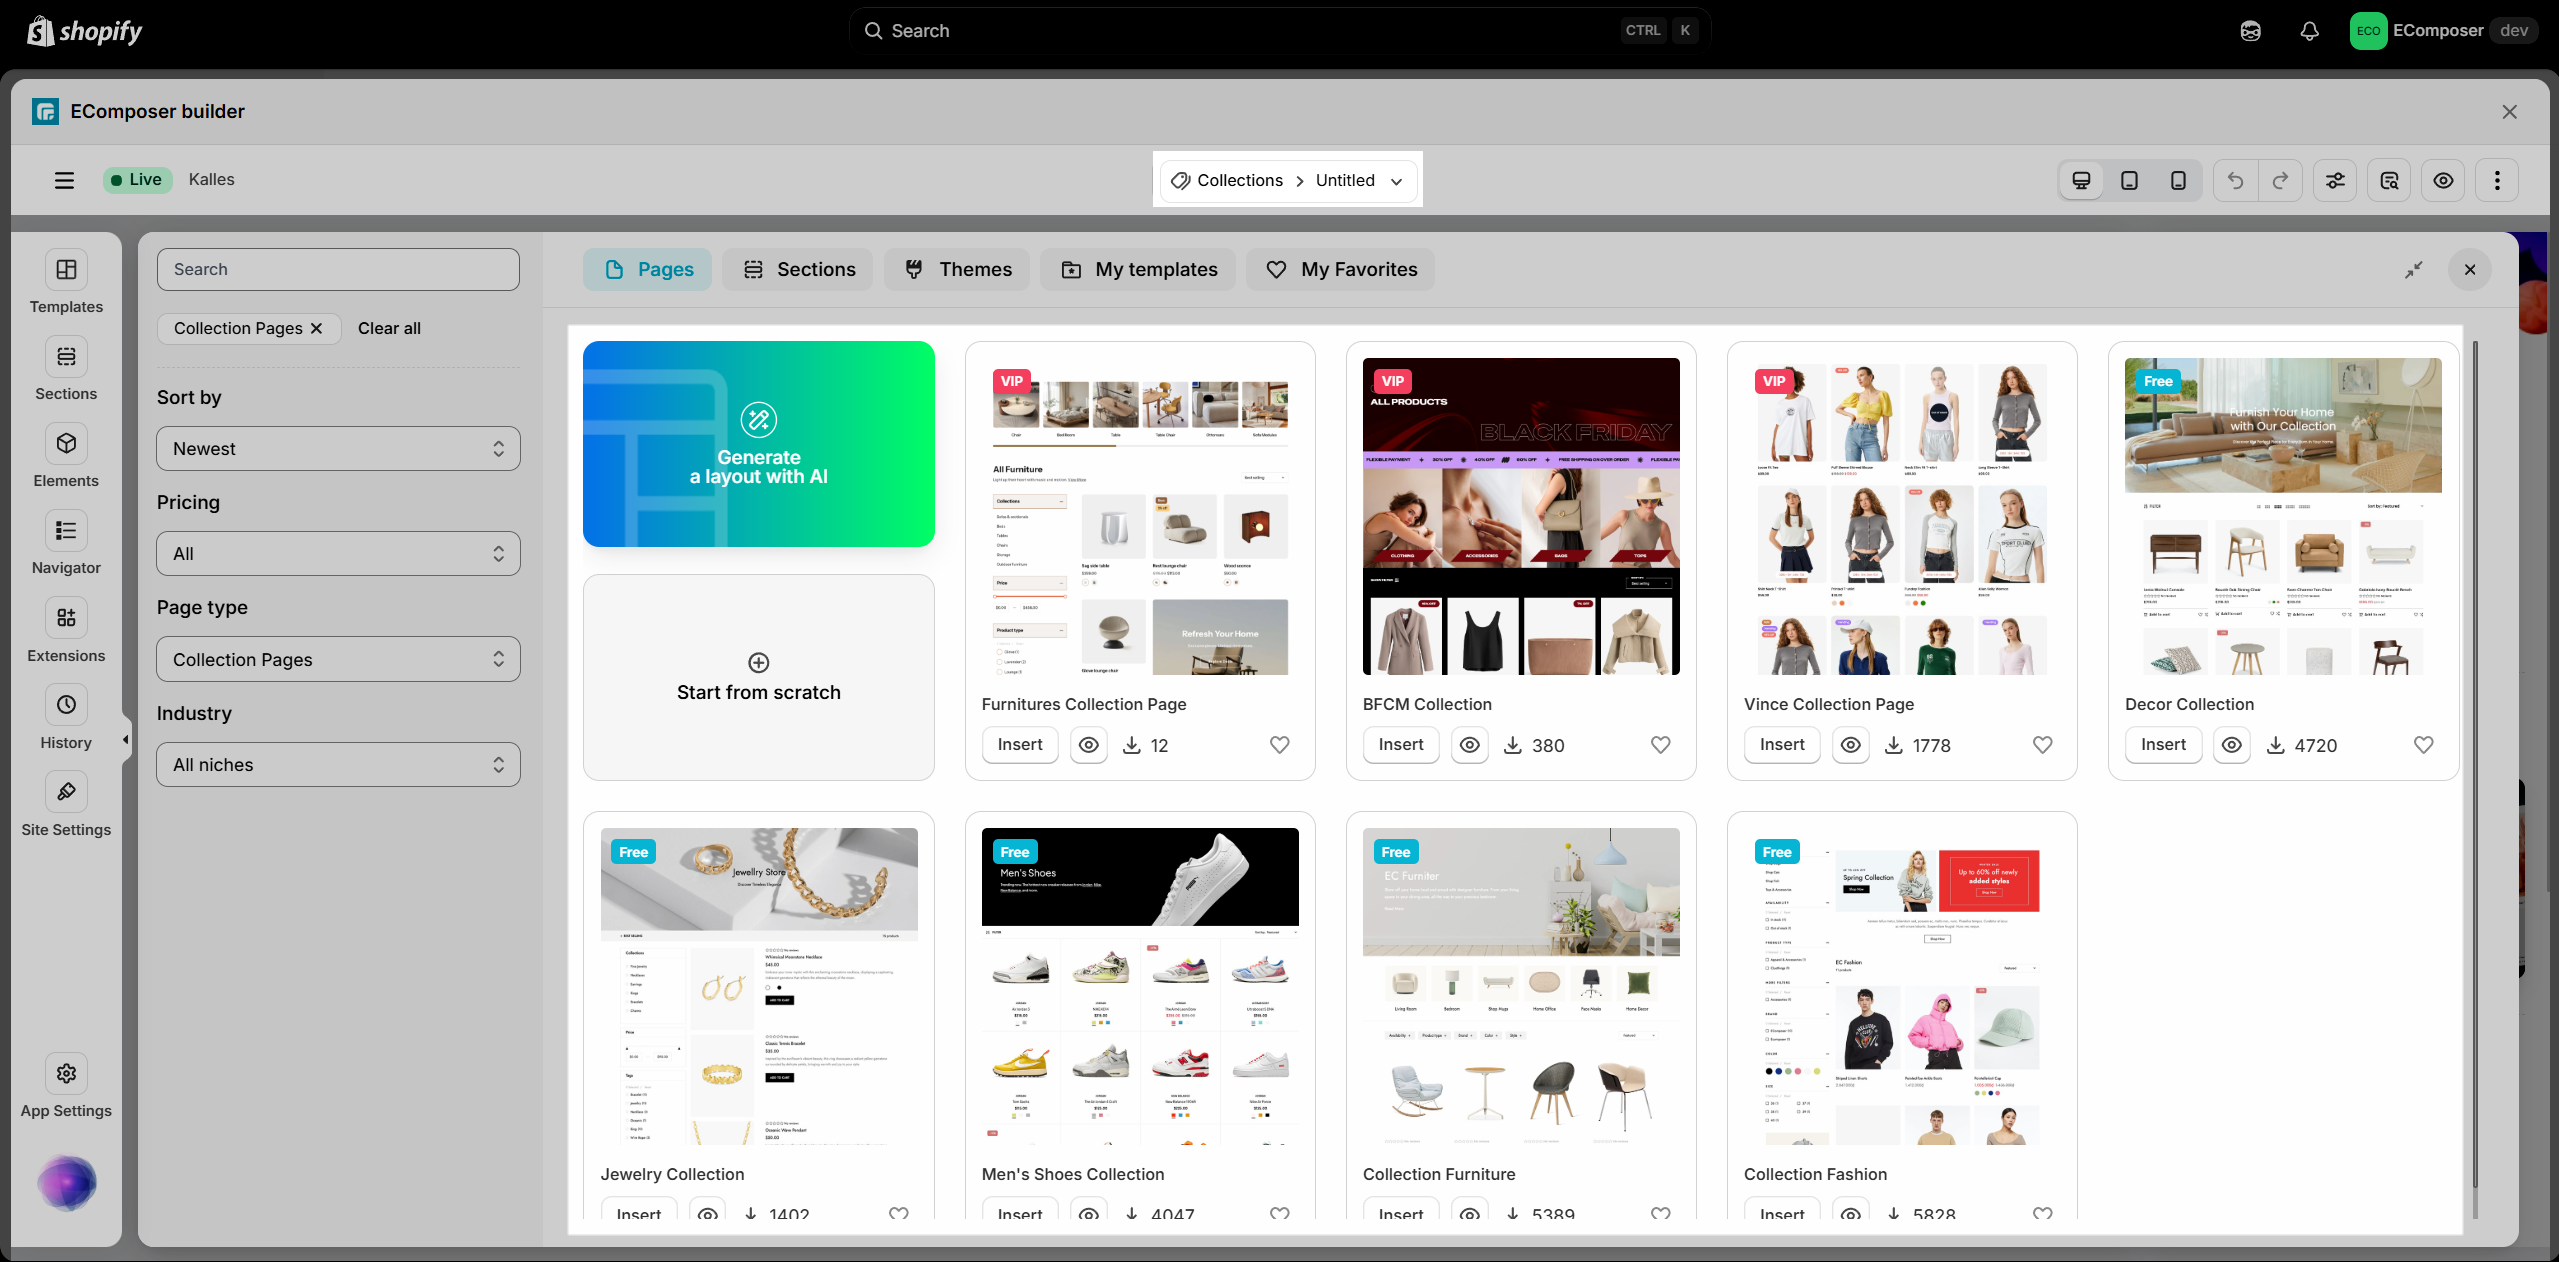
There are two ways to start building a Collection template in EComposer. The first way is to explore the library: browse the available collection layouts, pick the one you like, and click Insert now to add it to your page. The second way is to start from scratch, creating a collection page from a blank layout and customizing it completely to fit your store’s style.
The Collection template has some elements below:
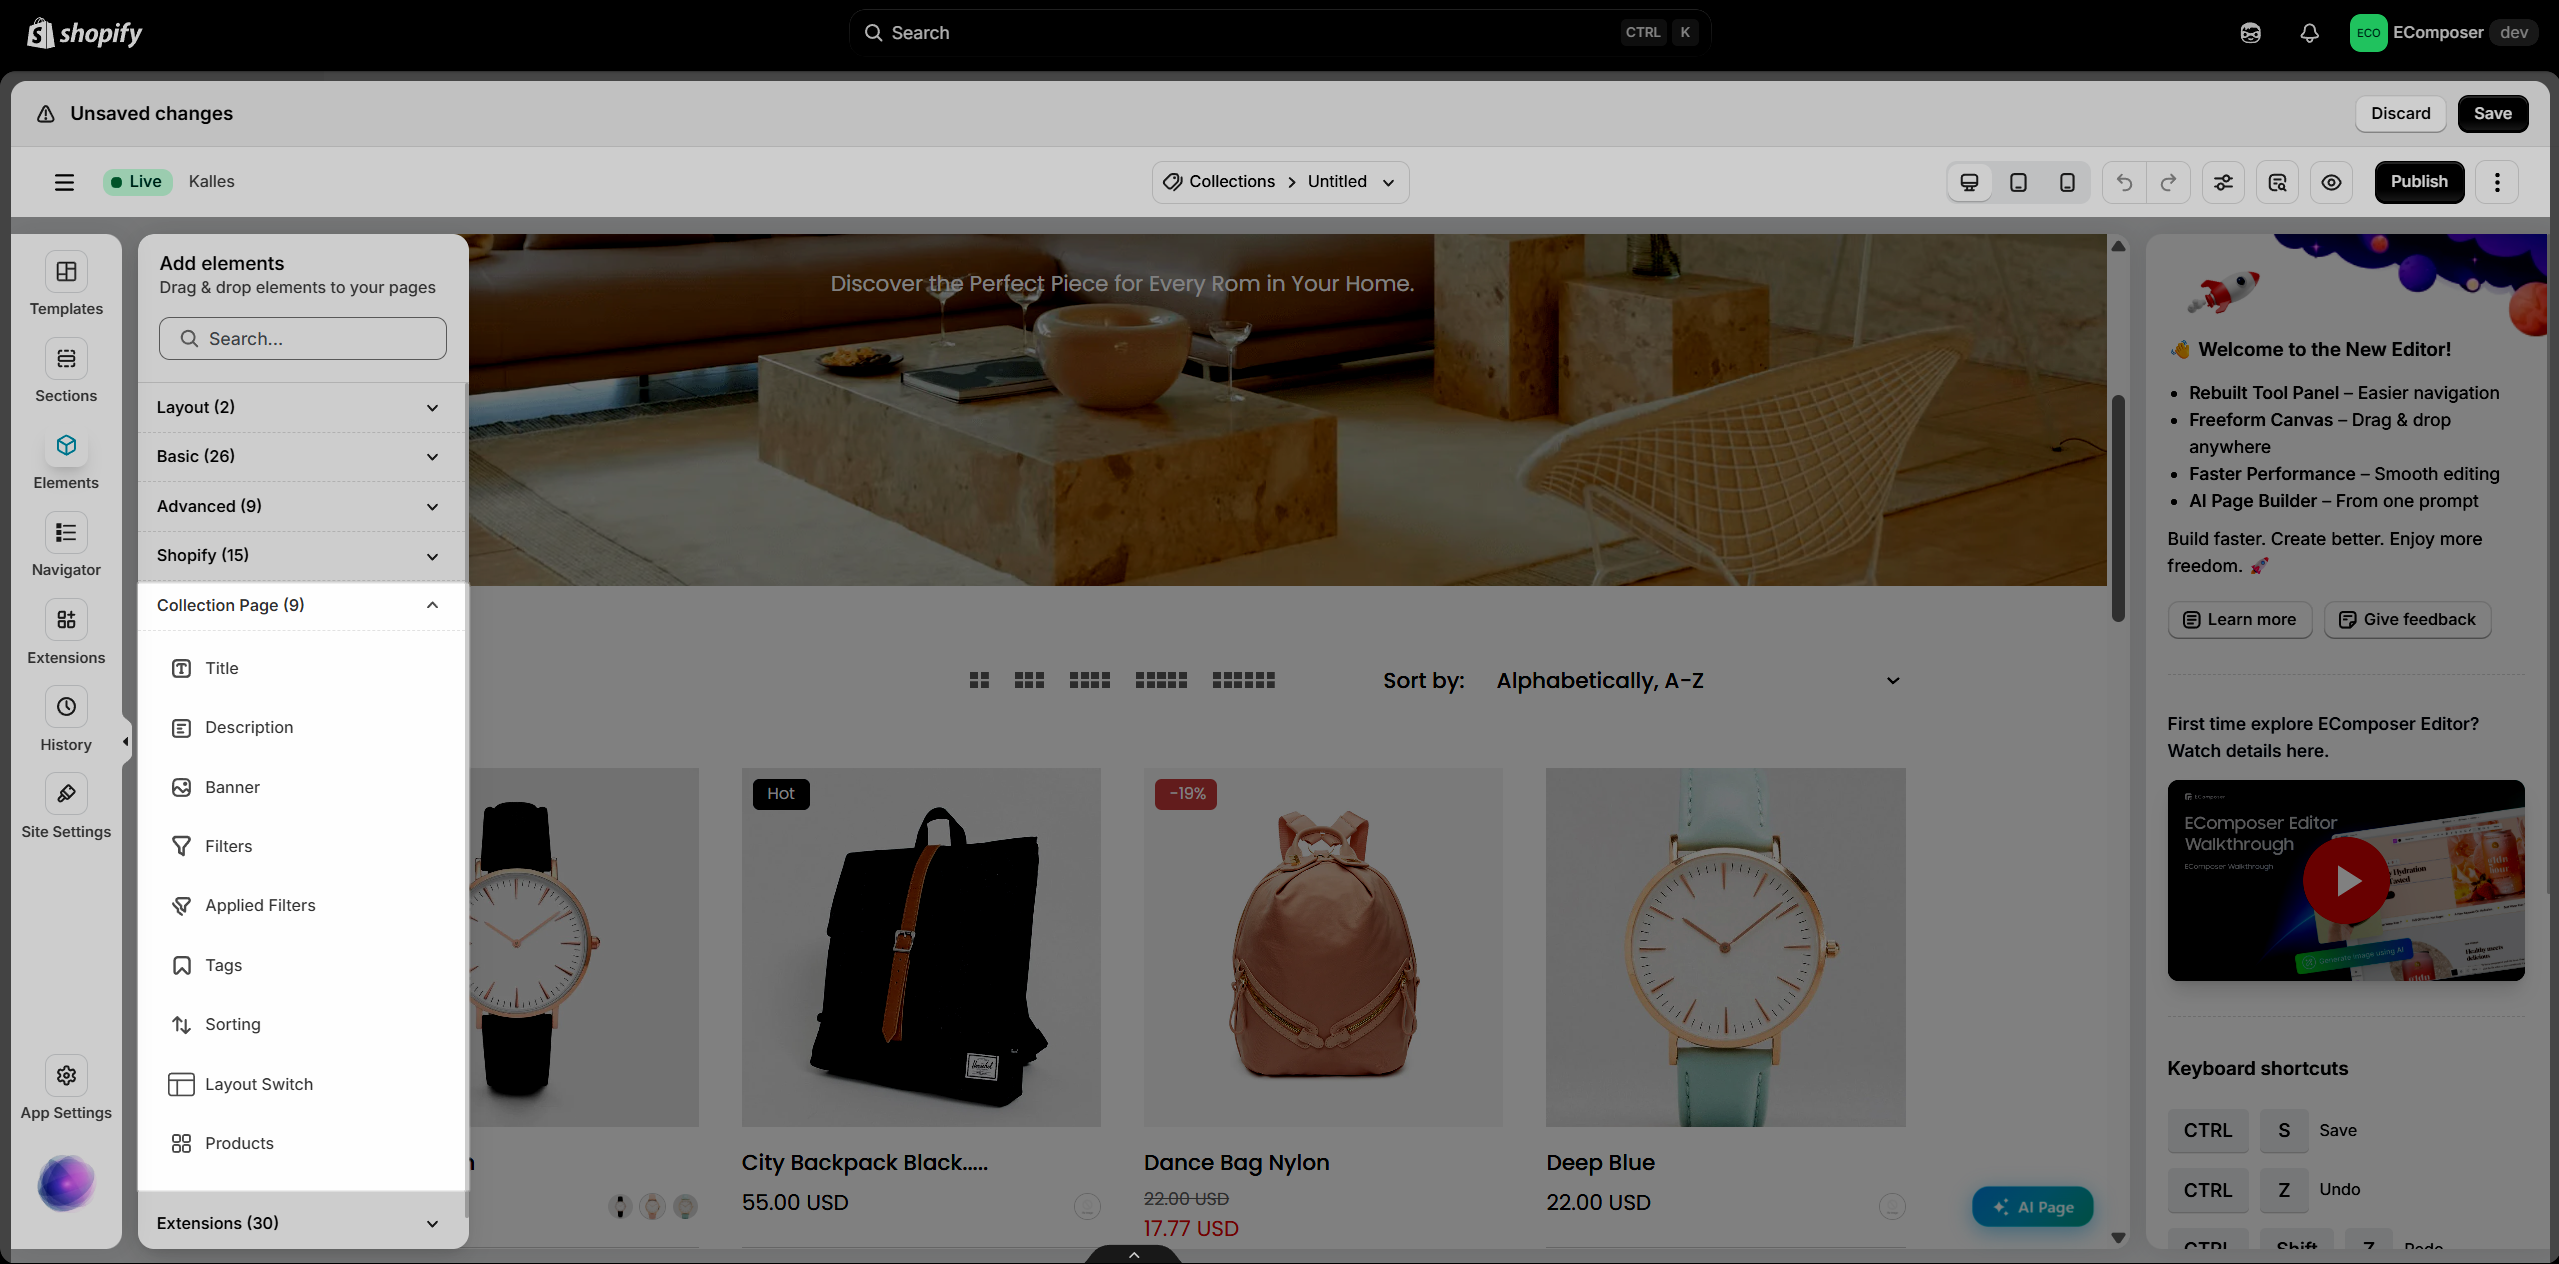
- Title: This option allows you to show the Collection title.
- Description: This shows the descriptions of the Collection.
- Banner: This element allows you to display the collection image of the collection as a banner.
- Filters: This allows customers to filter products in a collection with availability status and price.
- Applied Filter: This allows you to show the options that your customers are clicking to buy.
- Tags: Display all product tags of products in the collection.
- Sorting: This allows customers to sort products in a collection by featured, best-selling, price, name, and date.
- Products: This element displays all products in the collection.
2. How to assign the Collection template in EComposer to your collections?
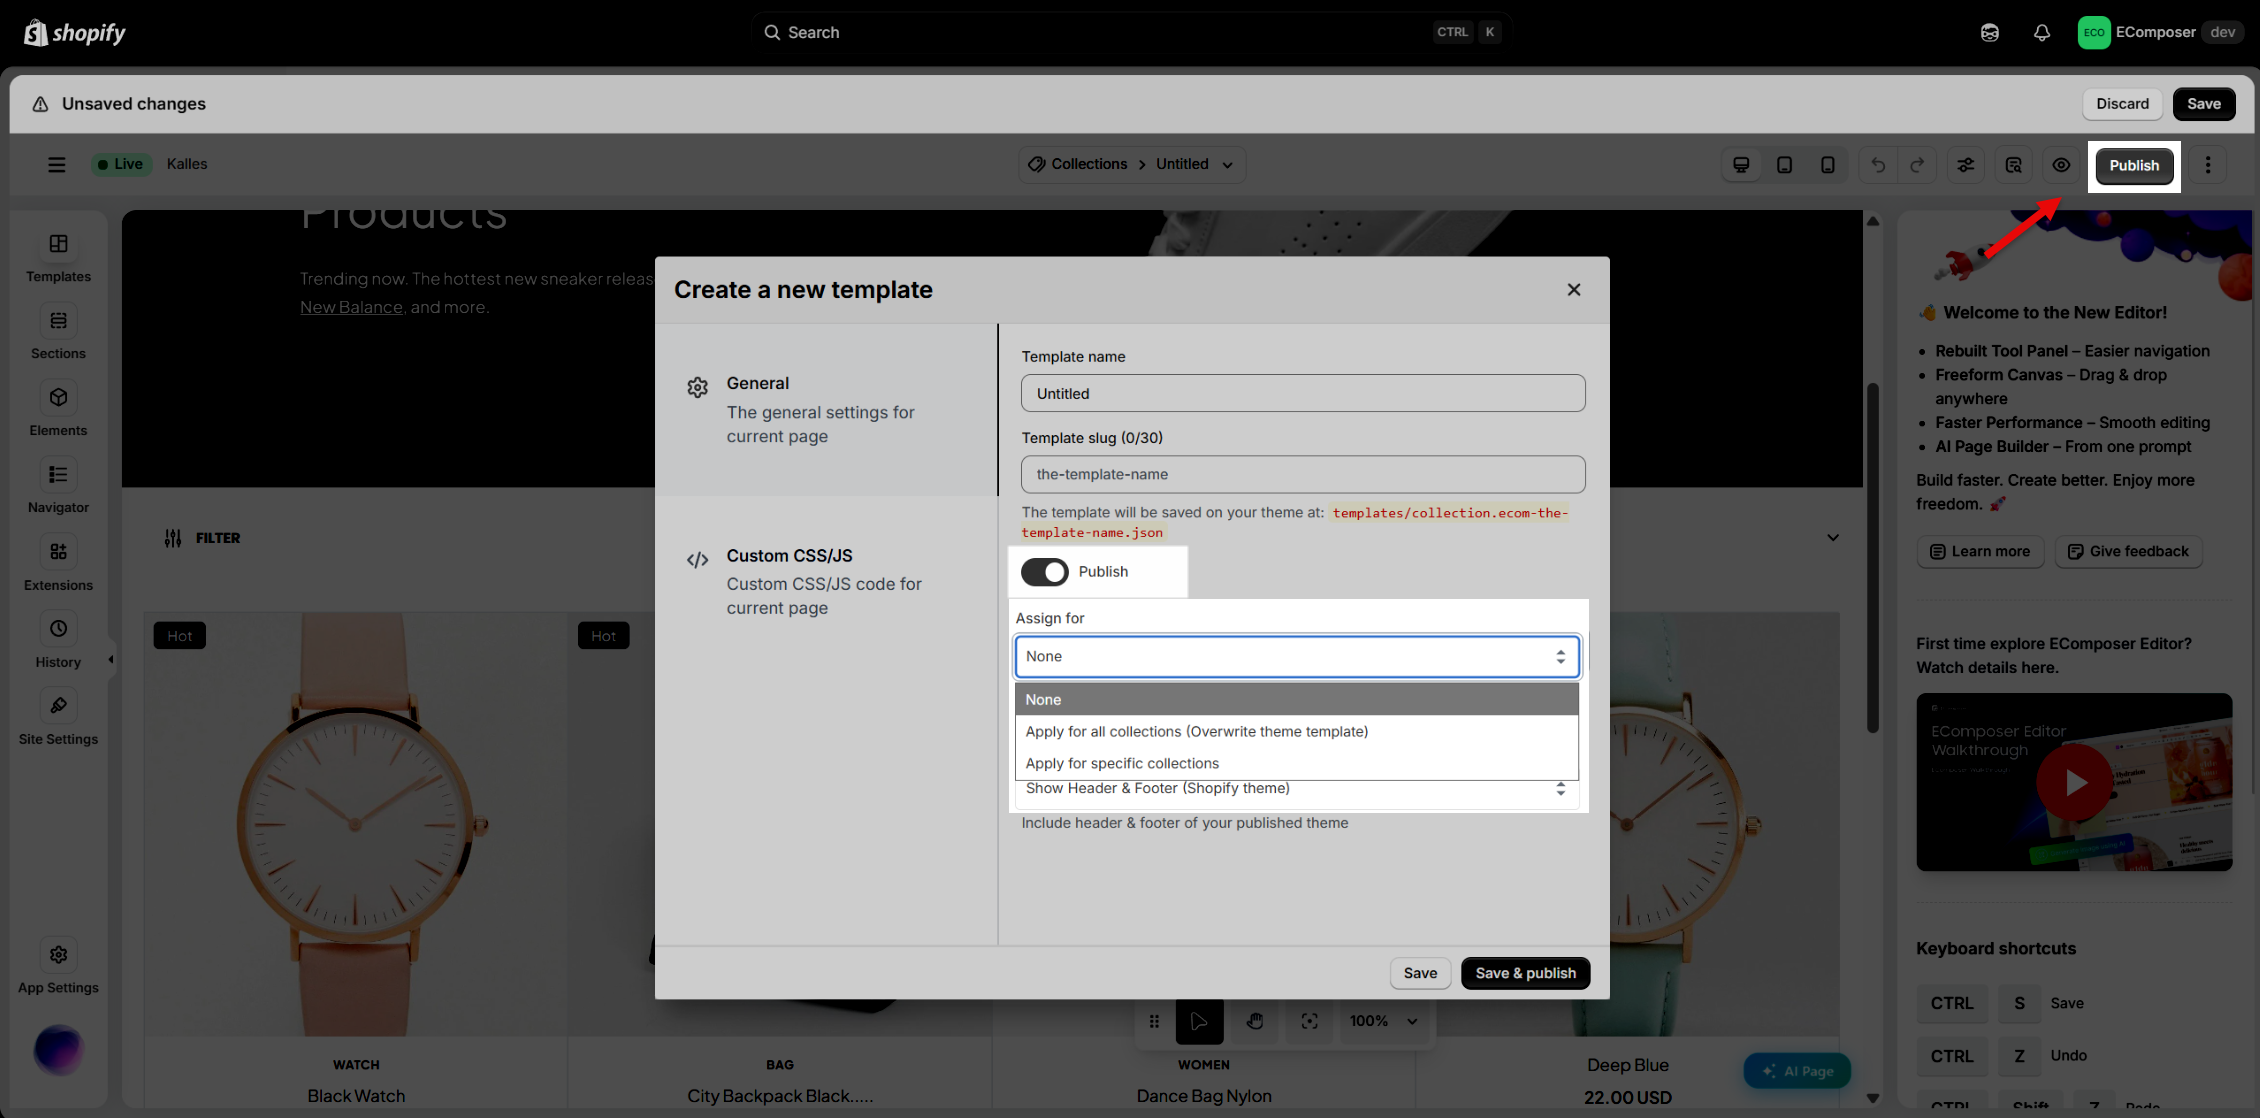
When creating a new Collection Template in EComposer, enter the template name and slug. To make the template active, turn on Publish in the template window and then click the Publish button at the top right corner of the editor, you can choose how it applies to your collections using the “Apply for” option:
- None: The template won’t be applied anywhere; it will just be saved.
- Apply for all Collections: The template will be applied to all your collections, overwriting the Shopify default template.
- Specific collections: The template will only be applied to the collections you select.
Choose the option that fits your needs to control how the template is used.
3. How to restore to the Shopify default Collection template?
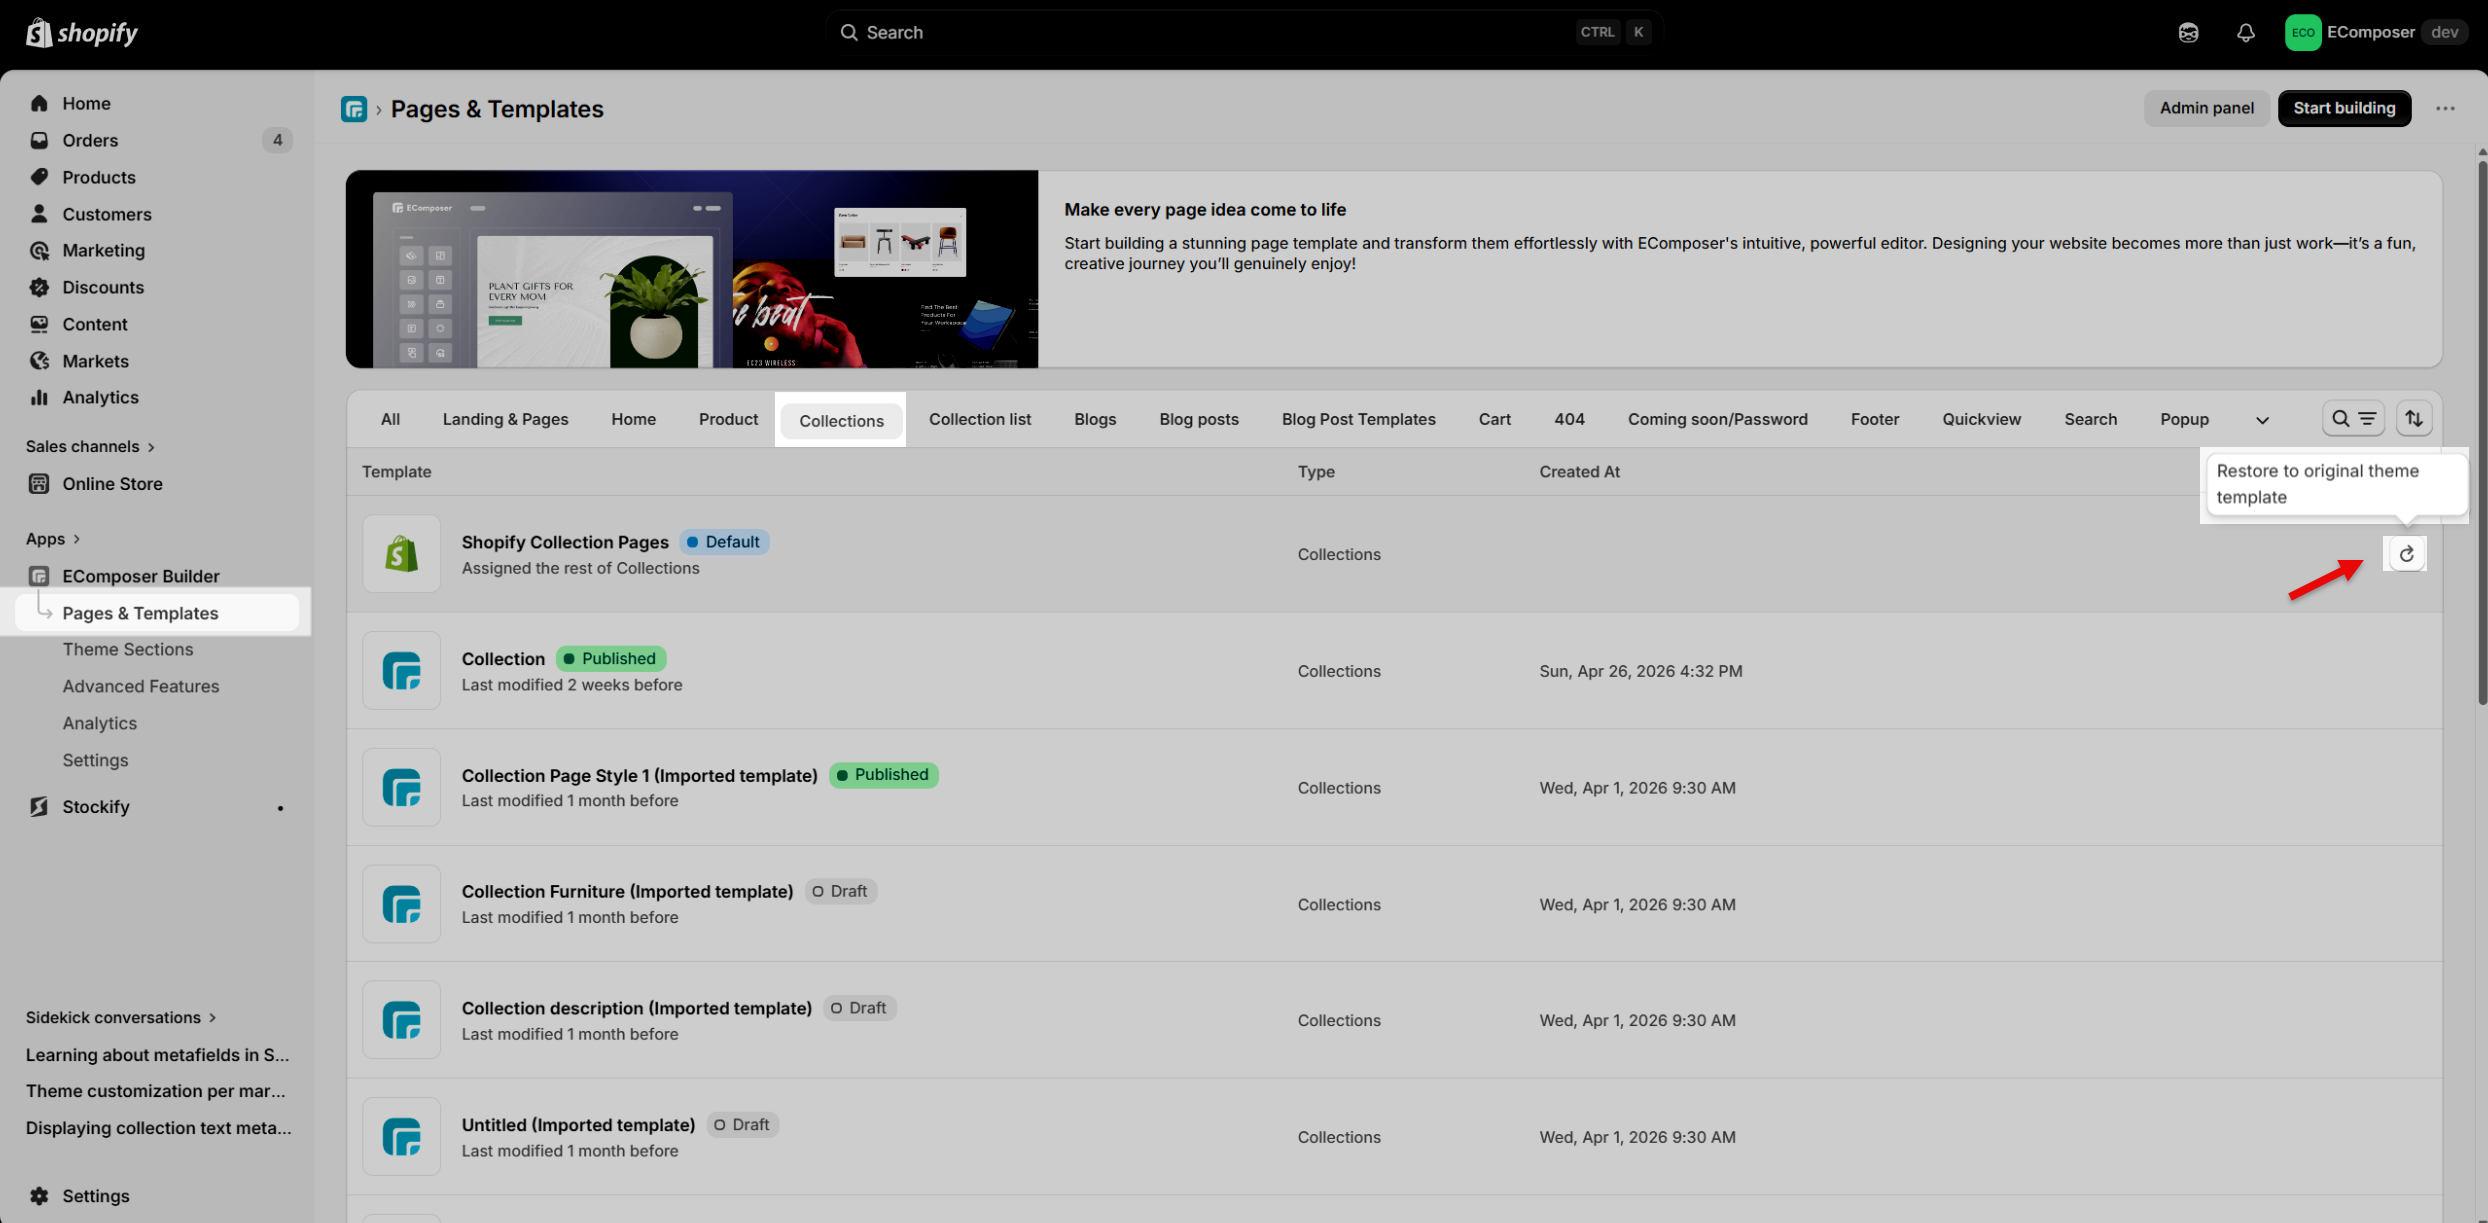
If you want to restore your collections to the Shopify default template, you can do so directly from the EComposer dashboard. Simply go to Pages & Templates → Collections and use the Restore button to revert your collections back to the original Shopify theme template. This will undo any custom templates applied via EComposer.
4. How to delete the Collection template?
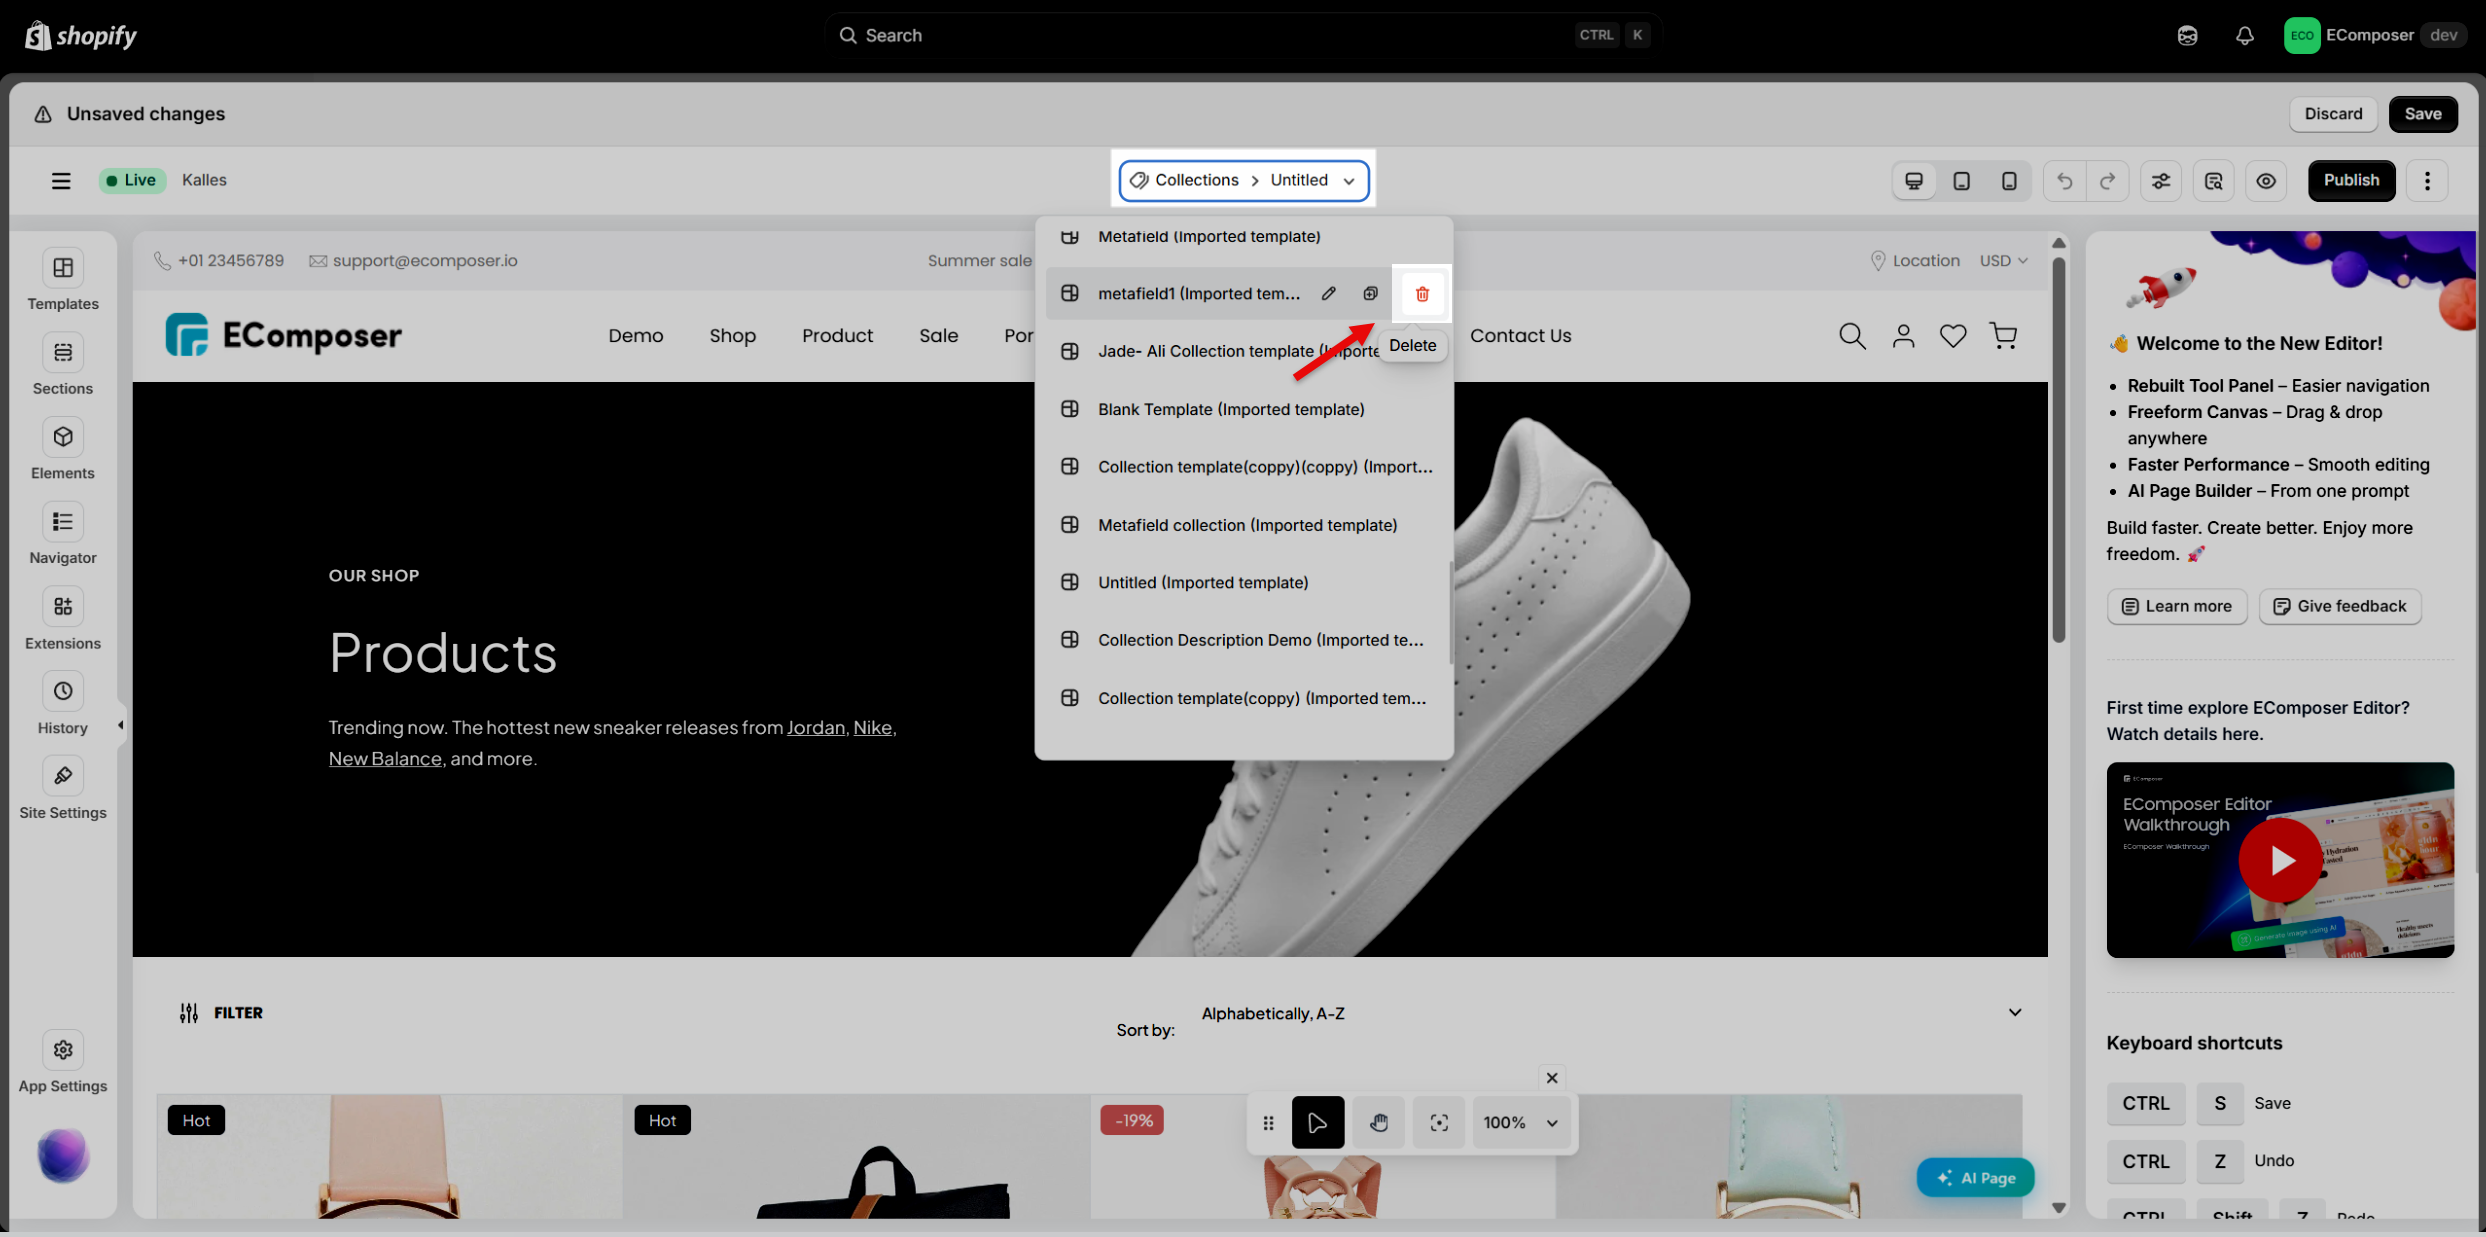
To delete a Collection template in EComposer, you have two options:
Option 1: Use the dropdown menu on the Collection and select Delete.
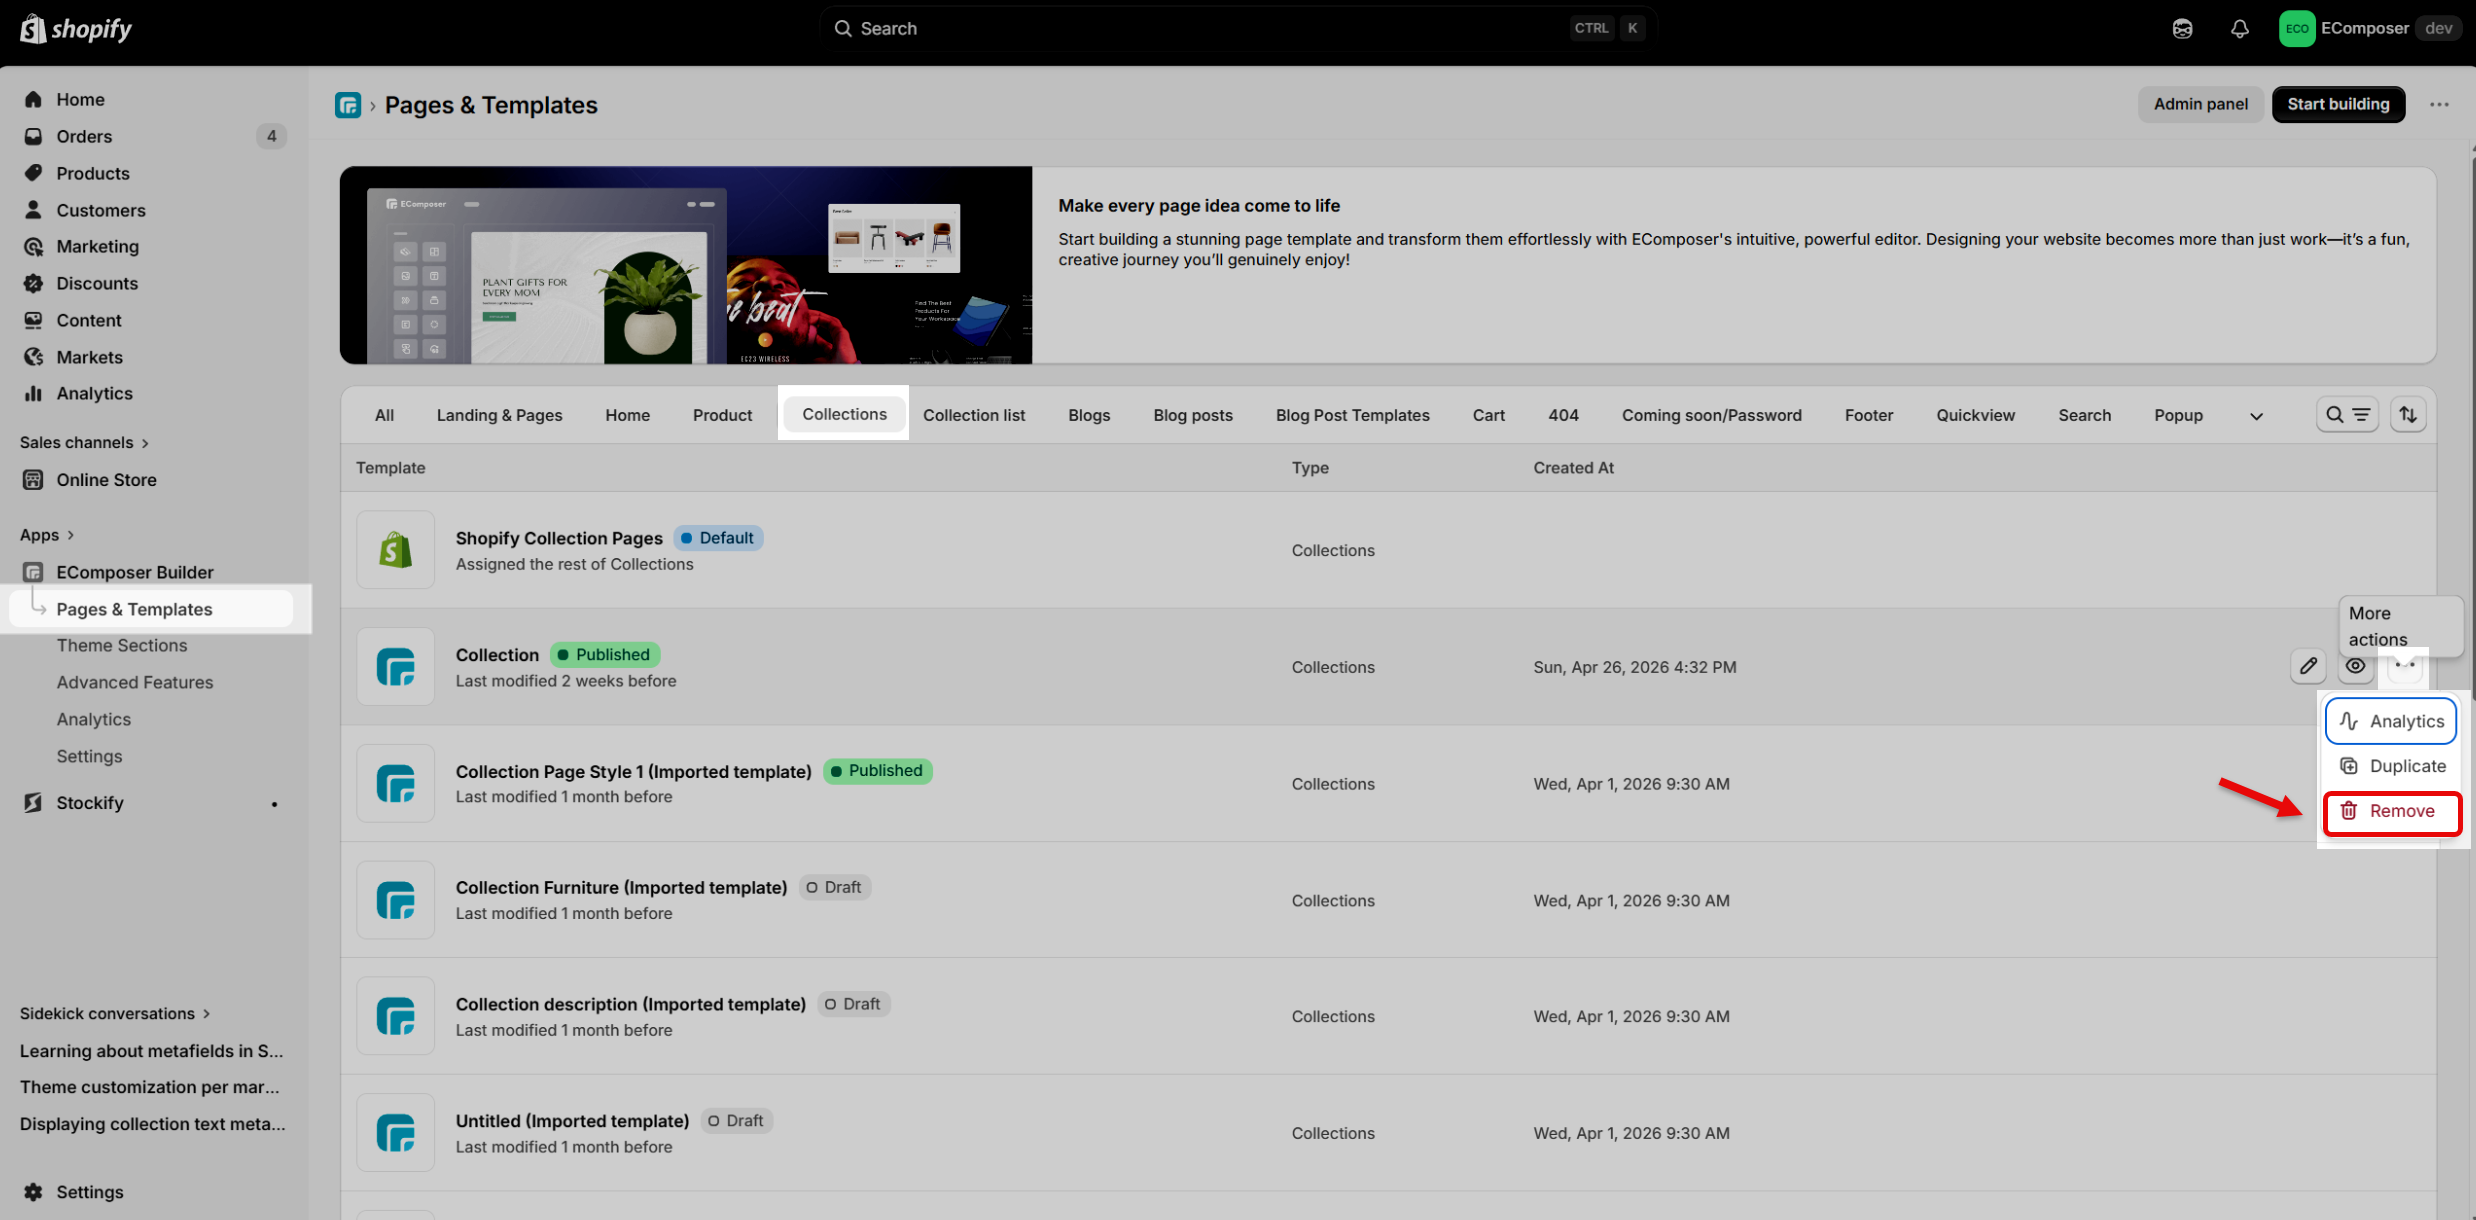
Option 2: Go to Pages & Templates → Collection, hover over the template, click More actions, and select Remove.