What is the difference between “Blog post” and “Blog post template”?
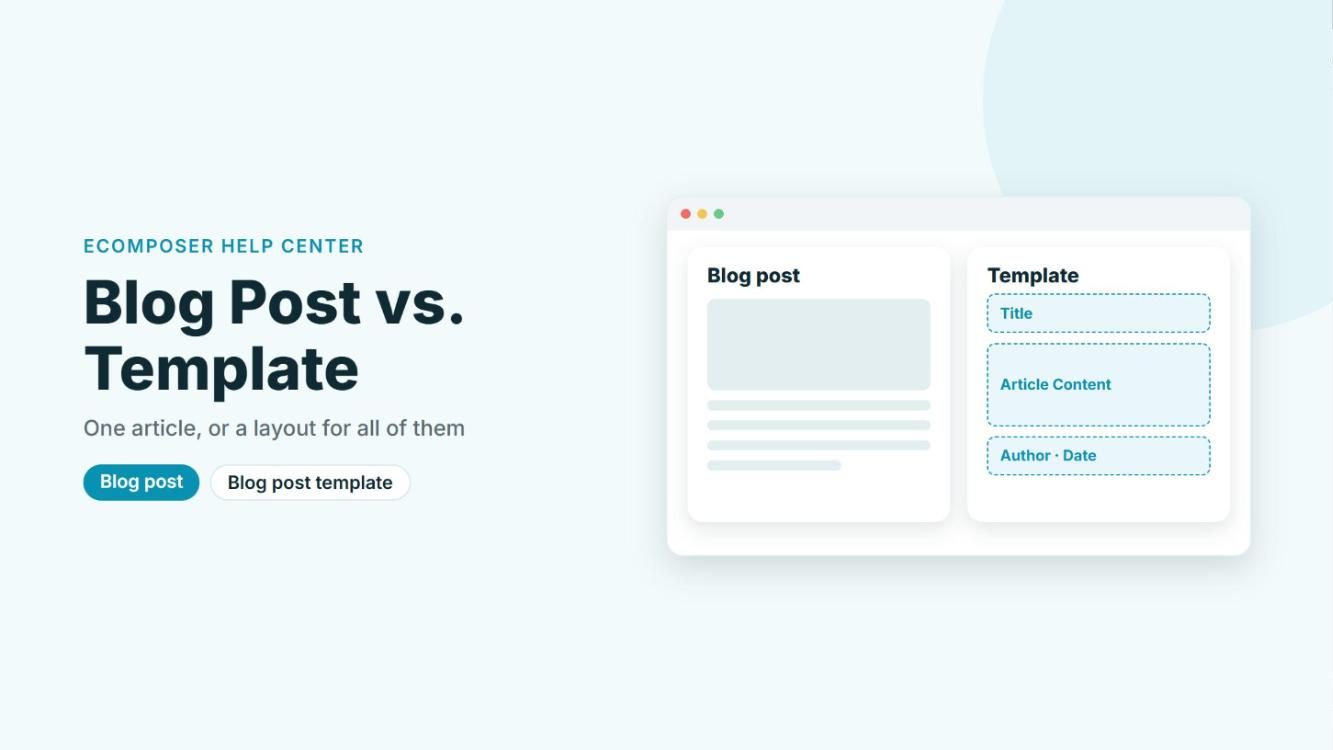
If you’re new to Shopify, it’s easy to mix up a blog post and a blog post template, because both show up in the EComposer editor. The difference is simple: a blog post is one article you design from scratch, while a blog post template is a layout that many articles share. Let’s go through both so you can pick the right one.
1. Blog post
A Blog post is a single article whose content is built entirely in the EComposer editor. You add the Text, Image, Link, Column and Row elements you need from the left panel, so each post can have its own structure and look. A Blog post belongs to one of your Shopify blogs and gets its own address there, just with far more design control than the Shopify editor gives you.
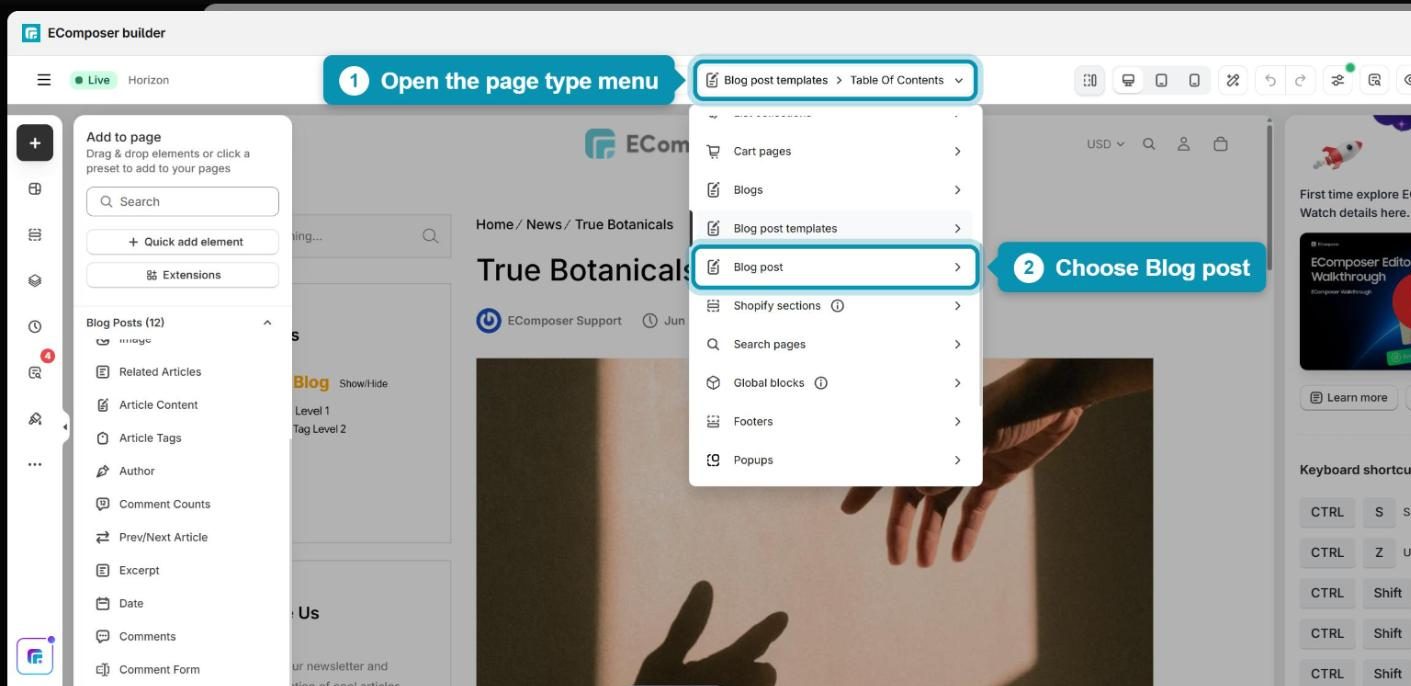
To work on one, open the page type menu at the top of the builder, choose Blog post, then click Create a new Template. You’ll start from a blank canvas and build the whole page yourself.
Before you start building, EComposer asks for the post’s title, handle, the blog it belongs to and its visibility, the same details you’d set when adding a post in Shopify. While it’s a draft, the post stays in EComposer and doesn’t show up in your Shopify blog posts.
2. Blog post template
A Blog post template is a pre-designed layout that decides how your Shopify blog posts appear on your online store. Think of it as the parent of your posts: because the layout is shared, it can change how your existing Shopify blog posts look without editing them one by one. Here’s how to open one and see how it works.
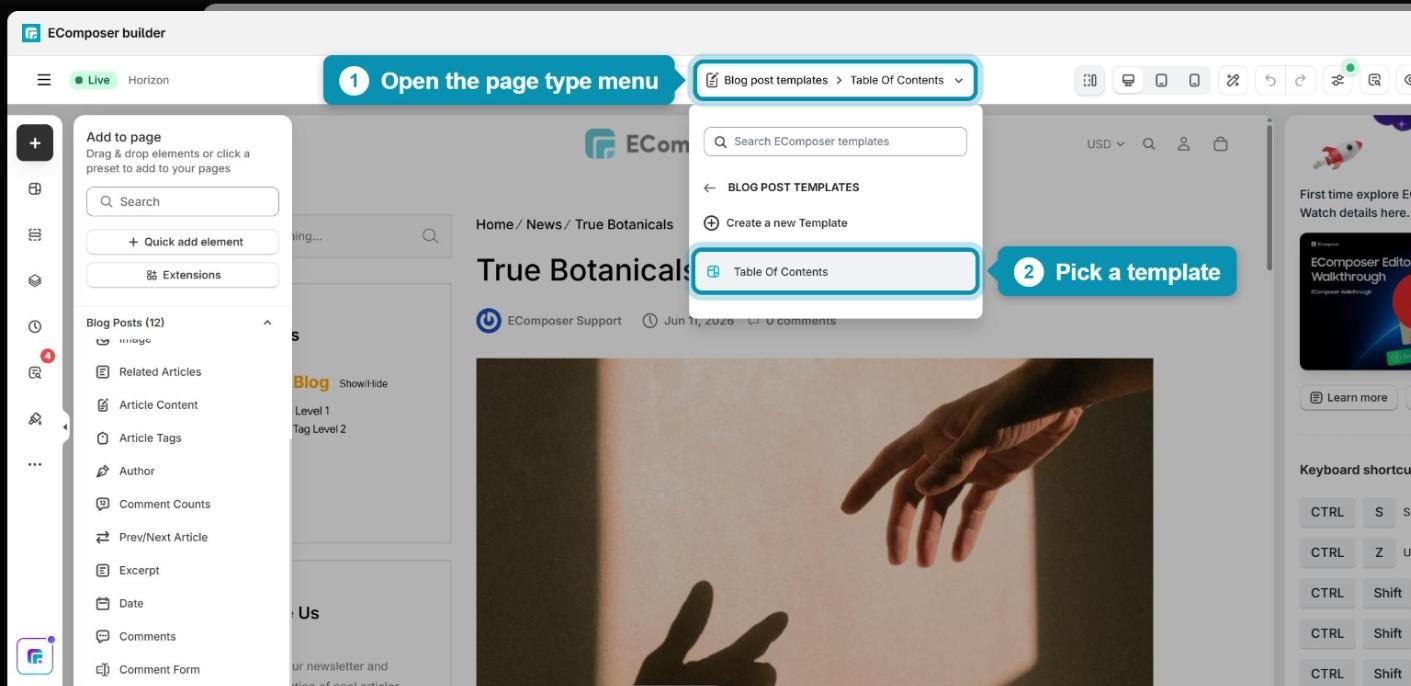
Step 1: Open the page type menu and choose Blog post templates. You’ll see your existing templates in the list (we’ll use Table Of Contents here), or you can pick Create a new Template to start your own.
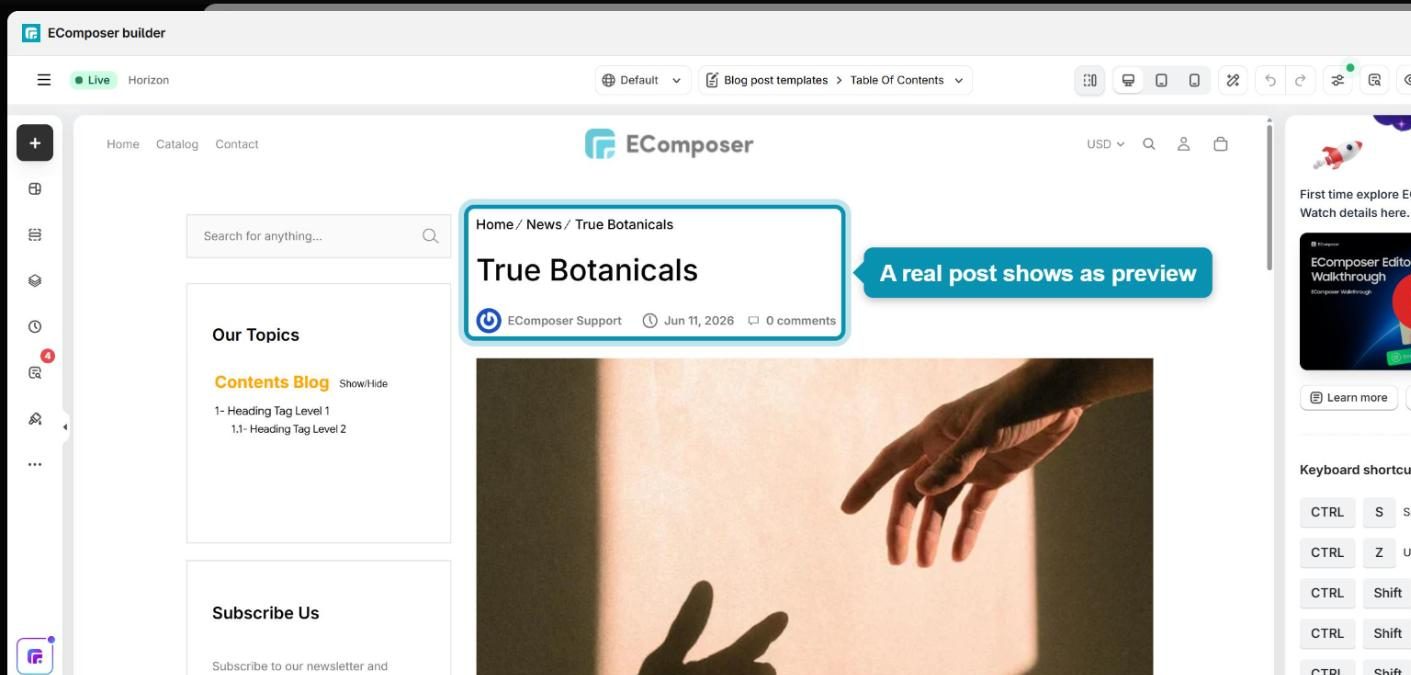
Step 2: Once the template opens, notice that you don’t write any content for it. EComposer shows an existing post as a preview, so you can see right away how your layout will render.
Step 3: Open the Add elements panel (the + icon) and look in the Blog Posts group. These are the placeholder elements you can arrange in a template: Title, Image, Related Articles, Article Content, Article Tags, Author, Comment Counts, Prev/Next Article, Excerpt, Date, Comments and Comment Form.
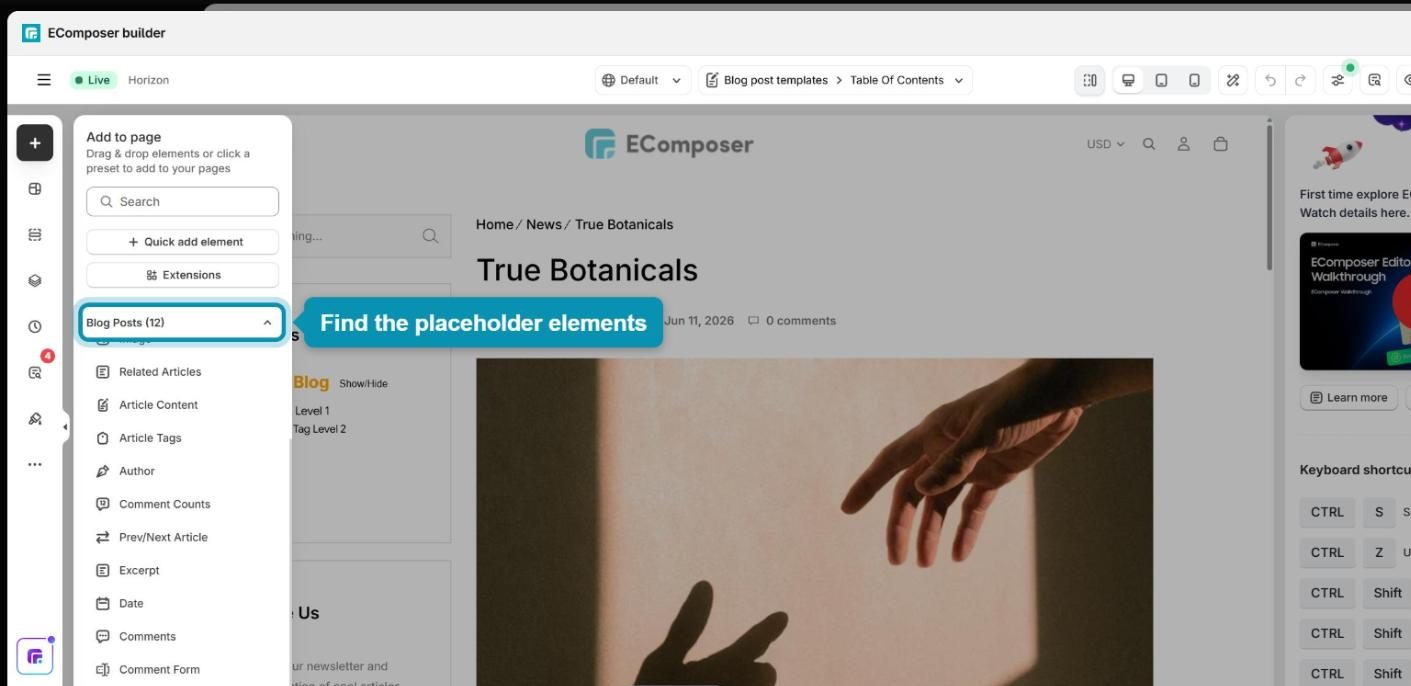
The Article Content placeholder is where the body of each post gets rendered. That body was already written in the Shopify editor, so all you need to do is arrange the placeholders in the layout you like.
Step 4: When the layout looks right, click Publish. In the Save template window, open Assign for and choose where the template applies: Apply for specific blog posts (then select the posts) or Apply for all blog post (Overwrite theme template). Finish with Save & publish.
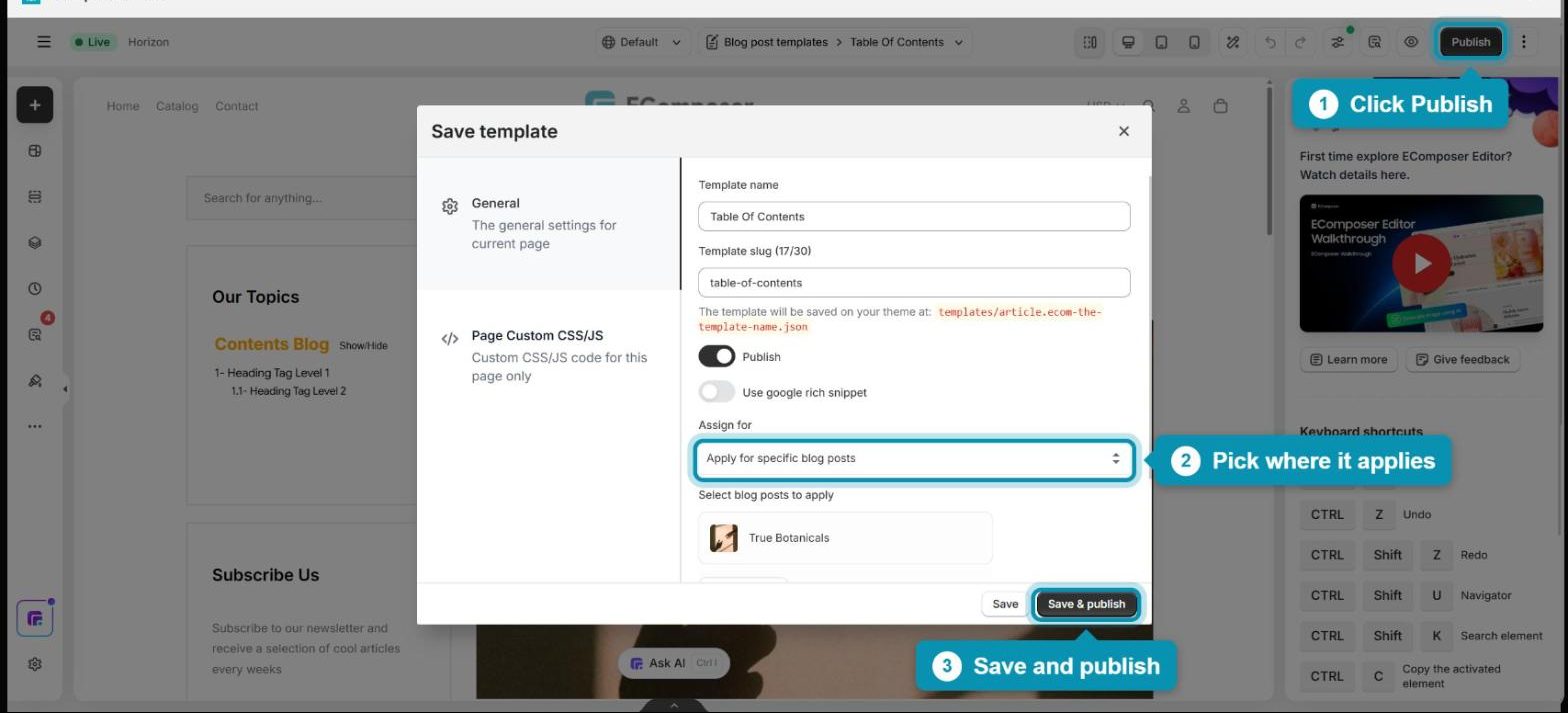
Posts that use the template share the same layout while their content stays dynamic, so each one still shows its own text, images and author. Posts you didn’t assign keep your theme’s default layout.
Note: Choosing Apply for all blog post overwrites your theme’s default blog post template, so only use it when you want every post to share this layout. A blog post template can’t be applied to blog posts that come from apps.