How To Create A Blog List Template in Shopify?
A Blog List template displays all blog posts within a selected blog category.
The default blog template provided by your theme offers only limited customization options. If you would like to create a more advanced and fully customized blog layout without editing code manually, EComposer Builder is an excellent solution.
With EComposer, you can easily design and customize your Blog Template using drag-and-drop elements, flexible layouts, and powerful styling options. In the following guide, we will show you how to build and personalize your Blog List template with EComposer.
1. How to build a new Blog template with EComposer
By default, Shopify provides only one template for all Blogs of your store. This template will overwrite your current theme template and the changes you made will apply to all your Blogs Template.
To create a new Blog Template, please follow these steps:
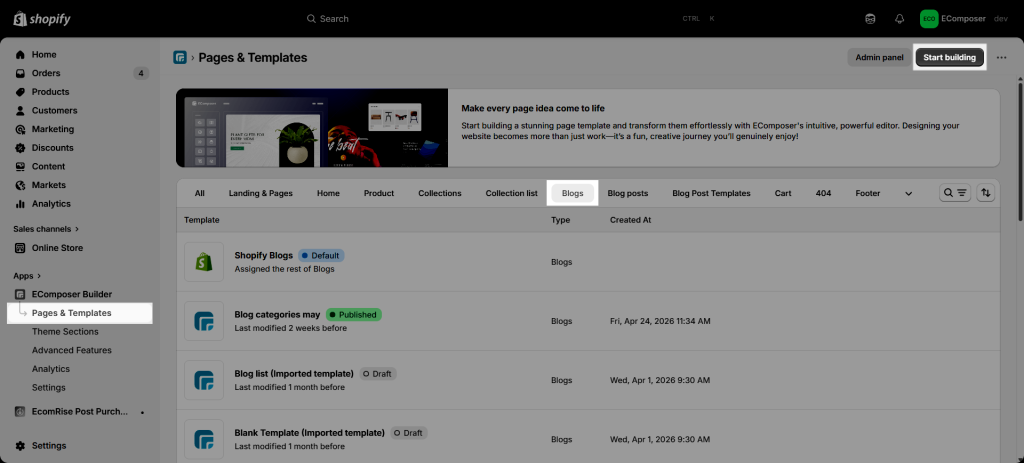
- Step 1: From App dashboard > Pages & Templates
- Step 2: Open the Blogs tab > Start Building
Building content with EComposer Elements
There are two ways to build a Blog template.
- The first way: Start by selecting a structure, then drag and drop any elements from the Elements panel to customize your layout.
- The second way: Go to Library → choose a layout → click Insert to import and use the prebuilt design instantly.
We have some blog elements that can take data from Shopify to display in the app:
- Title: You can use it to show the blog title.
- Articles Count: This allows you to display the number of articles.
- Articles: This element will show all articles in your blog category.
- Blog Tags: This element will help you view the tag for the purpose of letting the reader easily search for your articles.
2. How to assign the Blog template in EComposer to your blogs?
After creating your new Blog List template, click the Publish button in the top-right corner to save your work. In the Publishing popup, enable the Publish option first to display the Assign for setting.
If you only want to save the template without publishing it, simply disable the Publish option or select None in the assignment settings to save the template as a draft only.
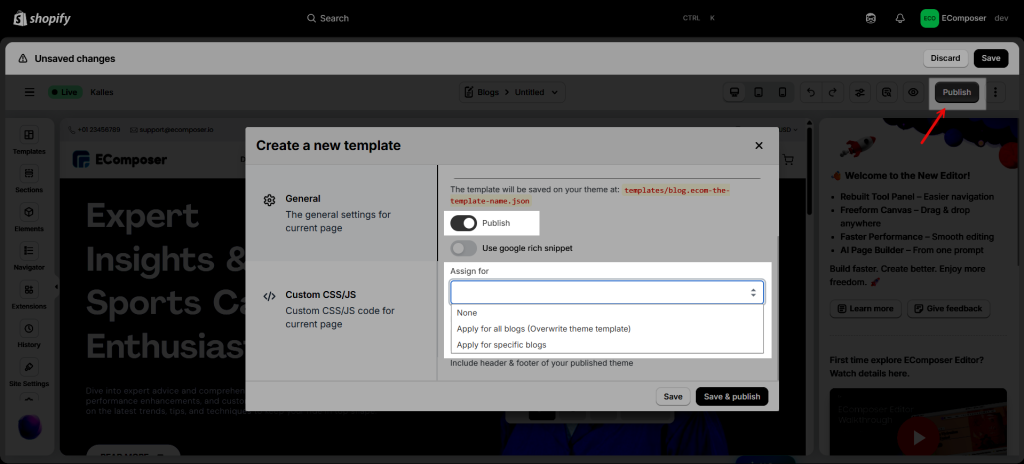
- None: Which means you apply for nowhere, just save it.
- Apply for all Blogs: This action will apply the Blog template from EComposer to all of your blogs. It will overwrite the Shopify default template.
- Specific Blogs: Which means several blogs that you select after will be applied to.
3. How to restore to the Shopify default Blog template?
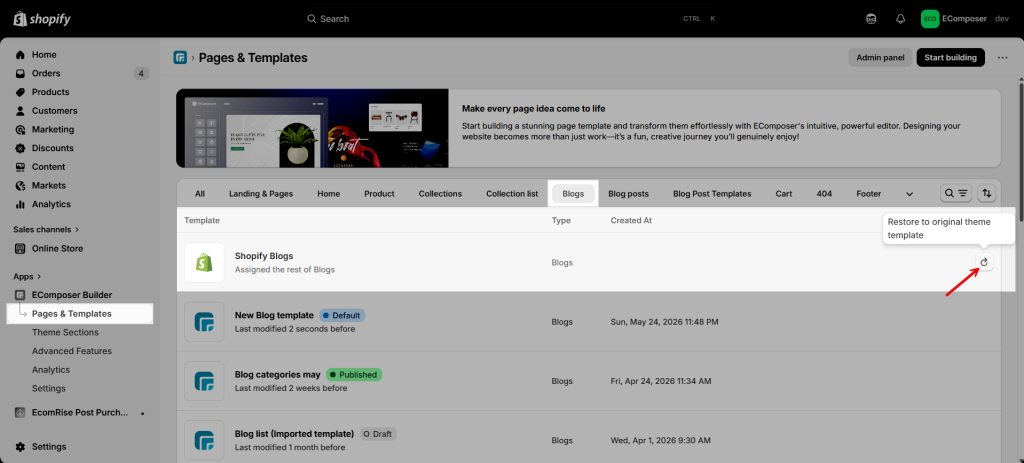
In case you want to unassign the Blog template of EComposer to restore to the Shopify default template, please follow the steps below:
Step 1: From the EComposer dashboard
Step 2: Click on Pages & Templates -> Blogs
Step 2: Click the icon Restore
4. How to delete a Blog template?
Before deleting the Blogs template, please make sure to unpublish the template first. This helps prevent unexpected issues or broken page displays on your storefront during the removal process.
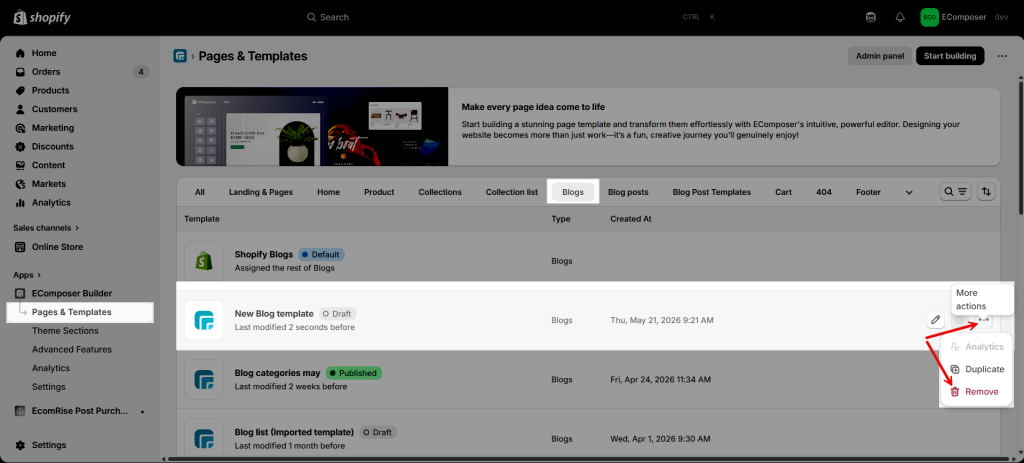
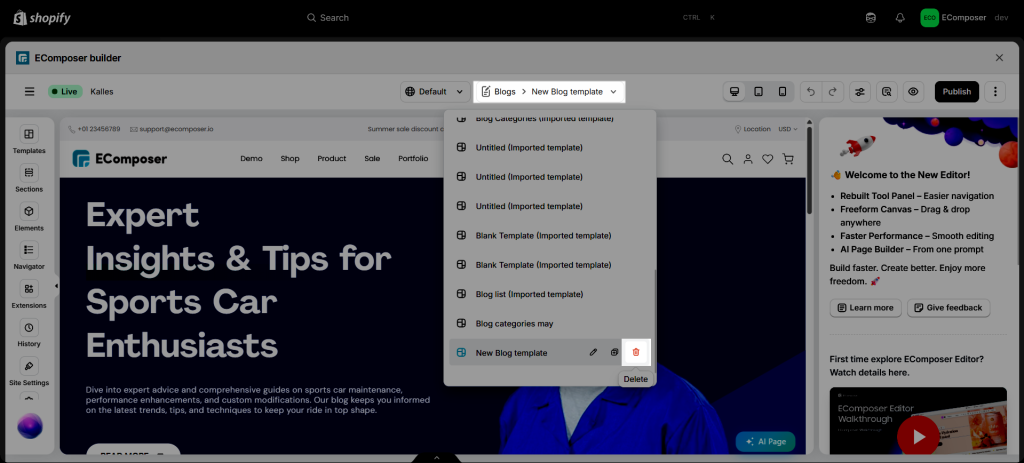
The first way: Click on the dropdown menu Blogs > Delete.
The second way: From the Pages & Templates, choose the page that you want to delete and click on More options > Remove.