How to change the font for all pages in EComposer?
When you build pages with EComposer, the fonts you see can come from three places: your Shopify theme, the template you inserted, or the fonts you set inside EComposer itself. Sometimes you want your pages to match your theme, and sometimes you want a font of your own. This article walks you through both, so your pages look exactly the way you planned.
1. Keep your Shopify theme font when you insert a template
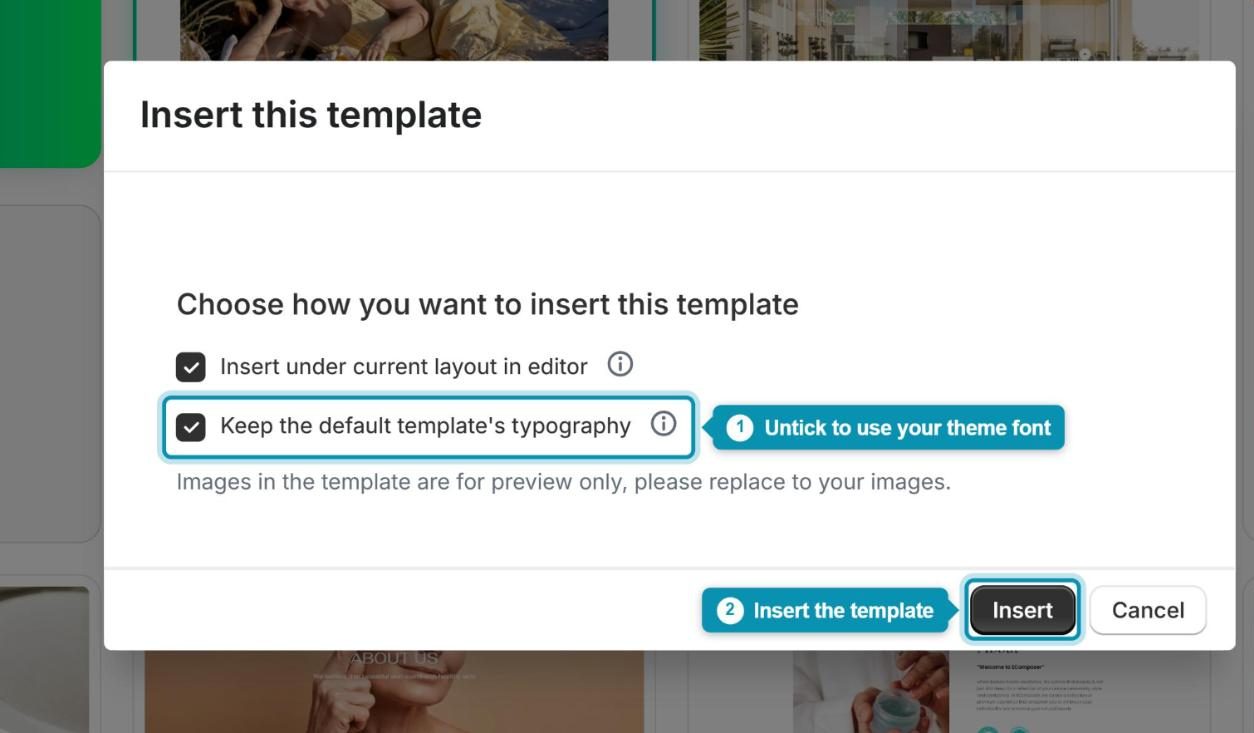
Templates from our library come with their own fonts, so the design stands out right away. When you insert a template, EComposer asks how you want to handle those fonts. If you’d rather keep your Shopify theme font, untick Keep the default template’s typography in the Insert this template window, then click Insert.
Don’t worry if you forgot to untick it. You can switch back to your theme font at any time, as shown in the next section.
2. Reset the fonts on a page to your Shopify theme font
If you want to go back to your theme font after inserting a template, you can reset every font on the page in two steps. EComposer resets the fonts to the ones in your Site Settings first, and to your theme fonts when there aren’t any.
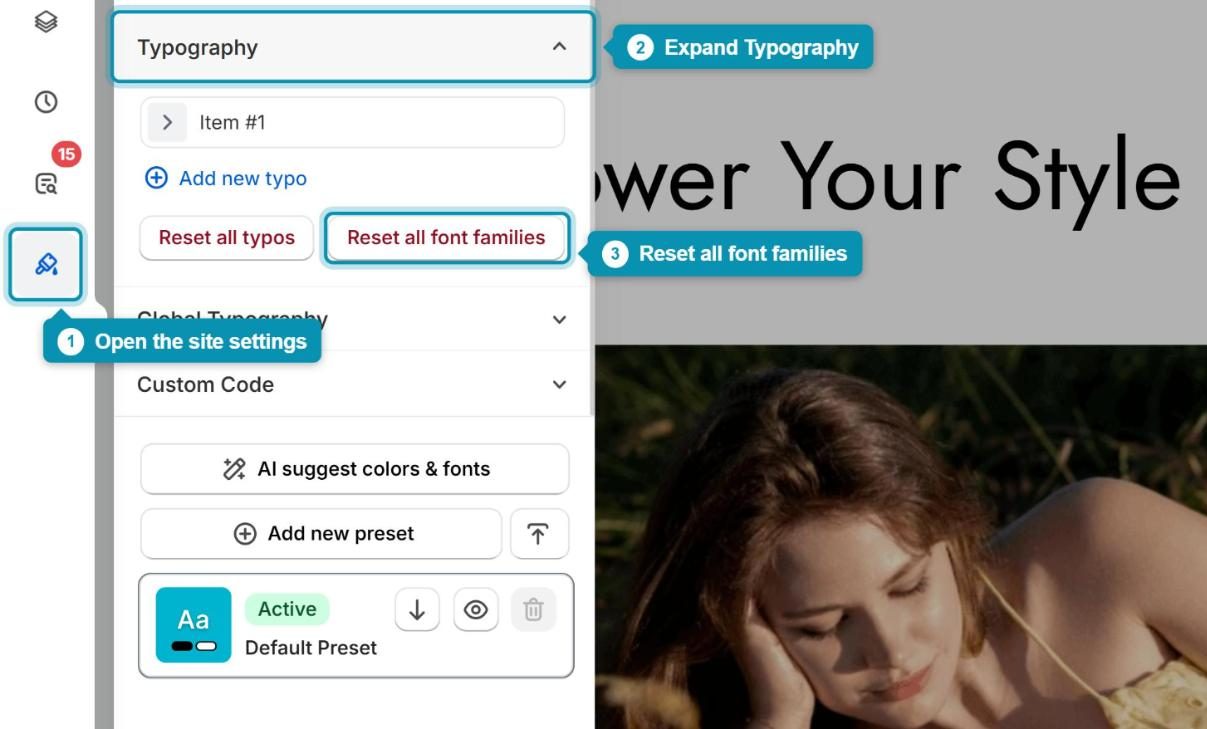
Step 1: Click the Site Settings icon in the left toolbar, open the Typography group, and click Reset all font families.
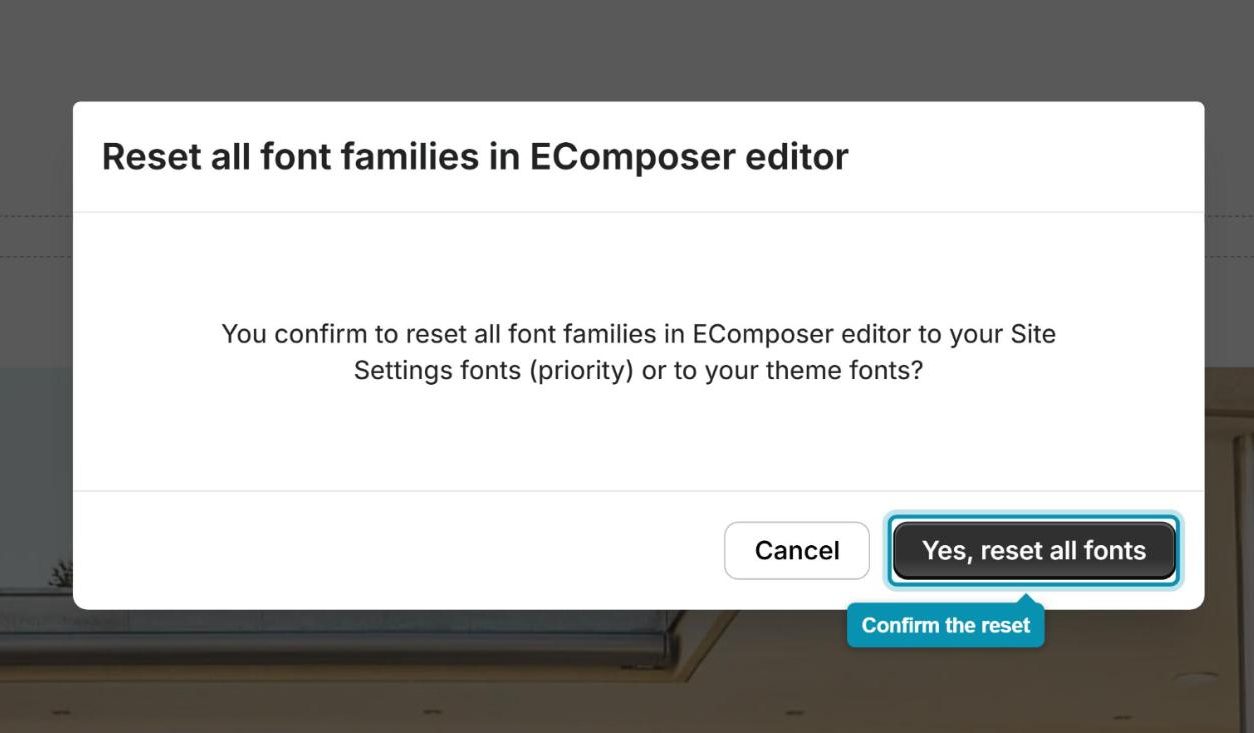
Step 2: In the confirmation window, click Yes, reset all fonts. Every element on the page switches back right away.
Repeat these steps on each page where you want to use your theme font.
3. Reset the font of a single element
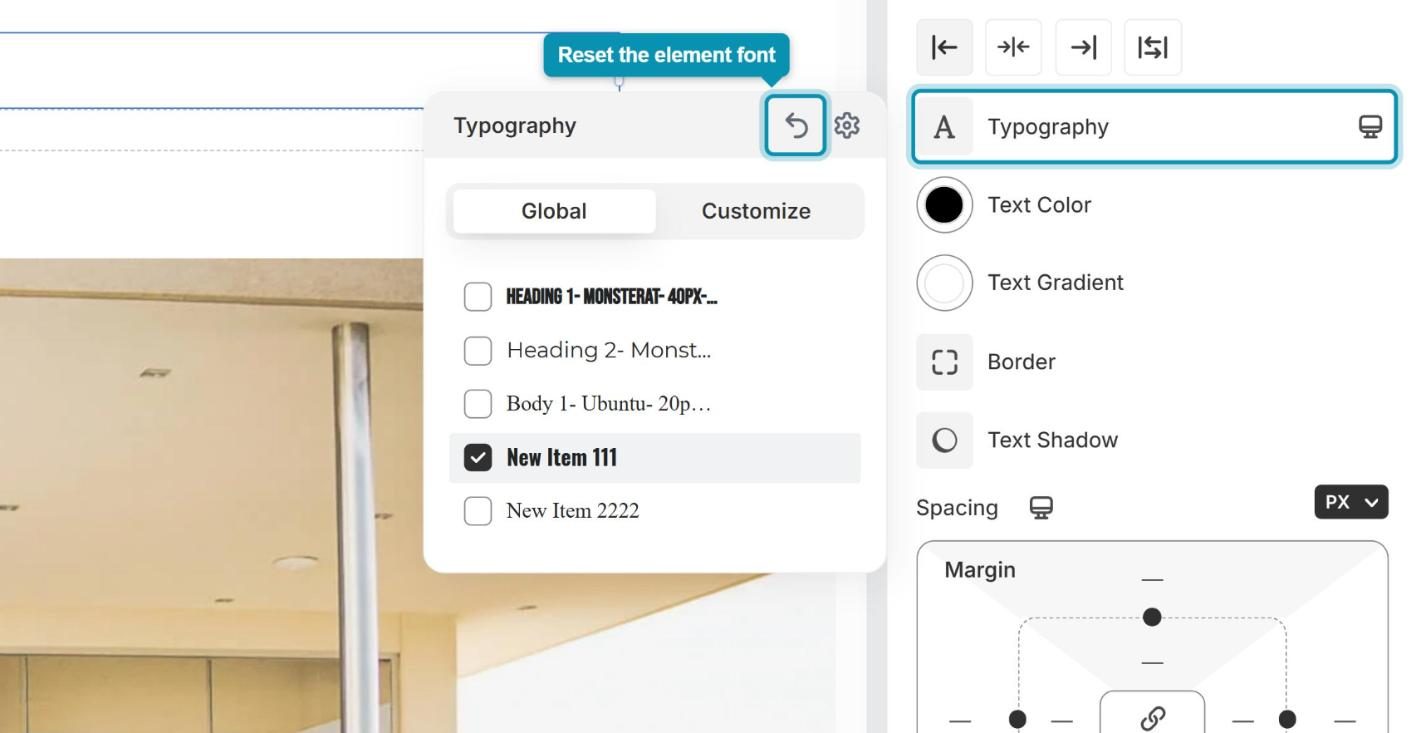
When only one element looks off, you don’t need to reset the whole page. Select the element, open the Design tab, and click Typography. Then click the Reset to default icon at the top of the pop-up, and the element goes back to your theme font.
4. Use a custom font on an element with Typography Customize
Typography Customize changes the font of one element at a time, which is perfect for a heading or a button that needs to stand out. In the same pop-up you can also adjust the size, weight, line height and letter spacing.
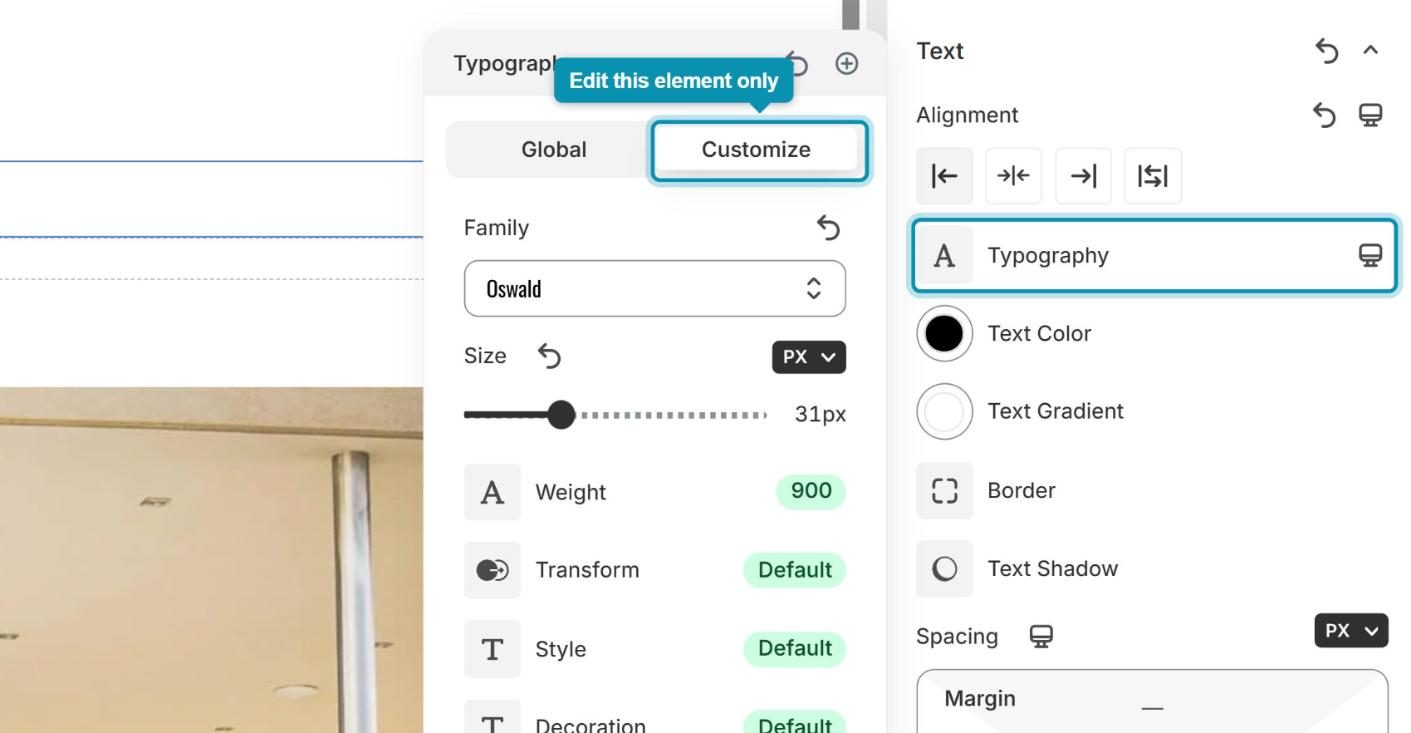
Step 1: Select the element, open the Design tab, and click Typography. Then switch to the Customize tab.
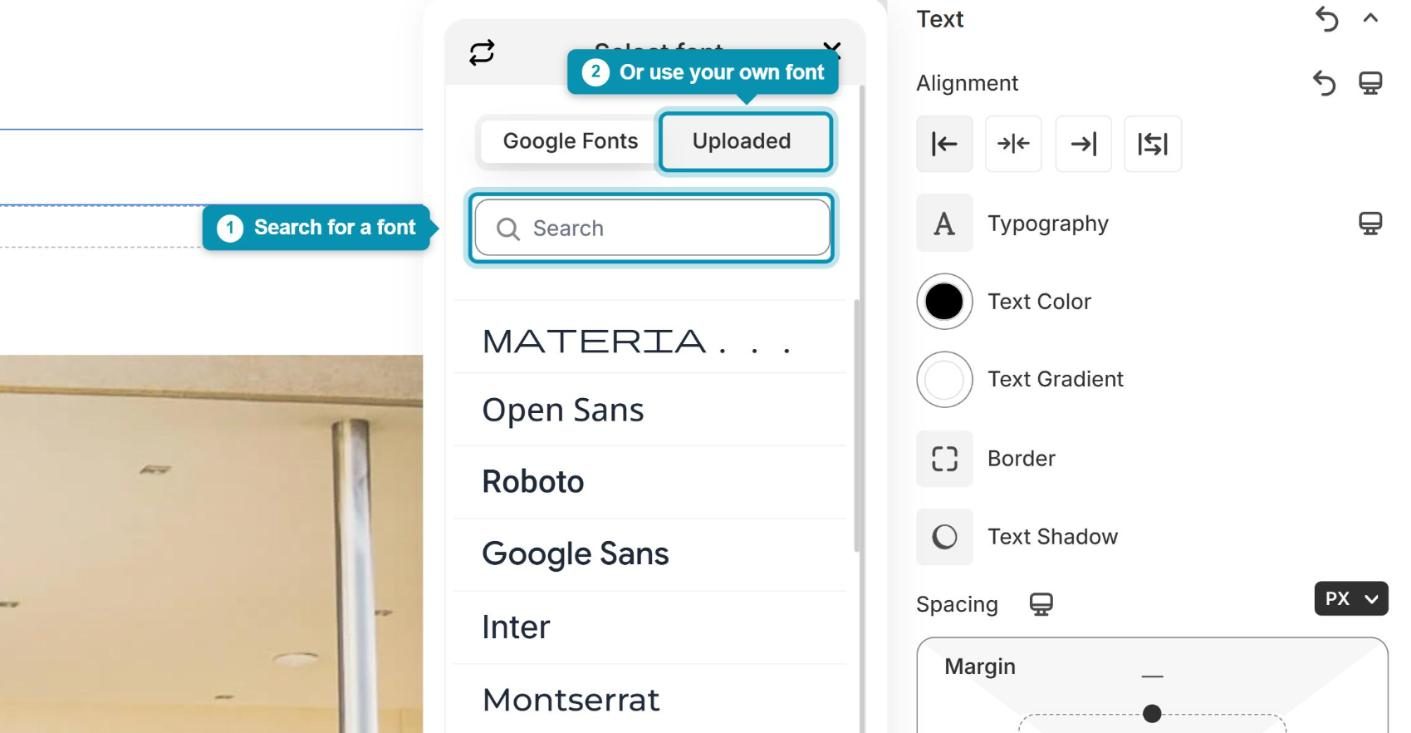
Step 2: Click the Family box and pick a font from the Google Fonts tab. To use your own font file instead, open the Uploaded tab and click Upload Font.
5. Use a custom font across your pages with Global Typography
Global Typography is the best choice when you want to:
- Use a font that’s different from your theme’s default font
- Change fonts later without editing each element again
- Keep typography consistent across multiple pages
You set the font once, and every element linked to it updates automatically.
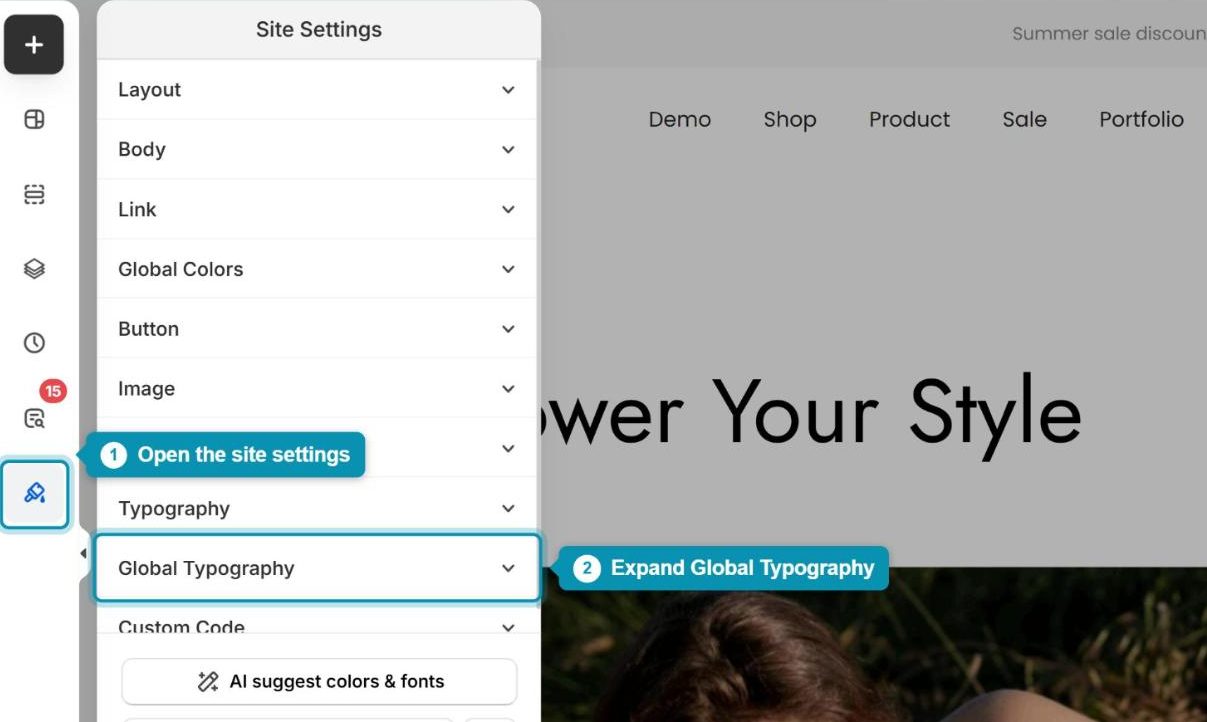
Step 1: Click the Site Settings icon in the left toolbar and open the Global Typography group.
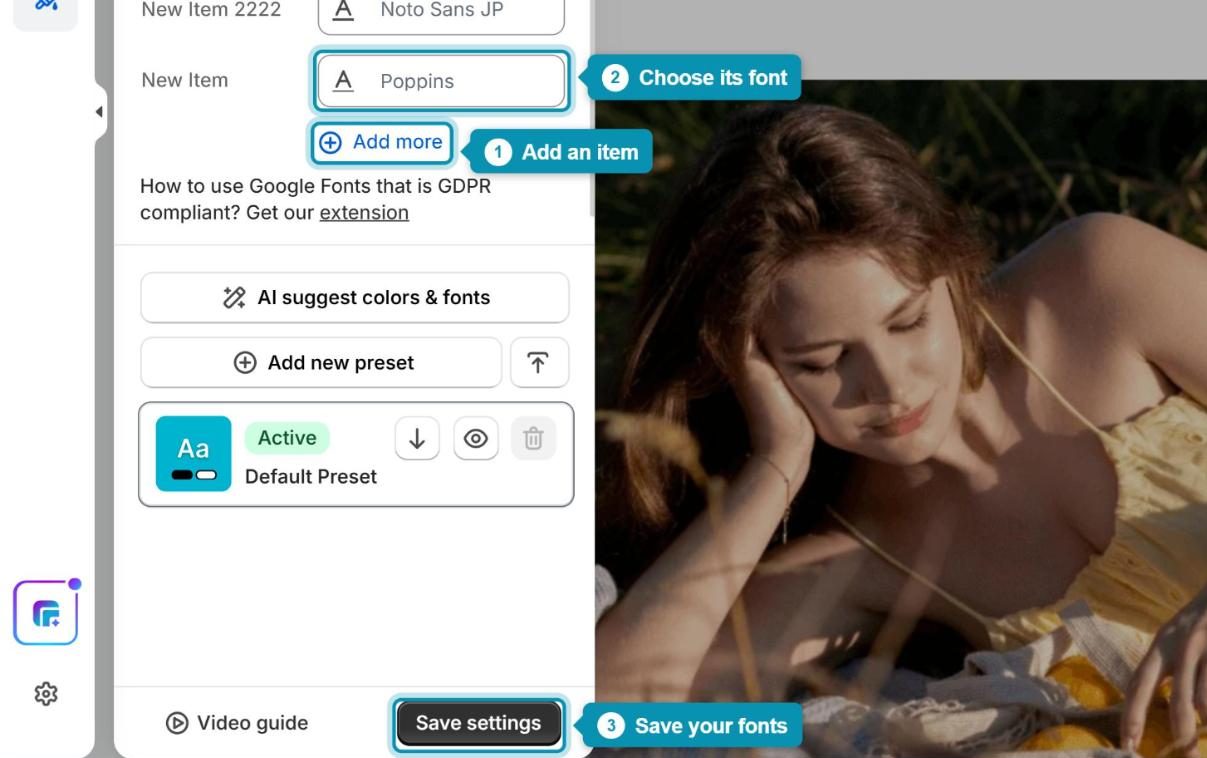
Step 2: Click Add more to create a new item, choose its font family, then click Save settings. You can create as many items as you need, for example one for headings and one for paragraphs.
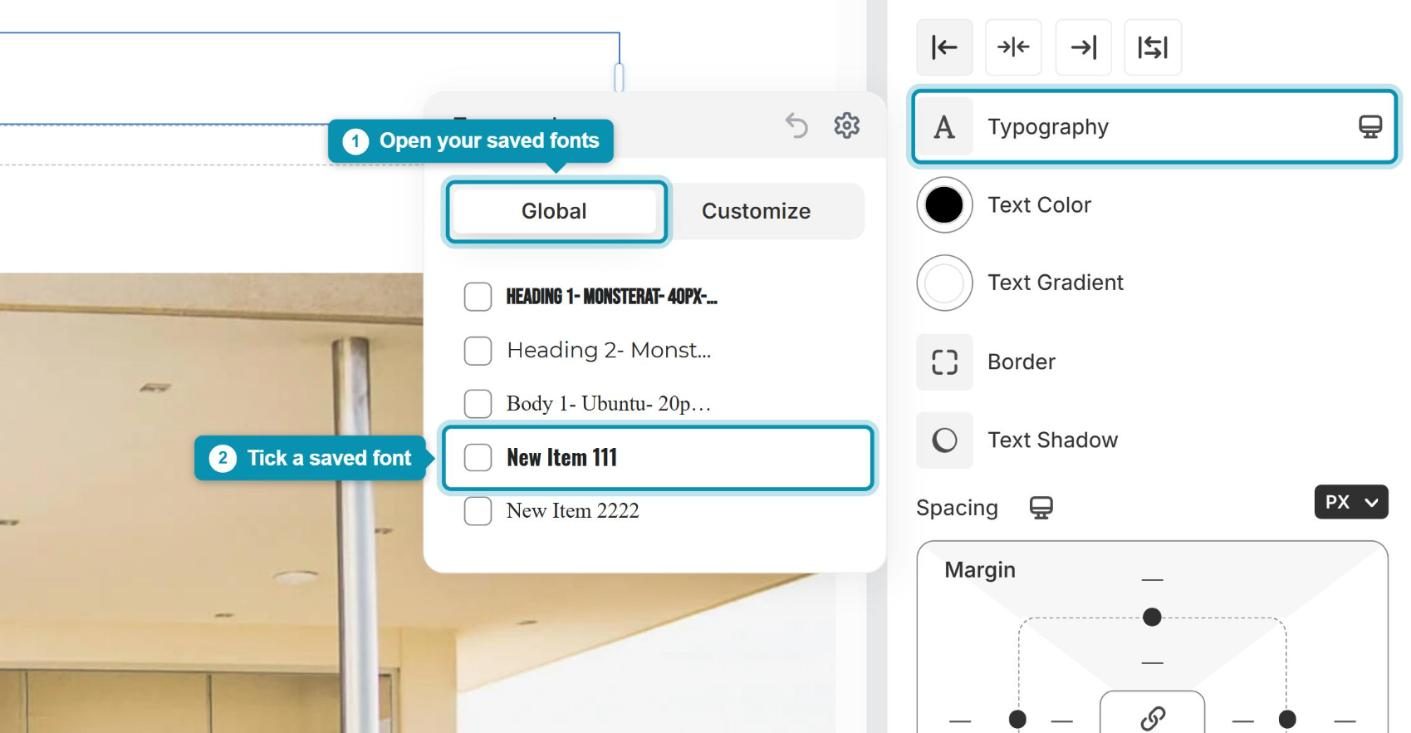
Step 3: Select an element on your page, open the Design tab, and click Typography. Switch to the Global tab and tick the item you created. Repeat this for the other elements that should use the same font.