EComposer Templates
The EComposer Templates was created to help EComposer clients with design suggestions. Here you can easily select, add new, or insert sections and pages. Instead of building a layout block-by-block from scratch, you can instantly import a template and easily modify its content, images, colors, and branding to match your store identity.
The layouts are updated regularly and fully licensed for your website and your clients. In addition, the EComposer Templates also provides a space for users to store their designs and reuse them many times.
1. Open the Templates
Go to the EComposer Editor → Templates to start viewing the templates of the EComposer.
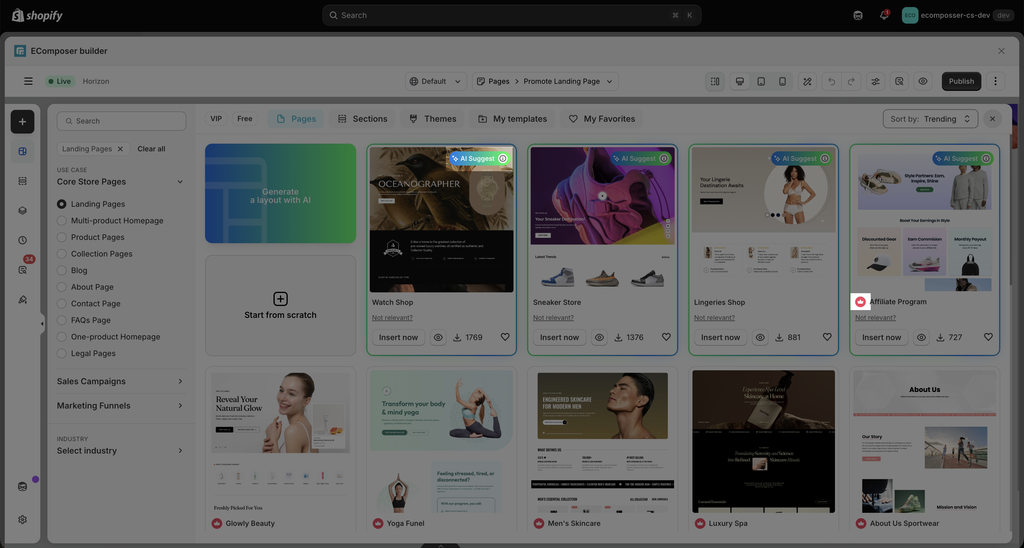
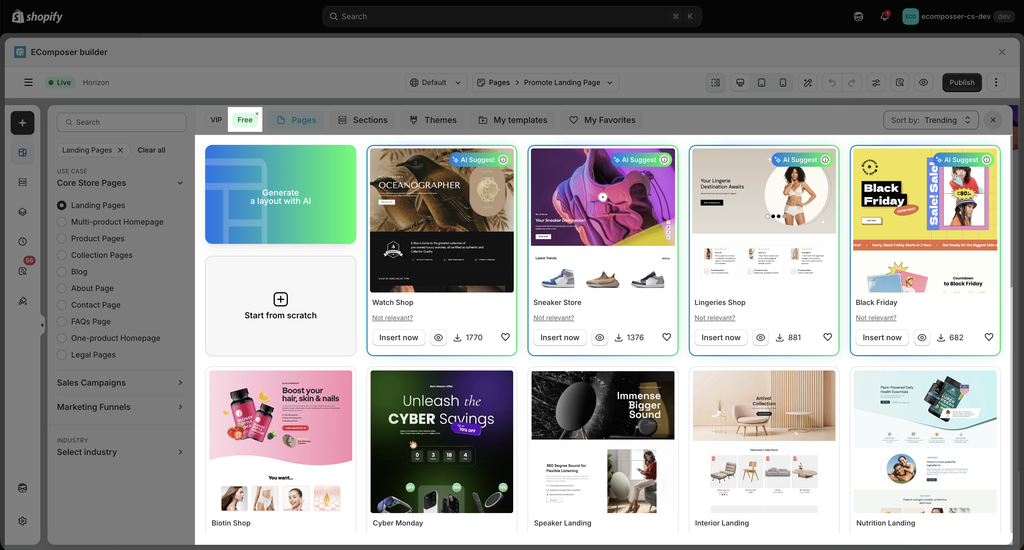
There, you can browse our extensive library of layouts tailored for every business need. Easily identify available templates by their icon tag: Free templates are open to everyone (no icon near the template name), while VIP templates are exclusive to our paid plan subscribers (with a pink crown icon on the left of the template name). You will also see the AI Suggest template.
You can also visit here to see what’s included in our paid plans, check out the benefits, and find the perfect fit for your store.
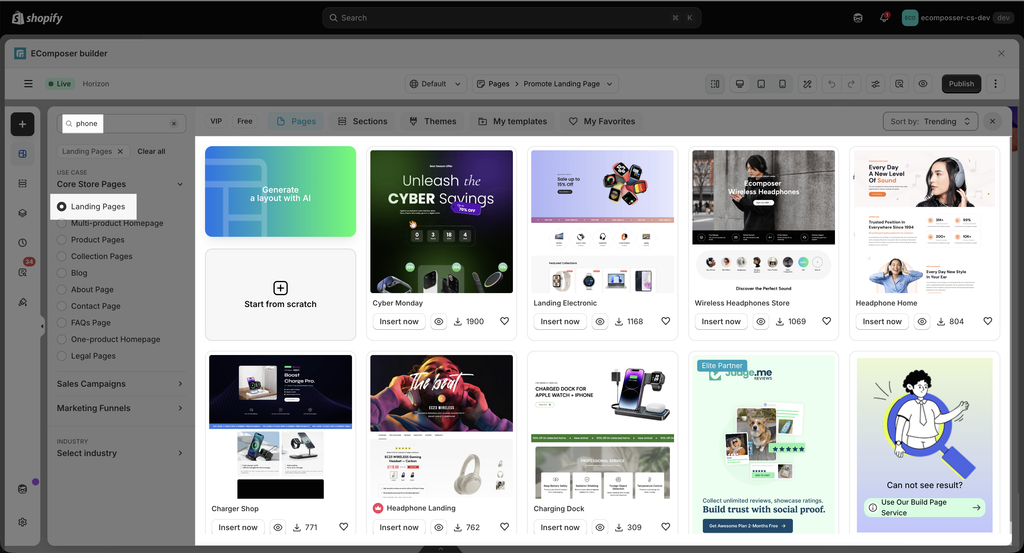
You can also quickly search for a name/ keyword from the search bar right here.
When you want to add a new section, you can also open the Explore Library.
2. How To Use the EComposer Templates?
2.1. AI Suggest Template
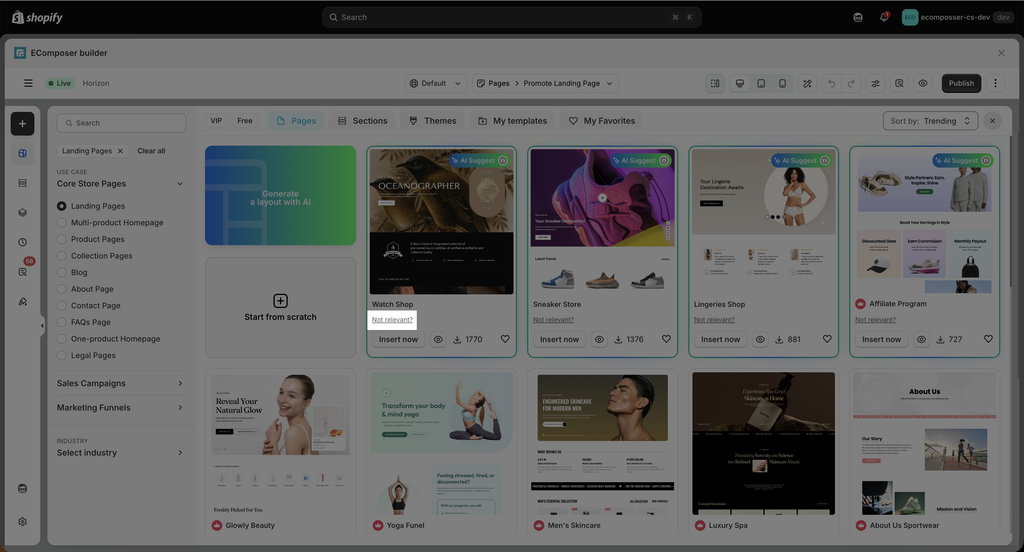
When you create a new page in EComposer, we will open the EComposer Templates and automatically suggest 3 to 5 of the best templates tailored to your store. These recommendations appear at the top of the list with an “AI Suggest” badge.
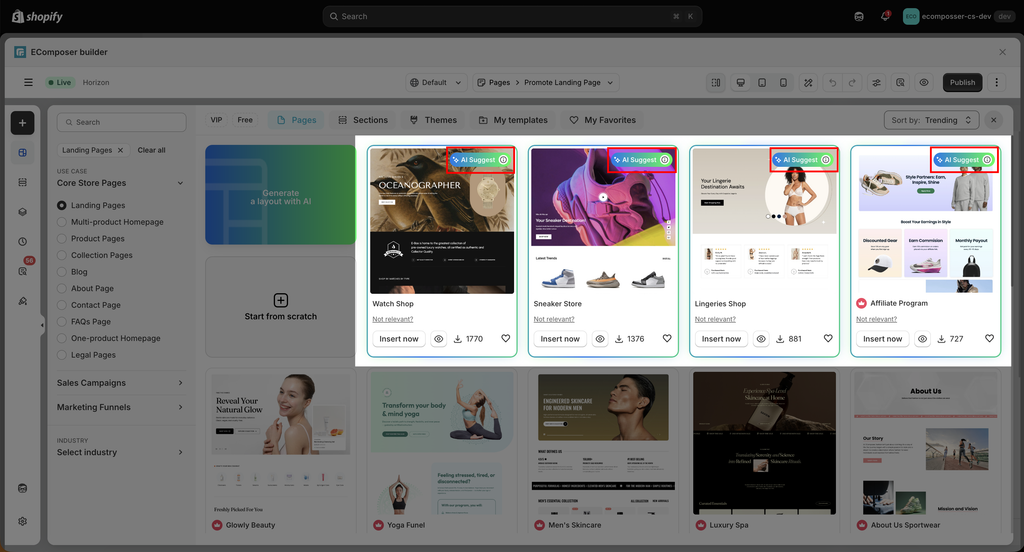
This feature saves you time browsing and helps you quickly find high-converting layouts that match your store’s niche. Suggestions are based on templates that match your niche, have high download rates, and fit the specific page type you are currently building (e.g., Homepage, Product Page).
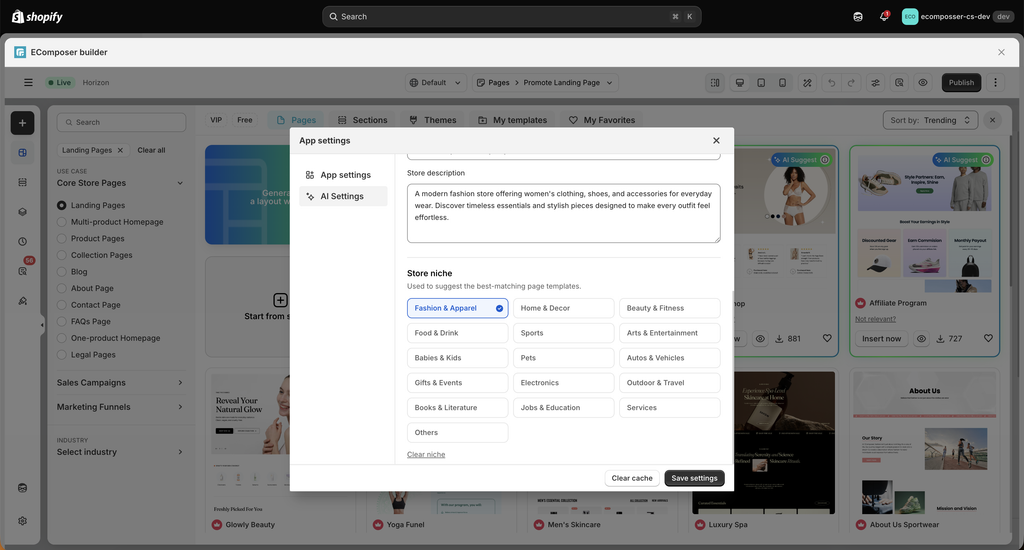
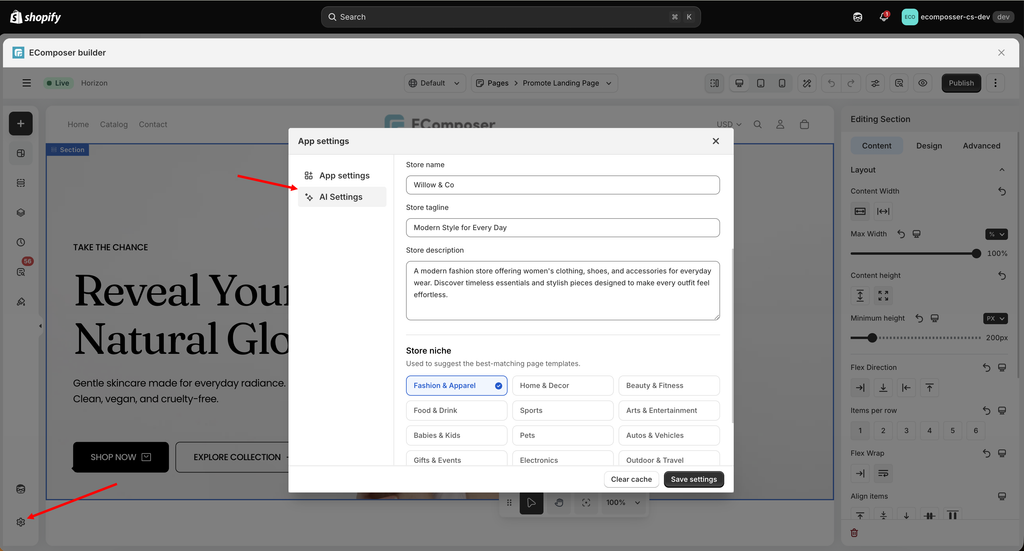
The recommendations are based on the store information you provide in App Settings → AI Settings, including your Store name, Store tagline, Store description, and Store niche. If you have provided your store information in AI Settings, EComposer uses it to understand your store and suggest templates that better match your brand, content, and business niche.
For example, a fashion store with a description focused on women’s clothing may receive template suggestions designed for fashion and apparel stores.
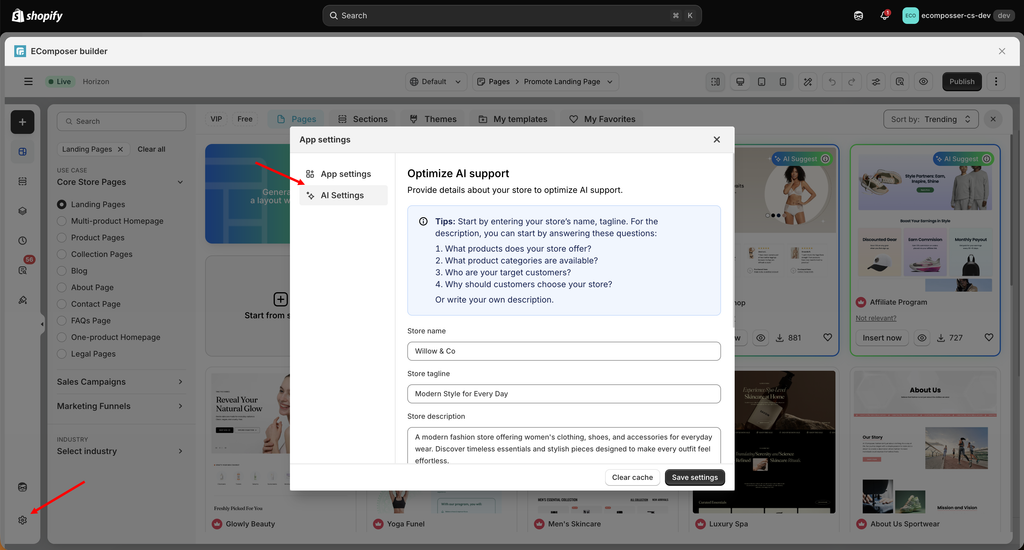
And scroll down to pick your store niche. Click Save settings to save changes.
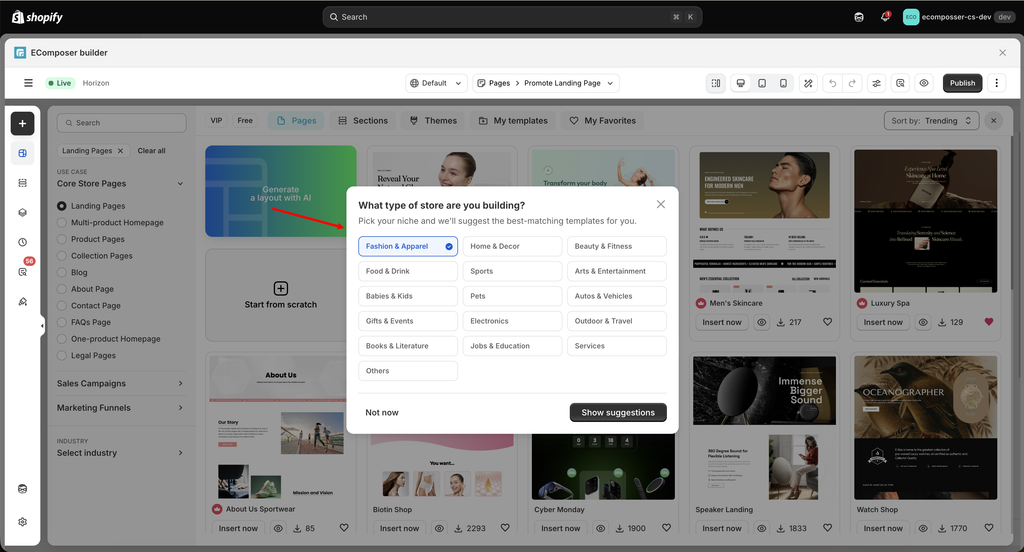
If you haven’t provided the required store information, EComposer will show a niche selection popup when you create a new template. Select the niche that best matches your store and click the “Show suggestions” button. EComposer will use it to recommend relevant templates.
Note: The template suggestions are recommendations based on the information you provide. You can still choose and customize any available template based on your needs.
Note: If you skip this step, AI suggestions won’t display, and you will see all the Prebuilt EComposer templates list instead.
You can click over any suggested template to see a tooltip explaining why it was recommended for your store.
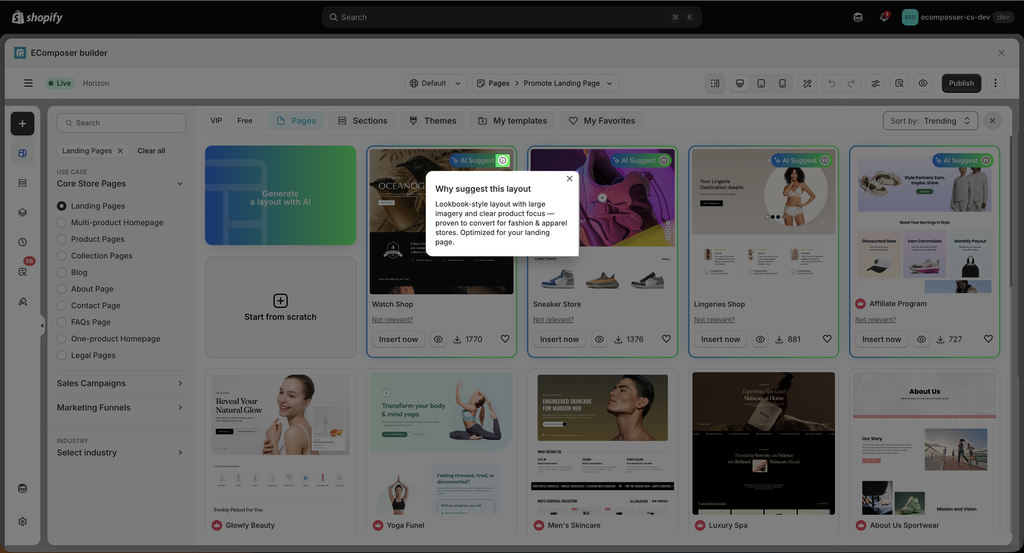
If a recommendation isn’t a good fit for you, click “Not relevant?” to help the AI learn and improve future suggestions.
You can update your store information anytime in the App Settings > AI Settings.
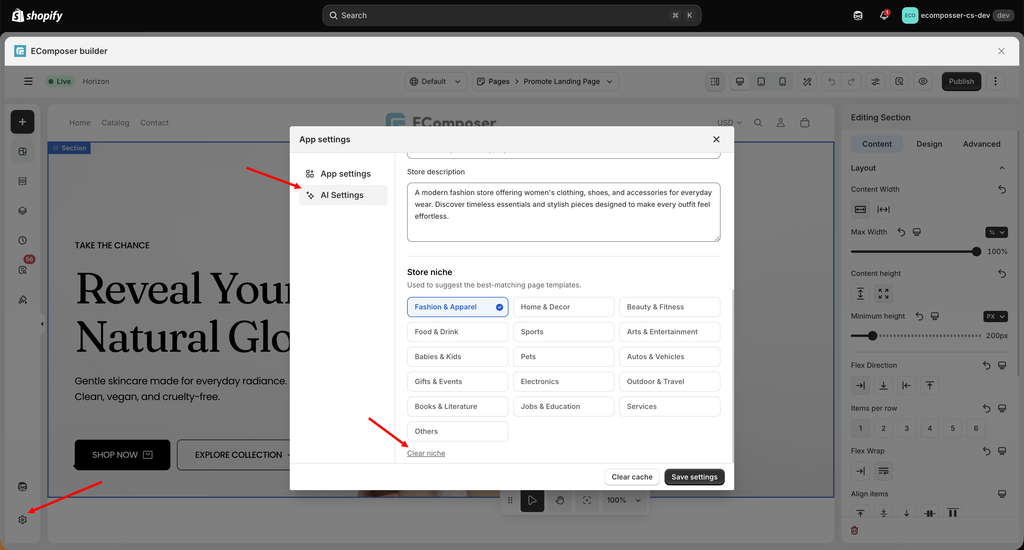
You can also clear the niche anytime you want.
2.2. Free/VIP Templates
Filters a premium, high-converting template for users on Paid Plans. Those templates will have a pink crown icon on the left of the template name.
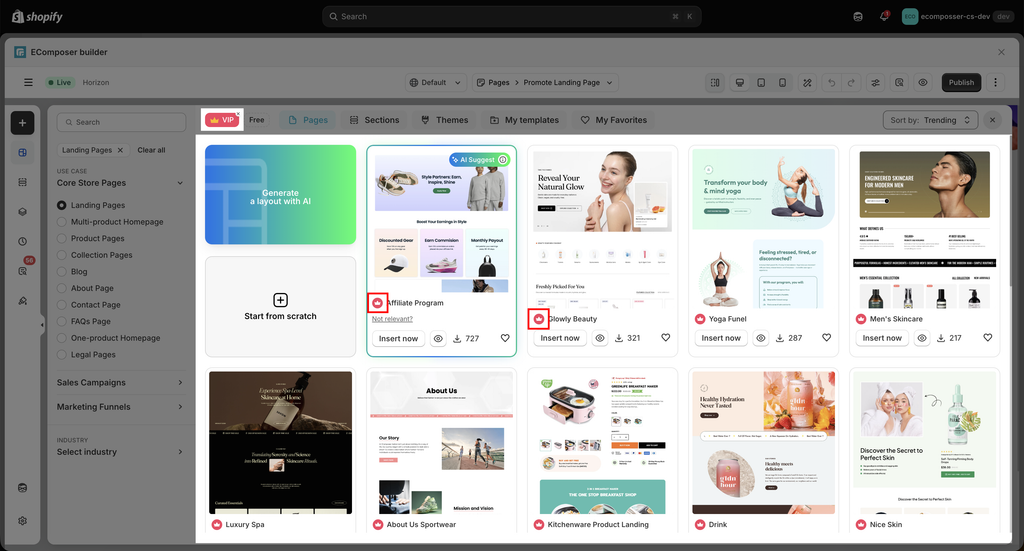
The free layouts/templates available to everyone (including Free Plan users) with zero added costs.
2.3. Sections
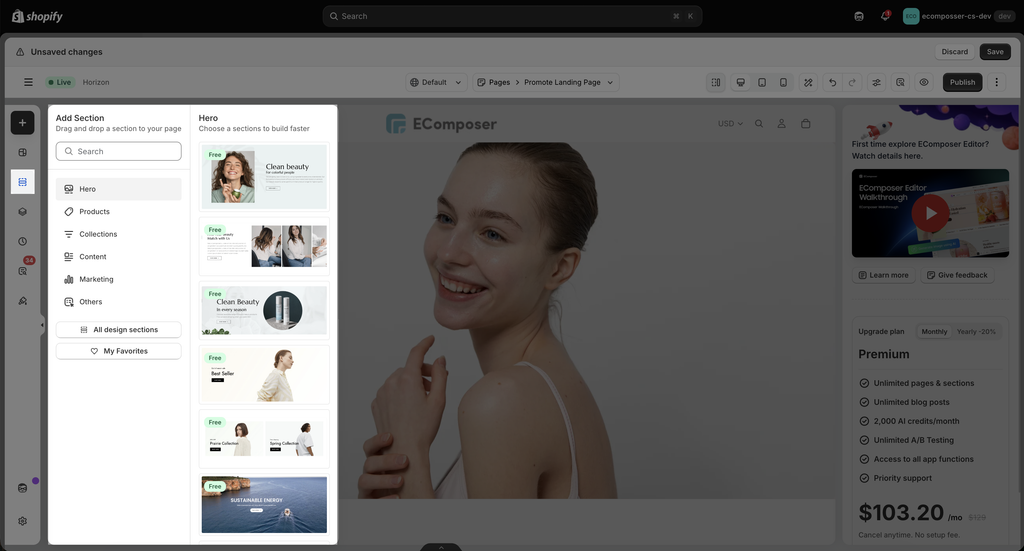
The Section Templates are small parts of the page with widgets pre-configured and designed.
The left side is the section categories that help you quickly find a desired section, including: Hero, Products, Collections, Content, Marketing, Others.
The Search Bar at the top right of the Sections is used to find a specific template in terms of website theme, for example: plant, pet, skincare, etc.
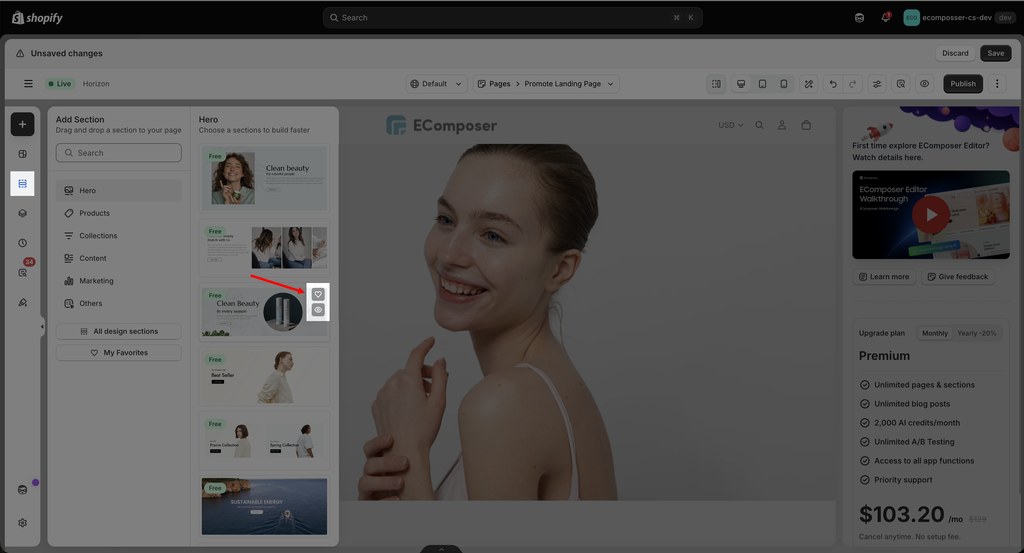
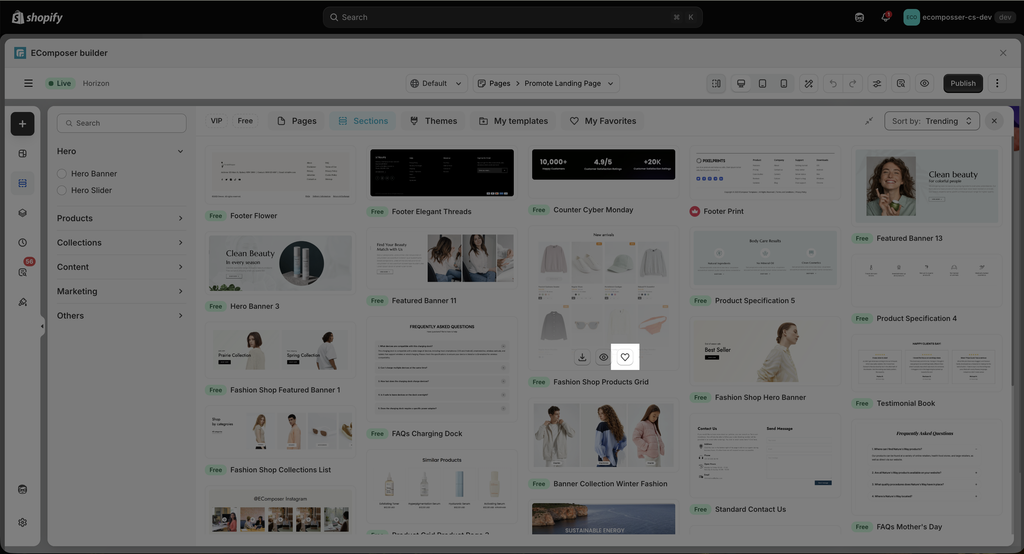
You can especially preview the design through the Preview icon or add the Template to Wishlist to view later.
You can also explore all the design sections from our app by clicking the All design sections button.
You can click on the section that you prefer → Insert Now to use.
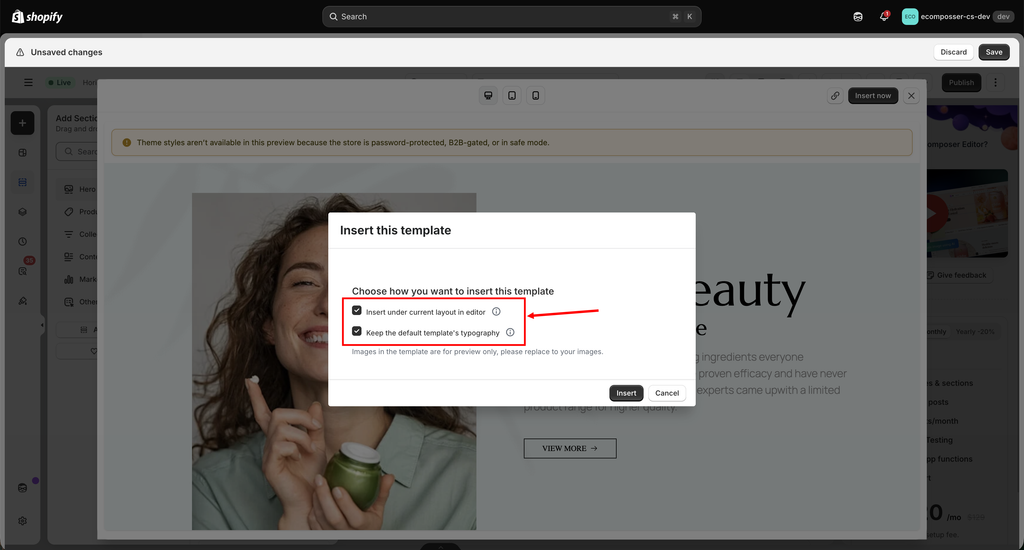
Choose how you want to insert this template
- Insert under current layout in editor: Add this design to the very bottom of your current viewport that you’re working on.
- Keep the default template’s typography:
- If checked: The app will import both the demo content and the element styles from the template (e.g., heading, text, image), which will override your theme’s default styles.
- If unchecked: The app will use the typography from your Site Style settings (if available) or from your theme settings (if no Site Style is set).
2.4. Pages
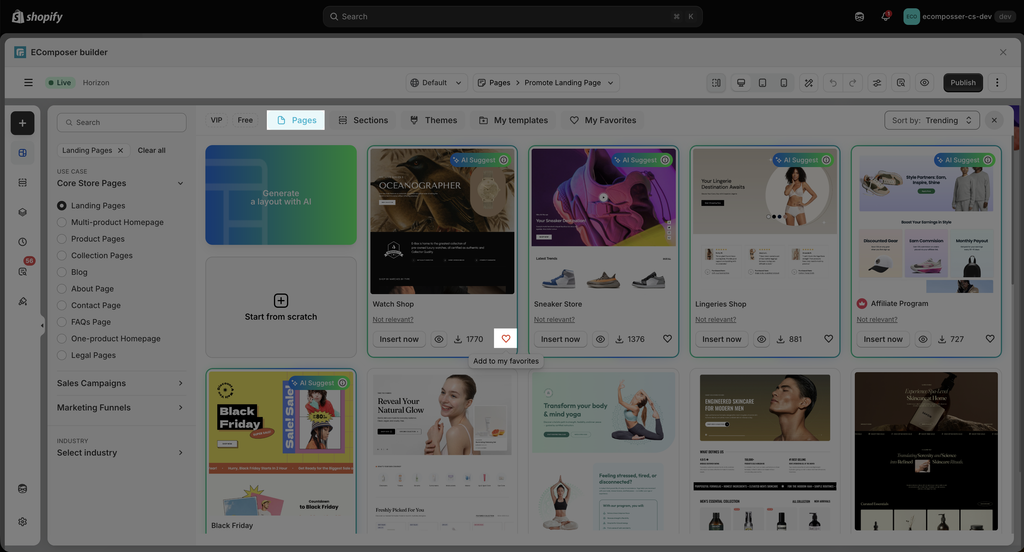
Page Templates are pre-made pages with a full layout, with sections and widgets pre-configured and designed like Homepage, Landing Page, etc. The functions of tabs are the same as Sections.
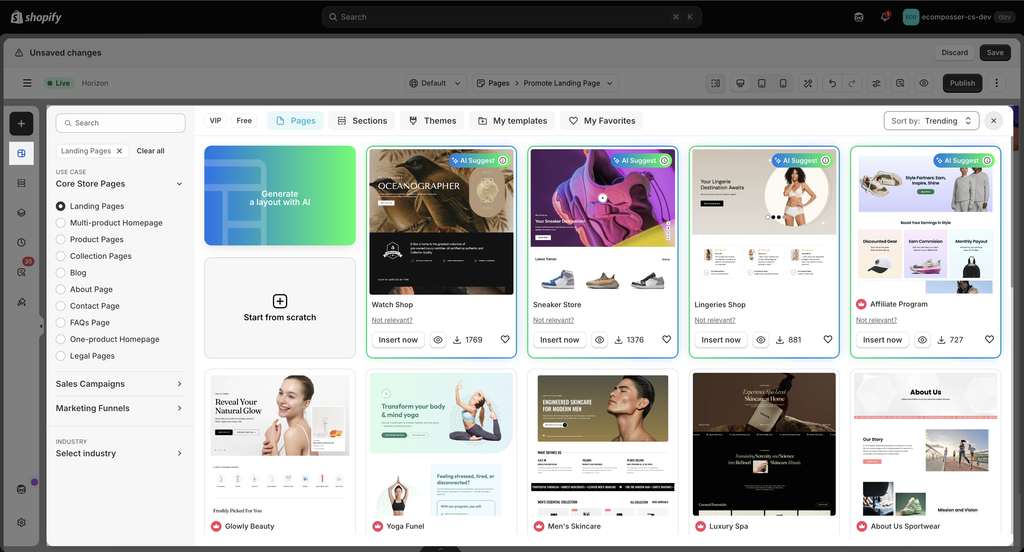
We divided all the page templates into 3 use cases: Core Store Pages, Sales Campaigns, Marketing Funnels.
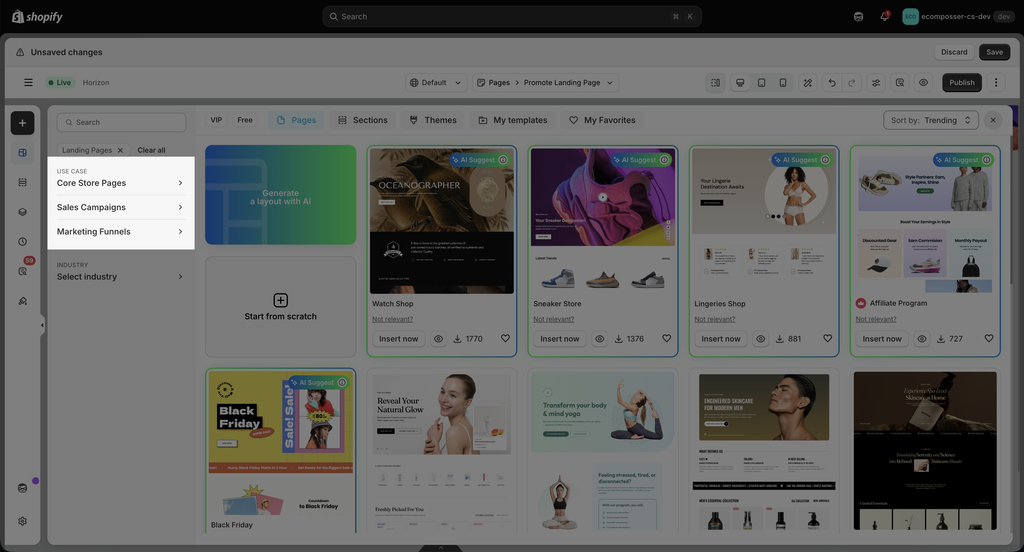
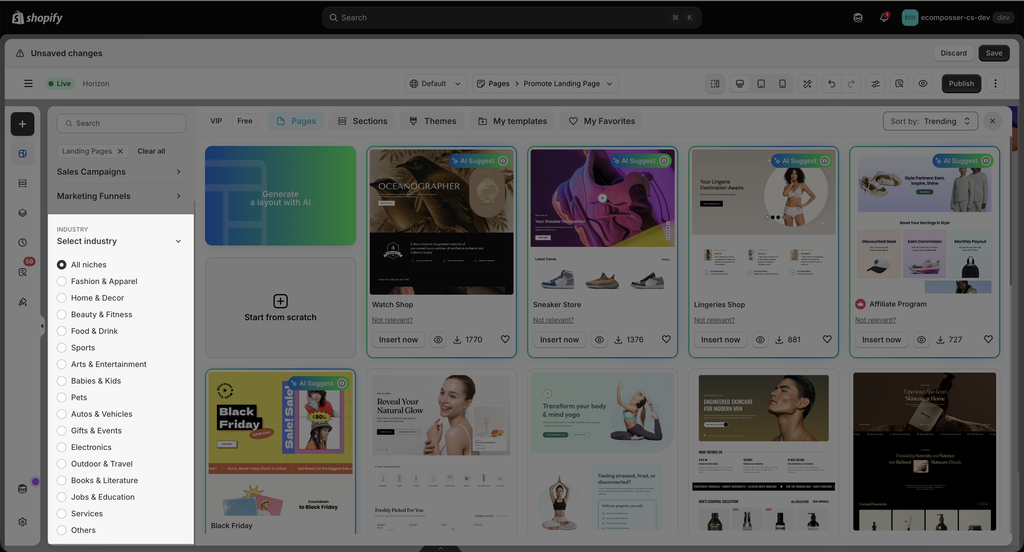
You can also filter the page template via INDUSTRY.
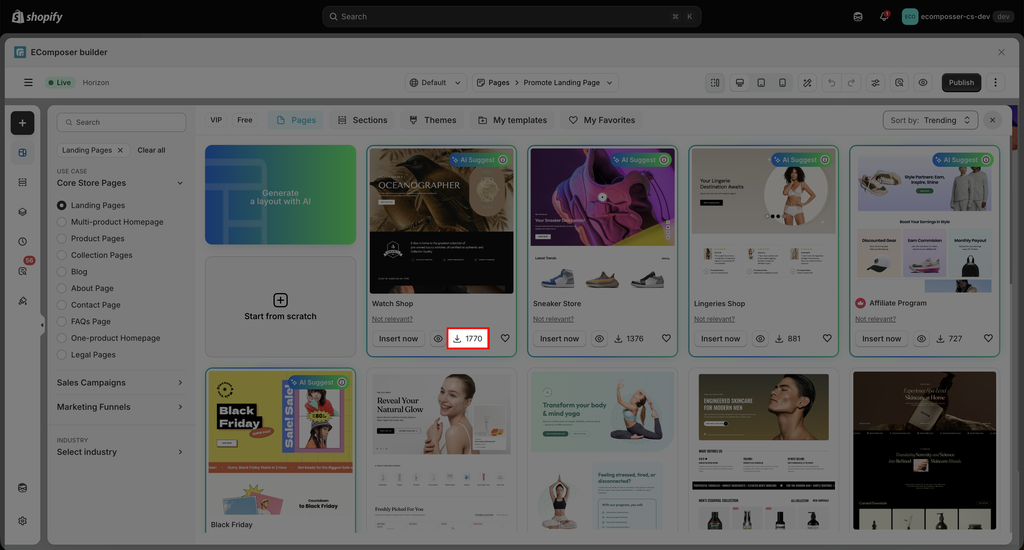
Hovering over or clicking a specific template card opens a dedicated detail panel. Before installation, you can inspect the template using these functions:
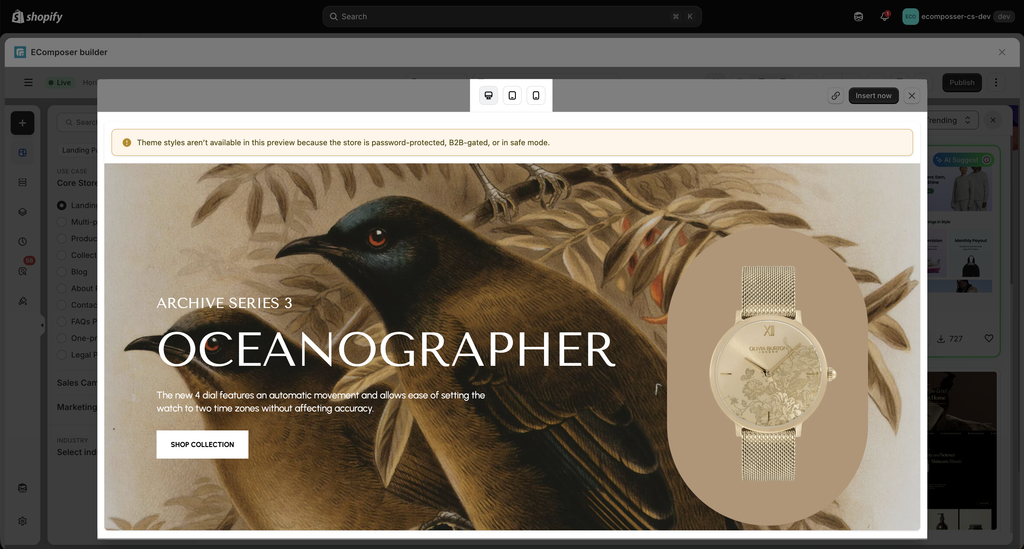
- Live Preview: You can toggle between Desktop, Tablet, and Mobile viewports to test layouts, animations, and text readability before importing.
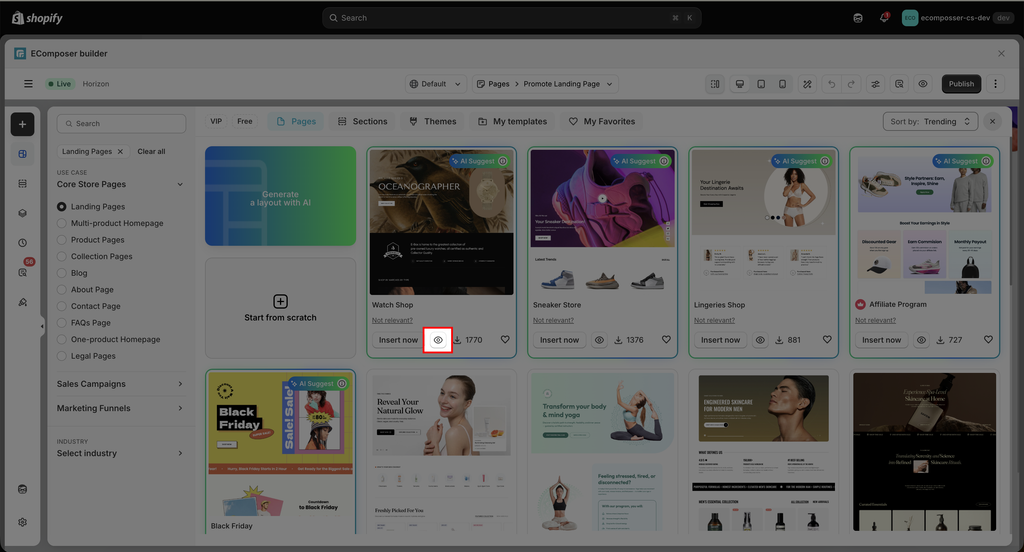
- Install Count: Displays a live counter of how many times the template has been used. A high install count serves as social proof, indicating a highly trusted, popular, and optimized layout.
2.5. Themes
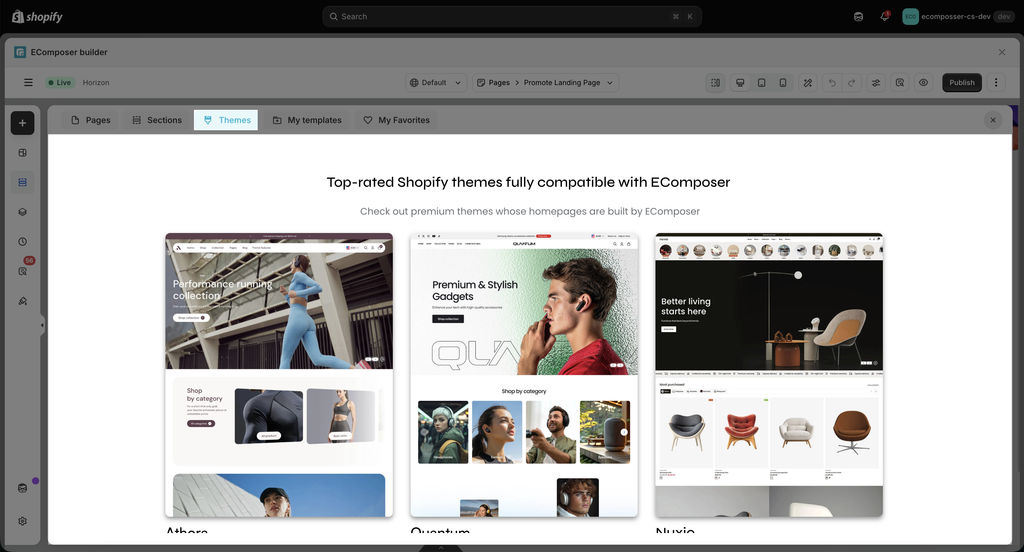
Here you can check out the premium Shopify theme list that is built with our partner. There is an exclusive Offer for buyers that you will get the EComposer Standard plan for free for 6 months! You can view more details about it here.
2.6. My Templates
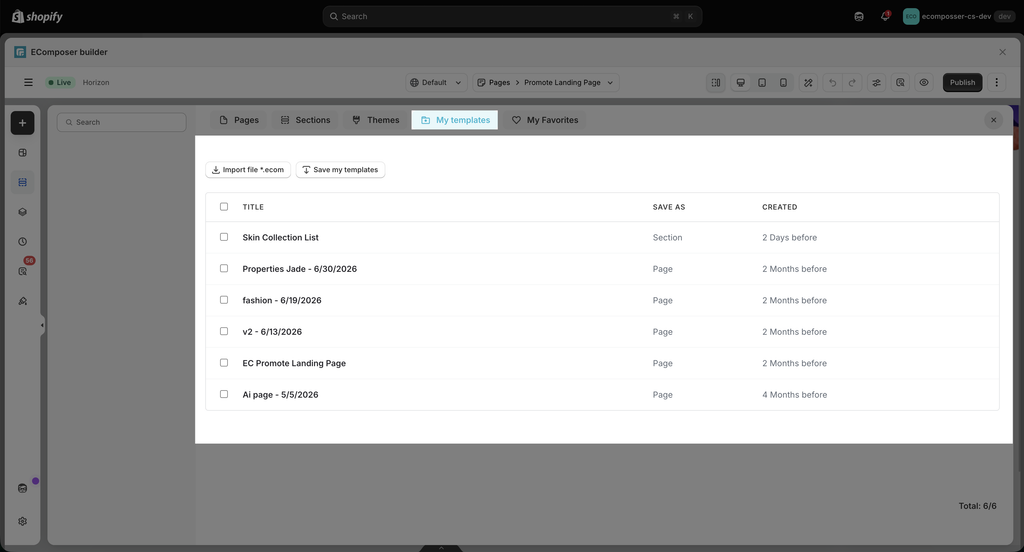
This function mainly helps you save your designs and reuse them on other pages.
- First, you can right-click to see the Save as template option.
- Then enter the template name > Click the OK button.
- Navigate to the target page from the top bar.
- Open Templates > My templates > click Insert now on the section you just saved.
Result: the section will appear on the second page at the very bottom.
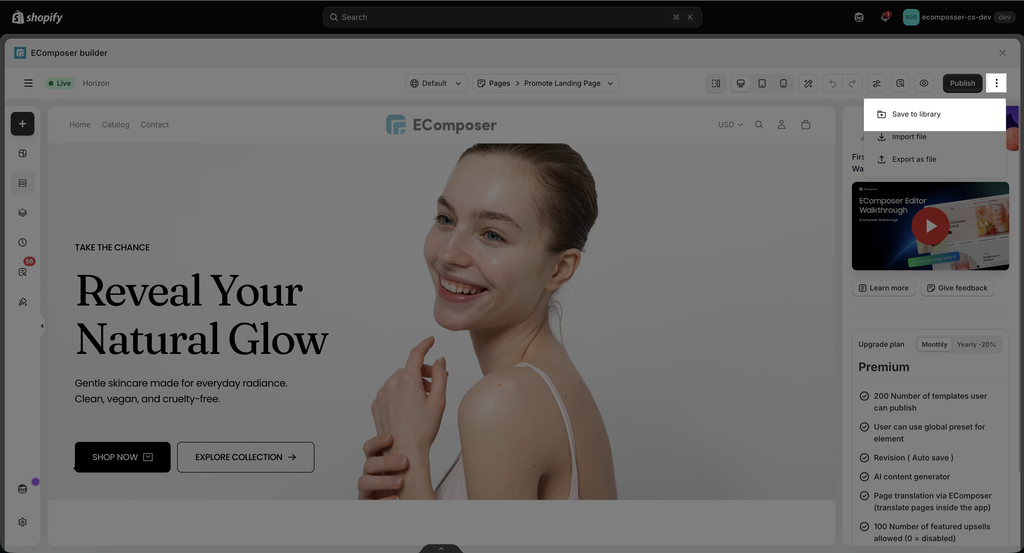
In addition, if you want to save the full layout of your page, please top right icon -> Save To Library -> Enter template name -> Save.
Note: You can also upload section files from your computer to My Templates via Import file with file /*.ecom/. Finally, you select Insert to use it.
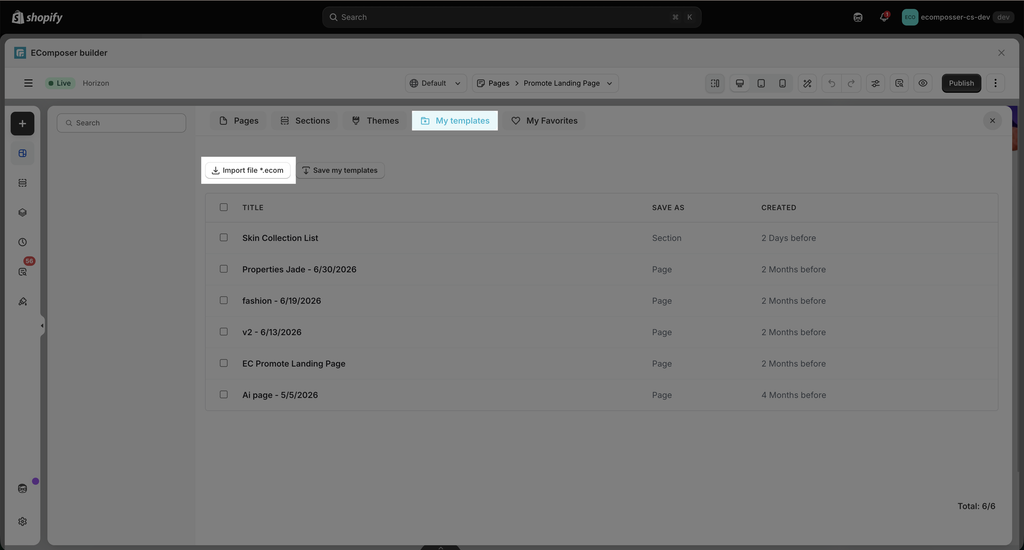
For further information about importing an ecom file, you can check this guide.
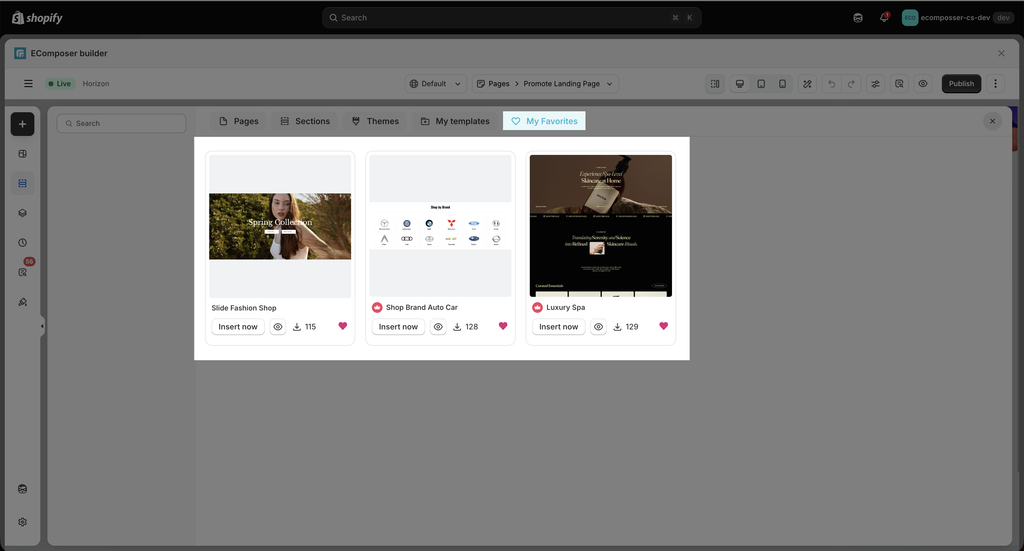
2.7. My Favorites
Show all the templates that have been added to the favorite by you to view later.
2.8. Sort by
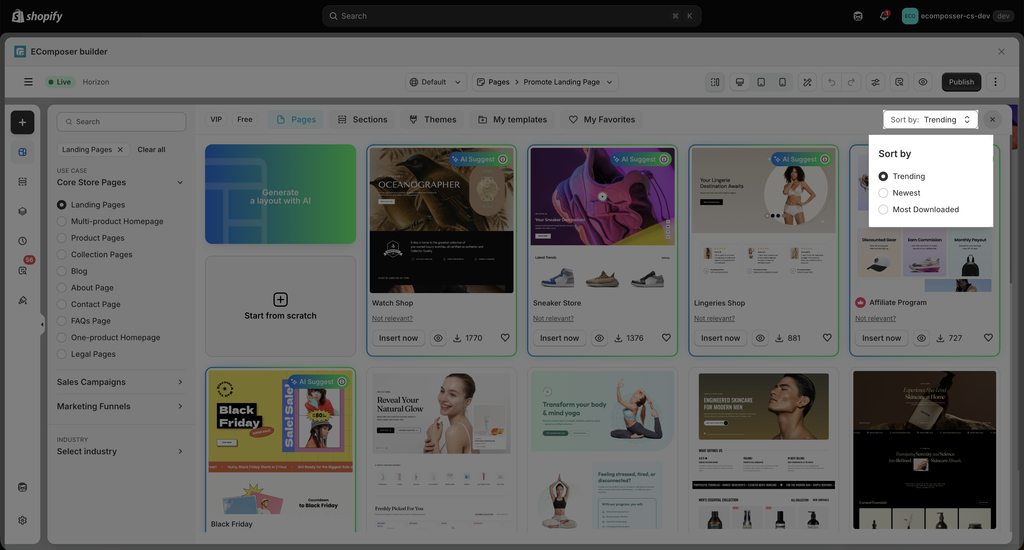
The Sort by dropdown is a powerful tool to discover market trends and fresh designs. You can sort the library by:
- Newest: Displays the latest designs added by our design team.
- Most Downloaded: The most popular and frequently installed templates in EComposer all the time.
- Trending: Showcases the most frequently installed and highly rated templates by the EComposer community over a short period.
2.9. How to pick and then use a certain section of a Page in the Library?
You can watch and follow this video:
3. Pro-Tips & Best Practices
To maximize the potential of EComposer’s template ecosystem and your development workflow, keep these expert strategies in mind:
- Combining Pages and Sections: Don’t limit yourself to using just one template. Expert SaaS store builders often import a Page Template to establish the core layout of their homepage, then jump into the Sections tab to add the relavant sections. Mixing and matching makes your store unique and highly functional.
- Mobile-First Mindset: Over 70% of e-commerce traffic comes from smartphones. When previewing a template, always spend a few moments adjusting its Mobile View. Ensure your text isn’t overwhelming, images aren’t cropped or too big, and your “Add to Cart” buttons remain easily tappable on smaller screens.
- Choose Layout Structure Over Color: Don’t discard a template just because you don’t like its colors or fonts. Colors, typography, and imagery can be edited easily in one click via EComposer’s Global Settings. Instead, choose a template based on its structure, and focus on whether the placement of banners, value propositions, and Call-to-Action (CTA) buttons matches your conversion goals.