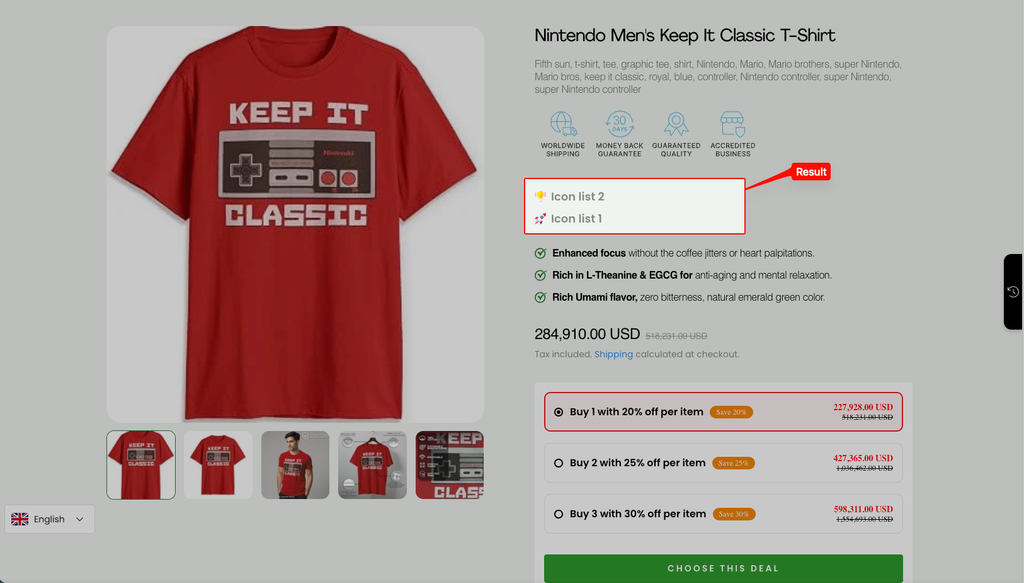
How to create Icon List with metafield and metaobject
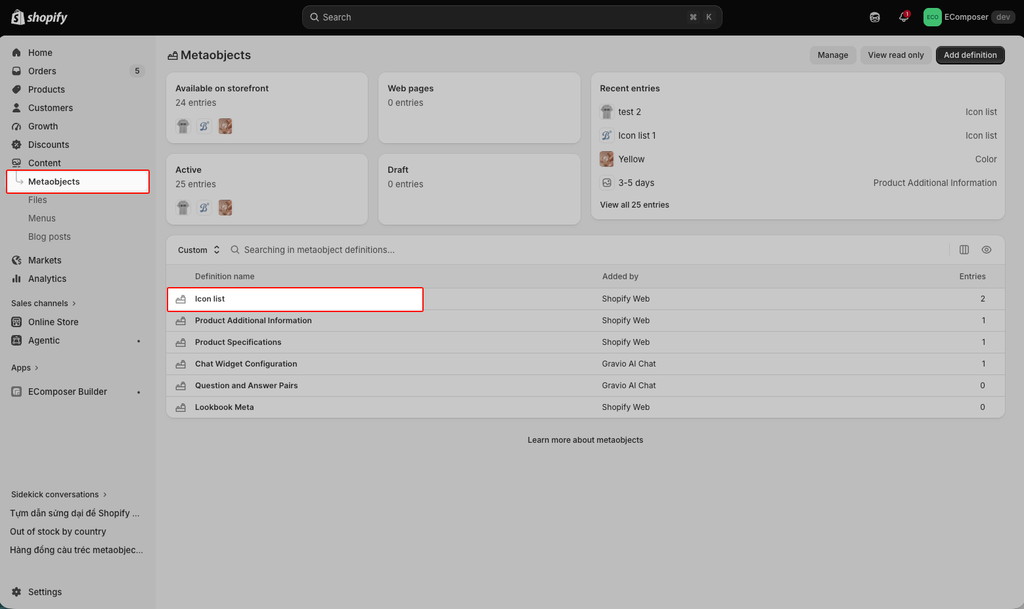
Step 1: Create a Metaobject
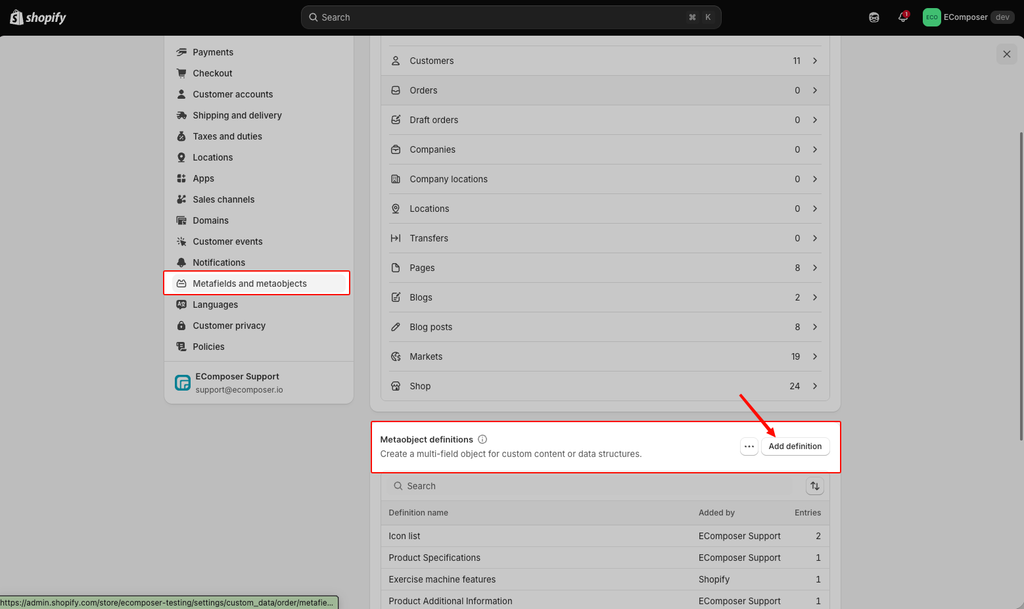
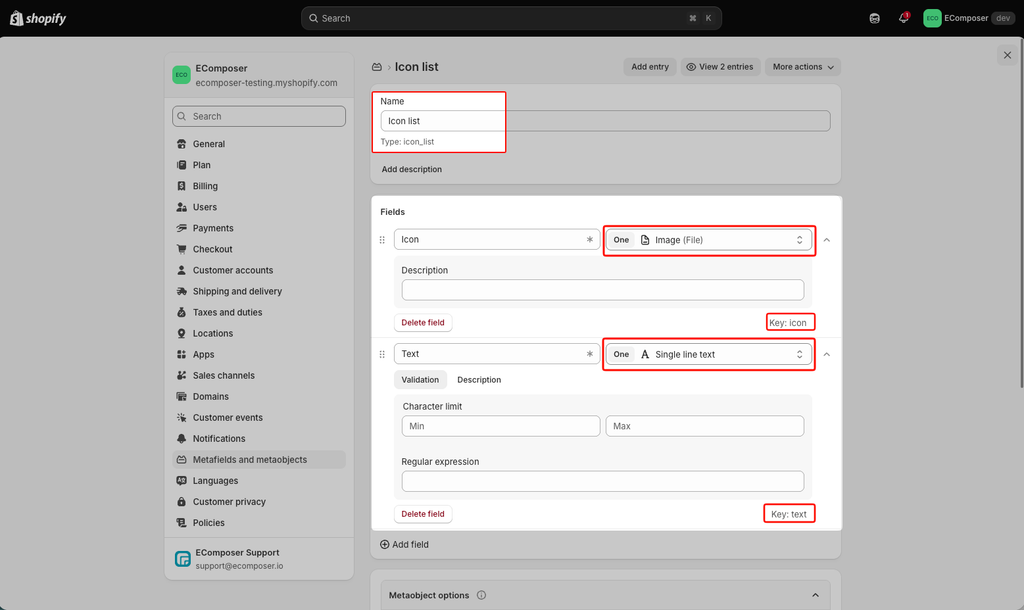
It contains 2 fields: Icon and Text
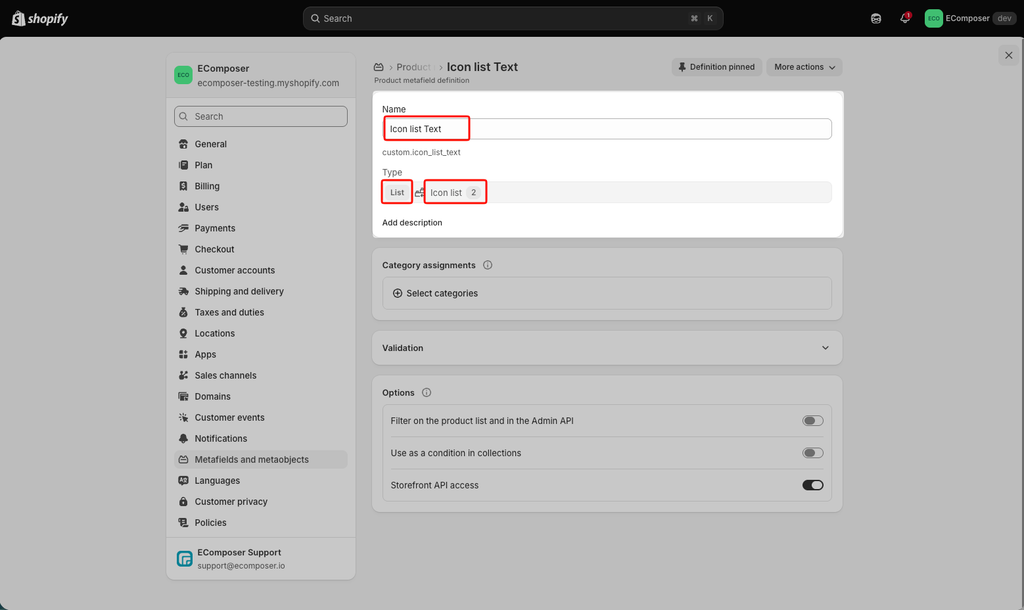
Step 2: Create Metafield
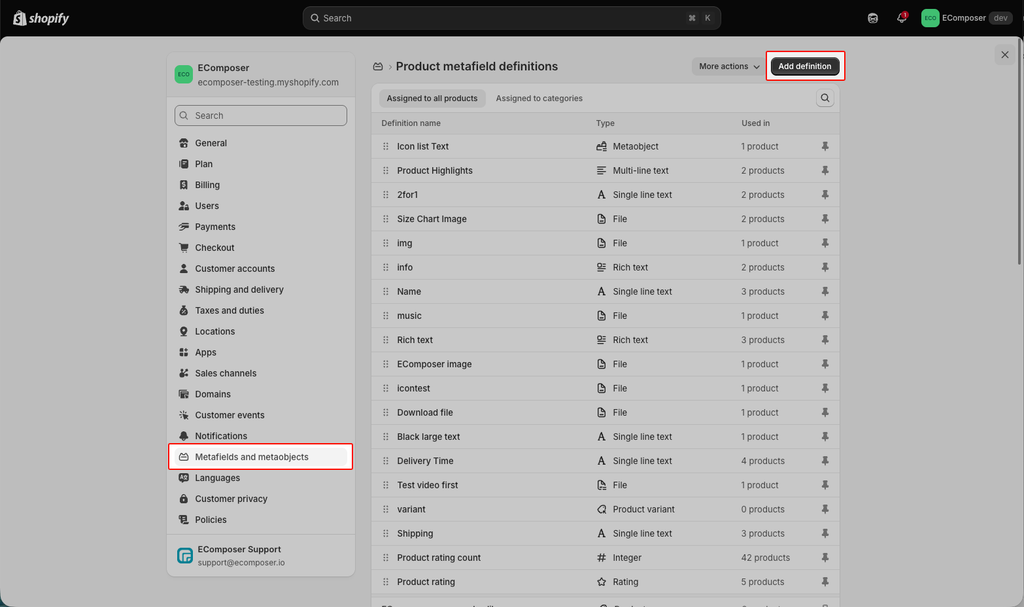
Remember the ID name of the metafield is custom.icon_list_text
You must choose Type: List
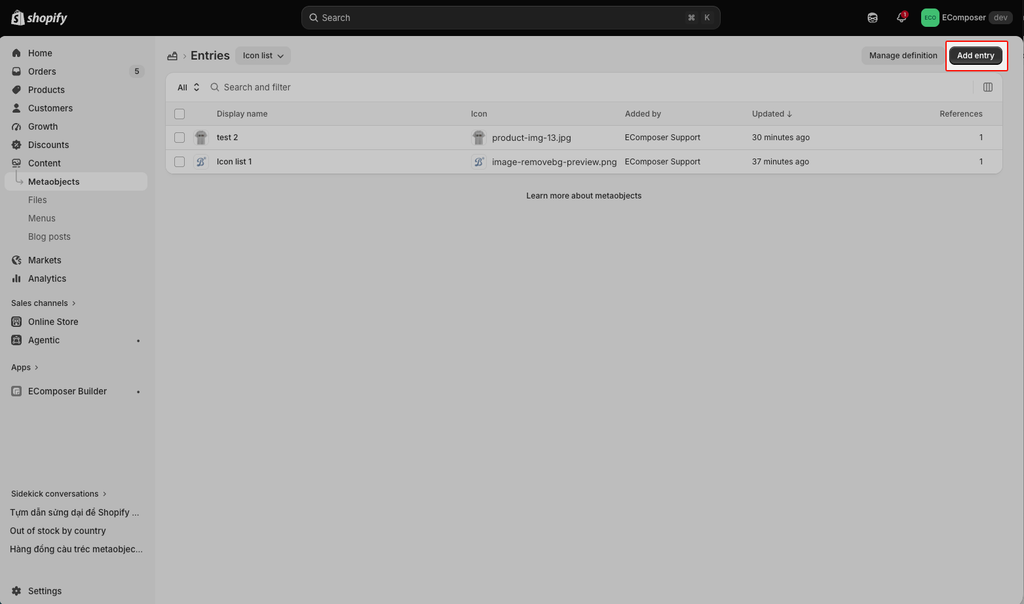
Step 3: Add entries
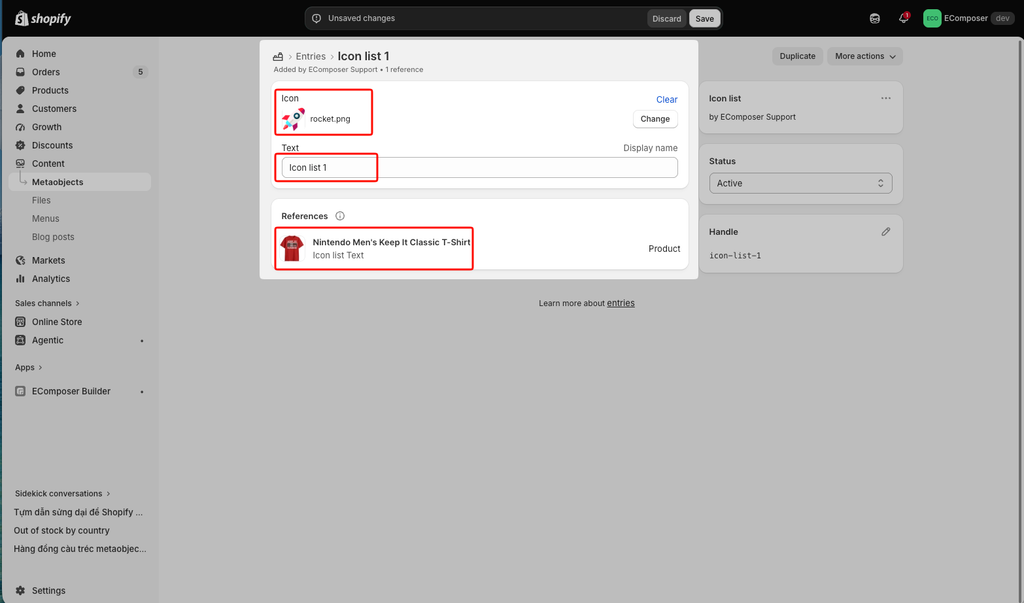
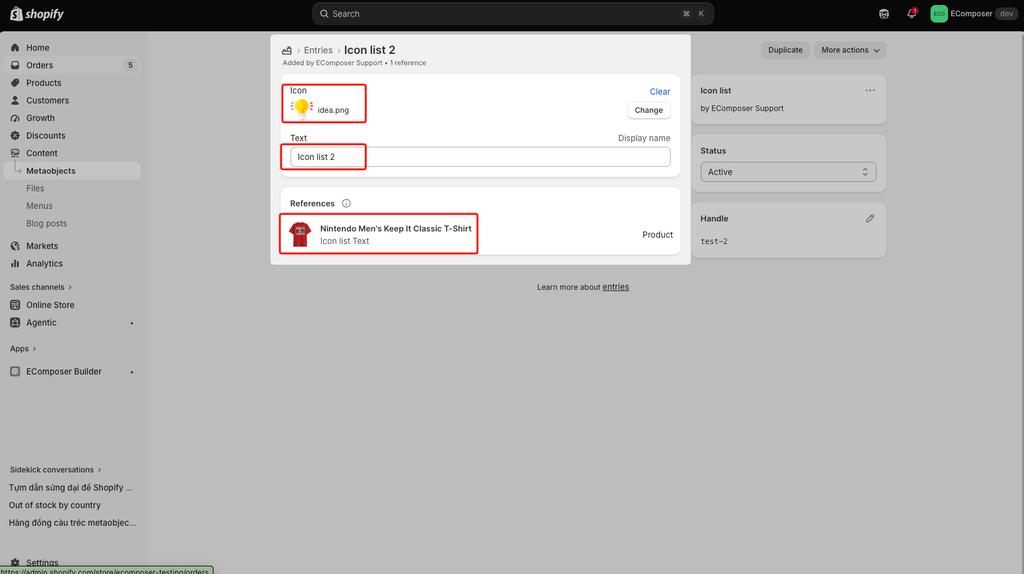
Step 4: Assign entries to products
You can select multiple entries per product.
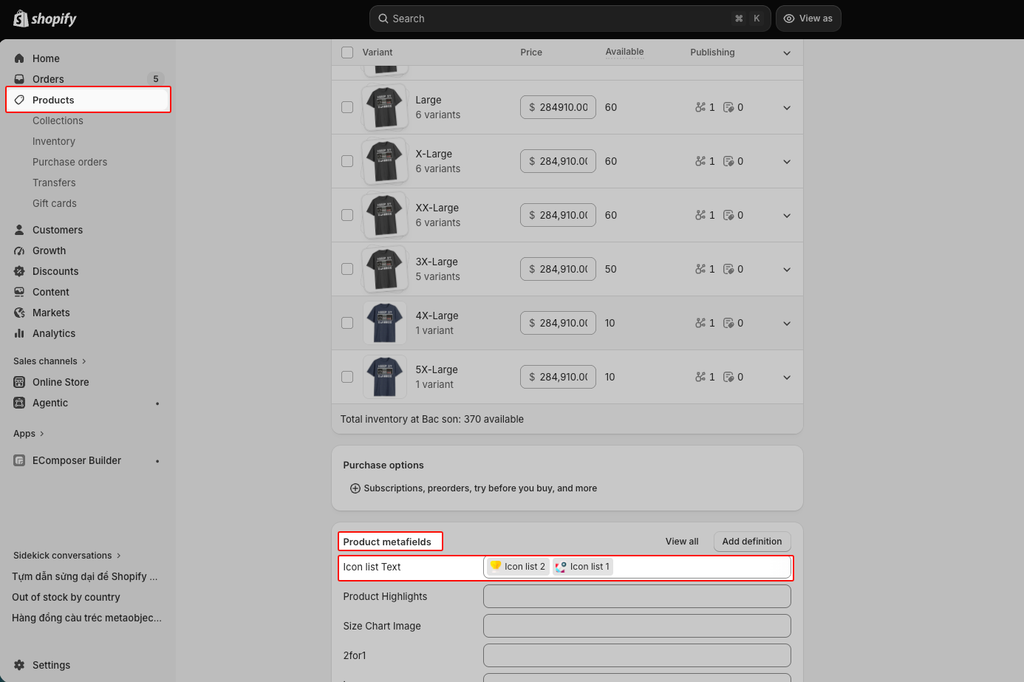
Step 5: Add metafield code
custom.icon_list_text is the ID name of the metafield.
{% assign features = product.metafields.custom.icon_list_text.value %}

{% if features != blank %}
  <ul class="product-features">
    {% for feature in features %}
      <li class="product-feature">

        {% if feature.icon.value != blank %}
          <div class="product-feature__icon">
            {{
              feature.icon.value
              | image_url: width: 40
              | image_tag:
                loading: 'lazy',
                widths: '20, 30, 40',
                alt: feature.text.value
            }}
          </div>
        {% endif %}

        {% if feature.text.value != blank %}
          <div class="product-feature__text">
            {{ feature.text.value }}
          </div>
        {% endif %}

      </li>
    {% endfor %}
  </ul>
{% endif %}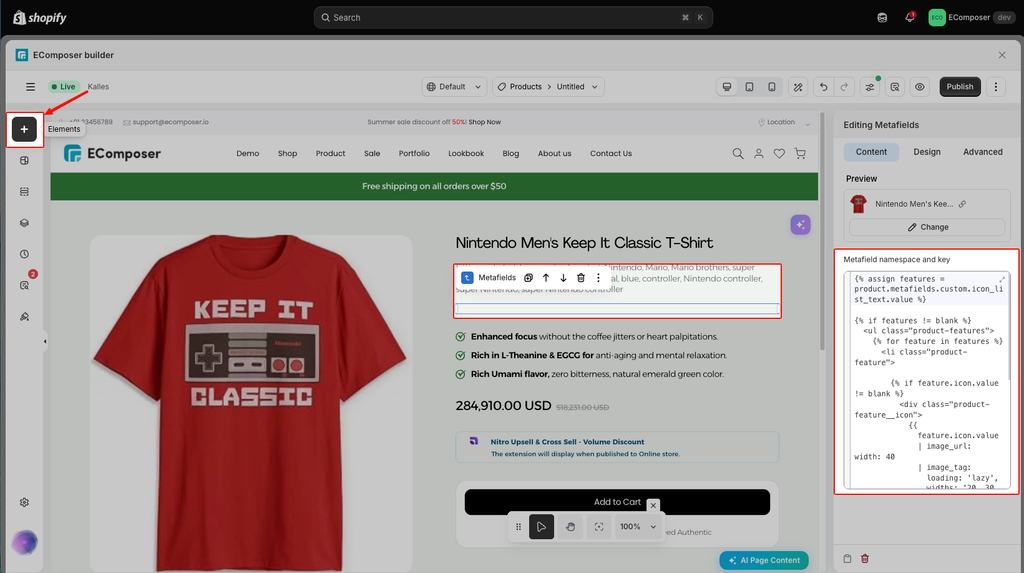
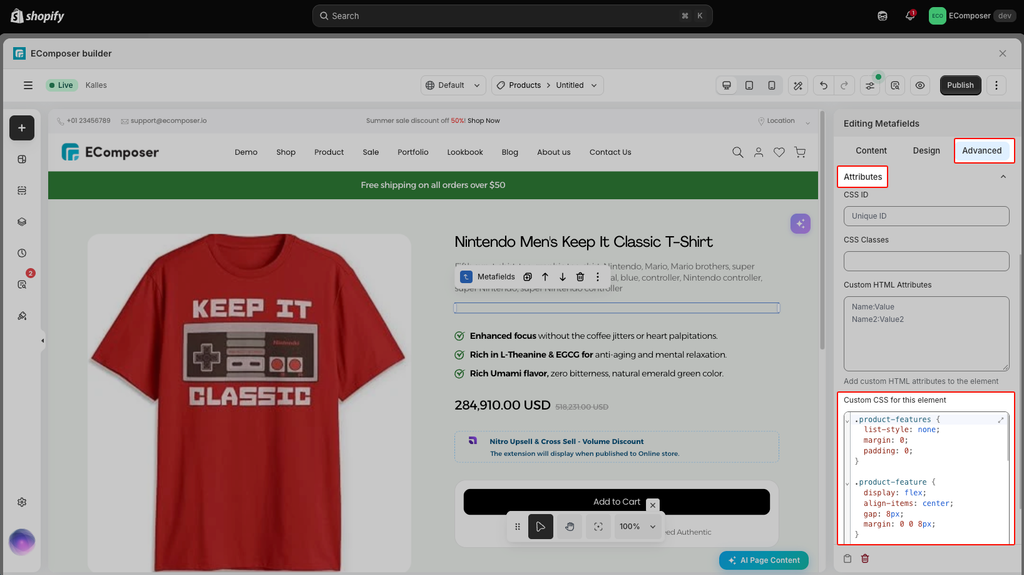
Add CSS code to modify style of icon list.
.product-features {
  list-style: none;
  margin: 0;
  padding: 0;
}

.product-feature {
  display: flex;
  align-items: center;
  gap: 8px;
  margin: 0 0 8px;
}

.product-feature:last-child {
  margin-bottom: 0;
}

.product-feature__icon {
  width: 18px;
  height: 18px;
  flex: 0 0 18px;
  display: flex;
  align-items: center;
  justify-content: center;
}

.product-feature__icon img {
  width: 100%;
  height: 100%;
  object-fit: contain;
}

.product-feature__text {
  font-size: 18px;
  line-height: 1.5;
}
Add CSS code here:
Result
Publish, then check the result on the live page