How To Create a Cart page in Shopify?
The Cart page is an essential part of any e-commerce website, allowing customers to review and manage the products they have added to their shopping cart before proceeding to checkout.
On the Cart page, customers can view important details such as product names, quantities, prices, and subtotals. They can also update item quantities, remove products, apply discount codes, and review estimated totals, shipping options, and taxes if applicable.
With the EComposer app, you can:
- Create a completely custom Cart page from scratch.
- Replace your current theme Cart page with an EComposer Cart page.
1. Create a new Cart page with the EComposer
EComposer allows you to create a brand-new Cart page and replace the default Cart page from your Shopify theme. You can fully customize the design using elements available in the app.
A Cart page typically includes components such as a banner with image and text overlay, cart items, cart summary, cart consent checkbox, checkout button, order note, discount coupon field, and more.
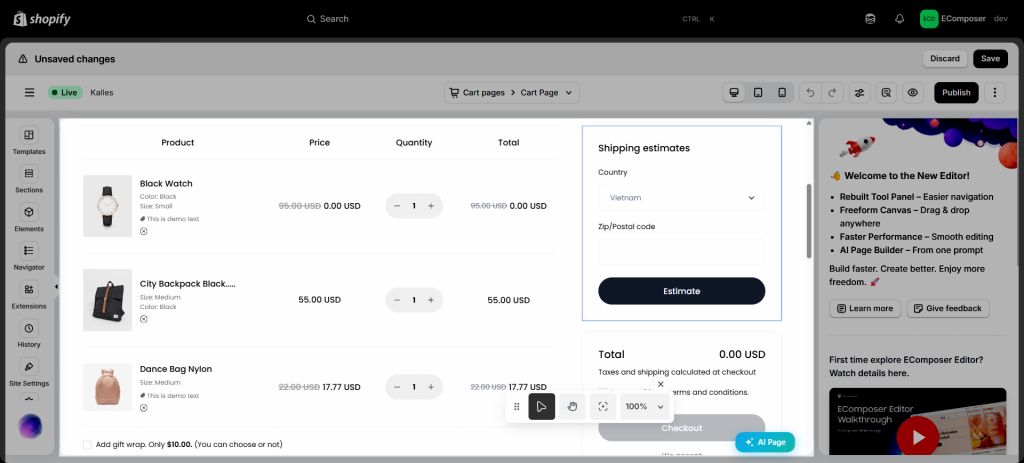
To build a Cart page with the EComposer, click on Dashboard -> Start building -> Cart -> Start Building.
In the Editor, you can start building your Cart page by adding elements such as Cart Items, a Banner with image and text overlay, Cart Summary, Cart Consent, Checkout Button, Order Note, Cart Coupon, and more. Below are the available Cart elements you can use for your design.
Once you have finished designing the page, make sure to click the Save button to keep your changes. Then, click Publish to publish the design to your live Cart page.
In the Publish popup, you can choose to publish or unpublish the page.
You can also configure the Header and Footer settings in the Layout section under General Settings:
- Shopify Theme (Use your theme header & footer): Displays the header and footer from your Shopify theme.
- Hide (Without theme header & footer): Hides the theme header and footer.
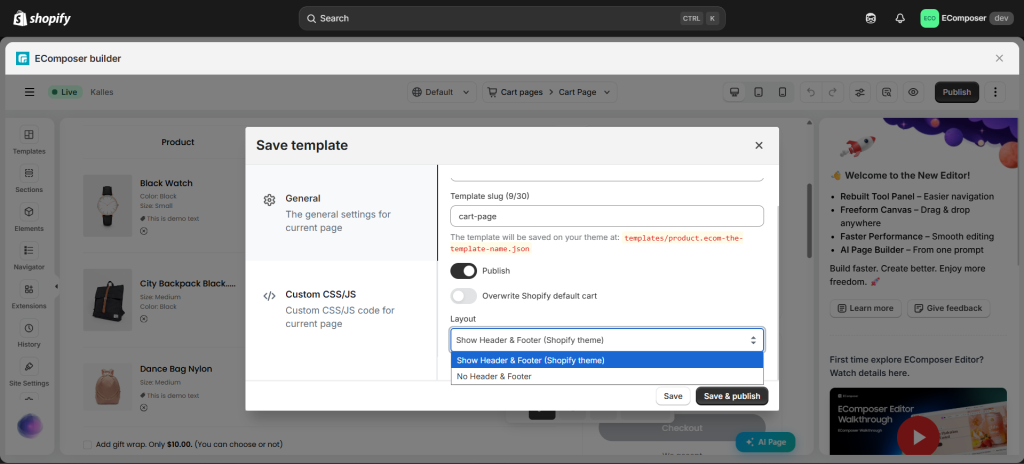
Finally, click the Save and Publish button to save your changes and publish the page to your live store.
2. Replace the new Cart page from EComposer with your existing Cart page from Shopify
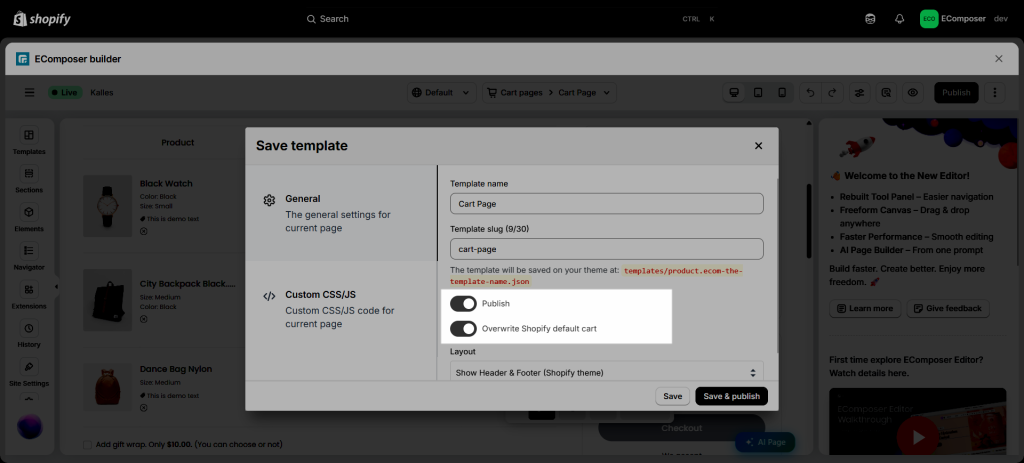
If you would like to replace the new Cart page that you have just created in EComposer with the existing cart page and make it visible to your customers, please click on the Publish button at the top right corner and tick the option named “Overwrite Shopify default cart”.
3. Restore your old theme Cart page
If you no longer want to use the Cart page created with EComposer, or if you want to switch back to the default theme Cart page for troubleshooting, you can restore the original theme Cart page at any time.
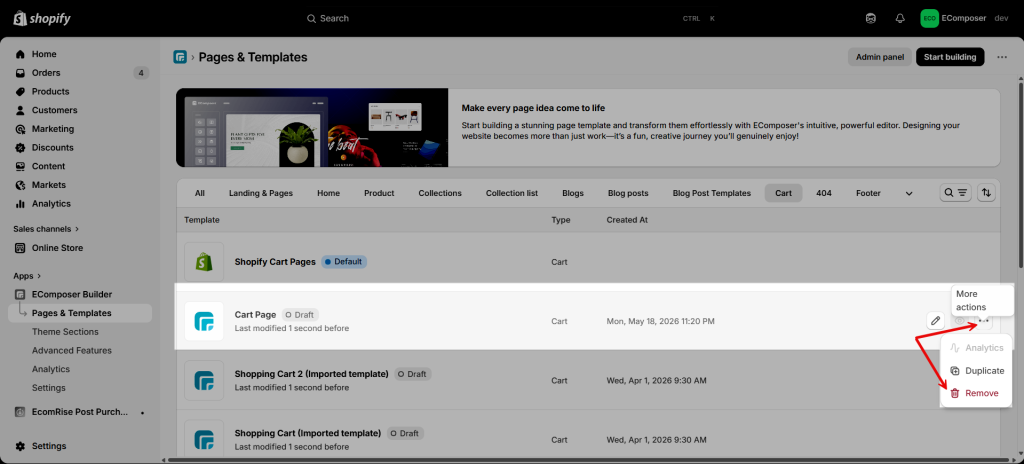
To do this, go to the Pages & Templates > Cart and click the Restore button for the theme you want to revert.
Note: Default Cart is the cart page that comes from Shopify Theme. It is not lost, it’s just stored there and you can restore it anytime!
4. Deleting the Cart page
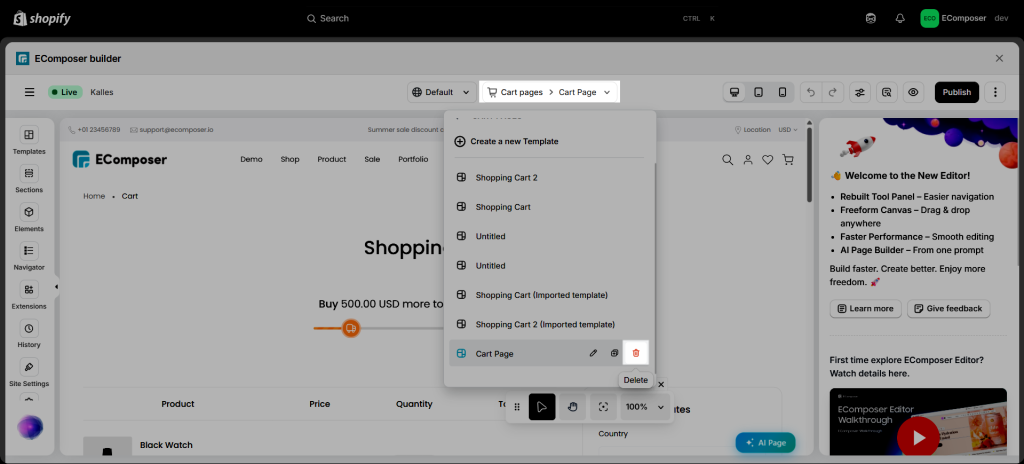
Note: Please make sure to restore to the theme cart page first for the removing option to show.
The first way: Click on the dropdown menu Cart pages > Delete.
The second way: From the Pages & Templates > Cart, choose the page that you want to delete and click on More options > Remove.