QR Code Element
The QR Code element allows you to add a customizable QR code directly to your EComposer page. Customers can scan the QR code from the live page using their mobile device to access specific content, such as a URL, text information, phone number, email, WhatsApp contact, or payment details.
This element is useful when you want to provide a quick way for customers to access additional information or take an action without manually entering data.

Common use cases include:
- Linking customers to another page, product page, landing page, or external website
- Displaying contact information such as phone number or email
- Sharing store information, instructions, or special messages
- Adding payment QR codes
- Providing quick access to promotions, downloads, or other resources
1. Add QR Code Element to Your Page
To add this element to your page, open the EComposer editor -> Go to Elements -> Search for QR Code -> Drag and drop the element to your desired position on the page.
2. Content Settings
The Content tab controls what information is generated inside the QR code and how it works.
- Content source: Choose the source of the QR code content. There are two options:
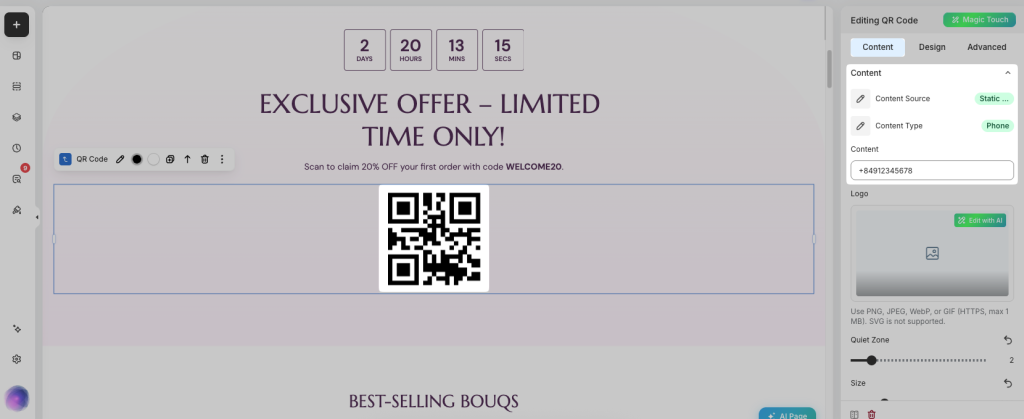
- Static Text: Create a QR code using manually entered content. Use this option when you want the QR code to always display the same information on your page, such as a fixed link, message, or contact information. There are some options: Text, Link, Phone, Email, and WhatsApp.
– Text: Create a QR code containing plain text, such as: Product instructions, Short messages, Store information
– Link: Create a QR code that opens a URL when scanned.
– Phone: Create a QR code containing a phone number. When scanned, customers can quickly open the phone dialer with the number.
– Email: Create a QR code containing an email address. Customers can scan it to quickly send an email. This will only work if your device has the Email app installed.
– WhatsApp: Create a QR code for WhatsApp contact. Customers can scan the code to start a WhatsApp conversation.
For example, if you choose the Phone, then you can enter your phone number in the Content option.
- Static Text: Create a QR code using manually entered content. Use this option when you want the QR code to always display the same information on your page, such as a fixed link, message, or contact information. There are some options: Text, Link, Phone, Email, and WhatsApp.
- Content: Enter the information you want to encode into the QR code. The content depends on the selected Content Type.
Examples:
Link →https://your-store.com
Phone →+84982999036
Text →Thank you for shopping with us
Email →[email protected]
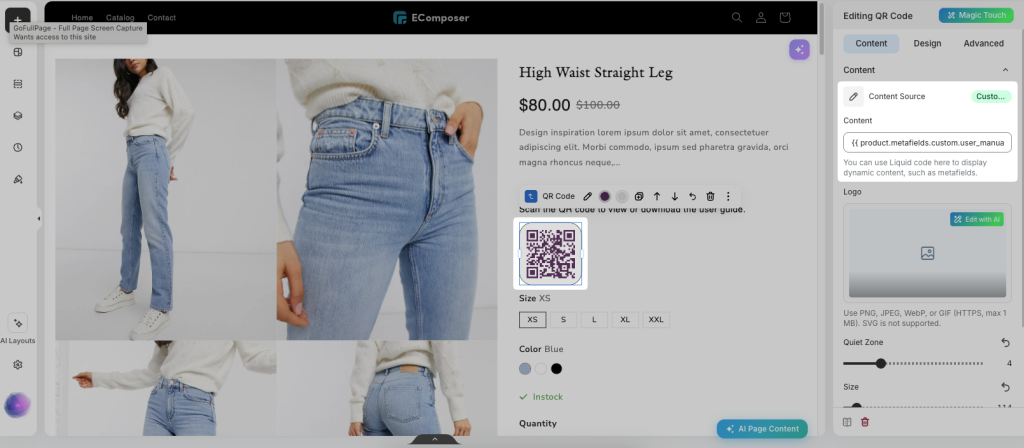
- Custom Liquid: Generate QR code content using Liquid code. This option is useful for advanced cases where you want to display dynamic content based on Shopify data. It will be helpful to use this on a Product template and apply it to all products.
To use this feature, please check this guide to create a metafield in Shopify first, then copy the Namespace and key of the metafield to use. For example, you can use the code below:
{{ product.metafields.custom.user_manual }}
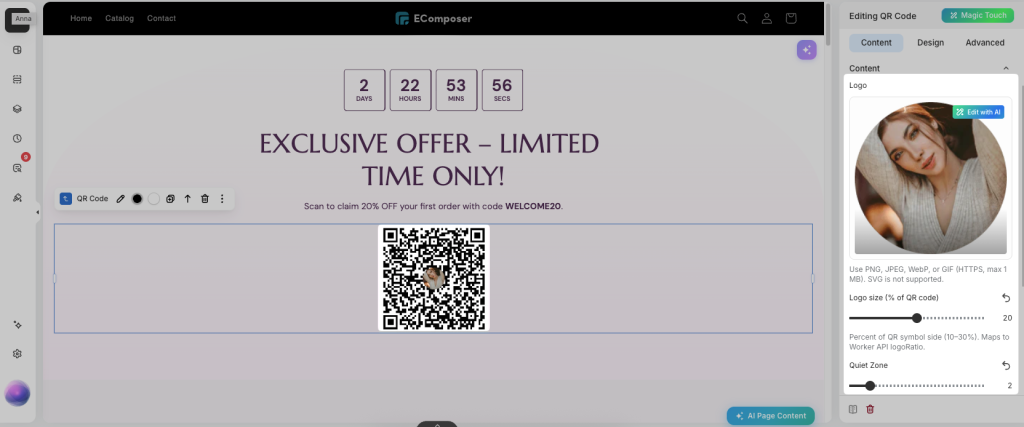
- Logo: Upload a logo to display in the center of the QR code. Supported formats: PNG, JPEG, WebP, GIF. Maximum file size is 1 MB. Please note SVG files are not supported.
- Logo size (% of QR code): Adjust the size of the logo displayed inside the QR code. A larger logo can make the QR code more visible with your branding, while a smaller logo helps keep more QR code patterns visible for easier scanning.
- Quiet Zone: Adjust the empty space around the QR code. Increasing the quiet zone can make the QR code easier for devices to recognize, especially when placed on complex backgrounds.
- Size: Adjust the QR code size displayed on your page. A larger size can make the QR code easier to scan, while a smaller size helps save space in your layout.
- QR Color: Change the color of the QR code pattern. You can customize the QR code color to match your store branding or page design.
- Background Color: Change the background color behind the QR code. Choose a suitable background color to ensure the QR code remains clear and easy to scan.
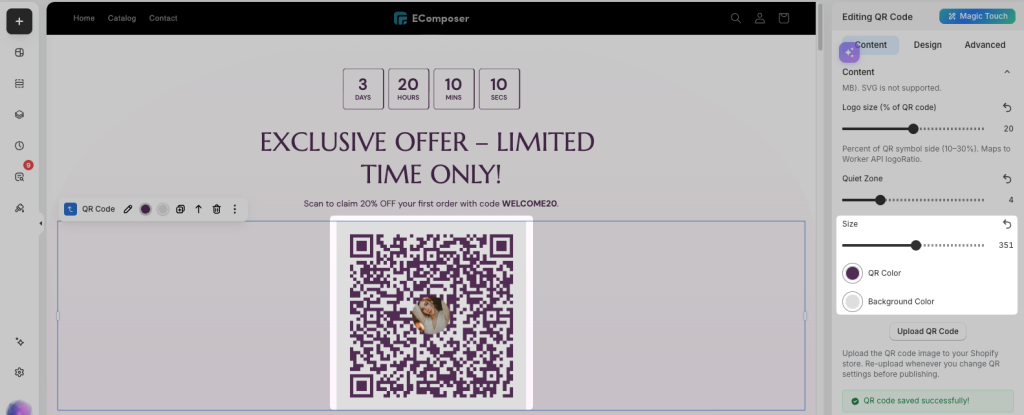
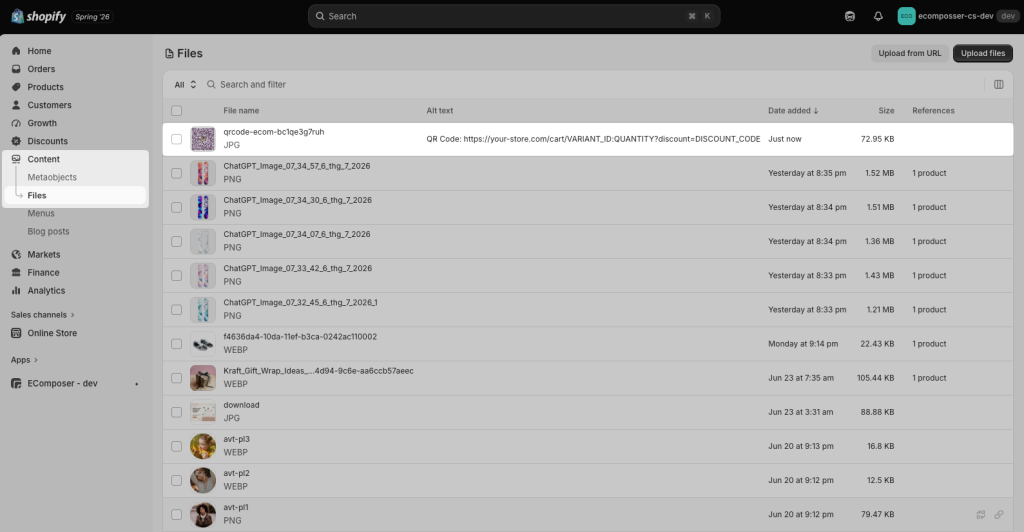
- Upload QR Code: Click Upload QR Code to generate a snapshot of your current QR code and upload it to your Shopify Content -> Files.
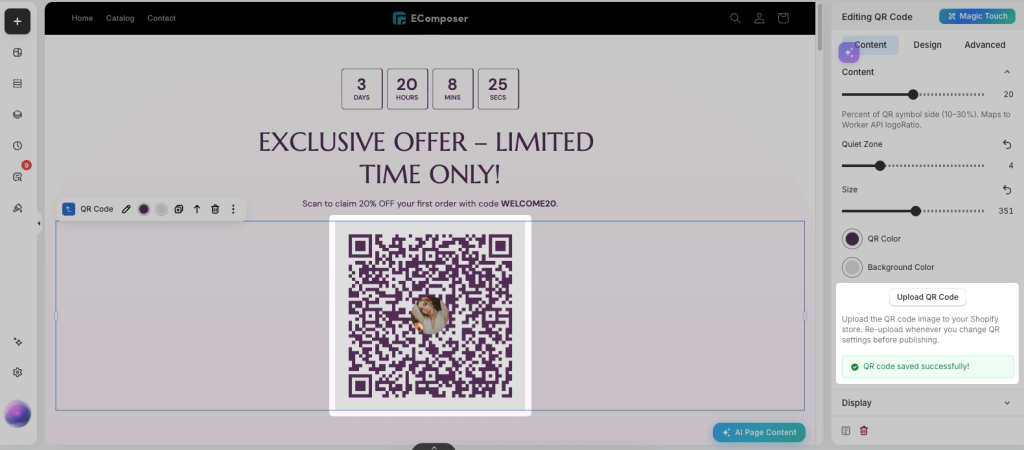
Instead of generating the QR code dynamically on the storefront, EComposer will display the uploaded image directly. This helps reduce runtime requests to EComposer services and ensures the QR code loads faster and more reliably for your visitors.
Each QR Code element is associated with a single image file in your Shopify Files. When you click Upload QR Code after making changes, EComposer automatically generates a new QR code image and replaces the existing file, so you don’t need to manually delete old files or update the image reference.
Important note:
– Whenever you change any QR Code settings (such as content, logo, logo size, colors, size, or quiet zone), click Upload QR Code again to upload the latest version.
– If you don’t re-upload after making changes, the storefront will continue displaying the previously uploaded QR code image.
– Only one QR code image is maintained for each QR Code element. Uploading a new version will overwrite the previous one.
Adjust how the element looks:
The Display settings control how the QR Code element is positioned on the page and provide optional actions for customers interacting with the QR code.
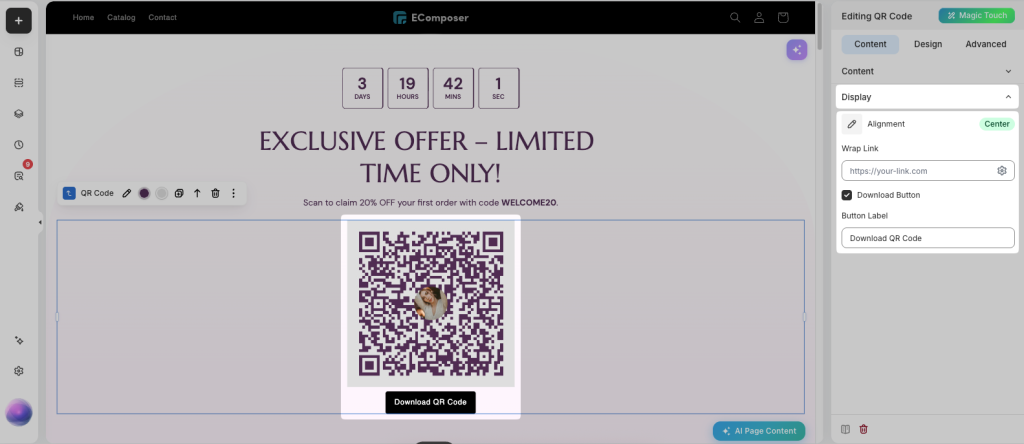
- Alignment: Choose how the QR Code element is aligned within its container.
- Wrap Link: Make the entire QR Code element clickable by adding a destination URL. When visitors click anywhere on the QR code or its associated content, they will be redirected to the specified link. This is useful when you want to provide both a QR code for mobile users to scan and a clickable link for desktop users.
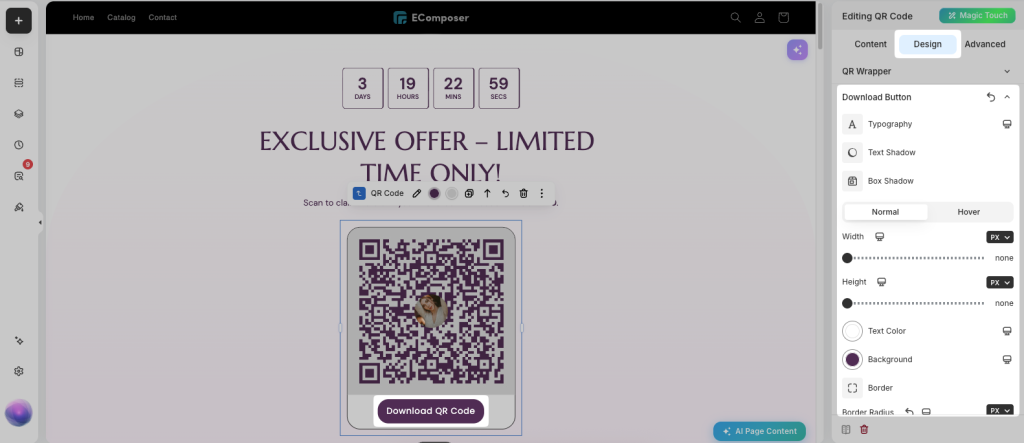
Leave this field empty if you only want visitors to interact with the QR code by scanning it. - Download Button: Enable this option to display a Download QR Code button below the QR code. Visitors can click the button to download the QR code image for later use, making it convenient to save, print, or share the QR code.
3. Design settings
The Design tab lets you customize the appearance of the QR Code element and its download button.
- QR Wrapper: Customize the container that wraps the QR code. You can adjust the Border, Border radius, and Spacing for the element.
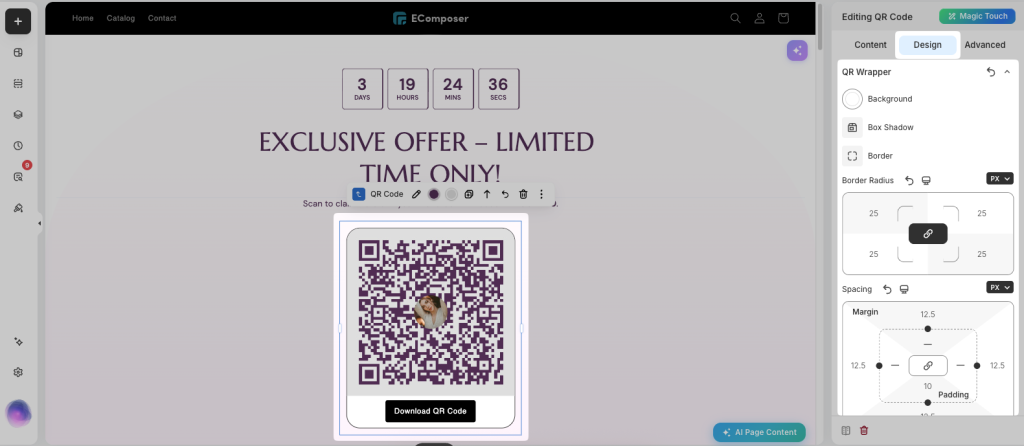
- Download Button: Customize the appearance of the download button. You can adjust typography, Text color, Background, Border, Border radius, and Spacing.