

How to create a Blog Post template in Shopify?
Blog posts are an important part of every online store, but Shopify’s default blog post template can feel too basic and may not fit your design needs. With EComposer, you can easily create a more engaging and customized Blog Post template.
To build a Blog Post template, simply drag and drop the elements you want to use into the editor. With just a few simple steps, you can design and publish a unique Blog Post template that matches your brand and style.
1. How to build a new Blog Post template (Built with EComposer)
By default, Shopify provides only one template for all Blog Post pages of your store. This template will overwrite your current theme template and the changes you made will apply to all your Blog Post Template.
In order to create a new Blog Post Template, please follow these steps:
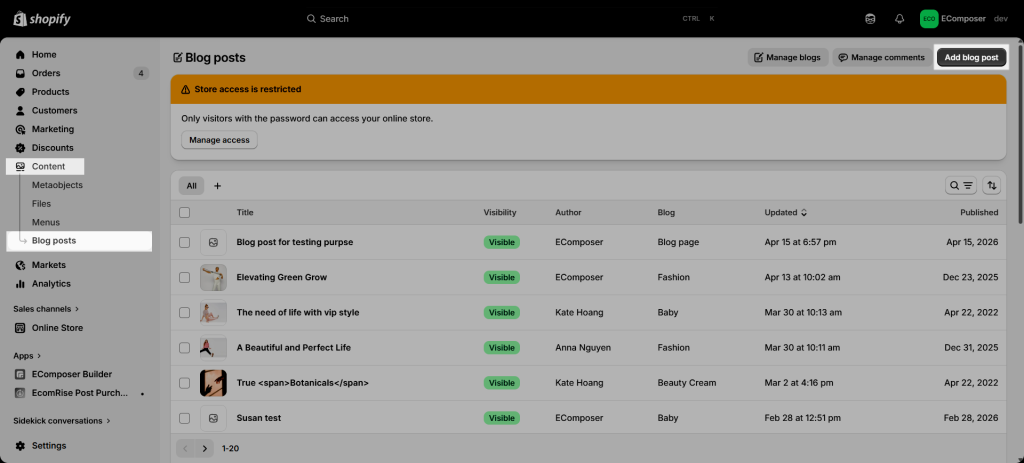
Step 1: Go to the Shopify admin to create your Blog Posts and publish them. EComposer will render the content of the Blog Post from Shopify to show. Learn more about Blog Post in Shopify here.
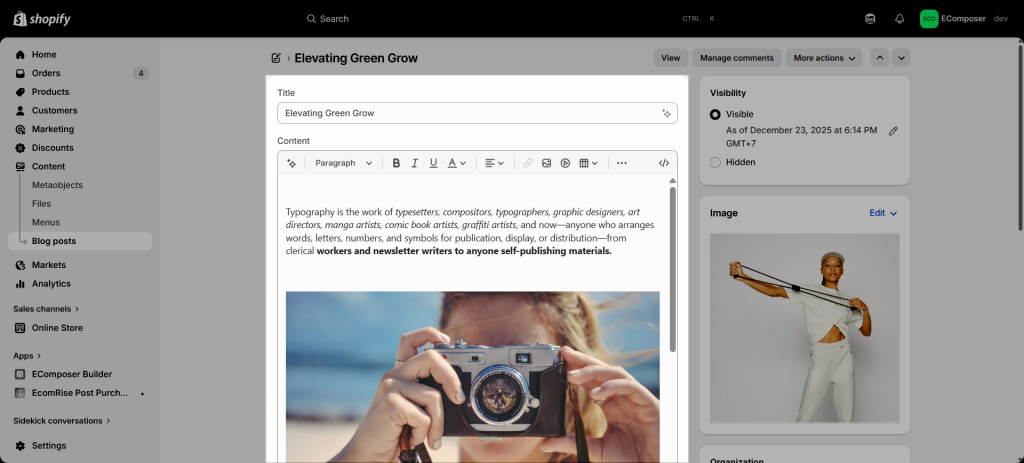
Write the Title and Content for your blog post in Shopify. You can also add the Featured image for your post and Save it.
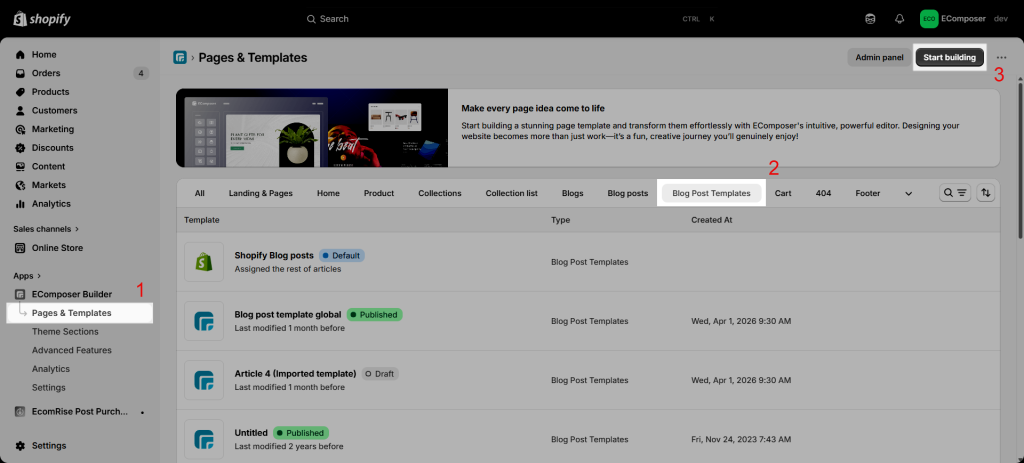
Step 2: Open the EComposer app, from the App dashboard, open the Pages & Templates menu -> Click to open the Blog Post Templates tab –> Start Building.
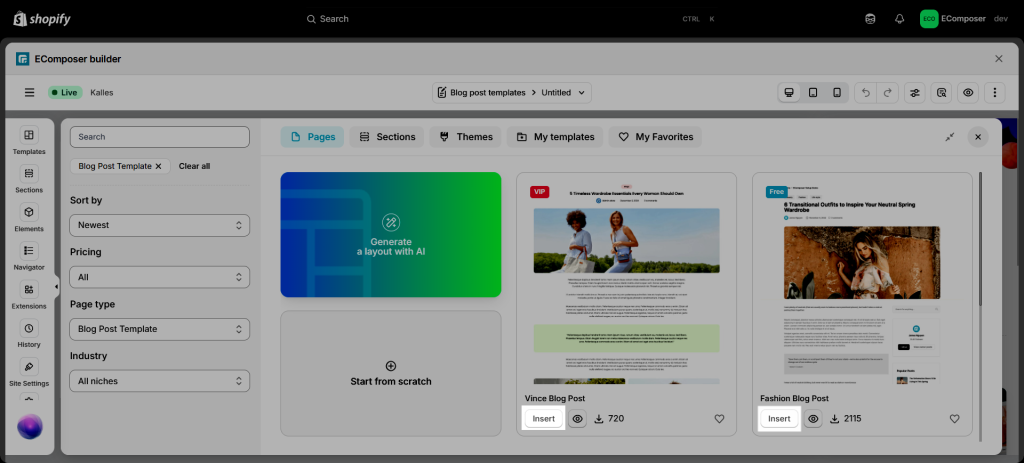
Step 3: You can choose and click the Insert button on a prebuilt template to import its design to your page.
Step 4: You can click on any blog post element to select a post to show the content from Shopify to EComposer to preview.
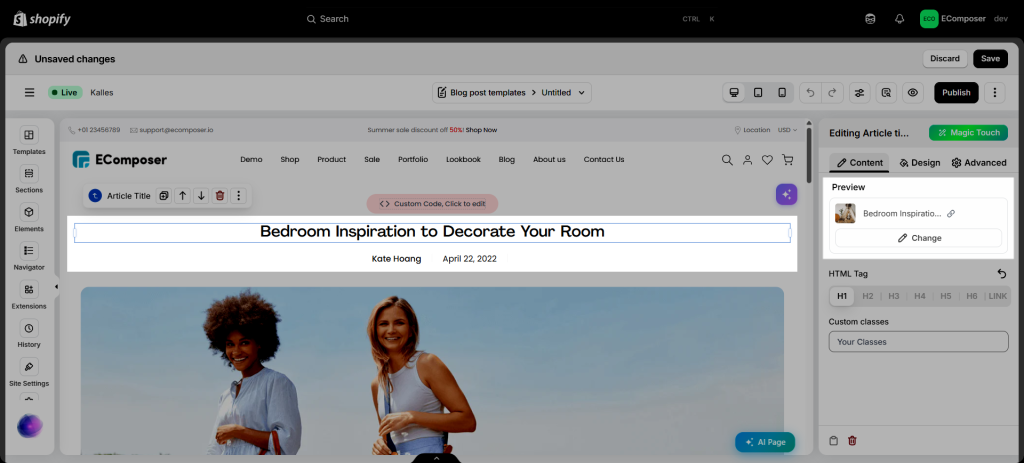
If you want to create a Blog Post template from scratch, you can start by choosing either a Structure section or a Freeform section, then drag and drop elements from the Elements panel to build your layout.
We recommend using the Blog Post elements, as they automatically pull content from Shopify and display it dynamically. This allows you to apply a single template to all blog posts across your store.
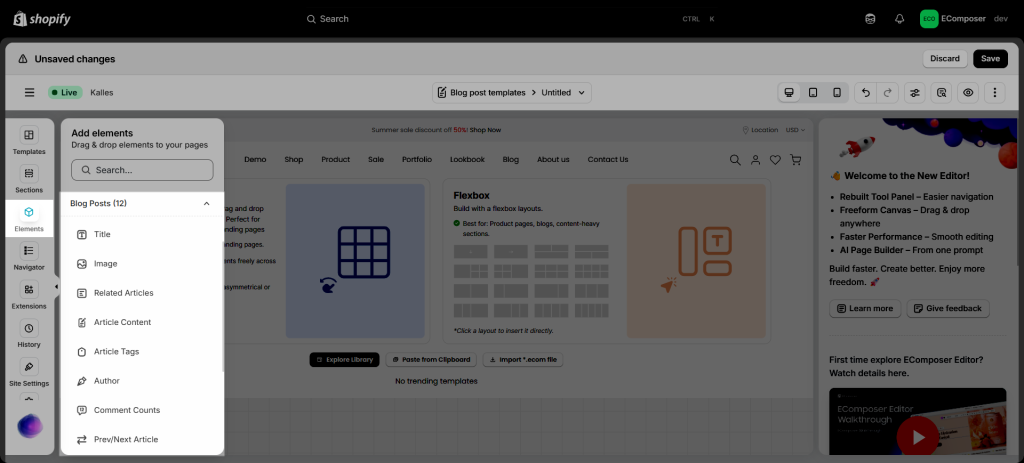
- Title: Displays the title of your blog post directly from Shopify.
- Image: Use this element to display featured images in your blog post, helping readers quickly understand the topic visually.
- Related Articles: Shows blog posts related to the current article, allowing readers to discover and explore more relevant content.
- Article Content: Displays the main content of your blog post, where you can share information, stories, or updates with your readers.
- Article Tags: Displays the tags assigned to the blog post, making it easier for readers to search and navigate related topics.
- Author: Shows the author’s name of the blog post.
- Comments / Comment Count / Comment Form: Displays customer comments, the total number of comments, and a comment form for reader interaction.
- Prev / Next Article: Allows readers to navigate to the previous or next blog post for a smoother reading experience.
- Excerpt: Displays a short summary or introduction of the article, often used on blog listing pages or as a preview section.
- Date: Displays the publishing date and time of the blog post from your Shopify store.
2. How to assign the Blog Post template in EComposer to your Blog Post?
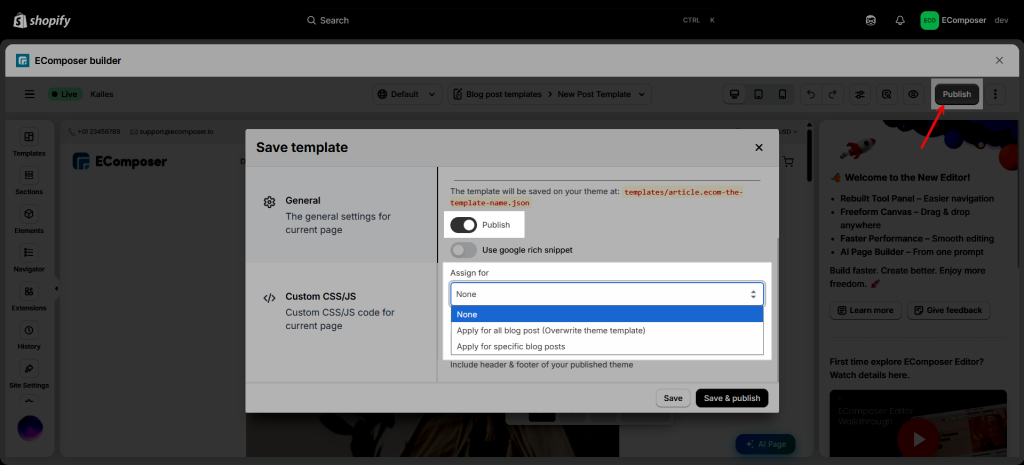
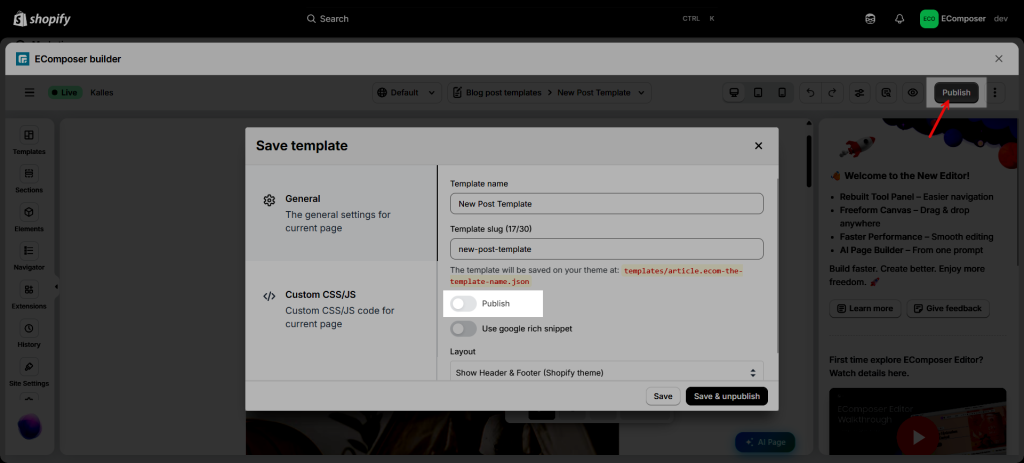
Please click on the Publish button at the top right corner to see the Publish popup. Turn on the Publish option and select the Assign for option. We have 3 choices:
- None: This means you apply for nowhere, just save it.
- Apply for all Blog Posts: This action will apply the Blog Post template from EComposer to all of your Blog Post. It will overwrite the Shopify default template.
- Specific Blog Posts: That means several Blog posts that you select, which will be applied.
3. How to restore to the Shopify default Blog Post template?
In case you don’t want to use the Blog Post template from EComposer and you want to restore to the Shopify default template, please follow the steps below:
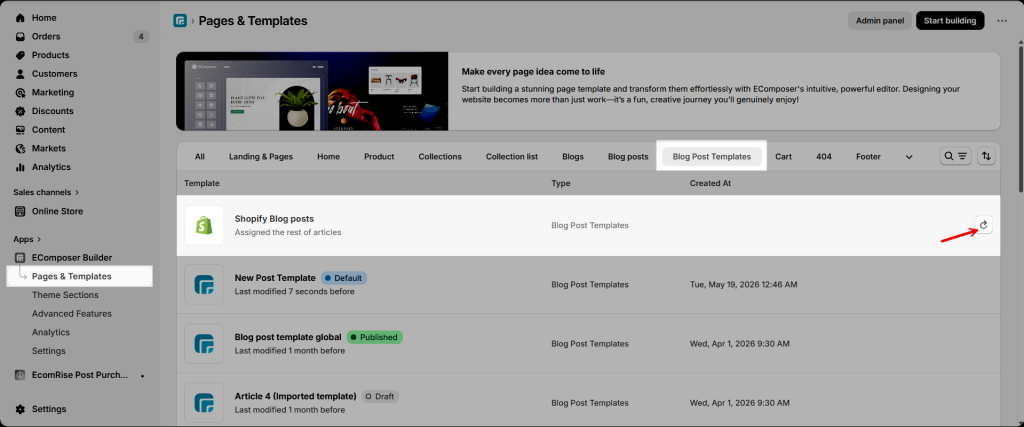
Step 1: From the Ecomposer dashboard > Templates.
Step 2: Click on Blog Post Templates.
Step 3: Hover over the Shopify Blog posts and hit the icon Restore.
4. How to delete a Blog Post template?
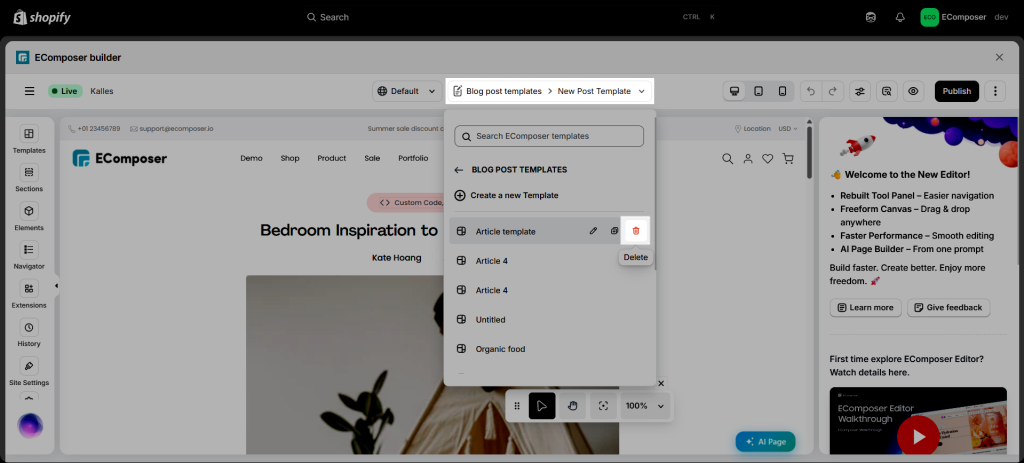
You should unpublish the template you want to delete first to prevent any conflicts. After that, you can delete the Blog Post template in either of these two ways:
The first way: Click on the dropdown menu Blog Post Templates > Delete.
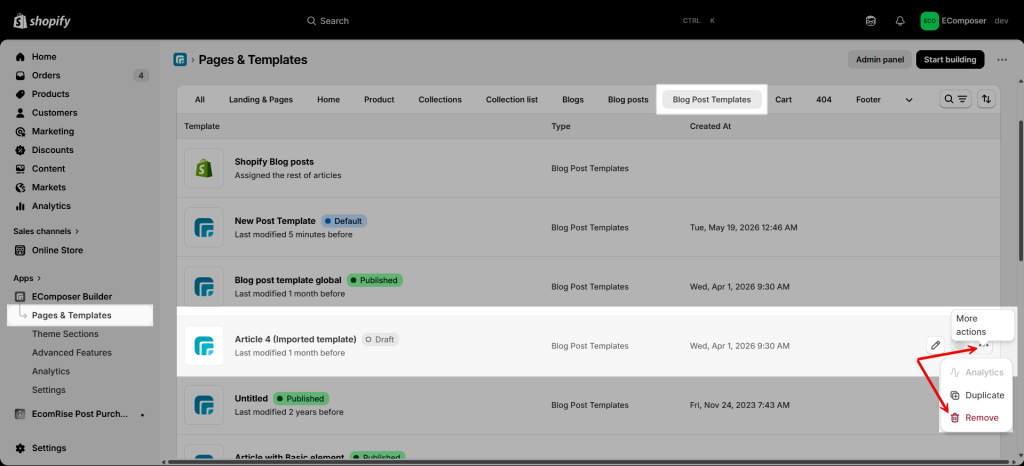
The second way: From the Pages & Templates, choose the page that you want to delete and click on More options > Remove.
Note: The Default template could not be deleted immediately; however, you should read No.3 above to learn how to restore it first. This will enable you to delete the Blog post template in EComposer in the correct order.




