Product Wishlist
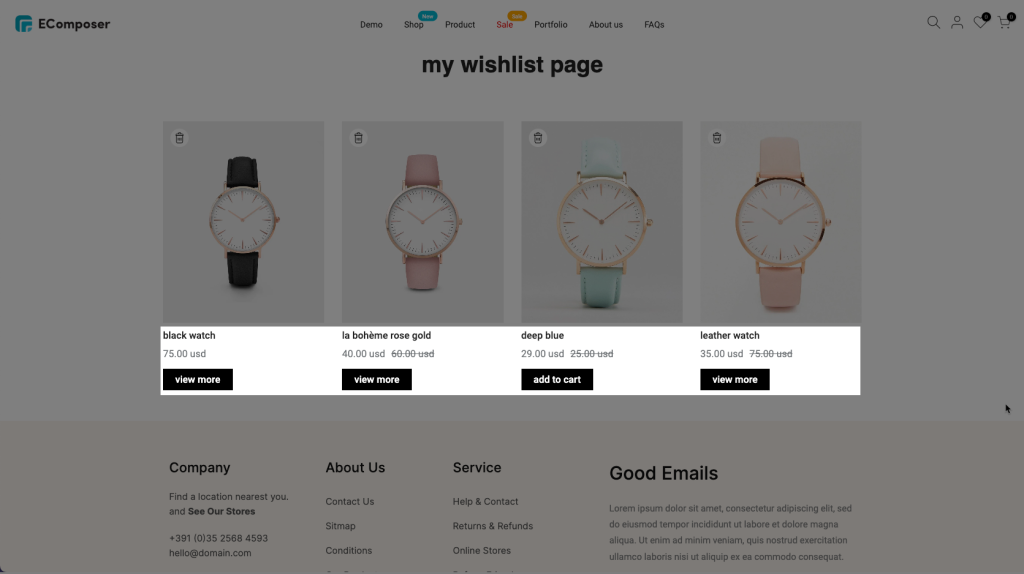
Our built-in Product Wishlist extension is designed to provide a seamless wishlist experience without relying on third-party apps.
Available on:
- Single Product Page
- Product Grid & Collection Product Elements
With EComposer Wishlist, customers can:
- Log in to add products to their wishlist
- Save their wishlist without registration or login
Notice: You can use this extension on EComposer Pro and Premium plans. Upgrade now to unlock
1. How to install the Product Wishlist extension?
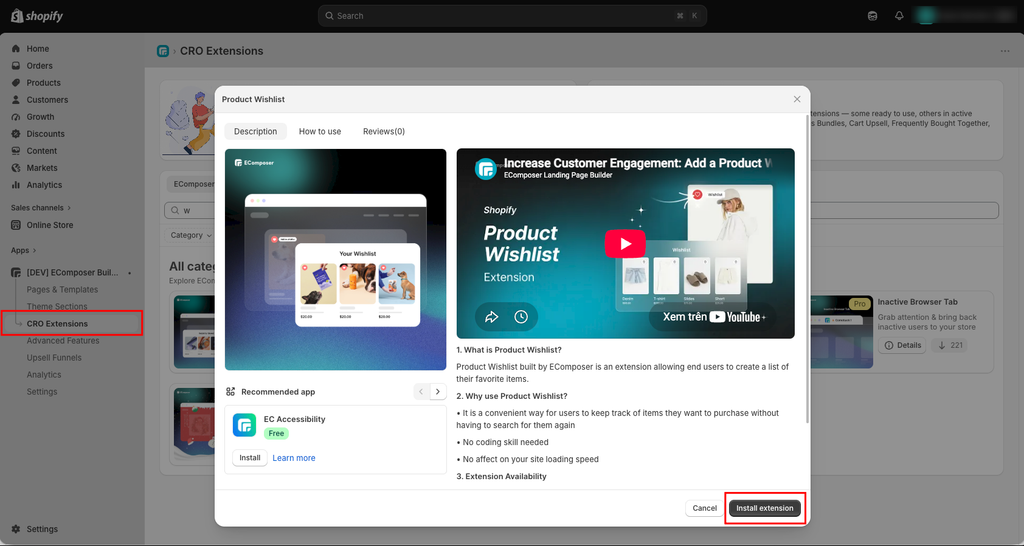
Step 1: From your EComposer dashboard, go to CRO Extensions from the left sidebar menu.
Step 2: Search for the Product Wishlist extension.
Step 3: Click Details and install the extension on your store.
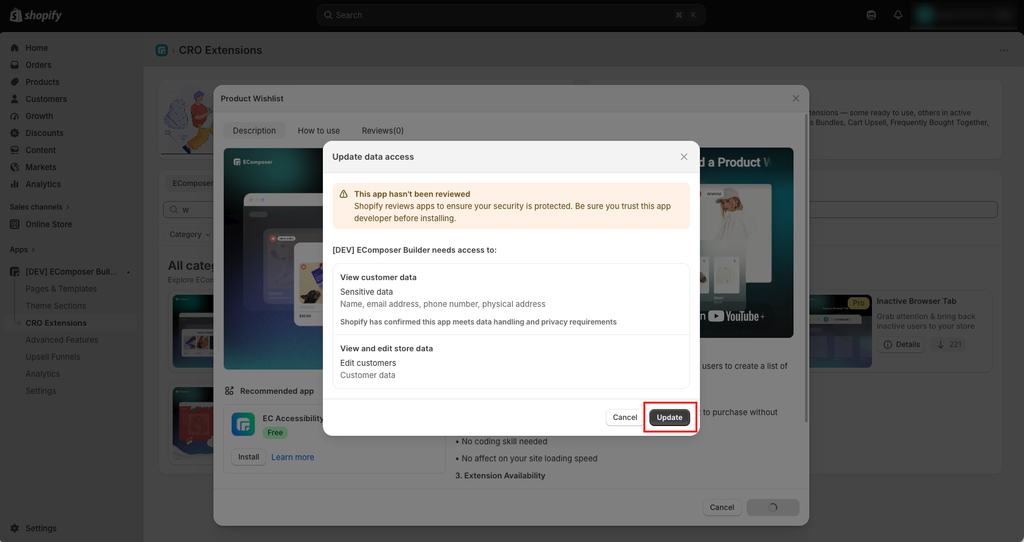
This function requires your Customer’s information. Kindly click the Update button to agree that you share with us Customer Information.
2. Config extension settings
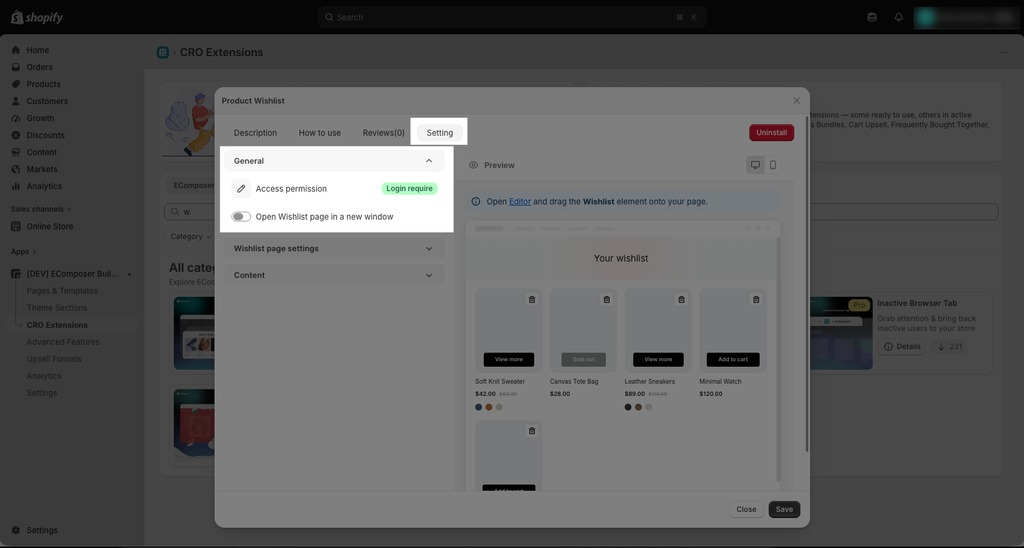
General: Configure the general behavior of the Wishlist
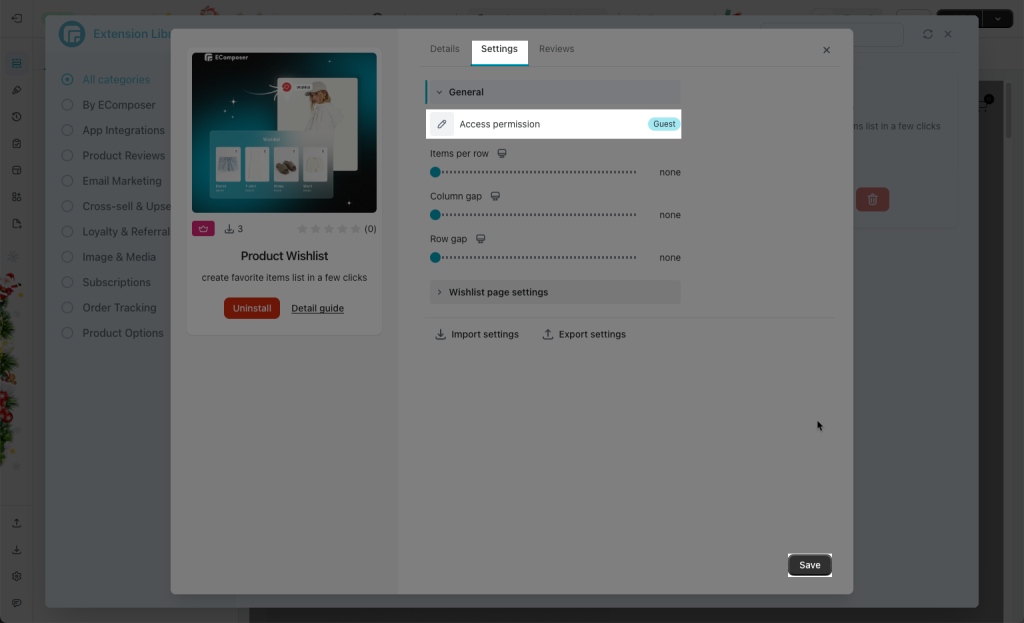
- Access permission: Choose Login required to allow only logged-in customers to use the wishlist, or Guest to allow customers to use it without logging in.
- Open Wishlist page in a new window: Open the wishlist page in a new browser tab when customers access their wishlist.
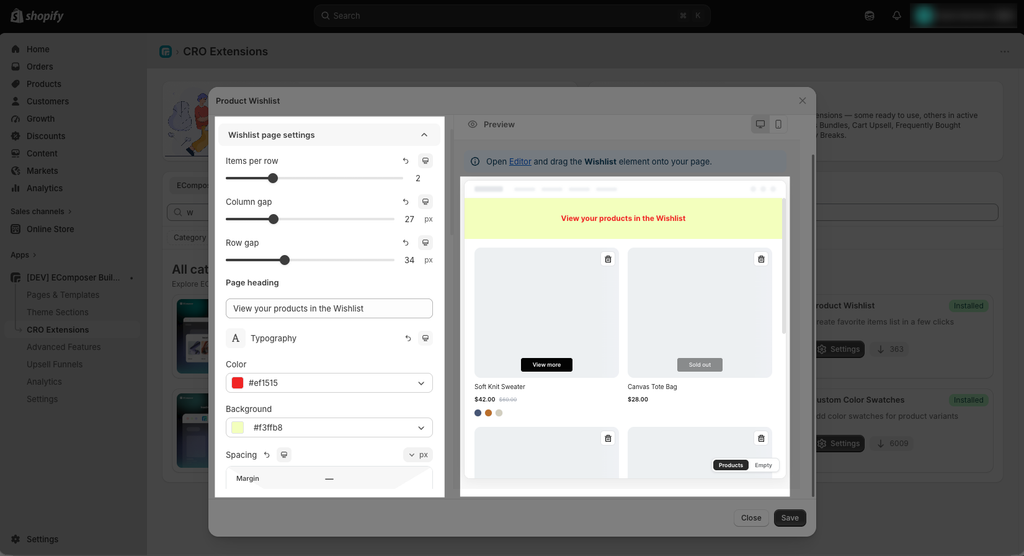
Wishlist Page Settings: Customize the appearance and layout of your Wishlist page with the following options
- Items per Row: Set the number of products displayed per row.
- Column Gap: Adjust the spacing between product columns.
- Row Gap: Adjust the spacing between product rows.
- Page Heading/Product Title/Product Price/Compare-at Price/Add to Cart Button: Mainly, these settings allow you to customize their appearance, including Typography, Color, and other design options.
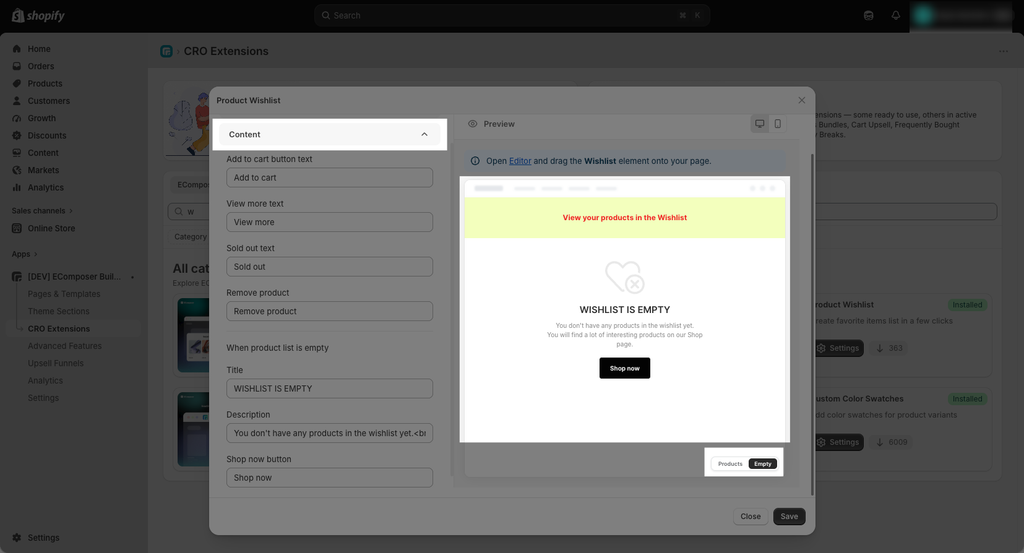
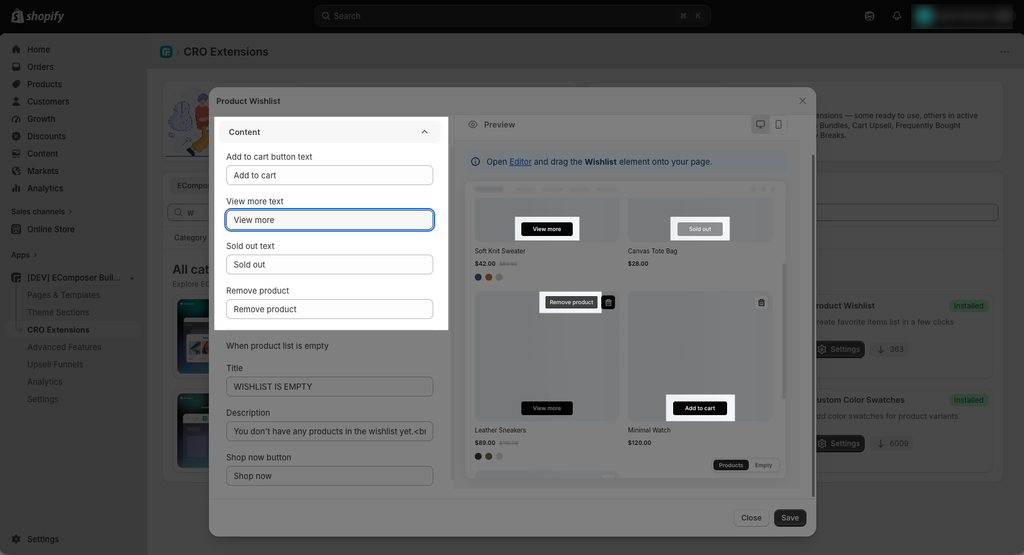
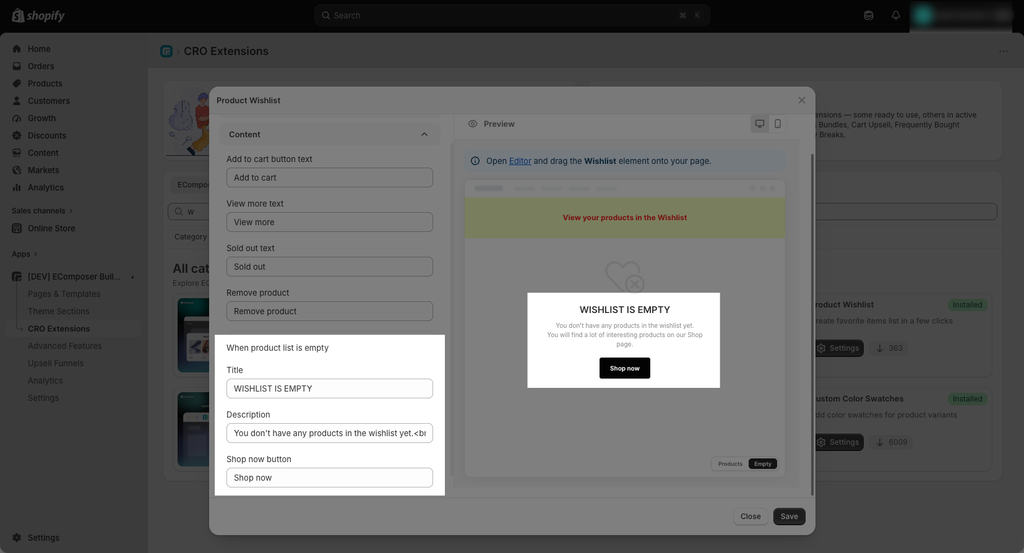
Content: Provides fields to enter and customize the content that will be displayed in the Wishlist.
- There are two tabs Products and Empty at the bottom-right. These tabs let you switch between the two states to preview the configure the Wishlist design when it contains products and when the Wishlist is empty.
- You can edit the text for Add to Cart, View More, Sold Out, and Remove Product directly in the corresponding fields.
- You also can edit the Title, Description, and Shop Now button text when the Wishlist is empty.
3. How to use the Product Wishlist extension
3.1. How to add the Product Wishlist extension to your Product template
Inside the EComposer editor, open the Extensions tab from the left sidebar, then find the Product Wishlist extension from the installed extensions list and drag it into your desired position on the Product template.
Normally, you should add it to the Product detail section. After adding it successfully, you can start customizing the extension settings and style.
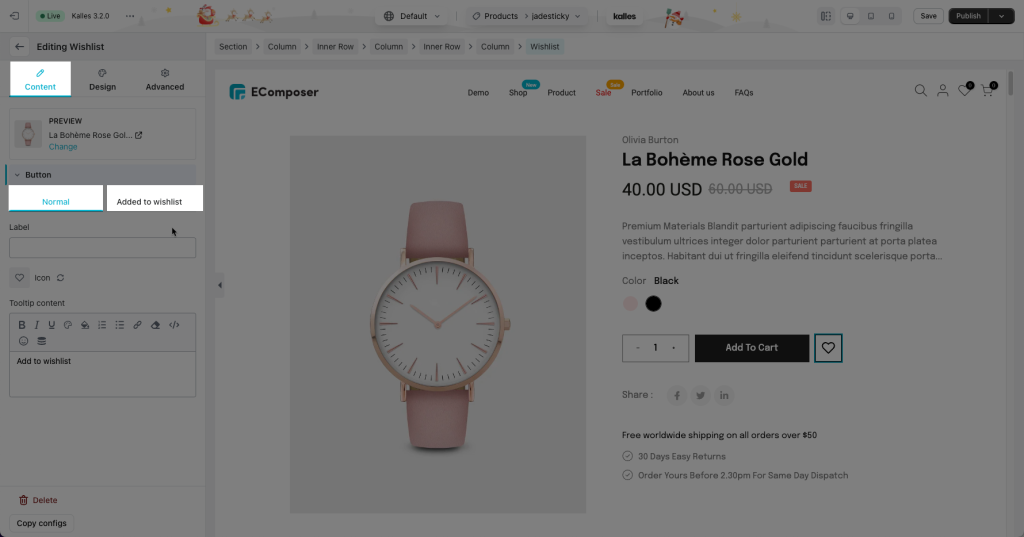
A wishlist button always has 2 statuses (Normal and Added to wishlist) Make sure to configure both of them here:
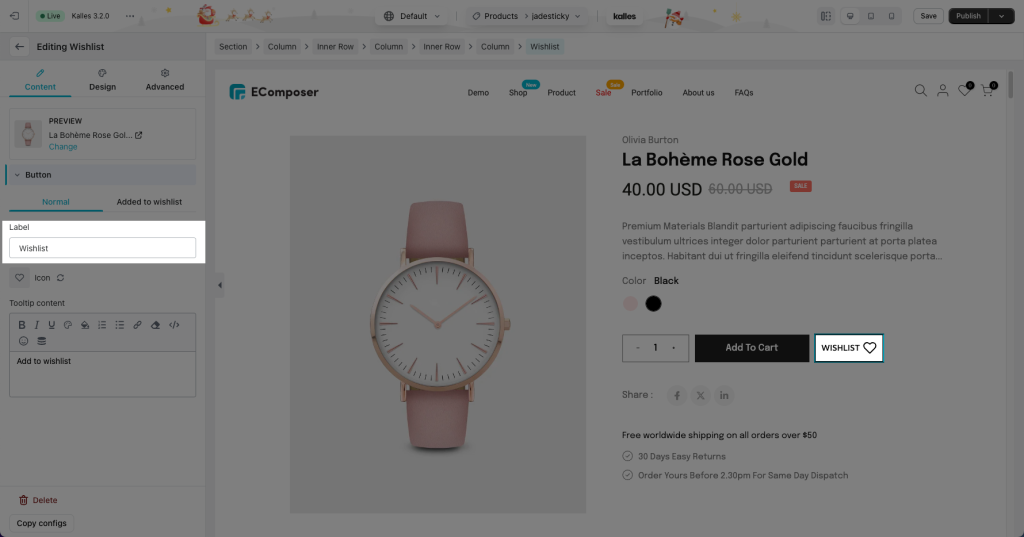
– Label: You can add the label for your wishlist button.
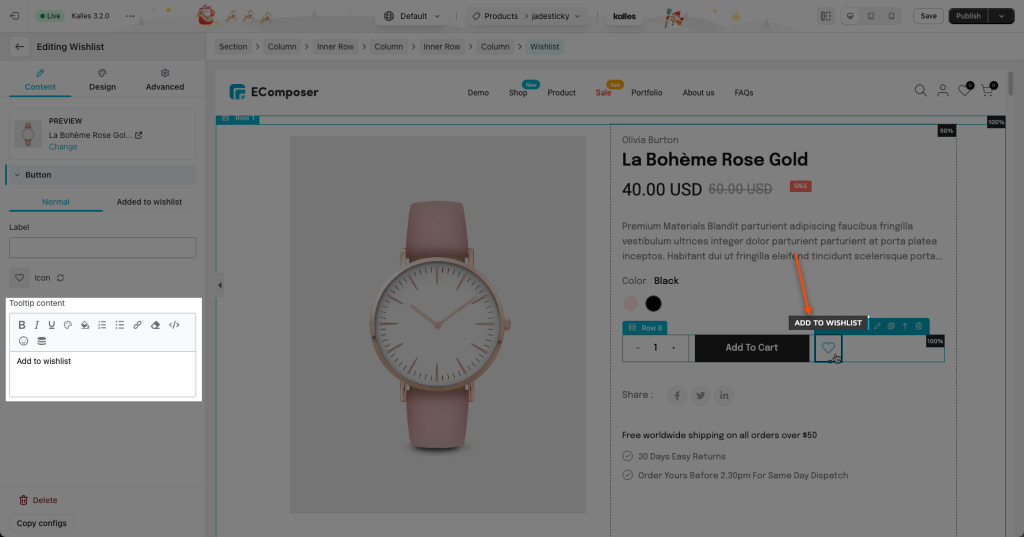
– Tooltip content: Here you can change the text of the tooltip that appears when you move the mouse over the wishlist button
2.2 Design
Under the Design tab of the extension, you can change the style of the button name and icon such as color, size, alignment,…
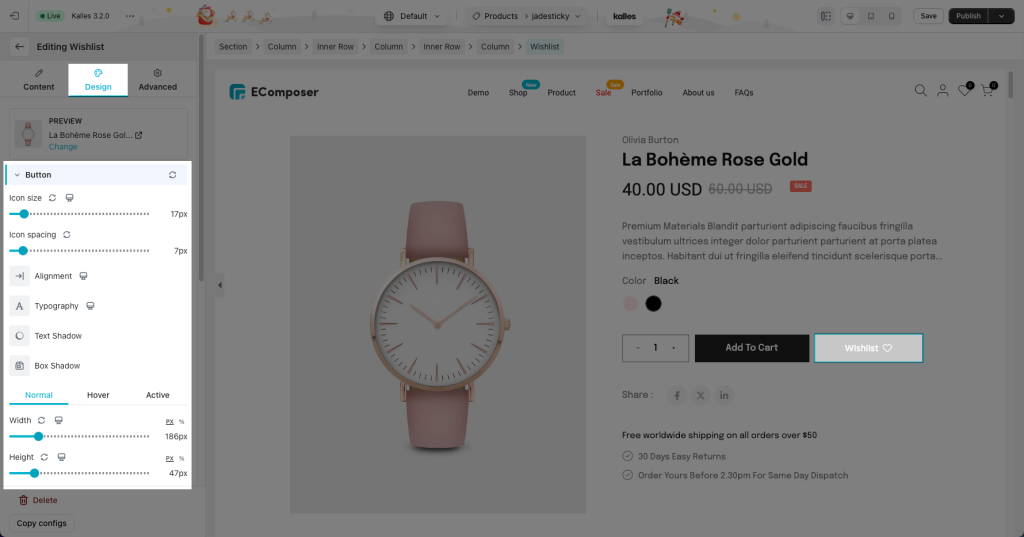
3. How to set up a Wishlist icon on the Collection page?
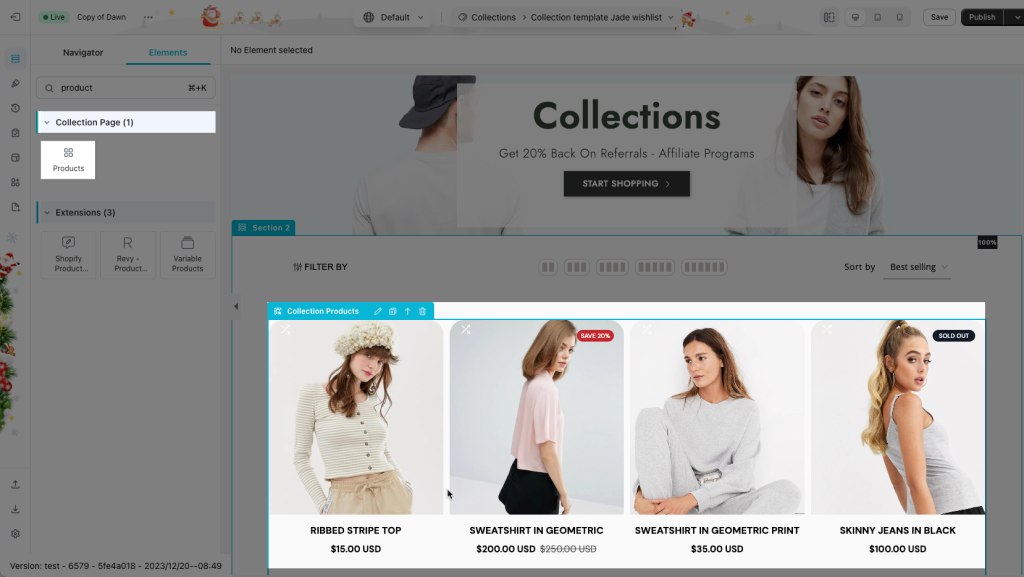
You need to drag a Collection products element first because the Wishlist icons will display overlapping on each product image here. The same setting on the Product grid and Related product elements.
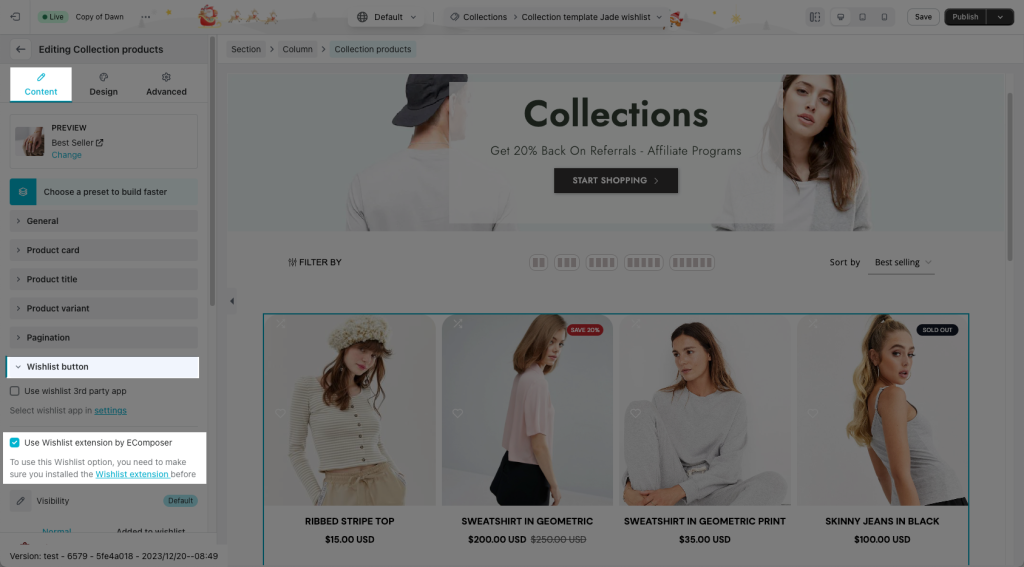
- Under the Content tab -> find the Wishlist button -> tick the option Use the Wishlist extension by EComposer to enable it.
Result: Please check the video below to see how the wishlist icon is showing up. You can decide how the icon displays with an action in Visibility.
– A wishlist icon always has 2 statuses (Normal and Added to wishlist) Make sure to configure both of them here.
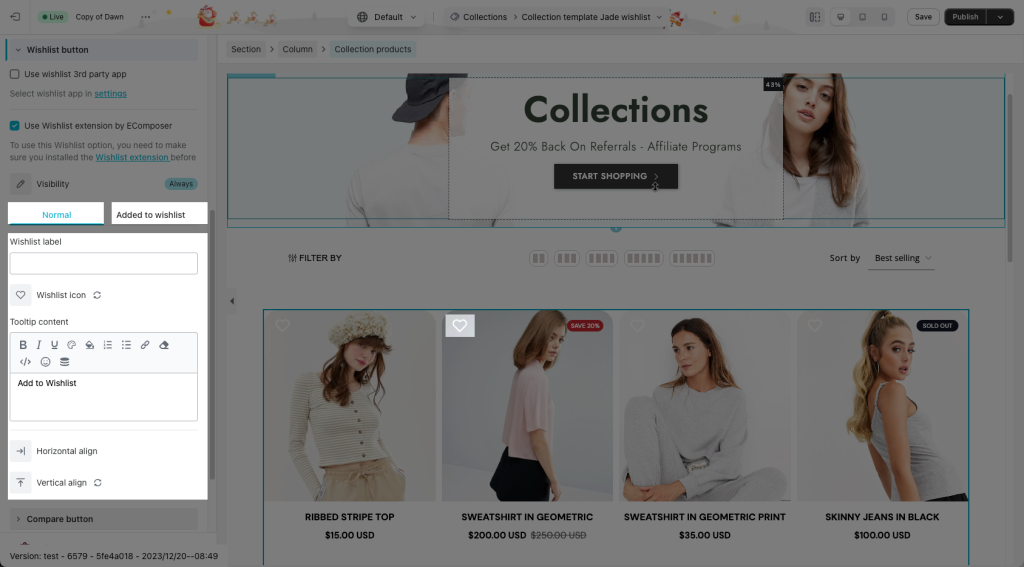
- Design tab: In this tab, you can change the color, size, space,… etc of the wishlist icon.
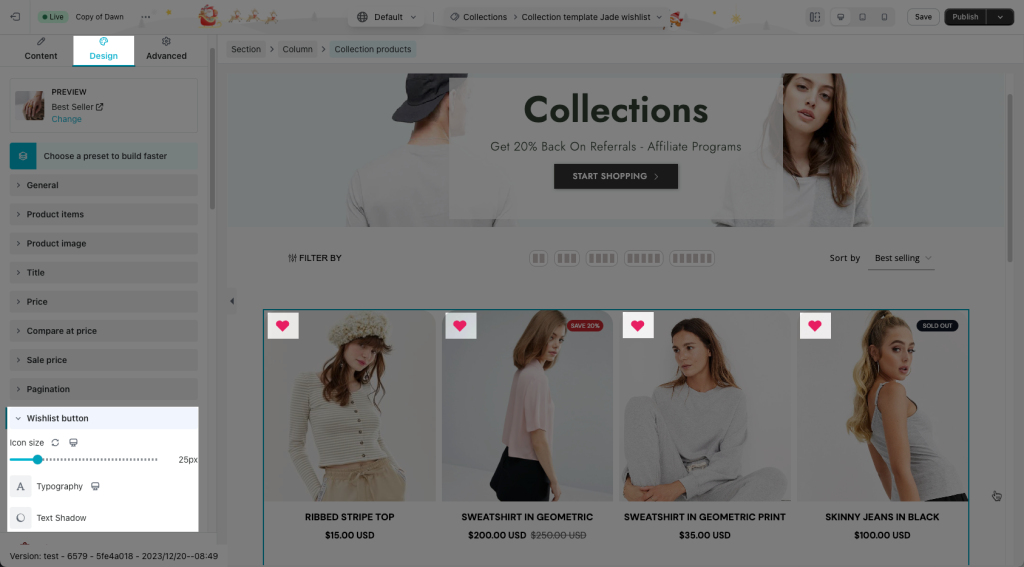
4. How to set up the appearance of the Wishlist’s details page?
4.1. Set up the detail page when not logging in
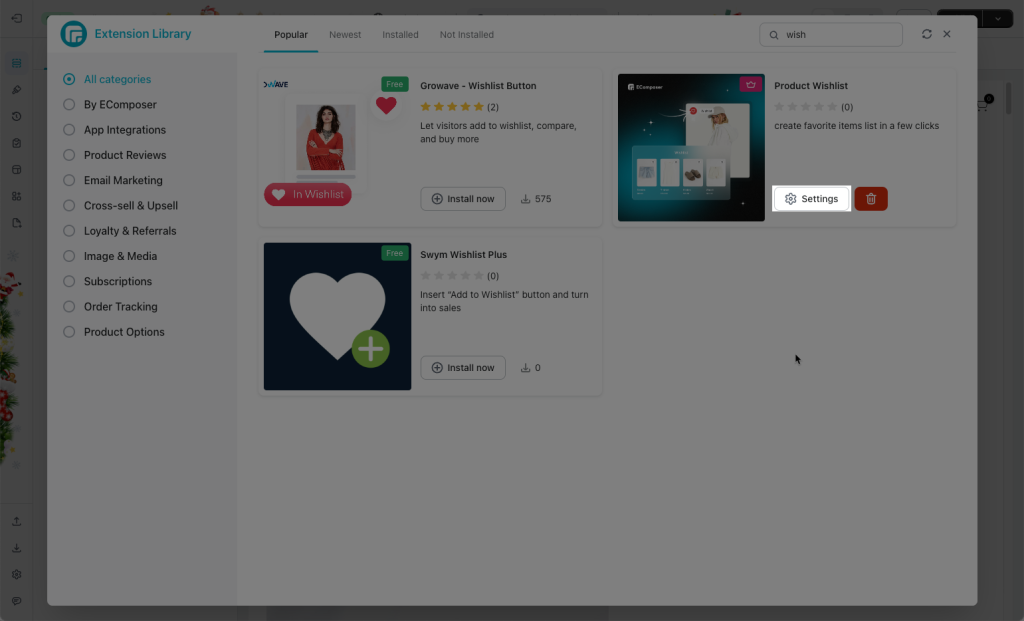
Let’s open Extension Library pop-up -> Find the Product Wishlist extension -> Click Settings to open extension’s settings.
Under the Settings tab, open General -> Access permission -> Guest
Now you go back to a Product page to see how this Wishlist button works without registration. Or you can access this page via this default URL:
your_store_domain/apps/ecomposer-visual-page-builder/wishlist4.2 Set up the detail page when login is required
Under the Settings tab, open General -> Access permission -> Login require
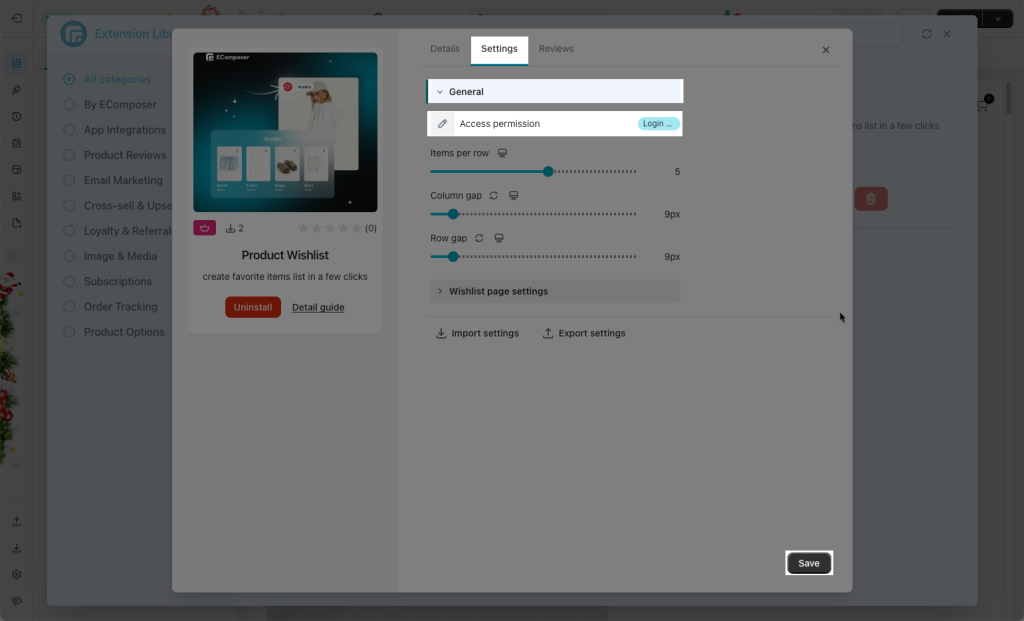
After clicking to the Wishlist buttot, you’re mandatorily redirected to the Login page. Or you can access this page via this default URL:
your_store_domain/account/loginSign up an account via Facebook, Google or Amazon account or using your own email
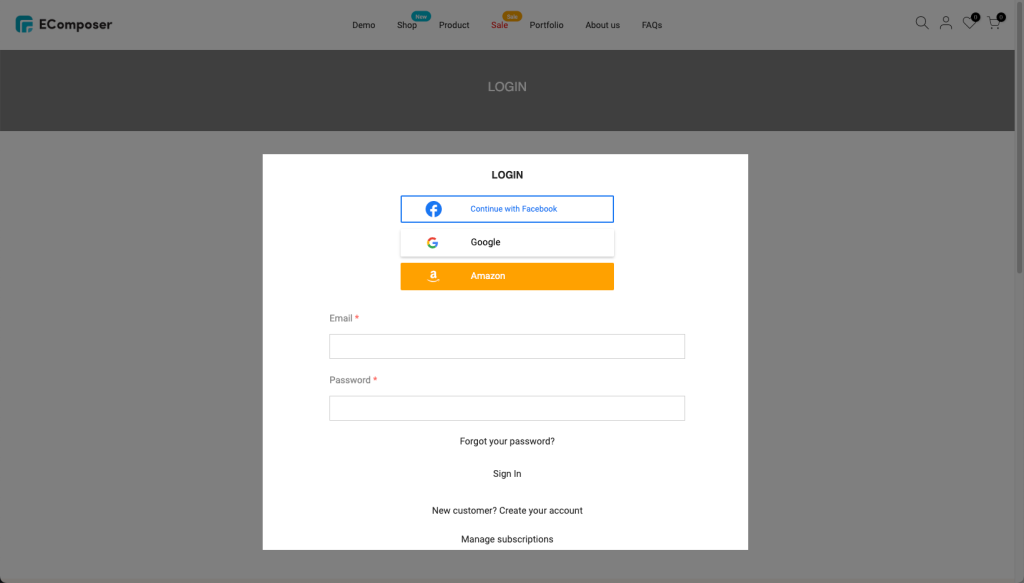
4.3. Change the style of the Wishlist detail page
Note: The settings of Wishlist detail page here are being used on both options: when you choose Wishlist with registration/login or Guest
On the extension Settings popup, you can find some options to configure for your wishlist page:
- General: Change the number of items on a row and the blank space between items vertically or horizontally.
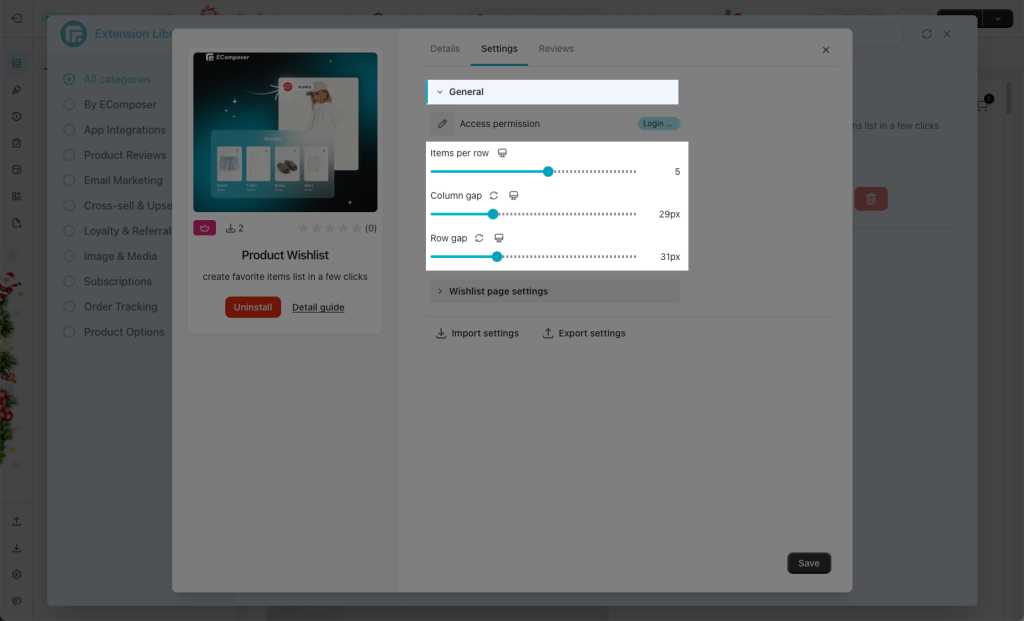
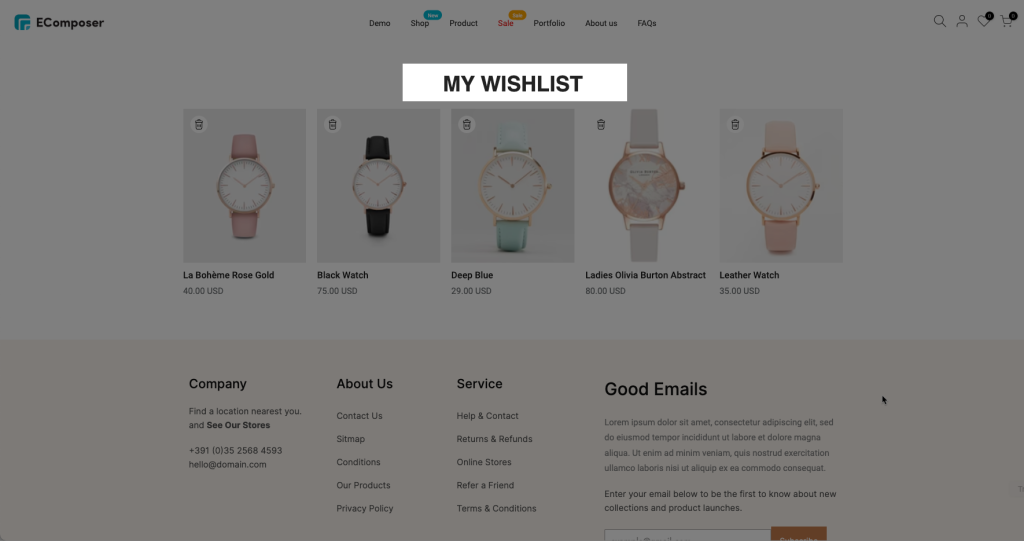
Result: 5 wishlist products showing on a row
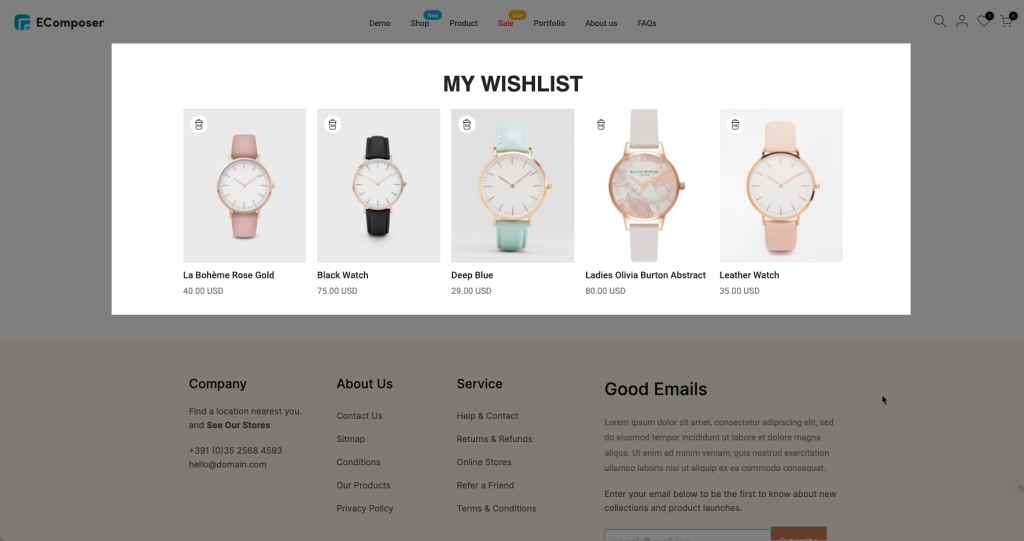
- Wishlist page settings
– Page heading: change the title of this page
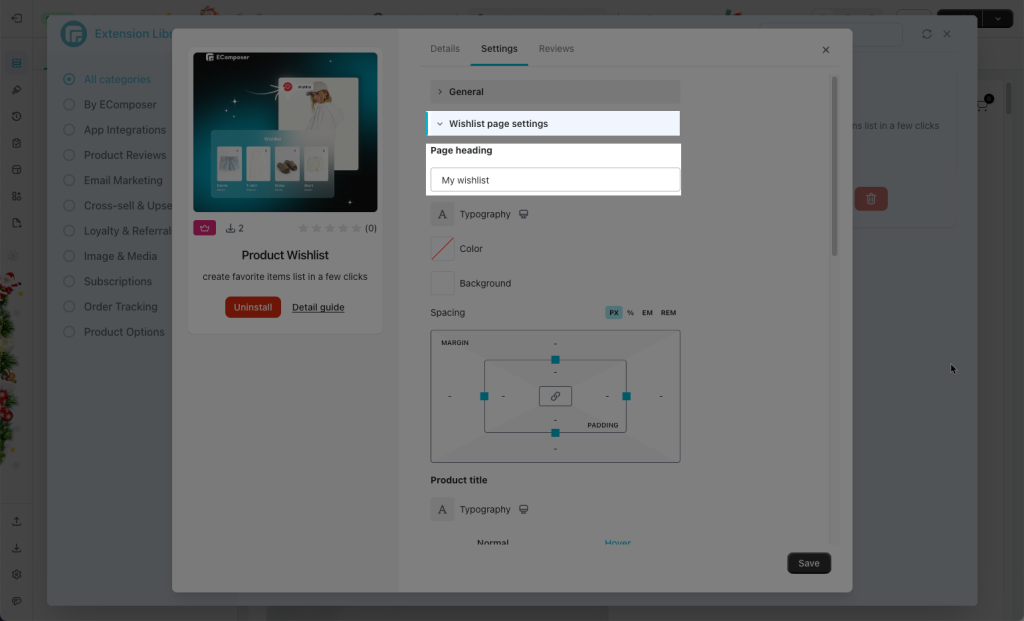
Result of the page heading:
– Product title, Product price, Compare at price, Add to cart button: you can change the Typography, Color, Background, Border, and Gap of these elements.