How to display 3D model on Ecomposer pages?
3D models let customers rotate products, zoom in on details, customize colors or features, and even preview items in their own space using AR. It’s a faster, more affordable way to give shoppers the rich visual experiences that help boost conversion rates and reduce returns. Reference: https://www.shopify.com/blog/ai-3d-model-generation
1. Displaying 3D model by Code element
Through a Code element, 3D model can be displayed on any page types such as Landing page or Product pages, Collection pages,…
Adding 3D models to your ecommerce store involves uploading files format GLB/ USDZ. The following 3D software is commonly used for creating 3D models for merchants: Maya, Blender, 3ds Max, ZBrush, Substance Painter, Photoshop,…
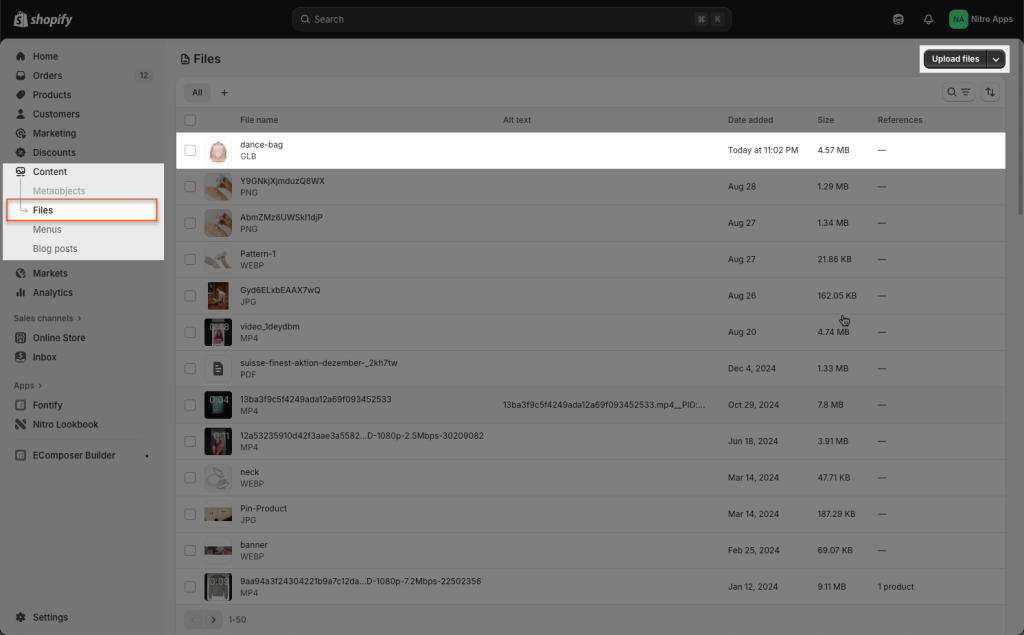
Go to Shopify Admin -> Content -> Files -> Upload your 3D file
Go back to Ecomposer Editor -> Navigate to the template page where you want the metafield to appear (e.g., a landing page) -> You copy this code below then add it to the page through Code element.
<!-- Include once on the page (top or above the viewer) -->
<script defer src="https://unpkg.com/@google/model-viewer/dist/model-viewer.min.js"></script>

<div id="soyuz-3d" style="--viewer-bg:#0a0b0f; max-width:1400px; margin:0 auto; padding:0 16px;">
  <model-viewer id="soyuz-mv"
    src="https://cdn.shopify.com/3d/models/53261ced1b6586af/9732_Soyuz.glb"
    ios-src="https://cdn.shopify.com/3d/models/53261ced1b6586af/9732_Soyuz.glb"
    poster="https://cdn.shopify.com/s/files/1/0686/0220/0369/files/9732-Soyuz-Flight-Fins.png?v=1753376643"
    alt="Interactive 3D model of the Estes Pro Series II™ Soyuz"
    camera-controls touch-action="pan-y" auto-rotate auto-rotate-delay="2000"
    shadow-intensity="0.3" ar ar-modes="webxr scene-viewer quick-look"
    style="background:var(--viewer-bg); width:100%; height:70vh; border-radius:16px; overflow:hidden;"
    field-of-view="30deg" camera-orbit="0deg 65deg 110%">

    <!-- Optional hotspots (tweak positions/normals to match your model) -->
    <button slot="hotspot-1" class="hotspot" data-position="0m 0.1m 0.2m" data-normal="0m 1m 0m" aria-label="Rip Stop Parachutes">
      <span class="dot"></span><span class="label">Rip Stop Parachutes</span>
    </button>
  </model-viewer>
</div>

<style>
  #soyuz-3d .hotspot{--d:10px;--r:24px;position:relative;transform:translate(-50%,-50%);display:inline-flex;gap:8px;color:#fff;font:500 14px/1.2 system-ui,-apple-system,Segoe UI,Roboto,Helvetica,Arial,sans-serif;text-shadow:0 1px 2px rgba(0,0,0,.4);border:0;background:none;cursor:pointer;white-space:nowrap}
  #soyuz-3d .hotspot .dot{width:var(--d);height:var(--d);border-radius:999px;background:#fff;box-shadow:0 0 0 var(--r) rgba(255,255,255,.18)}
  #soyuz-3d .hotspot .label{padding:6px 10px;border-radius:999px;background:rgba(0,0,0,.45);backdrop-filter:blur(6px);border:1px solid rgba(255,255,255,.15)}
  @media (max-width: 991px){ #soyuz-mv{ height:60vh !important; } }
</style>
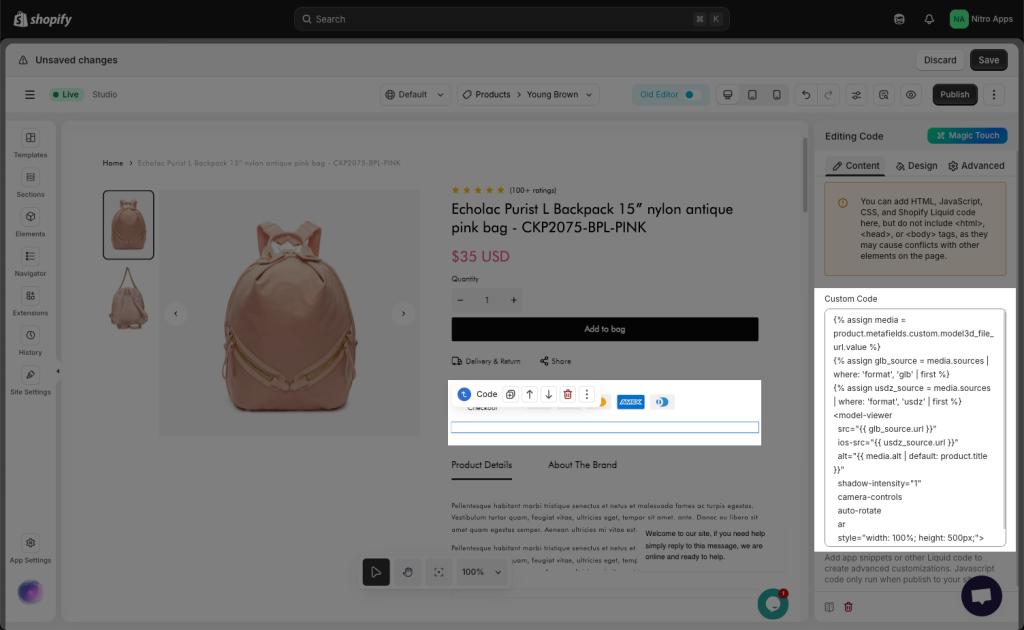
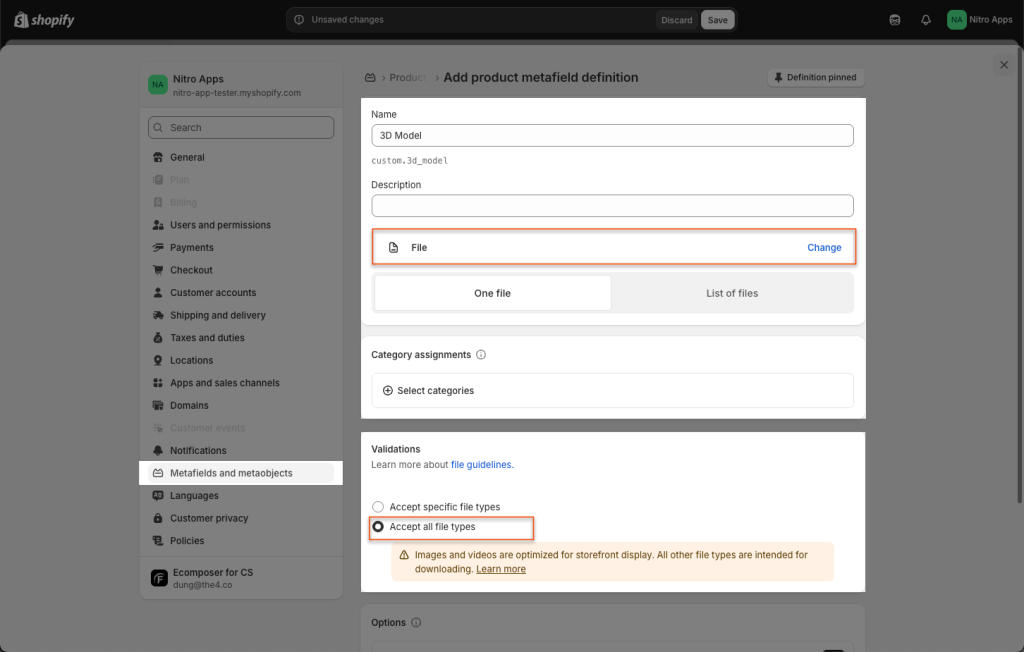
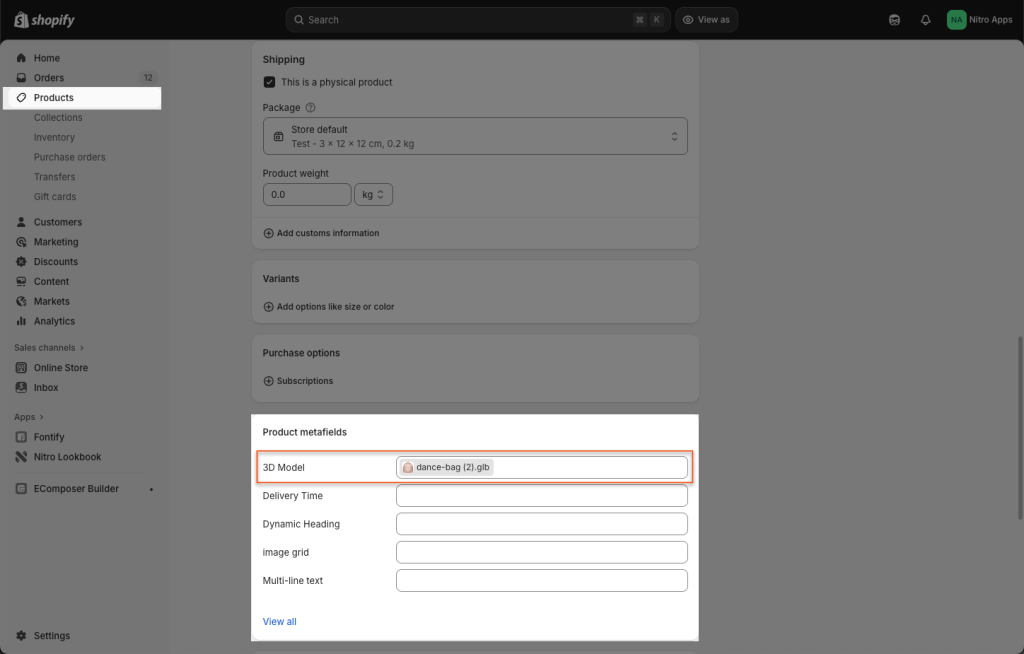
2. Displaying 3D model by Metafiled
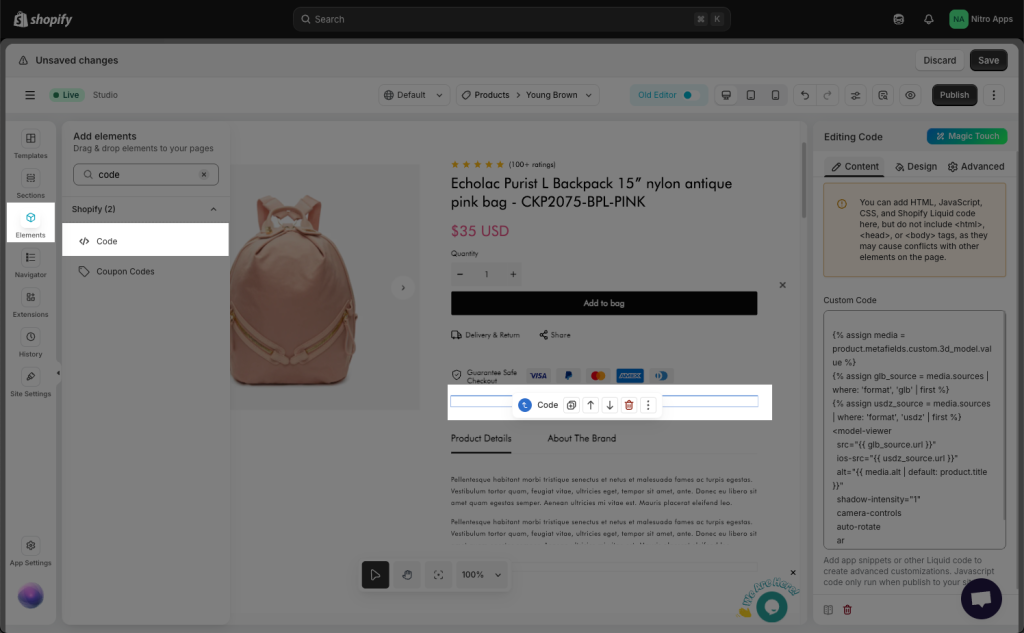
Finally, you copy this code below then add it to the page through Code element.
{% assign media = product.metafields.custom.model3d_file_url.value %}
{% assign glb_source = media.sources | where: 'format', 'glb' | first %}
{% assign usdz_source = media.sources | where: 'format', 'usdz' | first %}
<model-viewer
  src="{{ glb_source.url }}"
  ios-src="{{ usdz_source.url }}"
  alt="{{ media.alt | default: product.title }}"
  shadow-intensity="1"
  camera-controls
  auto-rotate
  ar
  style="width: 100%; height: 500px;">
</model-viewer>