How to change the font for all pages in EComposer?
When creating the pages in EComposer, you might want to use Shopify default font or not. This article will show you the way to use the default font from Shopify or use the font in EComposer.
1. Using Shopify Default Theme font
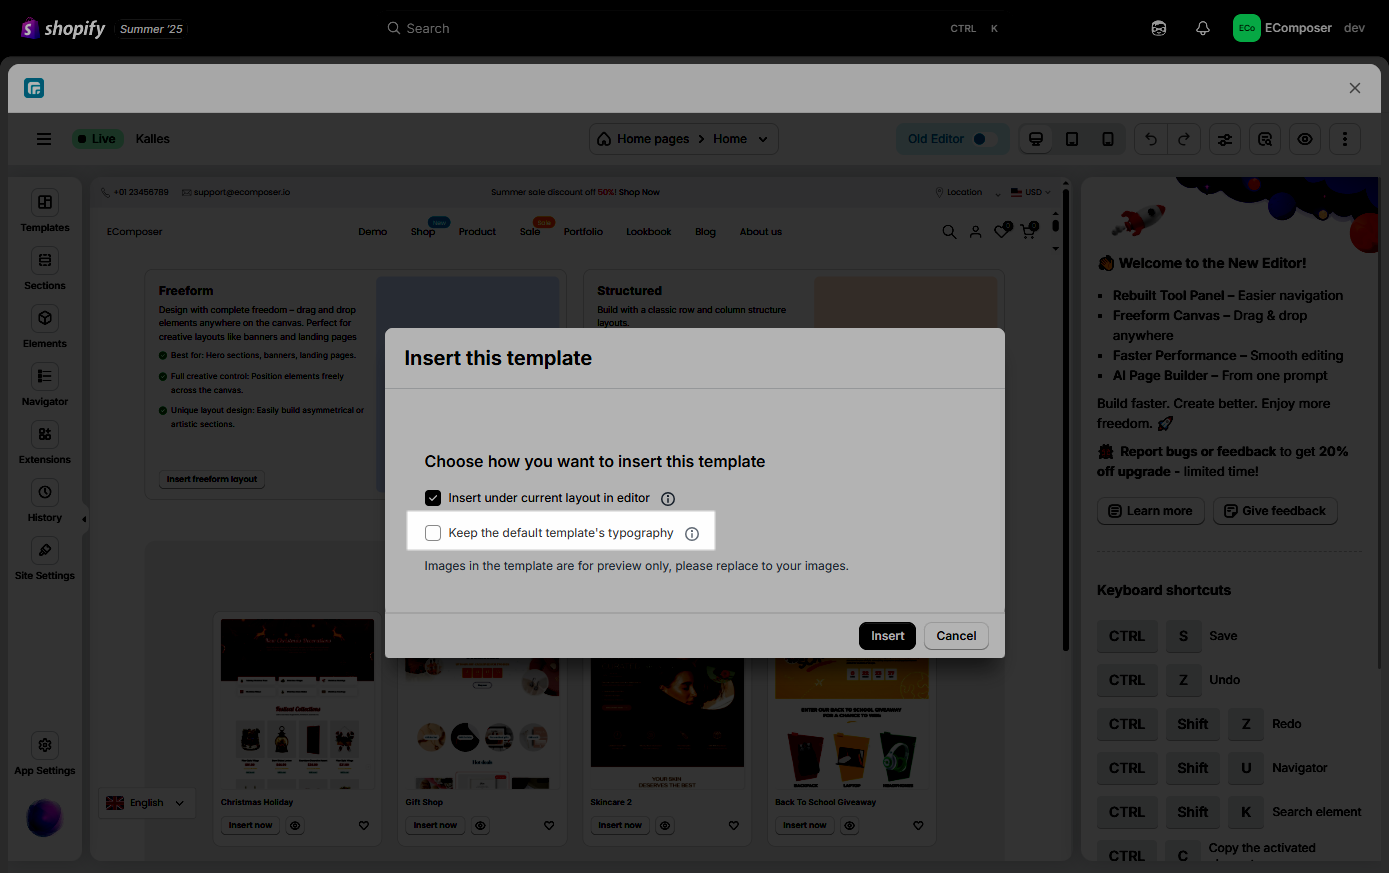
Normally, Shopify themes will use two fonts across stores, one font for headings and another font for body text. When building the templates, we added default fonts to the elements to make the designs stand out. So when you create a page in EComposer and insert a default template from the library, we will display a message saying whether you want to use the default font of the app template or not.
When importing a pre-built template from our Template library to use, if you do not want to use the default font in our default template, please just untick the “Keep the default template’s typography” box. Such as the example screenshot below:
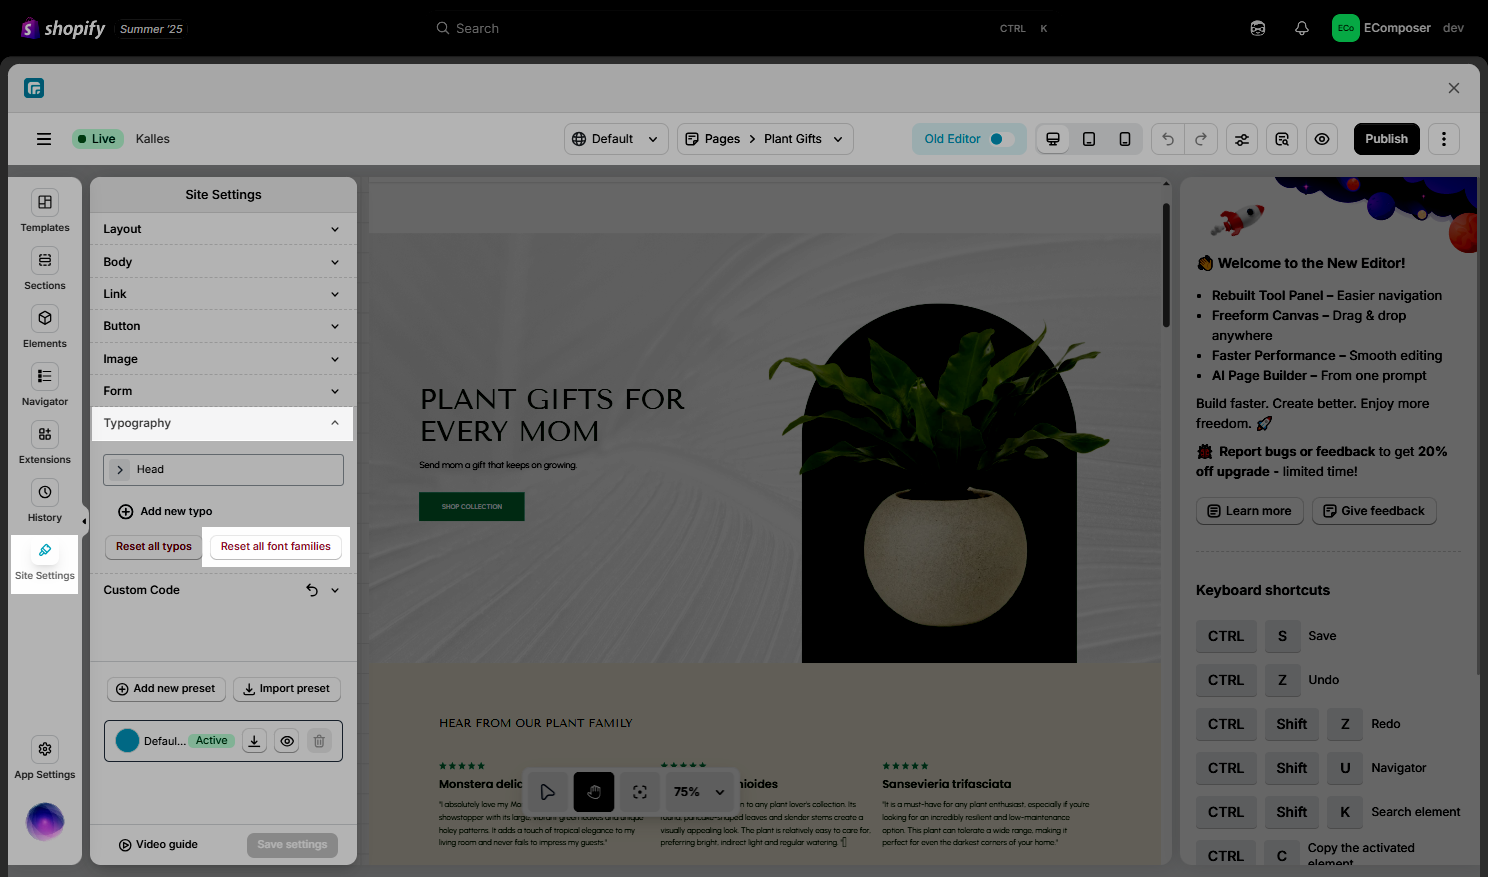
Don’t worry if you accidentally forgot to untick that option, and you want to go back to the Default font of Shopify. As shown in the screenshot below, you can open the Site settings -> Typography and click on Reset all font families to reset the default font on the elements on your page in EComposer to the Shopify Default font. Please do the same action for all pages inside EComposer.
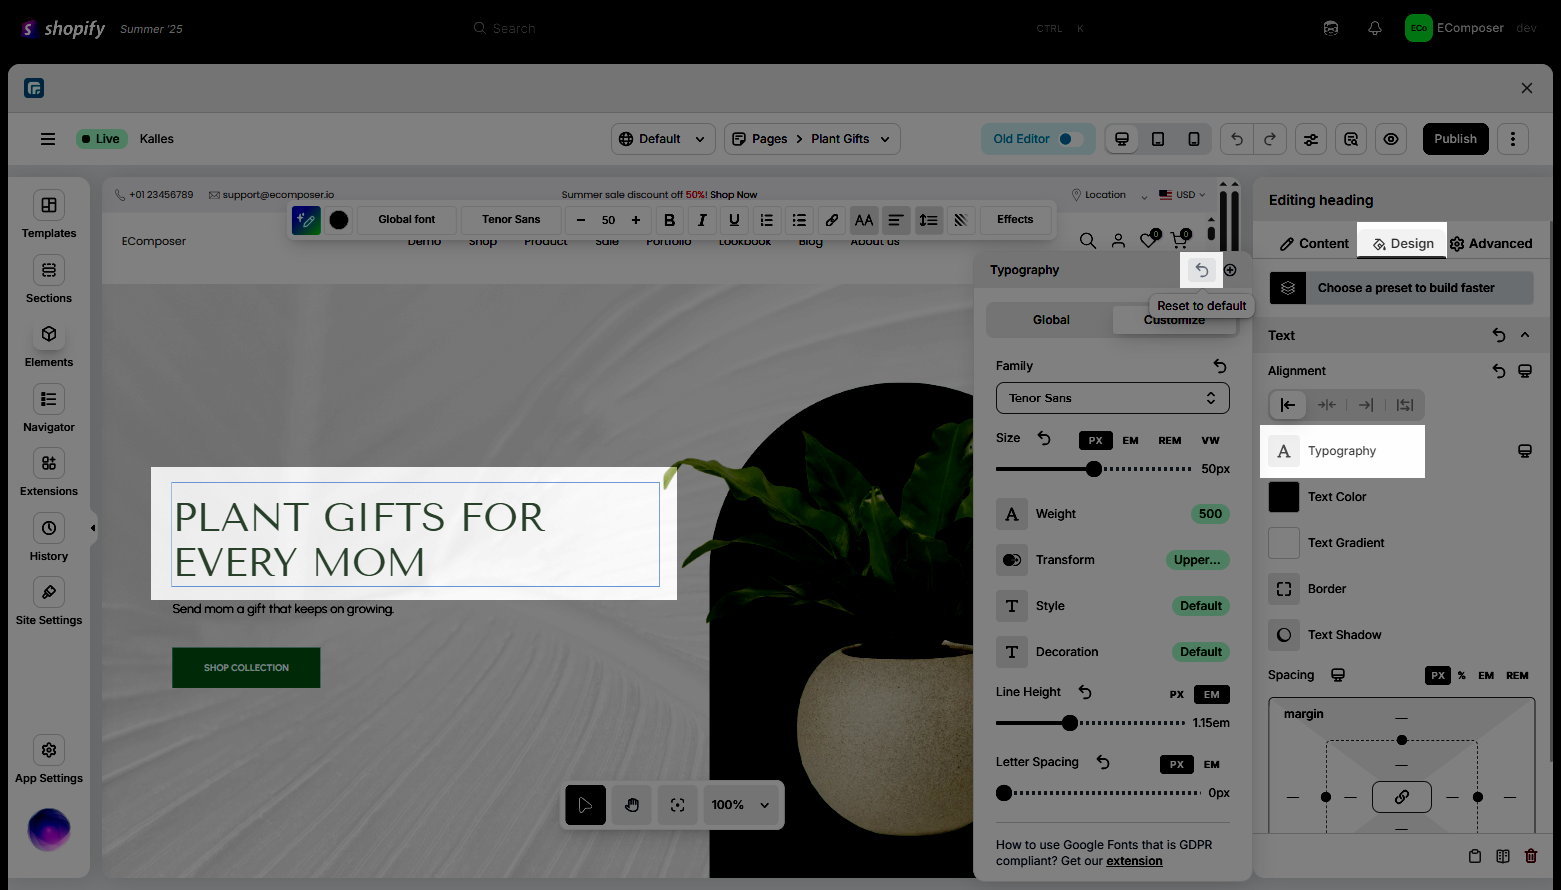
You can also reset the font on each element by following the image below.
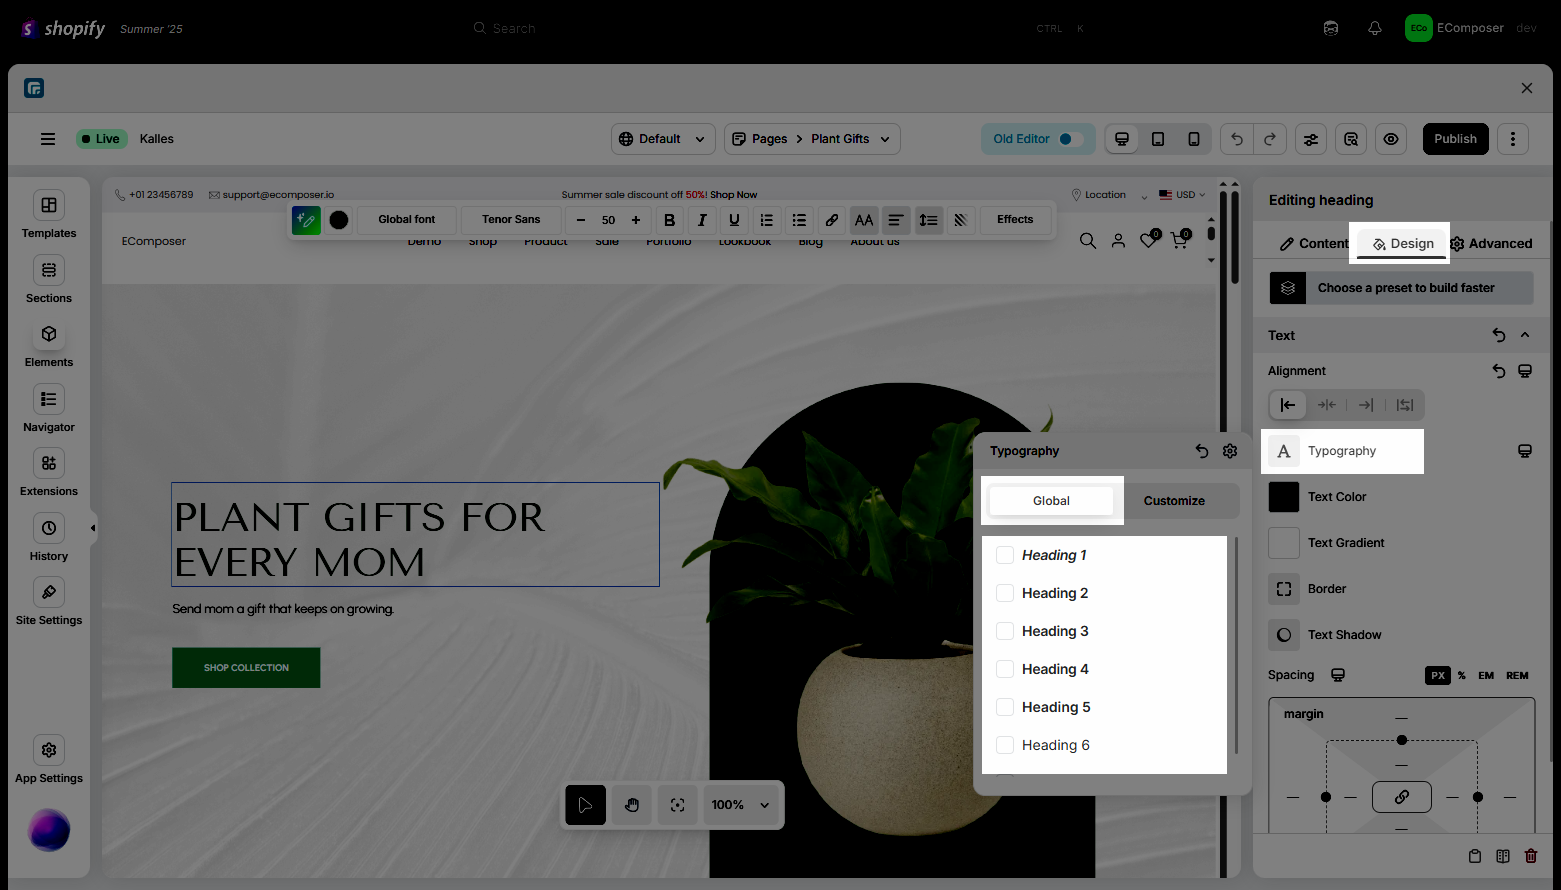
2. Use a custom font (different from your theme) with Global Typography
Changing the font settings in EComposer will only change the fonts on certain page elements. Also, the Typography Customize or Global Typography sets provide you with two options for setting. Follow along to learn more about them and the differences between the two.
2.1.Typography Customize
Hence, in the EComposer font settings, you may modify the style you want for each element, including Design features like color, font weight, and more.
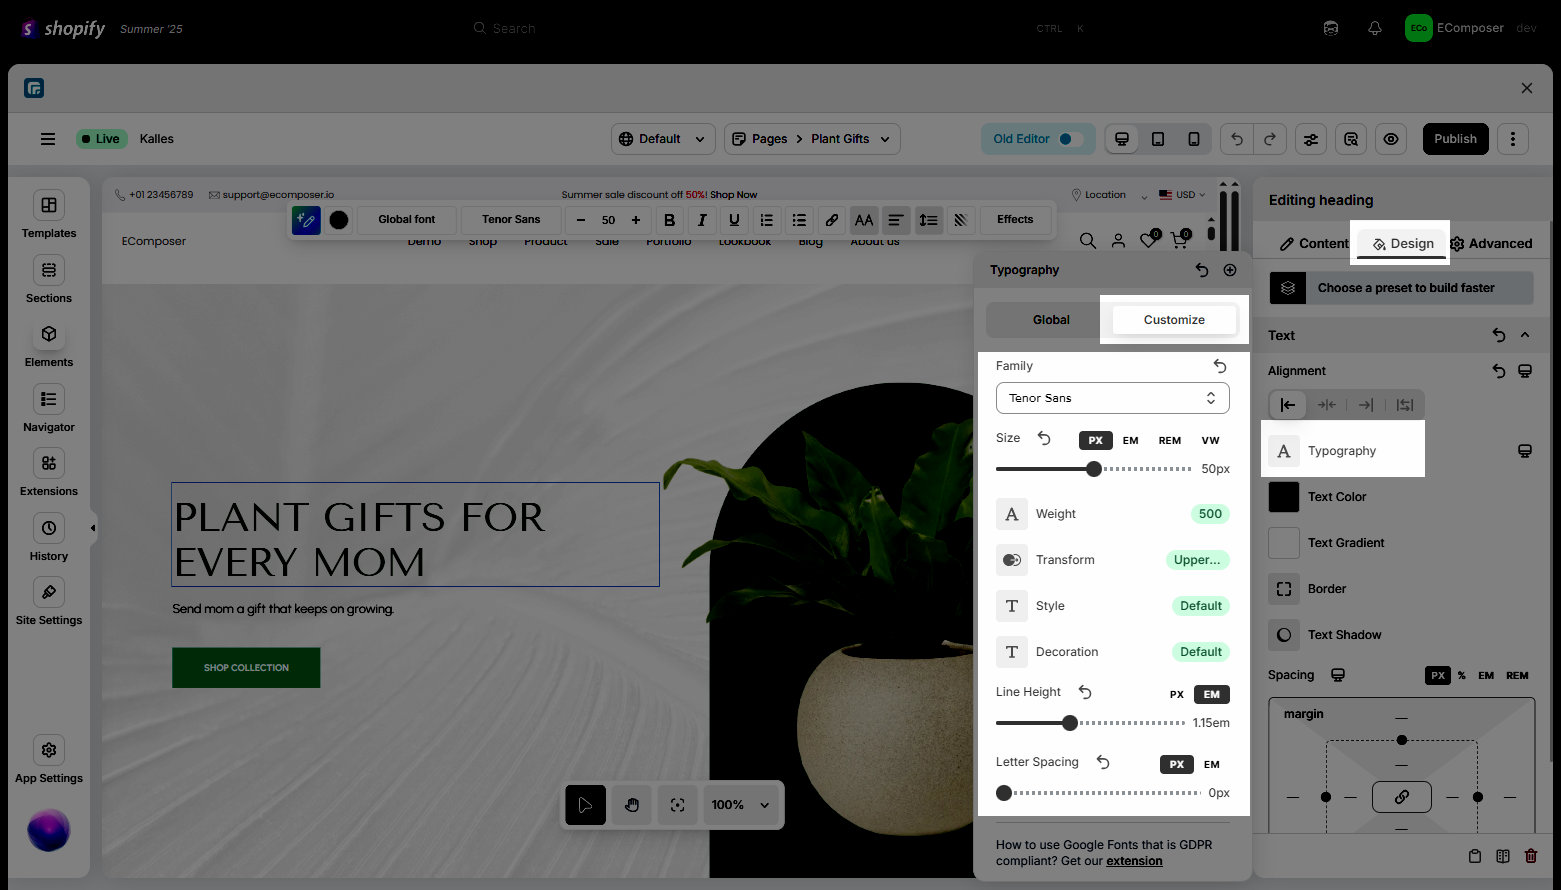
Special notice: You can easily add custom fonts outside the EComposer default fonts, which can help your content present visually. Check out the tutorial below:
2.2. Using Global Typography
This method is recommended if you want to:
- Use a font that is different from your theme’s default font
- Easily change fonts later without editing each element again
- Keep typography consistent across multiple pages
By using Global Typography, you only need to update the font once, and all elements linked to that global typography will automatically update.
Step 1: Create a Global Typography preset
- Open EComposer Editor
- Click App Settings (gear icon at the bottom left)
- Go to Global settings → Global Typography
- Click Add new typography or edit the existing ones
- Set up the typography: Font family, Font weight
- Save your settings
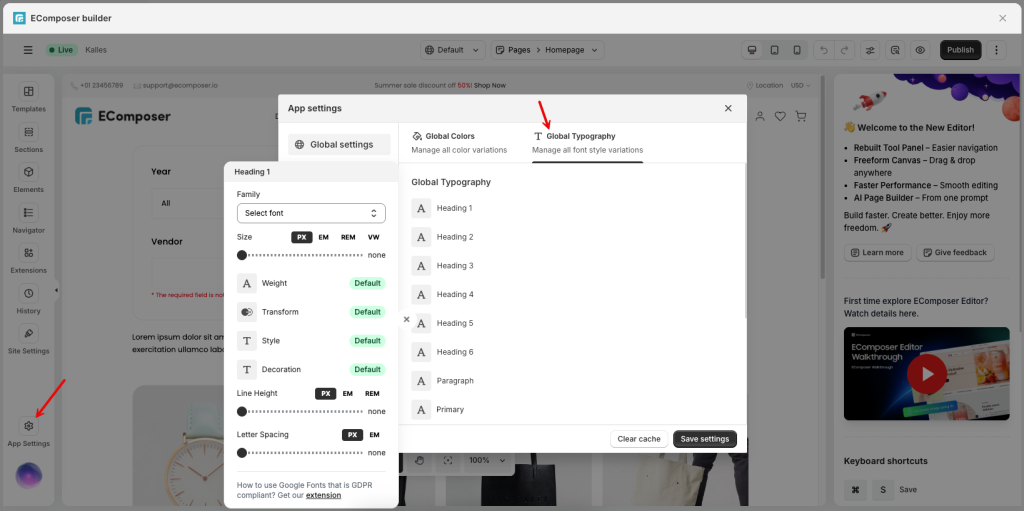
You can create multiple Global Typography presets (for example: Heading 1, Heading 2, Paragraph, Custom Title, etc.).
Step 2: Apply Global Typography to elements on the page
After creating the Global Typography:
- Open the page you want to edit
- Click on an element (Heading, Text, Button, etc.)
- Go to the Design tab
- Open Typography
- Switch to the Global tab
- Select the Global Typography preset you created
Repeat this step for other elements on the page that should use the same typography.