

How to connect EComposer Form to Popup/Spin Wheel?
EComposer allows you to create interactive experiences by connecting different elements and templates together. One of the most common use cases is linking the Contact Form by EComposer element with a Popup template or a Spin Wheel element.
This setup helps you:
- Show a thank-you Popup right after customers submit a form.
- Trigger a Spin Wheel automatically once users sign up or leave their contact details.
Let’s go through the step-by-step guides for both options below.
1. How to Connect the Contact Form by EComposer Element to a Popup
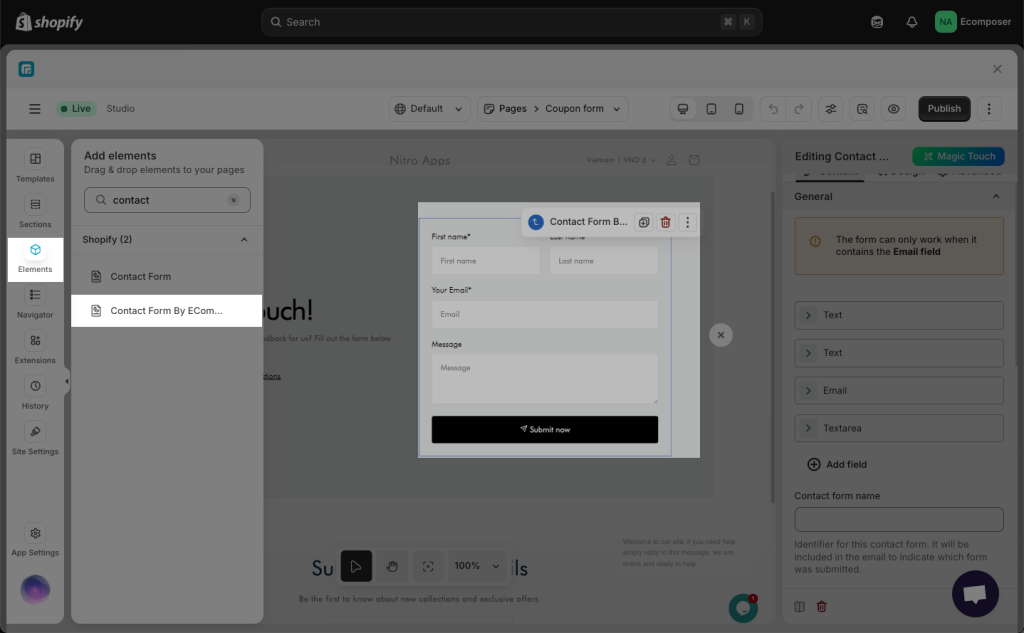
Step 1: Add a Contact Form by EComposer element to your page
On your landing page, drag and drop the Contact Form by EComposer element from the left sidebar.
Customize the content, layout, and style as you wish → then Save & Publish your page.
Step 2: Create a New Popup
Go to the EComposer App Dashboard → Templates → Create New → Choose “Popup” type.
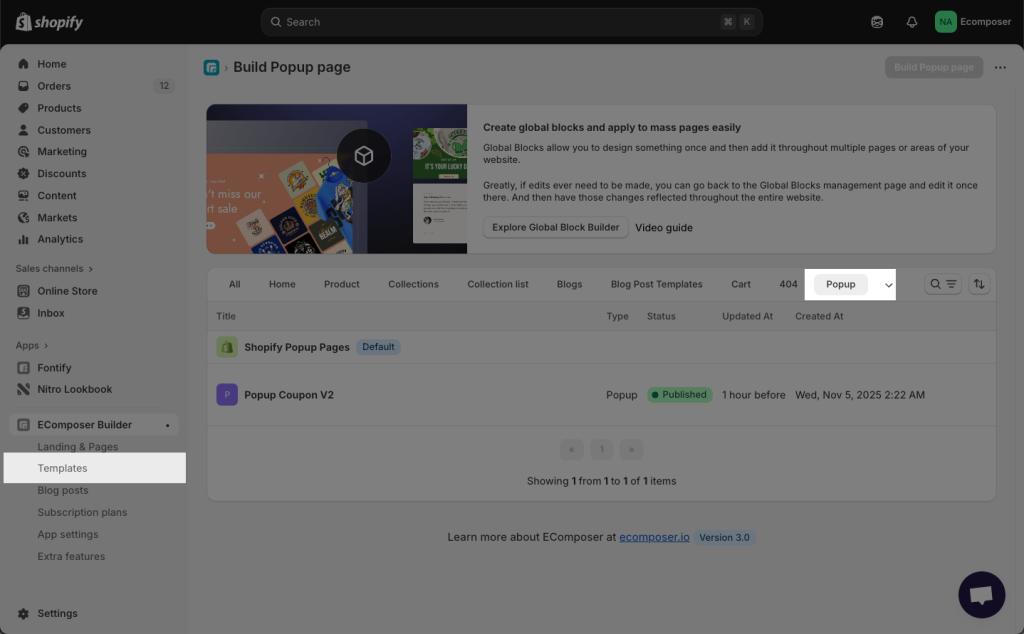
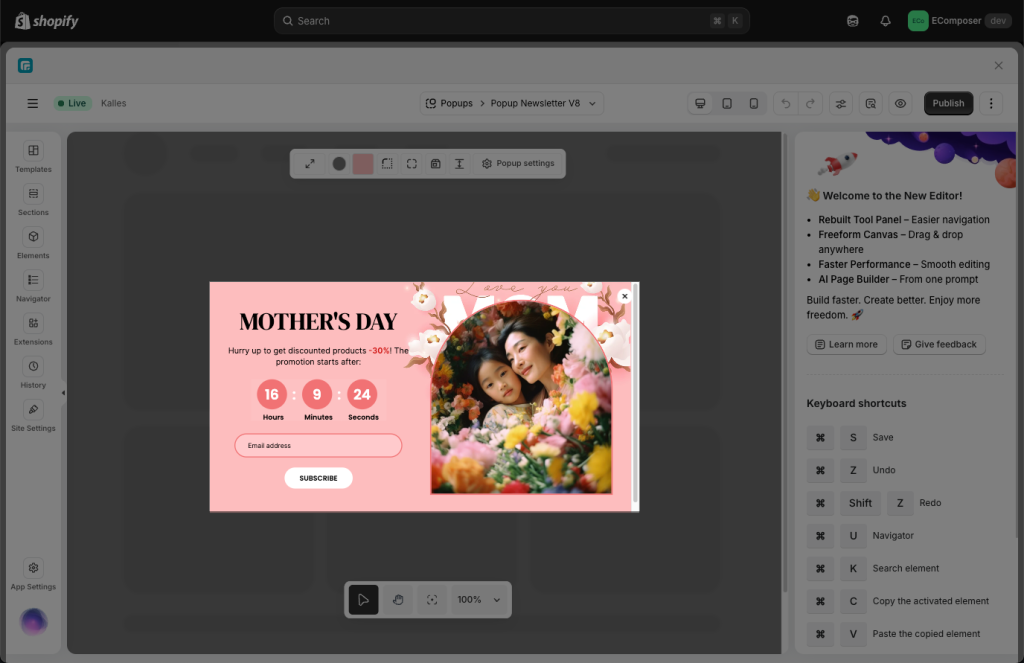
You can design any Popup style you want. For example, a Discount Popup that offers a coupon to encourage purchases.
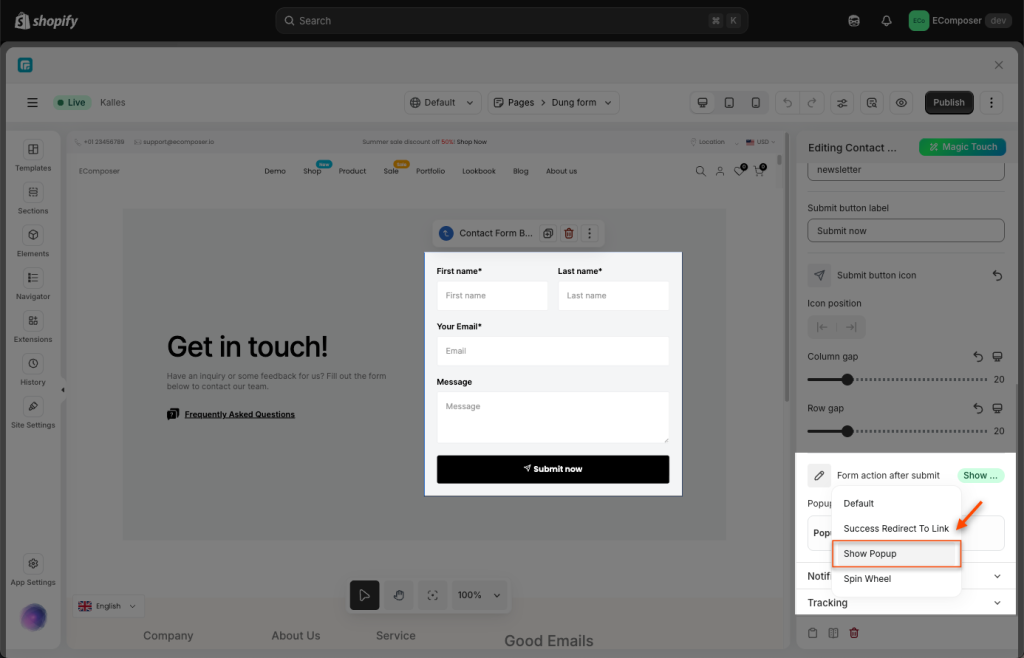
Step 3: Link the Contact Form to the Popup
Return to your landing page and edit the Contact Form by EComposer element.
In the Form Settings, find the Form Action After Submit section and choose “Show Popup”.
Then, choose the specific Popup template you want to display after the form is successfully submitted.
Step 4: Publish and Check the Result
Save and publish all changes. Now, when visitors fill in and submit the form, your Popup will appear instantly. You can also watch the tutorial video below for a visual guide.
2. How to Connect the Contact Form by EComposer Element to a Spin Wheel
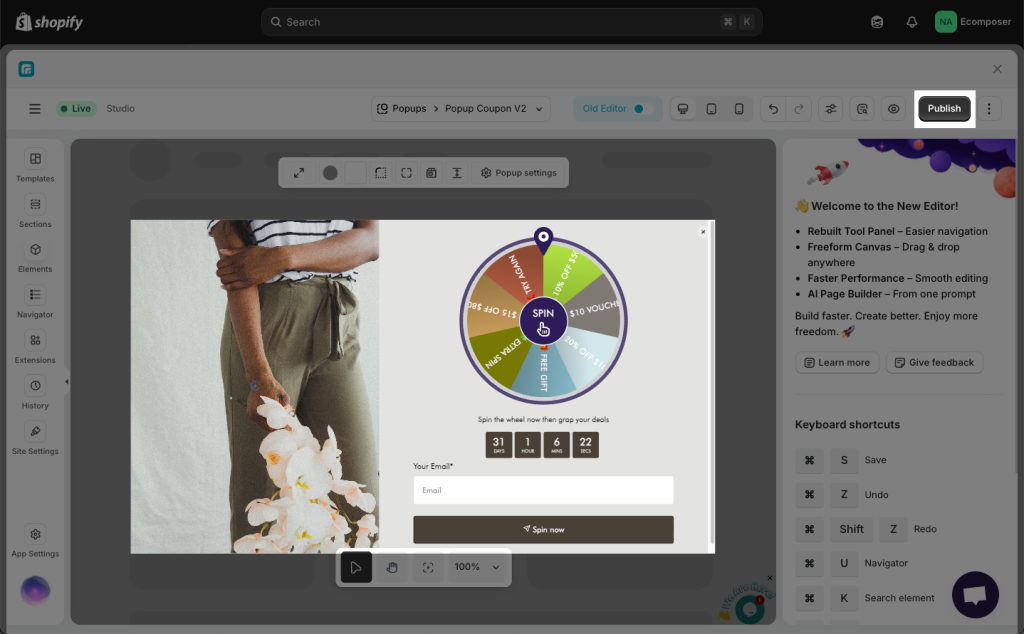
Step 1: Create a Popup with Spin Wheel.
First, create a new Popup template that contains both the Contact Form by EComposer element and the Spin Wheel element.
For example, a “Subscribe & Win” popup where users submit their email to spin and win rewards.
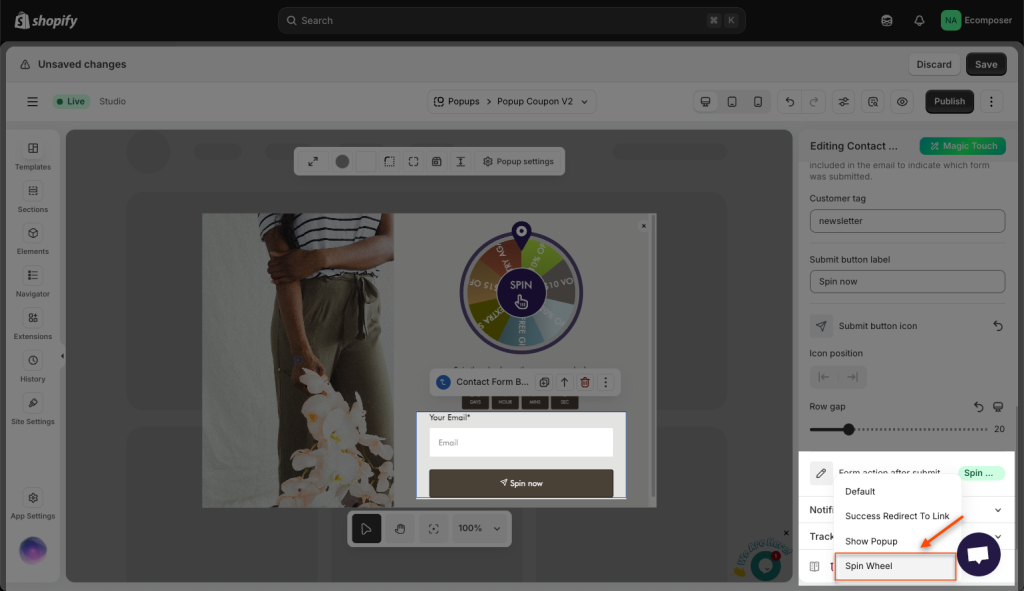
Step 2: Connect the Form to the Spin Wheel
Open the Contact Form by EComposer element settings → Go to Form Action After Submit → choose “Spin Wheel” as the trigger.
This ensures that once the form is submitted, the Spin Wheel will automatically start spinning.
Step 3: Publish and Check the Result
Save and publish your page. Now, try submitting the form to verify that the Spin Wheel starts automatically after submission.
Watch the video below to see this setup in action.


