Using Metafield on your store
To display product-specific content while using a single template for all products, you can consider utilizing metafields. Metafields allow you to store additional data for your products, such as images, descriptions, and other relevant information. This approach enables you to maintain a single template while tailoring its content to each product.
If you rely solely on EComposer to insert product-specific images and text into a single template, the content will remain identical for all products. Creating multiple product templates to accommodate unique content can quickly exceed your plan’s page number limit. Metafields provide an efficient solution to this challenge.
Before proceeding, familiarize yourself with metafields by consulting this article. Once you’ve grasped the concept, you can create metafields for your store.
By incorporating metafields, you can leverage the benefits of a single template while ensuring that each product displays its distinct content. Please follow the steps below to create your metafield.
Notice: The same steps for Collection, blog, page… the metafield supported in Shopify.
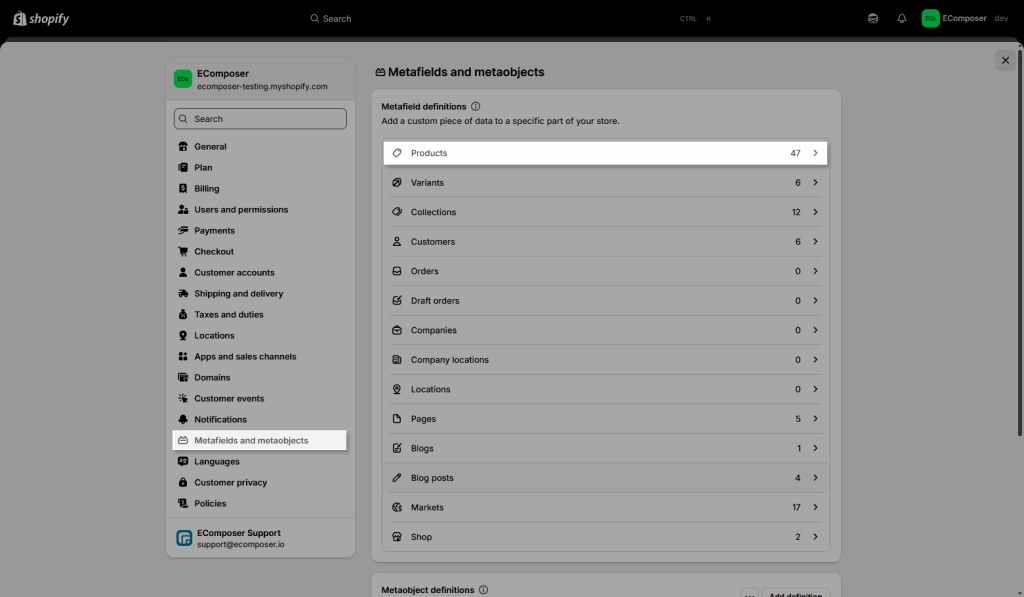
Step 1: Go to Shopify admin -> Settings -> Metafields and metaobjects -> Products -> Click Add definition.

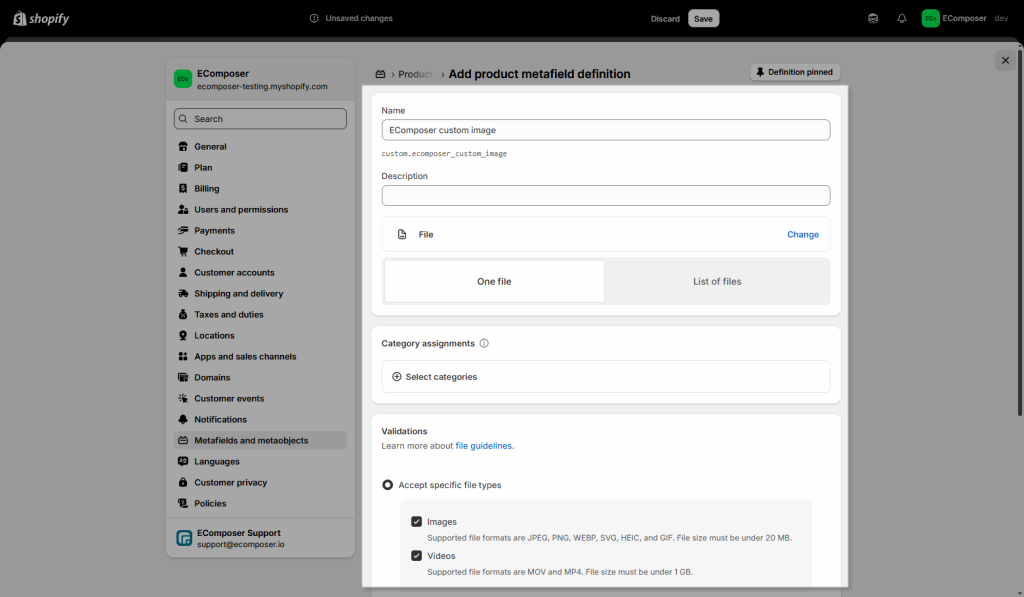
Step 2: Create your metafield with the Name and select a Type. Depending on your specific requirements, you can create various types of metafields to suit your needs. For example, if you need images, you can create a metafield of the File type. If text is required, you may choose the Single Line type.

Notice: Please use only text for the Namespace and key to make it work fine, don’t use the number there.
Please explore the relevant documentation below based on your specific needs.
Articles


