

Understanding Page Structure and Composition
It’s essential to understand the fundamental structure that defines how content is organised and presented when building a page using EComposer. A page consists of several key components, each contributing to the overall layout and design.
Let’s create a new page first, then delve into the hierarchical structure of a page, breaking it down into sections, rows, columns, and elements.
1. Creating a new page
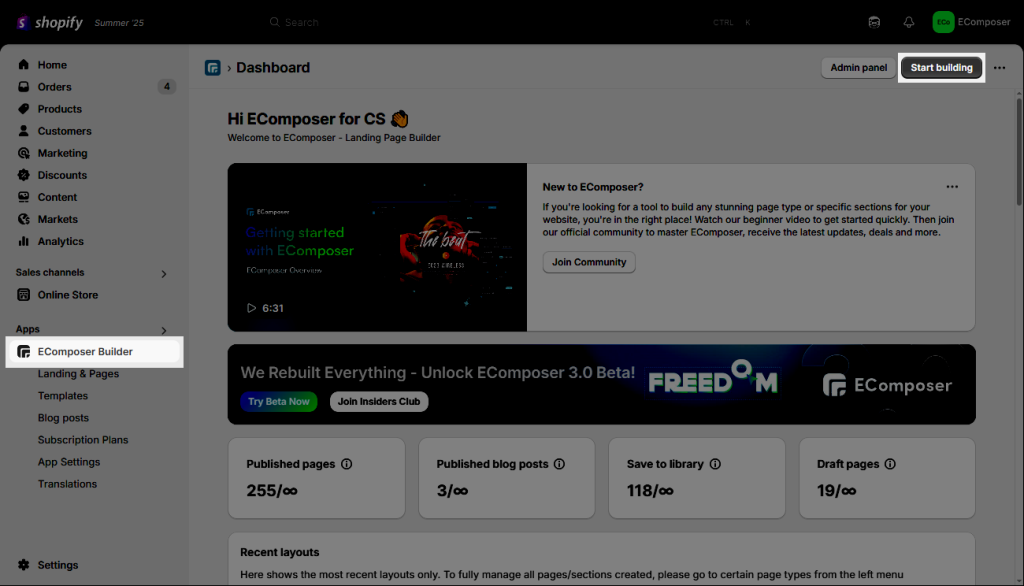
Step 1: From the Dashboard -> Start building
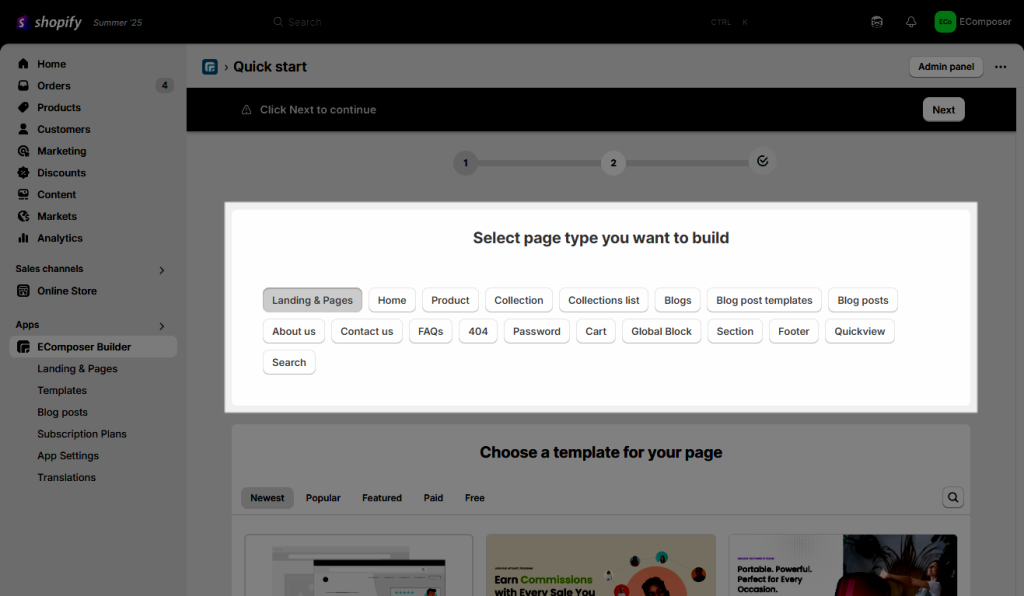
Step 2: You can click on the page type that you want to build. For example, I want to build an About us page, so I will choose the Landing pages.
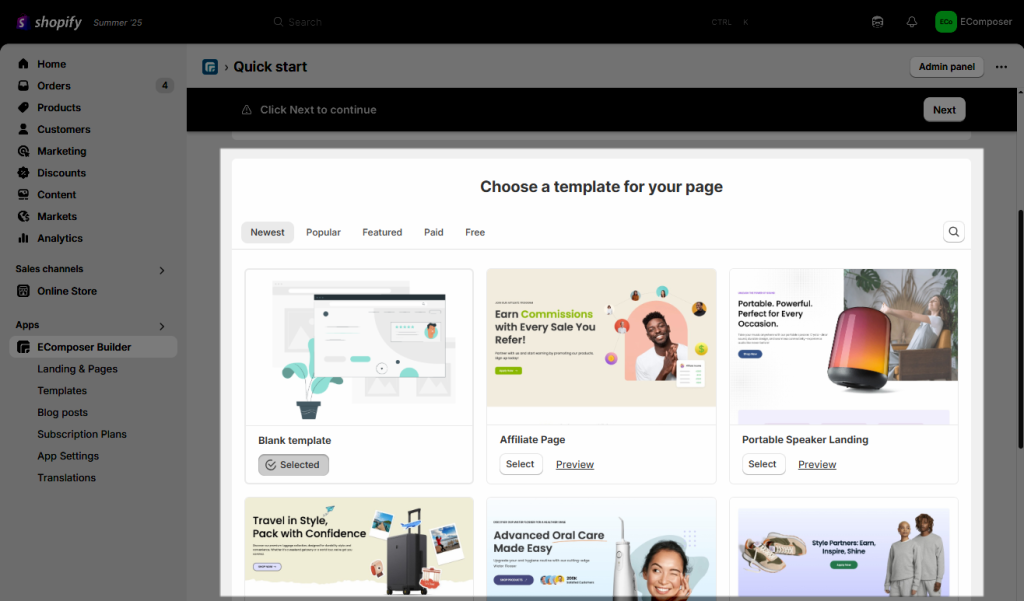
Step 3: Here, you can choose a pre-made template for your page, or select a Blank template to create the page using the elements.
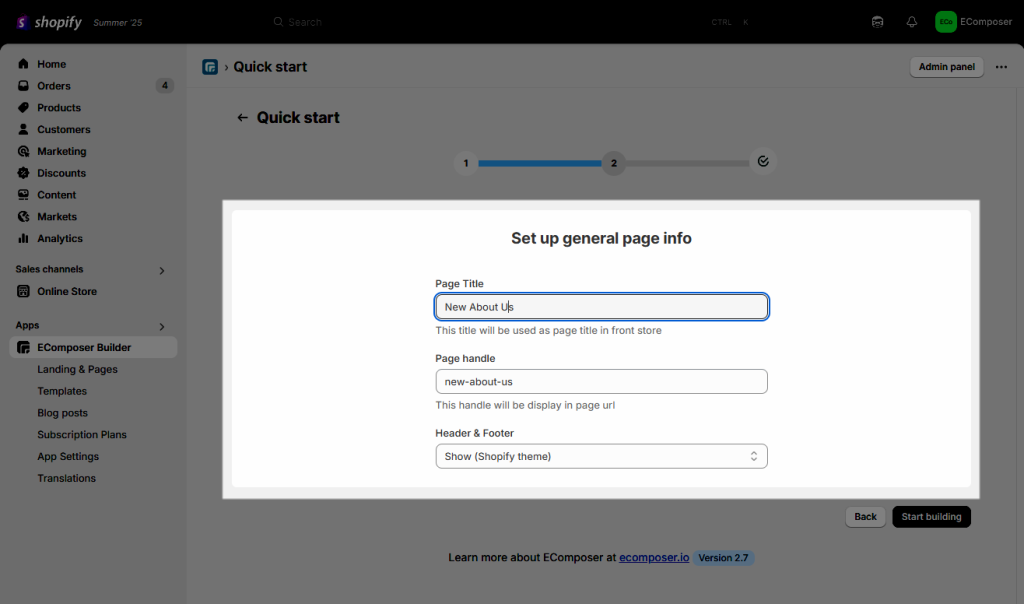
Step 4: Your next steps are to enter the Page title and the Page handle. You can also choose to “Show” or “Hide” your Shopify Theme’s Header and Footer on the page.
Step 5: After you are pleased with the outcome, click the Publish + Save & Publish to save your changes.

2. Understanding the Page Structure and Composition
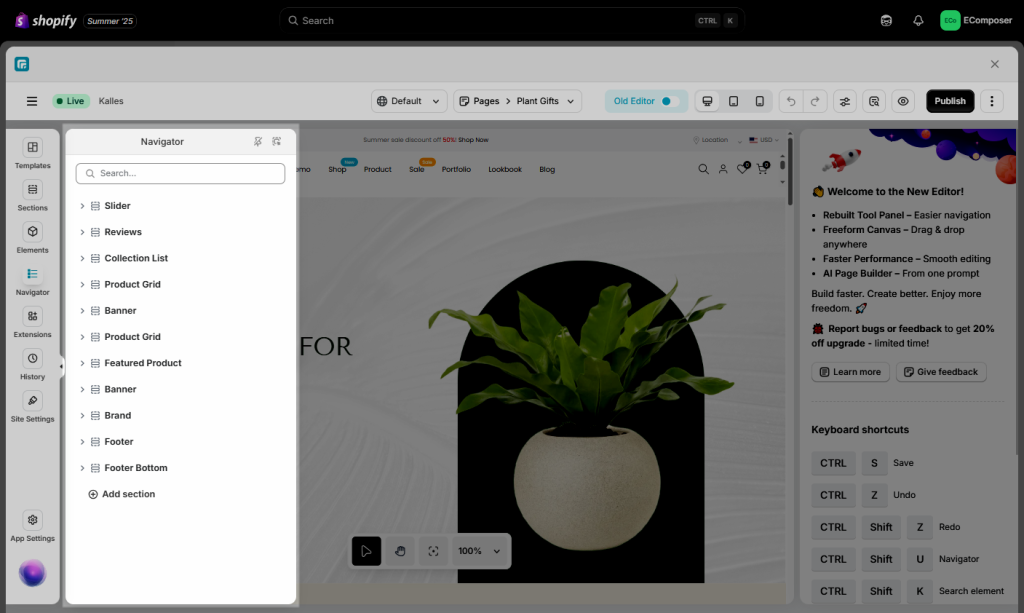
A page can consist of one or more sections. For example, if you choose a pre-designed template, you can see it with some sections inside the Navigator tab. To understand more about how the Navigator works, you can visit here.
2.1. Sections
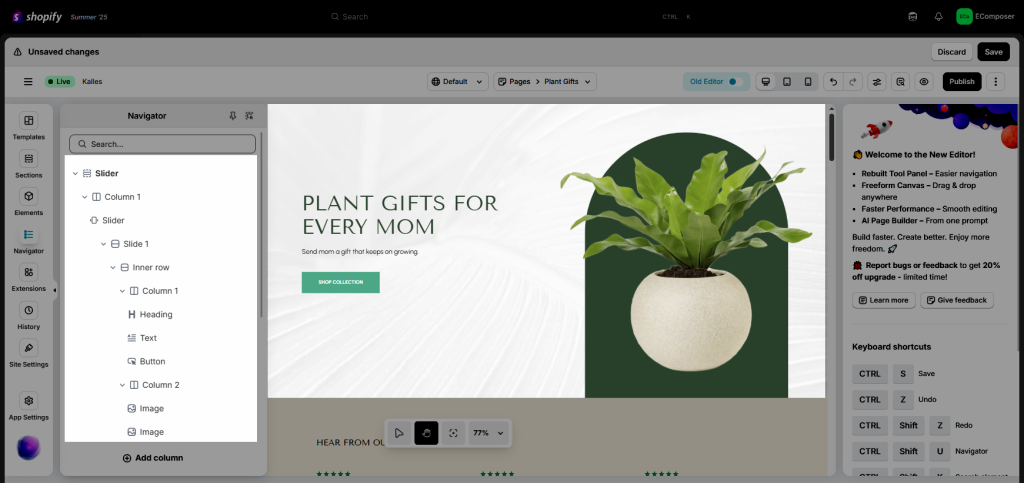
A section includes rows, columns, and individual elements. The concept of sections allows you to logically structure and organize the different components of your page. By combining multiple sections, you can create visually distinct areas on your page, each with its own unique purpose and content. For instance, you might have a “Slider” section, a “Banner” section, and a “Clients” section.
For example, the section below contains one column, and there is a Slider element in the column.
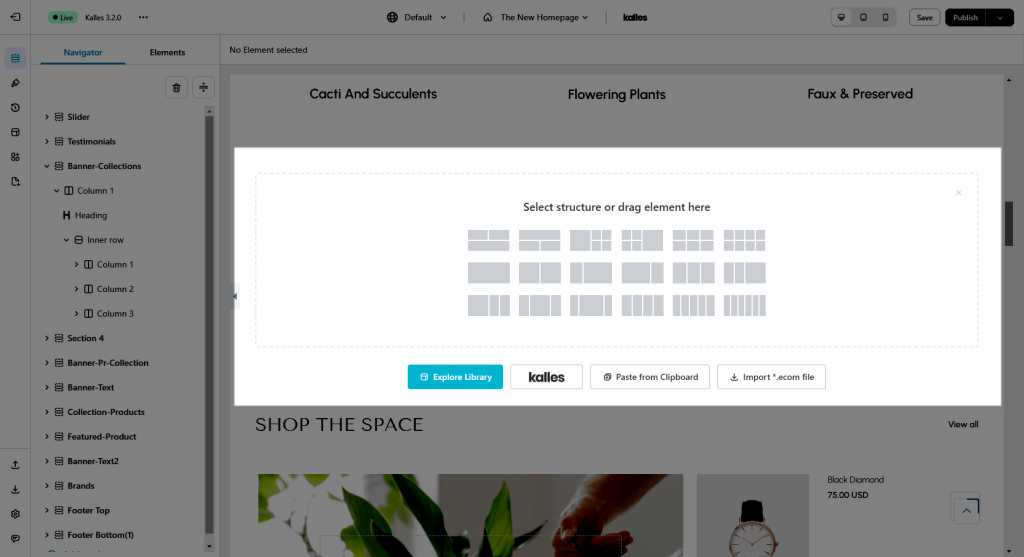
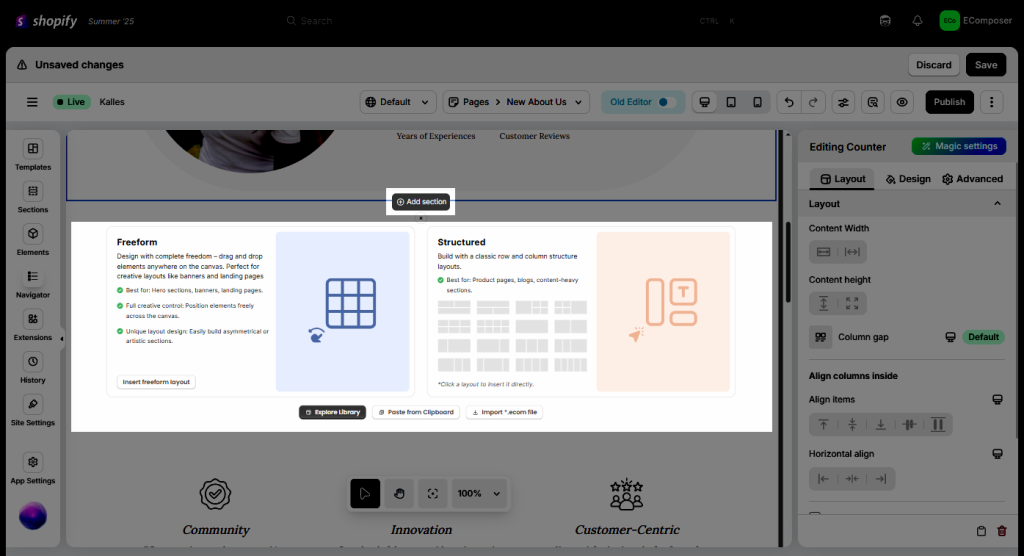
When creating a new Section, you can see the structure of the section to select the layout that you want.
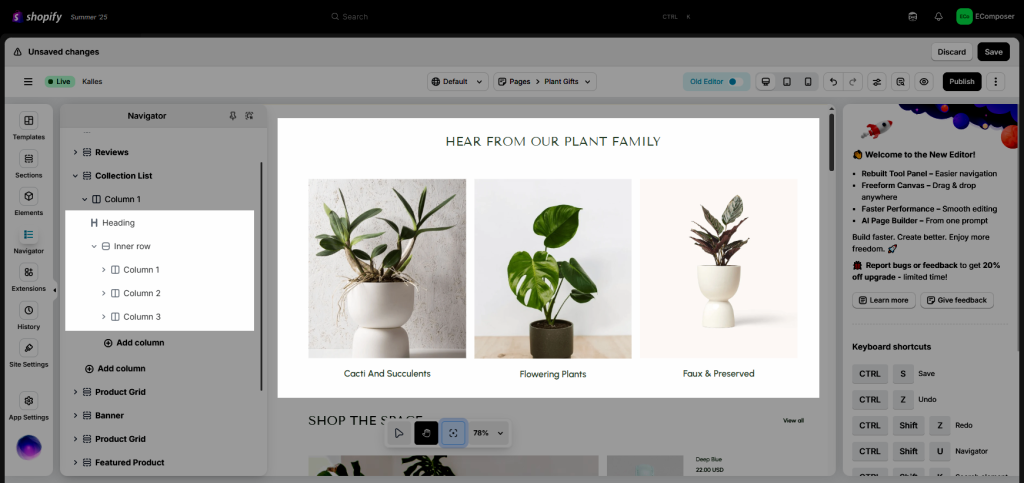
2.2. Inner Row
An inner row contains the columns. You can add an inner row to a Section, column, or between the elements. For example, in the image below, I want to have a section with a Heading and 3 columns right below it, so I will add a Heading and an inner row with 3 columns.
Within each section, you can further organize content using rows. A row represents a horizontal grouping of elements, allowing you to create visual divisions within a section. This helps maintain a balanced and visually appealing layout. For instance, a “Featured Products” section might have rows for each product category.
2.3. Columns
Within each section that has columns, a section can contain multiple columns. Like the example below, there are 2 columns in a section.
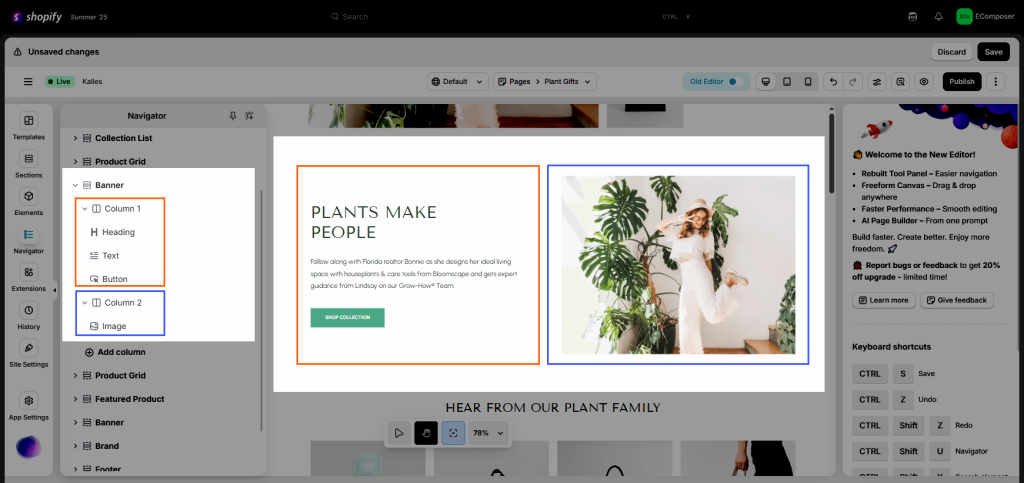
Rows are divided into columns, which provide a way to structure content horizontally. Columns allow you to display multiple elements side by side, creating a grid-like arrangement. You can choose the number of columns in a row based on your design requirements. For example, a “Featured Products” section might have a row with three columns to showcase different products.
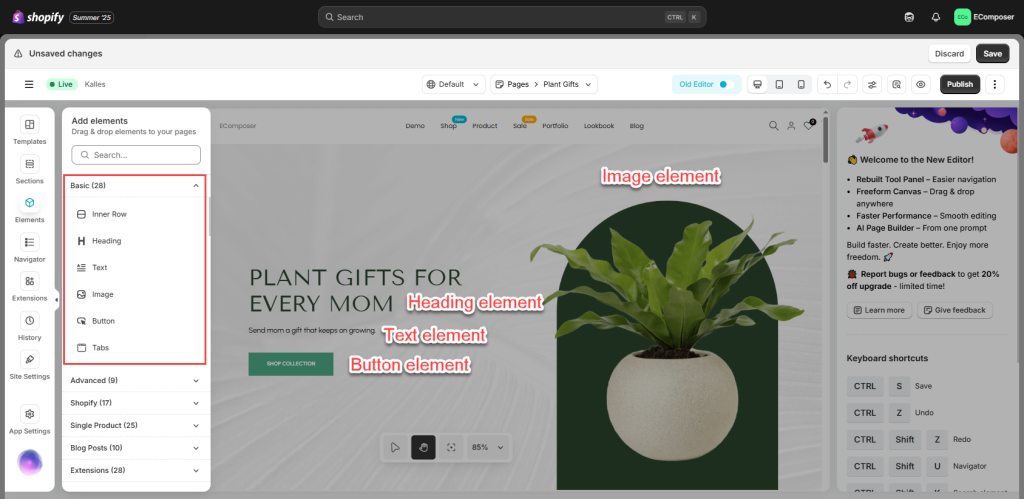
2.4. Elements
Elements are the building blocks of your page’s content. They can include various types of content such as text, images, videos, buttons, and more. Elements are placed within columns to populate your page with meaningful information and interactive features. For instance, an element within a column might contain an image, text, or button.
2.5. Nested Structure
To achieve more intricate designs, you can nest elements within other elements. This is particularly useful for creating complex layouts or incorporating additional content within a single element. For example, you could nest an inner row within an element to create a visually distinct section within a larger content block.
Understanding this hierarchical structure – sections, rows, columns, and elements – empowers you to design and customize pages in the EComposer Shopify app efficiently. By carefully organizing your content within these components, you can create visually engaging and informative pages that effectively convey your brand’s message to your audience. Experiment with different arrangements, styles, and content to craft compelling pages that resonate with your customers.
3. Configure the Page Information
If you want to configure some information for the page, please click the Publish button, and a pop-up will appear. The general information setting board will be displayed, and you can then fill in the blanks with information such as:
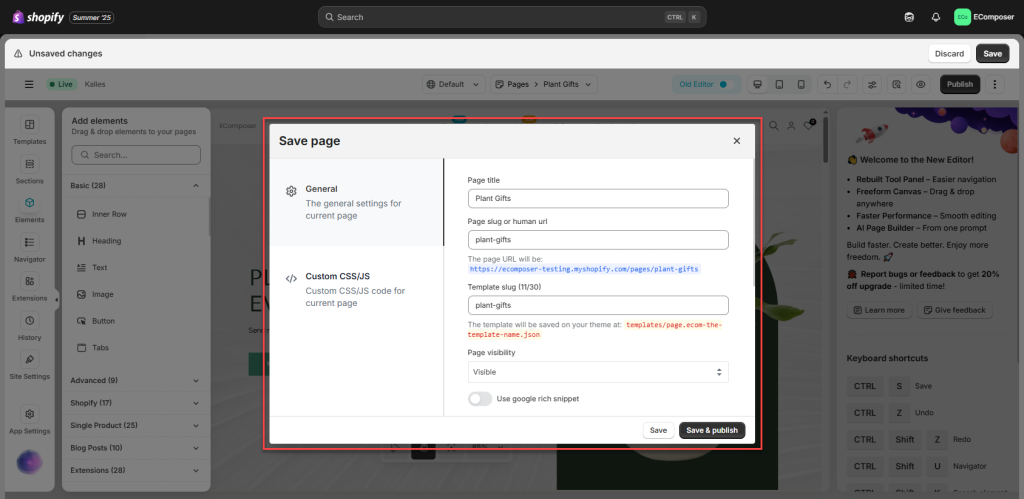
- Page title: Add the page title here.
- Page slug or human URL: Normally, the page slug will be the same as the Page title, but you can also change it to what you like.
- Template Slug: Set the slug here; it will let you find this page easier in the Theme files to modify if needed.
- Page Visibility: This will determine if the page is published or not.
- Visible: Published and live.
- Hidden: Not published (not live), and you can set a date/time to make it publish it you prefer via the setting called “Set visibility date”
- Use Google Rich Snippet: It is a feature in Google’s search results that gives users additional details about a page before they click on the link. Visit here for more details.
- Header & Footer:
- Show (Shopify theme): This will use the theme header and footer.
- Hide: This will hide the theme header and footer in both the Editor and live page.
- Meta description: A short text that describes the page when shared.
- Social sharing image: This image will be shown on the page when shared.
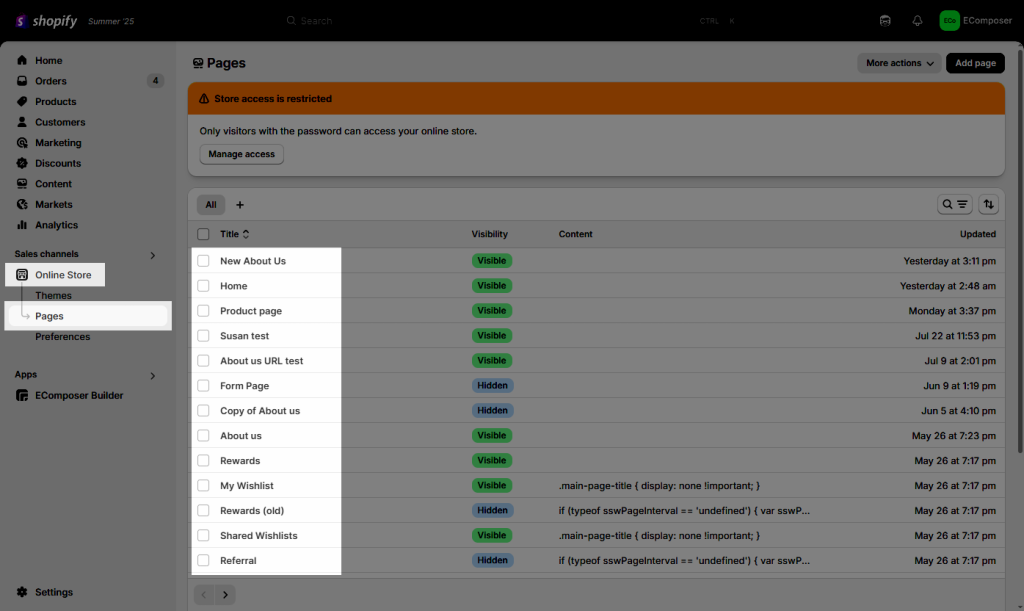
4. Where does the page get saved after it’s created?
After you create the page, the page will be saved in the Shopify dashboard > Online Store > Pages.
Note: If you want to edit the page, you have to go to the EComposer Builder page to edit the content.
5. How do I add the page to the Menu?
Please follow this link to get more information about adding the page to the Menu.
To sum up, check out our video below to understand clearly the EComposer Page Structure and Composition.


