Metafields
Metafields allows you to customize the functionality and appearance of your Shopify store by letting you save specialized information that isn’t usually captured in the Shopify admin. You can use Metafields for internal tracking, or to display specialized information on your online store in a variety of ways.
For example, a candle seller might want to display a burn time for candles on their product pages, while a grocery store might want to display a product expiration date for canned goods. Other examples of specialized information include the following:
- Part numbers
- Color swatches
- Launch dates
- Related products
- Blog post summaries
- Files for download
1. Add the Metafield definitions
From Shopify backend > Settings > Custom data. You can add the metafield definitions here.
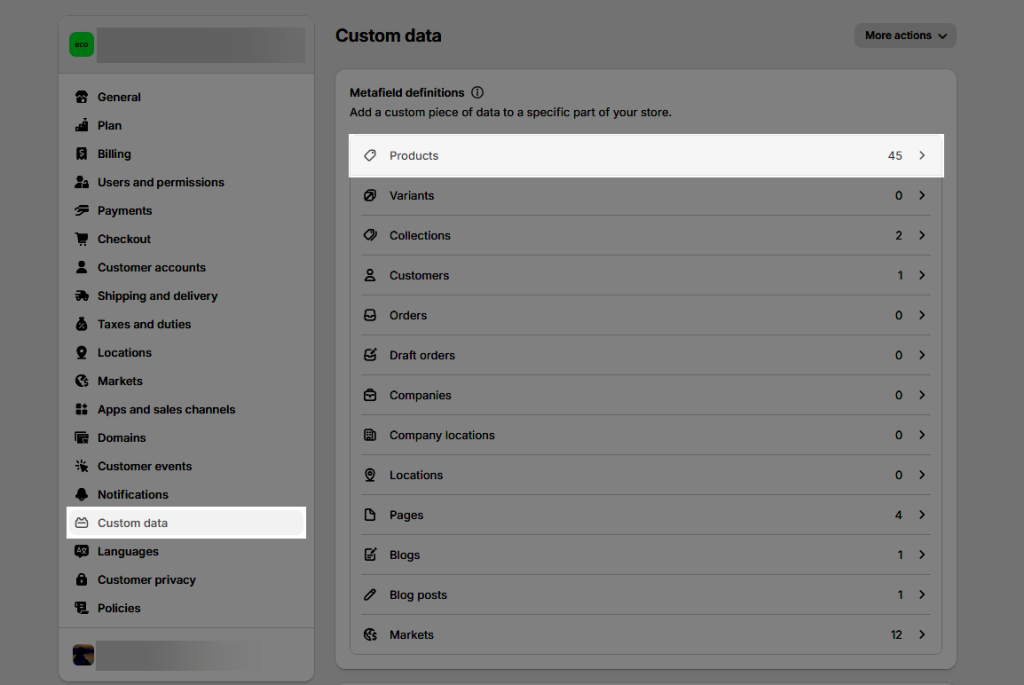
Then choose Add Definition:
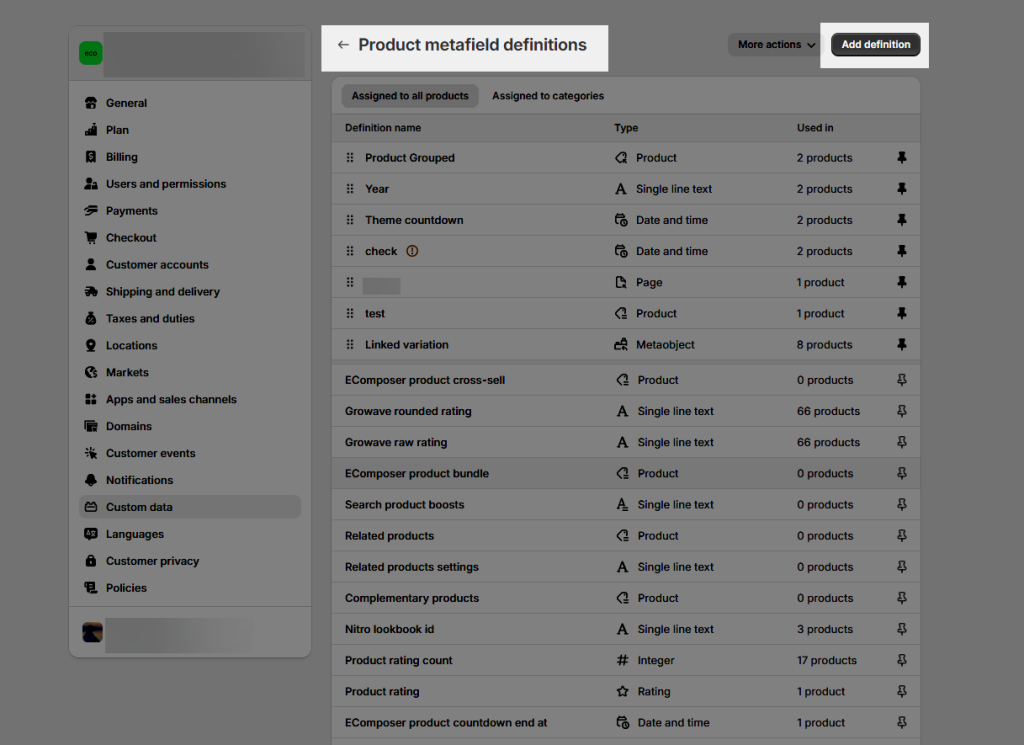
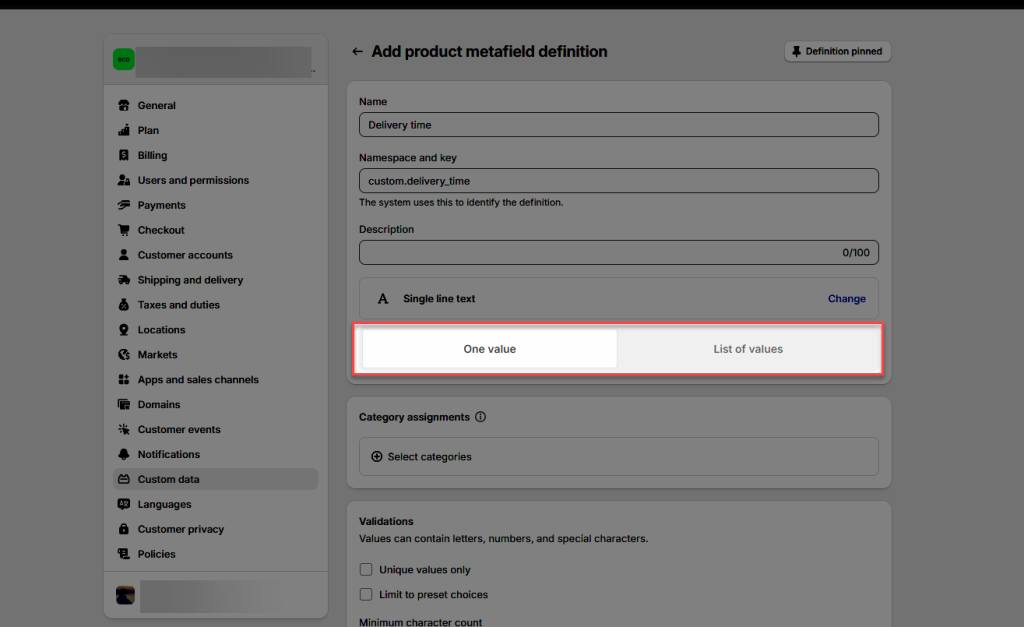
For example, I wanna configure Metafield for Product Delivery time, the Metafield definitions have some following parts:
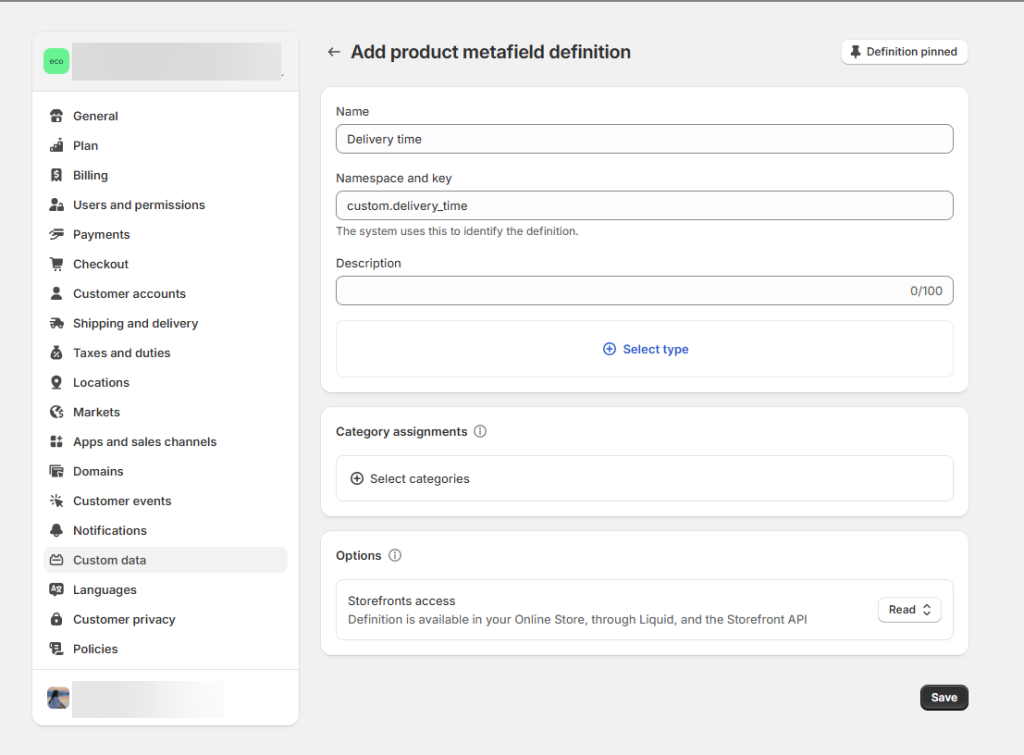
- Name: Add the name for the Metafield here.
- Namespace and key: The namespace and key create a unique identifier for your metafield. They’re separated by a ., and can only contain letters, numbers, underscores (_), and hyphens (-). You can use a namespace to group similar metafields together, but each namespace and key combination must be unique
- Description (optional): The description is displayed on the Shopify admin page where you add values for your metafield.
- Select content type button: Click here to choose a type for the Metafield content that you wanna use.
For example, I choose content type: Single line text
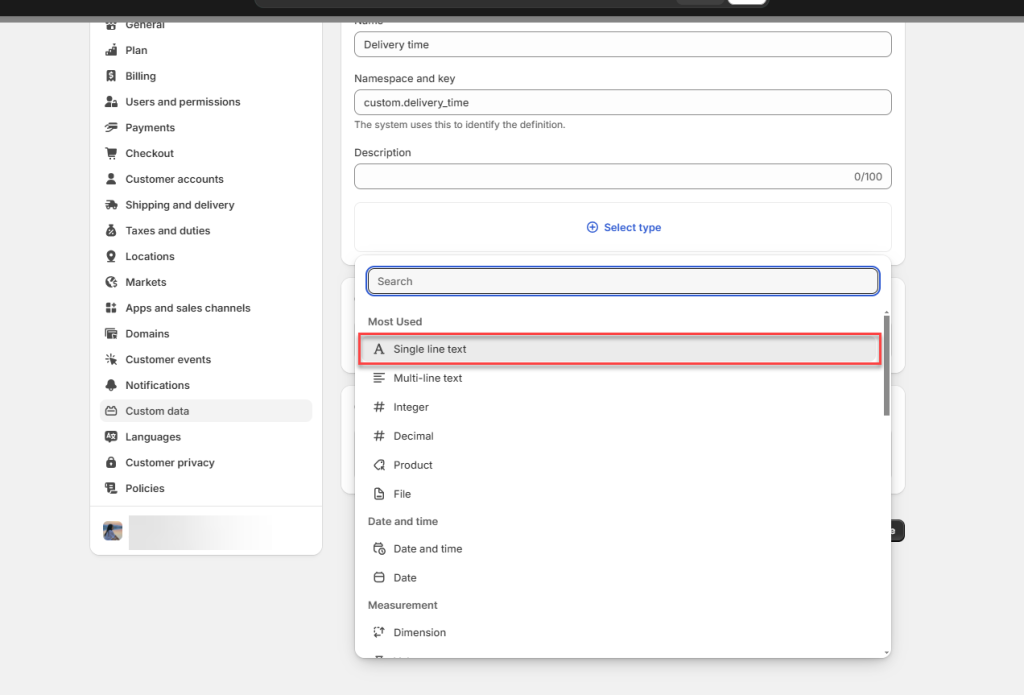
- One value: choose this option for a single value
- List of values: choose this option for a list of values you want to insert
- Validation (optional): That option allows you to configure the limitation of the content type that you pick. For example, with Text, we can configure maximum/ minimum length and regular expression.
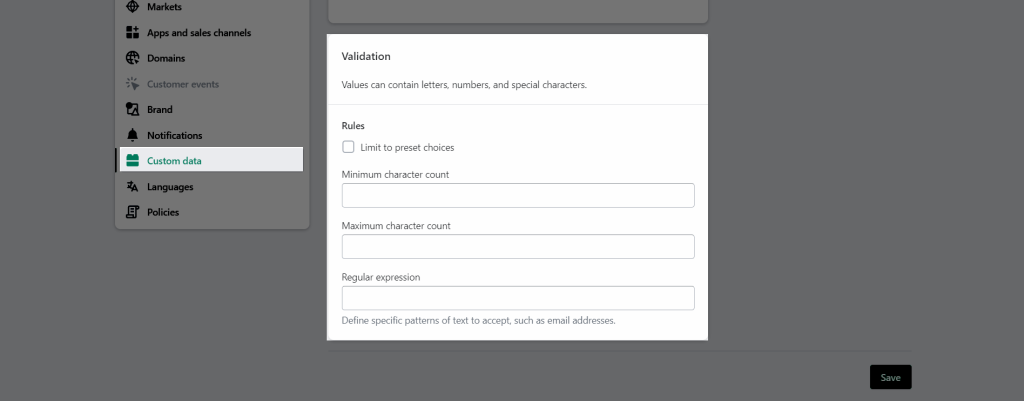
After configuring done, make sure that you press the Save button to save all the changes.
2. Adding values to metafields
Go to Shopify Admin > Products > All Products > Select a certain product that you want to display in the metafields content.
For example: Select the “Leather Watch” product.
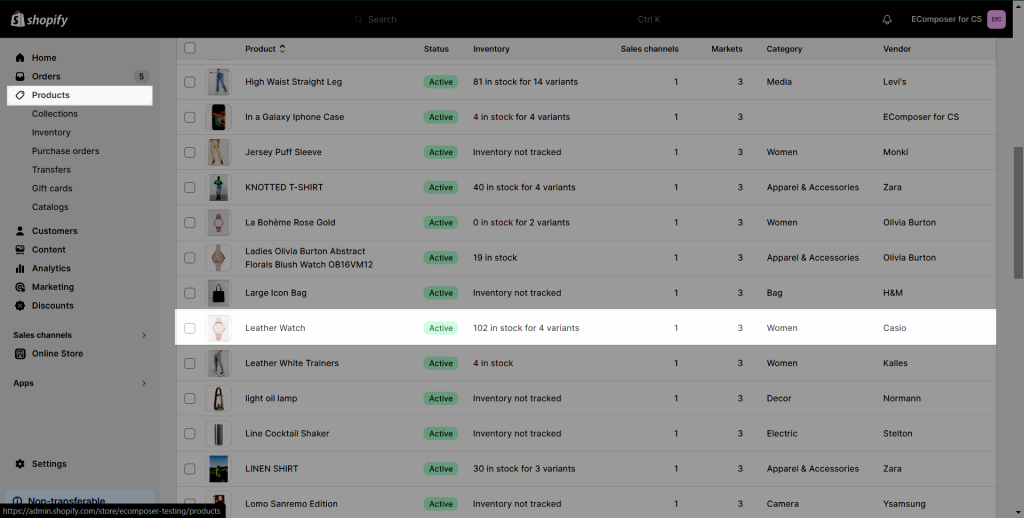
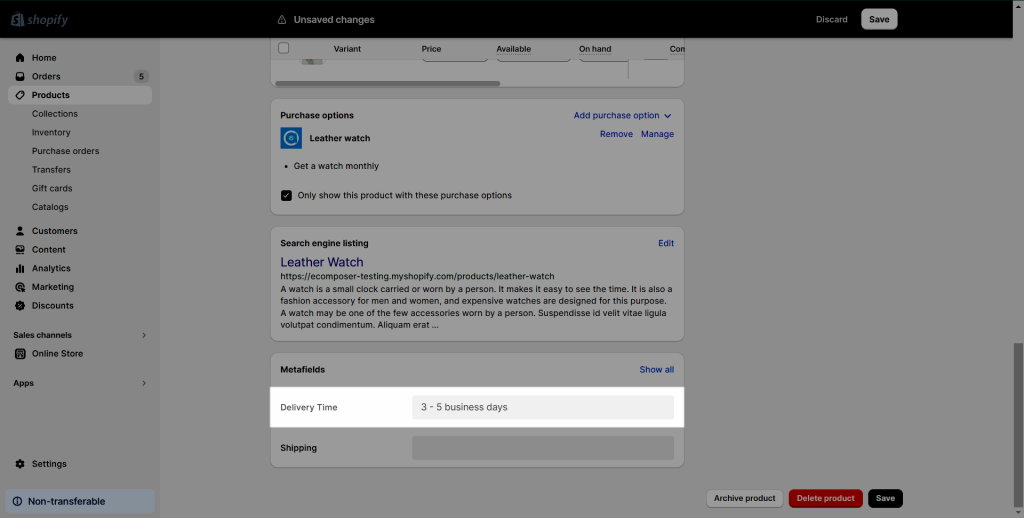
Open the “Leather Watch” product > Scroll to the bottom of page, you will see Matefield section appearing here.
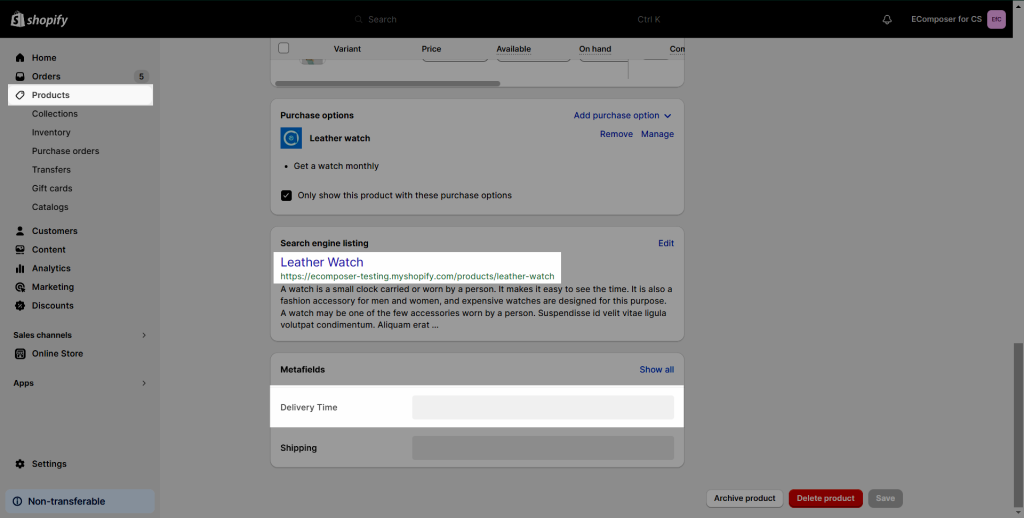
Set a value for the definition that you have just created > Click Save button. For example, I set the delivery time for this product as 3-5 business days.
3. How to show metafield on Product page?
Go to Ecomposer backend > Edit or Create a Product page > Go to Product page:
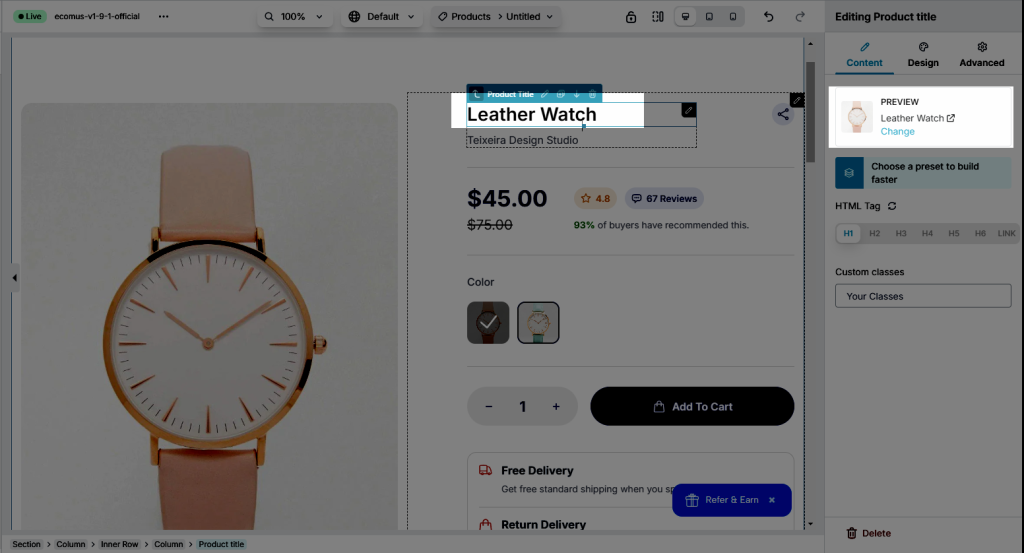
Note: On that product page, you must choose to show the exact Leather Watch product the step 2.
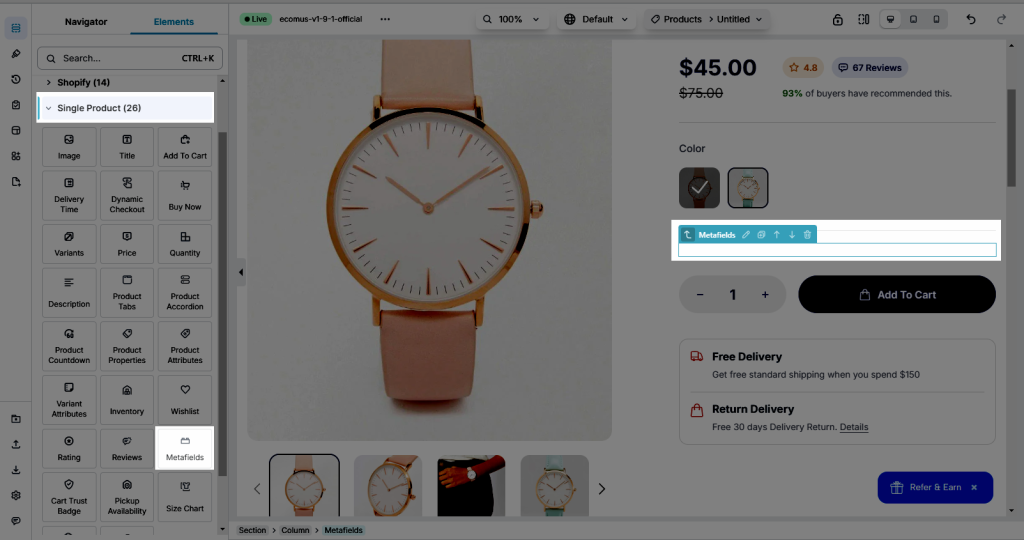
On the left sidebar, Element tab > Single Products elements > Drag the Metafield element to the position you want.
Next step, go back to the Shopify backend > Settings > Metafield option > Products metafiled definition > Copy the value below:
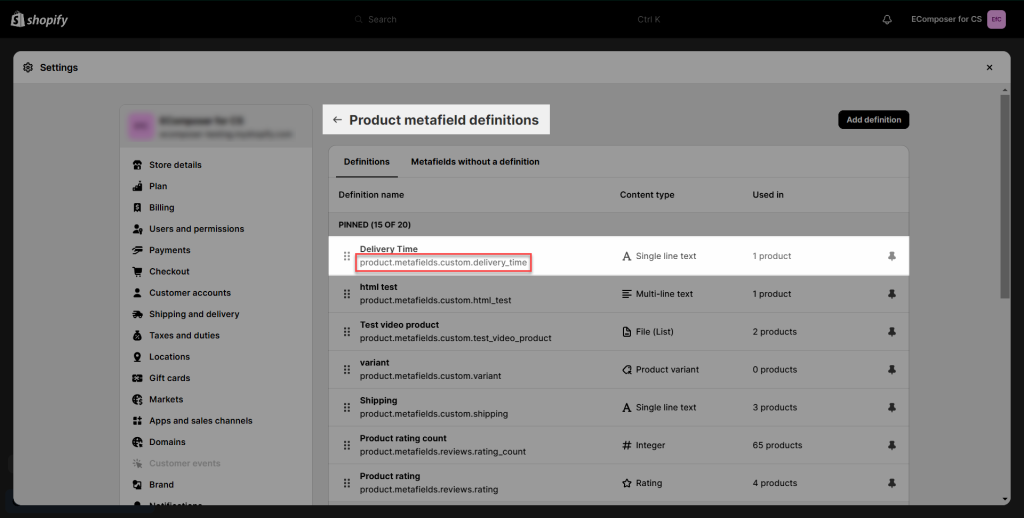
Then paste it to Metafield element > Namespace and Key option, the Delivery time will show up the value you set immediately. Put the Namespace And Key in “{{ }}.
For example: {{Namespace And Key}}
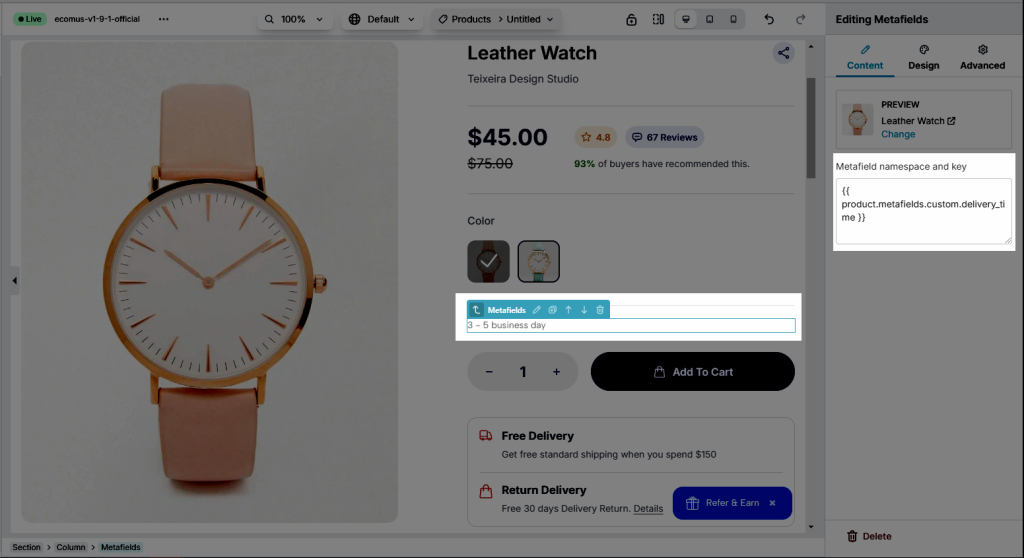
Note: With the content type Text, you can enter only the Namespace and key to make it works. But with the other content types like File or URL… please add .value to the end of Namespace and key like this {{ product.metafields.custom.shipping.value }}
4. Design tab
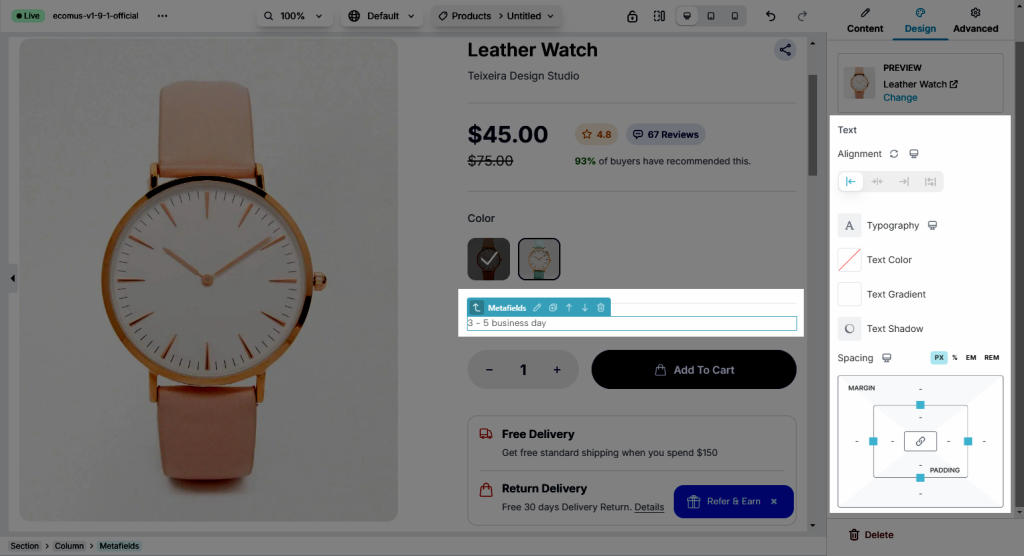
- Alignment: Allow you to align the title of the Newsletter input. You can choose Align Left, Align Right or Align Center. This option is available for desktop, tablet, and mobile devices.
- Typography: This option allows you to customize the Font-size, Font-weight, Font-family, Line Height, Text-transform, etc… for the Metafield text here.
- Text Color: Configure the color for the Metafield text here.
- Text Shadow: Allow you to add a shadow for the Metafield text by changing the Blur, Horizontal, Vertical, etc…
- Spacing: Set the spacing (by the way increase margin/ padding) between the Metafield text and other elements here. This option is available for desktop, tablet, and mobile devices.




2 Comments
George Irwin
Hi there! I’m trying to access metafields I’ve added to collections on a collection template, and while it displays in the database icon options, it isn’t displaying any content.
Can you help plz
Anna Nguyen
Hi George,
I’m Anna from the EComposer support team. I hope you are doing fine :)
I’m so sorry for my delay responce. Please contact us via live chat to get help from the support team to solve the issue.
Thank you
Anna