Ajax Cart
By Shopify default, when clicking on the Add to cart button on the Product page, customers will be redirected to the cart page. With the Ajax cart extension, you will have more choices like showing a cart popup, reloading the page, going to the checkout page, or a cart message… So your customers can easily select product options and avoid wasting time on annoying page reloads. This function surely encourages customers to shop more hence increasing your revenue.
Let’s step forward to see more clearly how it works and what exactly the app will bring to you with EComposer App.
1. How to install the Ajax Cart extension?
Note: When you finish installing the Ajax Cart extension, it will automatically show when you publish. You can only use this extension on Paid plan
To open the Extension popup: From the left sidebar, go to Extensions → search for the extension name and click to install, or click View more to browse all available extensions in the app.
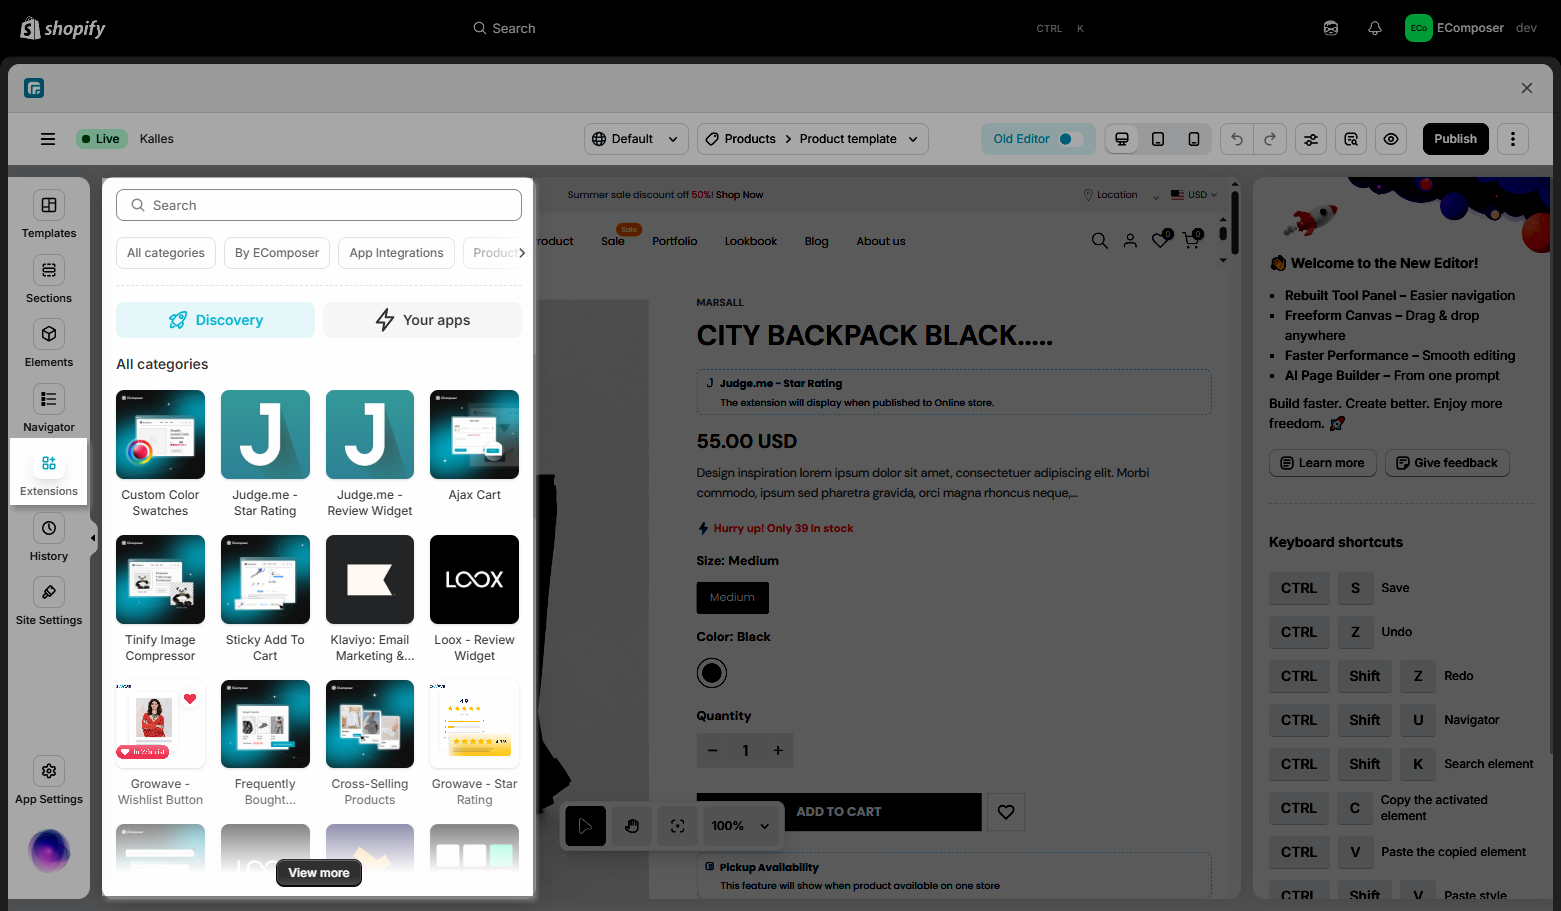
Click Install to have the Ajax Cart extension installed:

2. How to set up the Ajax Cart extension?
You can open the extension and then open the Settings tab to see the settings for the extension.
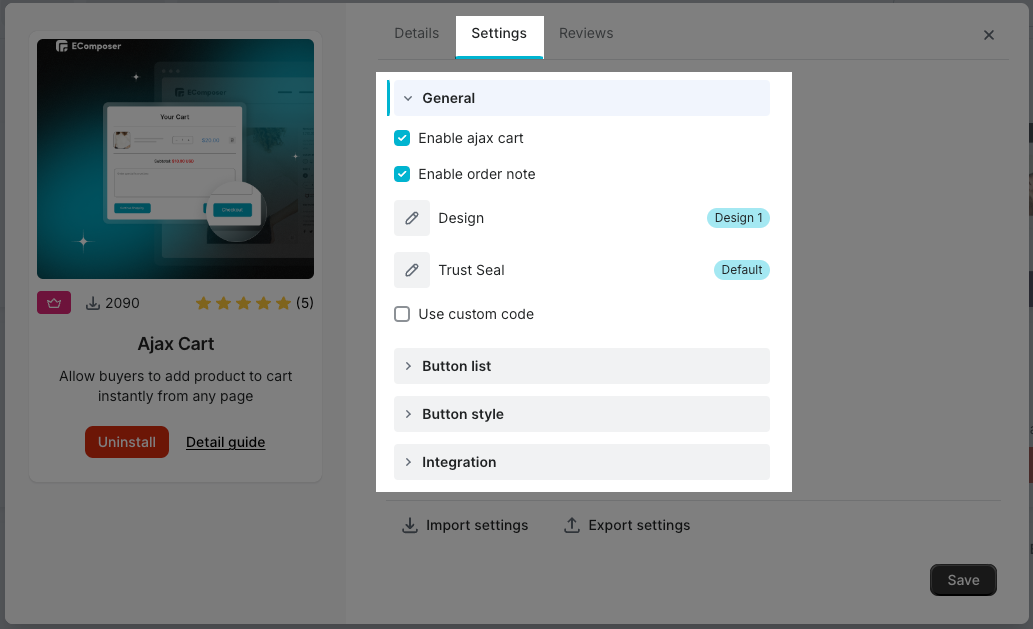
Notice: The extension only work on the live page
2.1 General
In this tab of this extension, we have:
- Enable ajax cart: To let it be shown or not, you can turn it on without uninstalling the extension.
- Enable order note: Allow customer to fill in the Order Special instructions before Checkout.

Results:

- Design: You can have two options
Design 1: The buttons will work according to the old version settings
Design 2: The buttons will work according to the settings in the Button list tab

- Trust Seal Image/ Trust Seal Image Size: You will upload the image for this option and have flexible changes in the size for it.

Result:

- Use custom code: You can add a custom HTML and CSS snippet to this field, turning your ideas into reality with just a few lines of code!
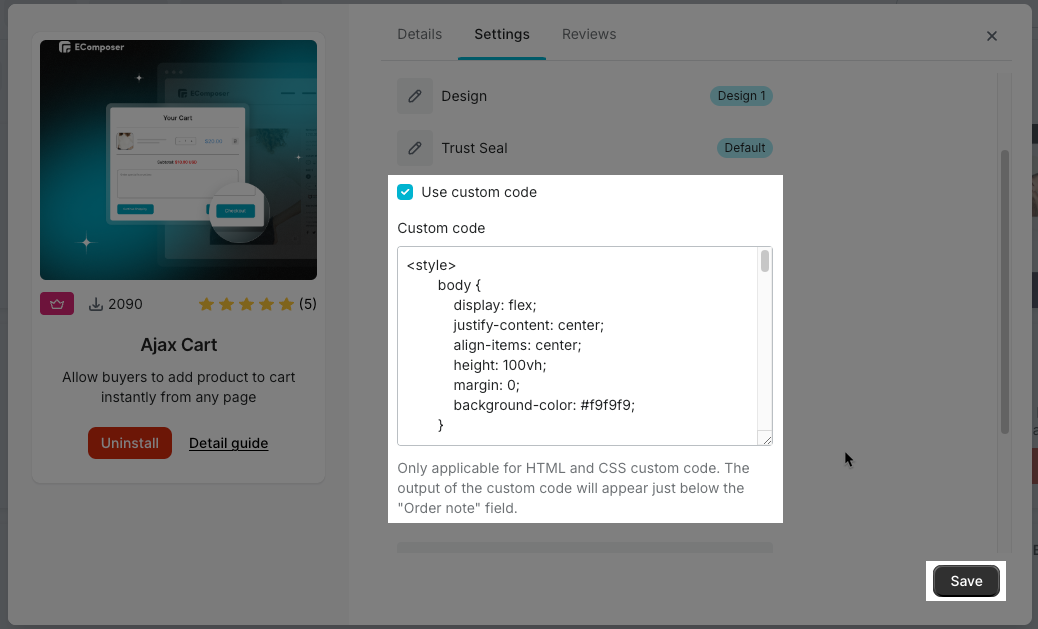
Result:
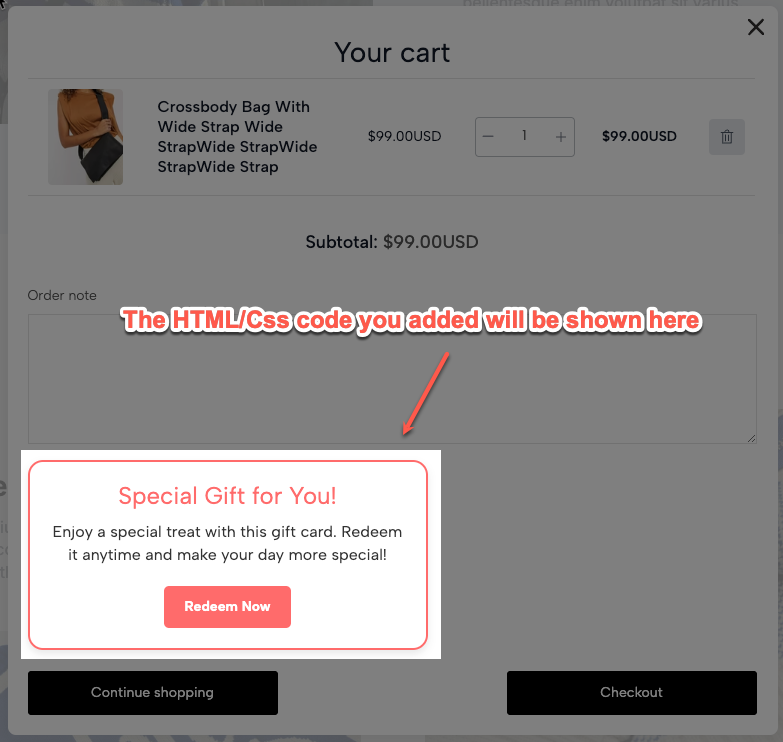
2.2 Button List
Here you can add or remove the buttons on the extension. We have 3 buttons: Continue Shopping, Checkout, and View Cart. On each button, you can change the name and color both for the normal and hover status.
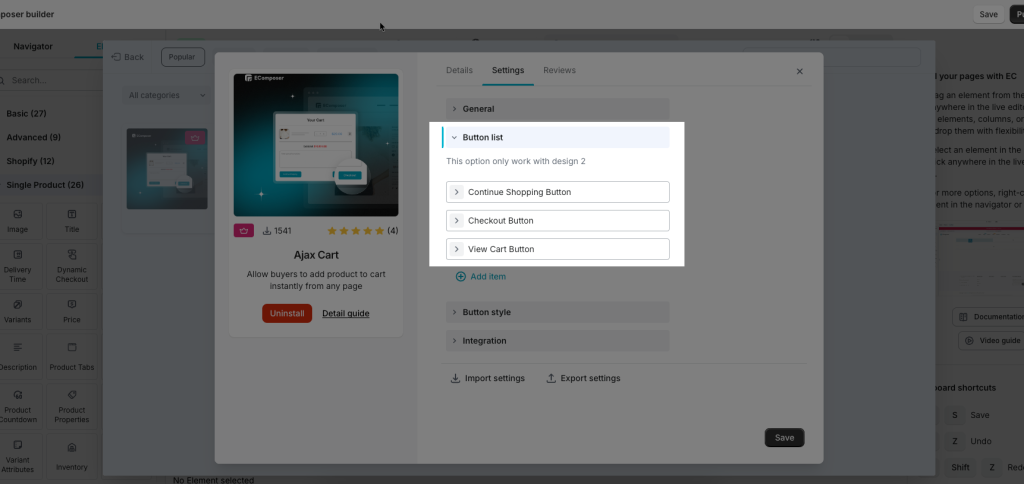
Note: This option only work with design 2
2.2.1 Checkout Button
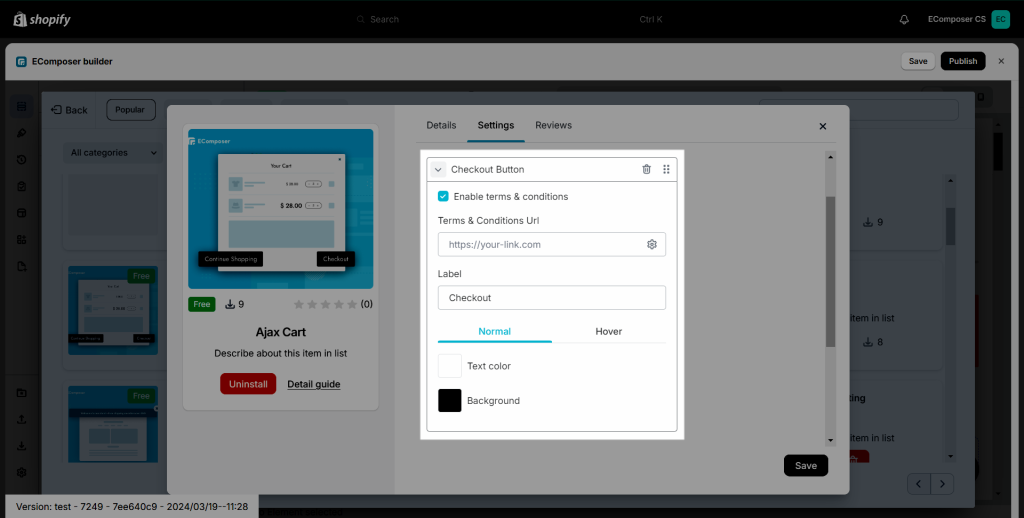
The Checkout button will redirect customers to the Checkout page of your store, so they can place orders more quickly.
We have the Enable terms & conditions option for you to add the link to your term & conditions page.
2.2.2 Continue Shopping Button
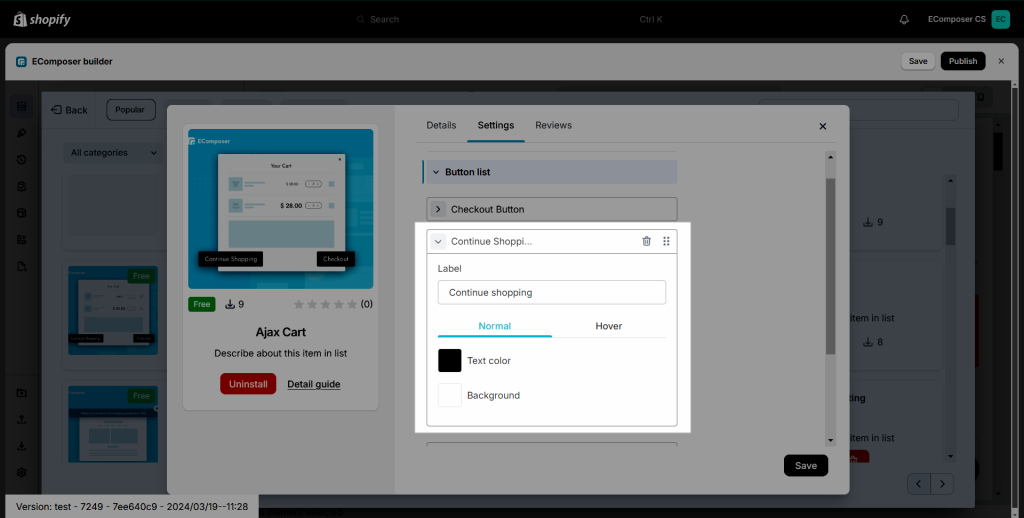
The customer can click on this button to close the Cart popup if they want to continue to shopping.
2.2.3 View Cart Button
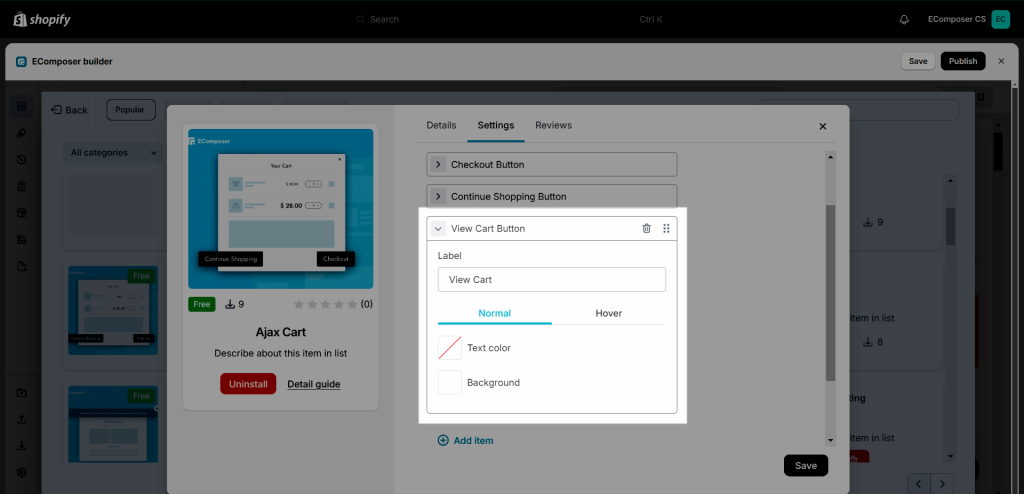
This button will lead customers to the Cart page.
2.3 Button style
You can change the Typography, Width, Border radius, and Spacing for both the Checkout Button and the Continue Shopping Button
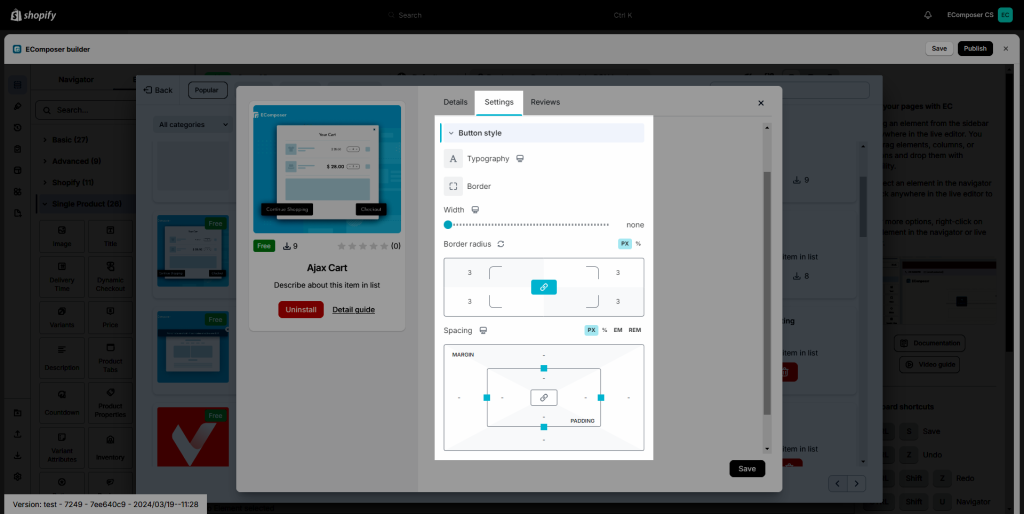
Then click the “Save” button to view it from the Live Page.
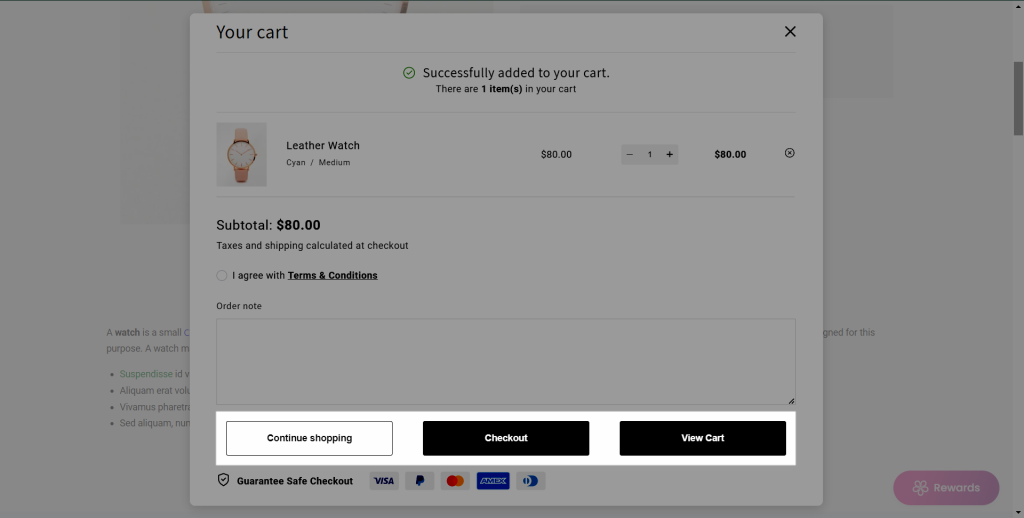
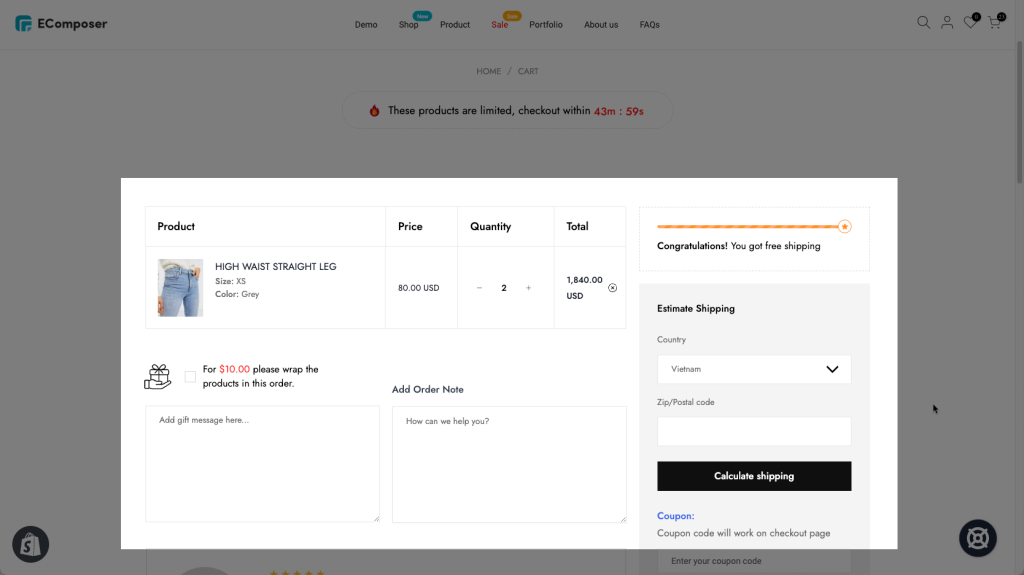
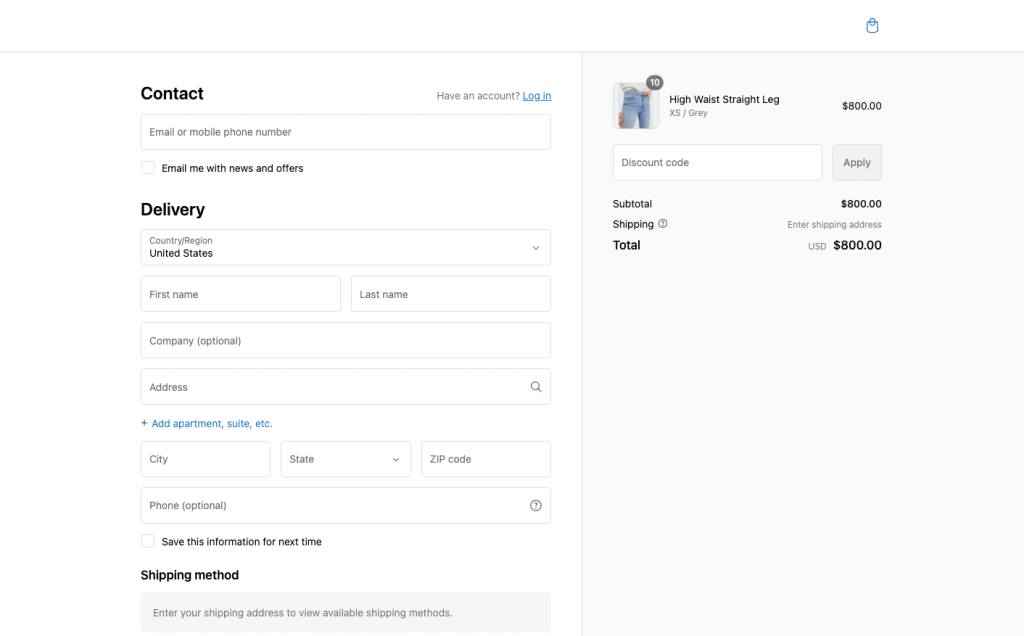
This extension will be used on the Add to cart button. After setting the extension, you can decide on the action after adding the product to the cart by clicking on the Add to cart button:
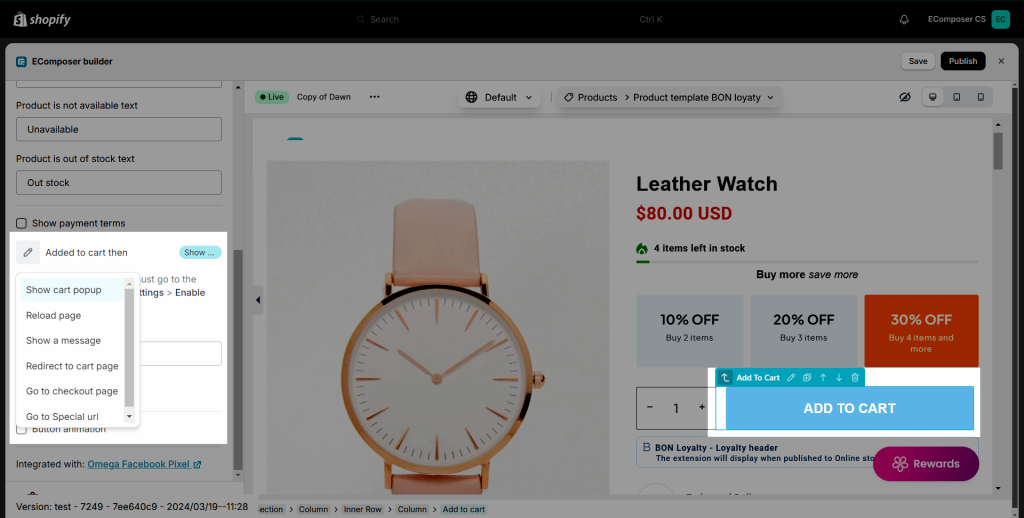
- Show cart popup & Show a message: Please check the video below to understand better
- Reload page
- Go Special URL: you can put a custom page’s URL here
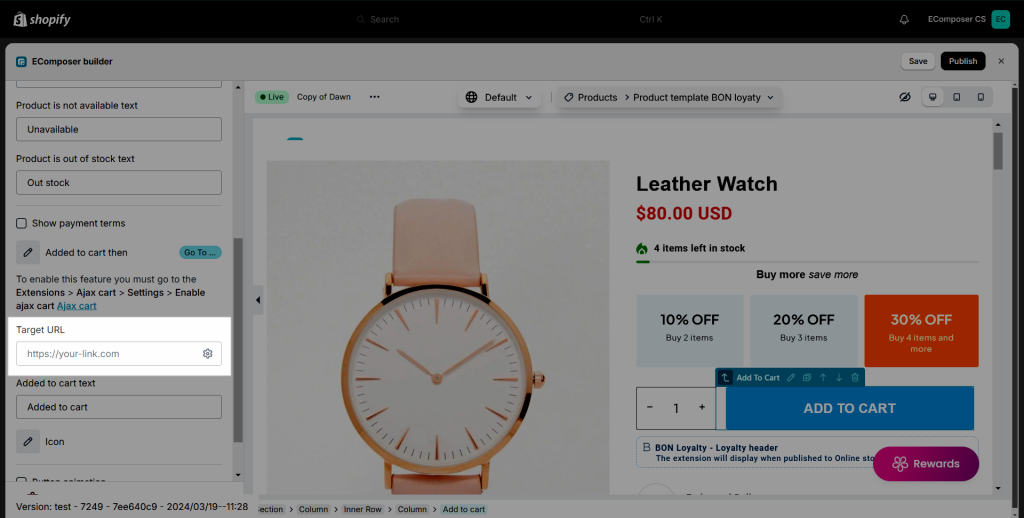
- Redirect to the cart page
- Go to the checkout page
3. How to change the text when Ajax cart is “cart popup”
After installing the extension, our app will add the Ajax cart template to your theme. So if you want to change the text of the cart popup, please follow my guide below:
Go to Theme => Edit content.

Open the Sections tab.

Find the text option you want to edit. For example, if you want to edit the Checkout button, you can find the Checkout text like this:

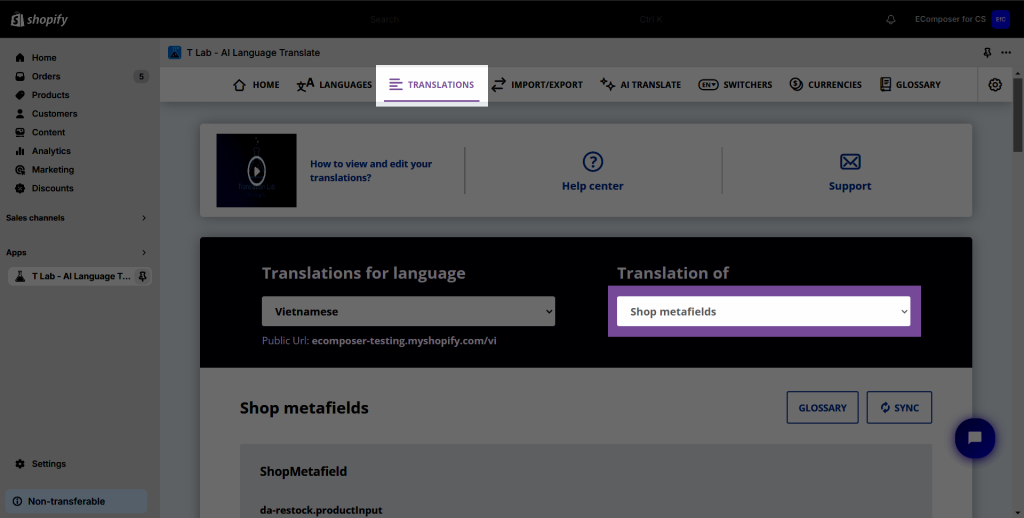
4. How to translate button in Ajax cart
You might need to translate the button into many languages.
From T-Lab Dashboard, go to Translation -> Shop metafields
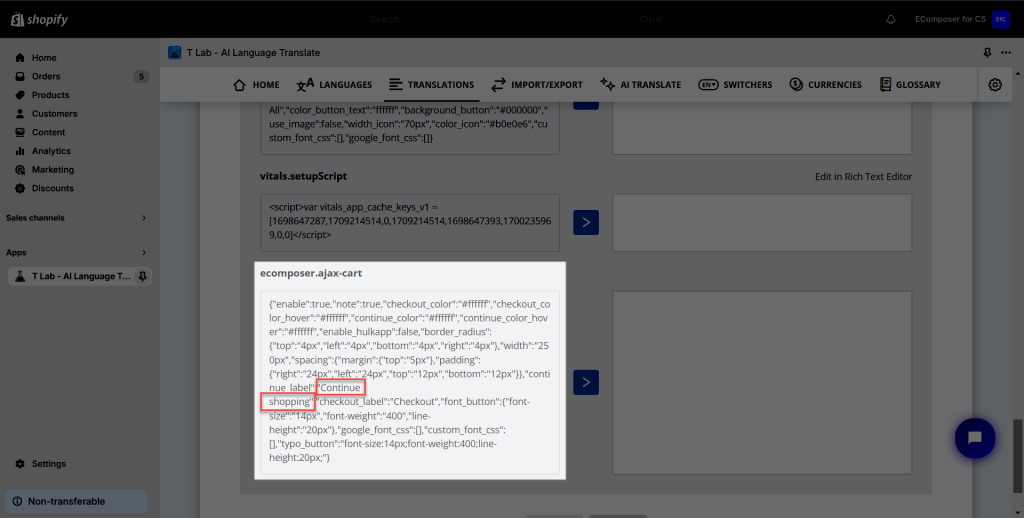
Find ecomposer.ajax-cart, then translate the text you want inside




4 Comments
kitchen
I do not know whether it’s just me or if everybody else
encountering problems with your blog. It appears like some of the text
within your posts are running off the screen. Can someone
else please provide feedback and let me know if this is happening to them as well?
This might be a problem with my browser because I’ve had
this happen before. Cheers
Anna Nguyen
Hi Kitchen,
I’m Anna from the EComposer support team.
Could you please take a screenshot of that problem for me? Sorry, I’m not sure I understand about what you are facing on your end.
Thank you
Anna
Jade
Hi there,
I just installed the Ajax cart options to my website, and have 2 buttons on a page that I would like to link to 2 separate products. The issue I have is that any changes I make to the 1 button – it automatically makes those changes to the second button too. Meaning I am unable to link a different product on the second button. Please help
Anna Nguyen
Hi Jade,
I’m Anna from EComposer team :)
May I ask, you are using the Add to cart button on a Landing page or on a Product page? If it is on a Landing page, you should add the Add to cart button to a Product box element to make them work separately. Please refer to this document https://help.ecomposer.io/docs/editor-elements/shopify-elements/product-box/
If you need more help, please contact us via live chat to get help faster.
Thank you!
Anna