Exit Popup
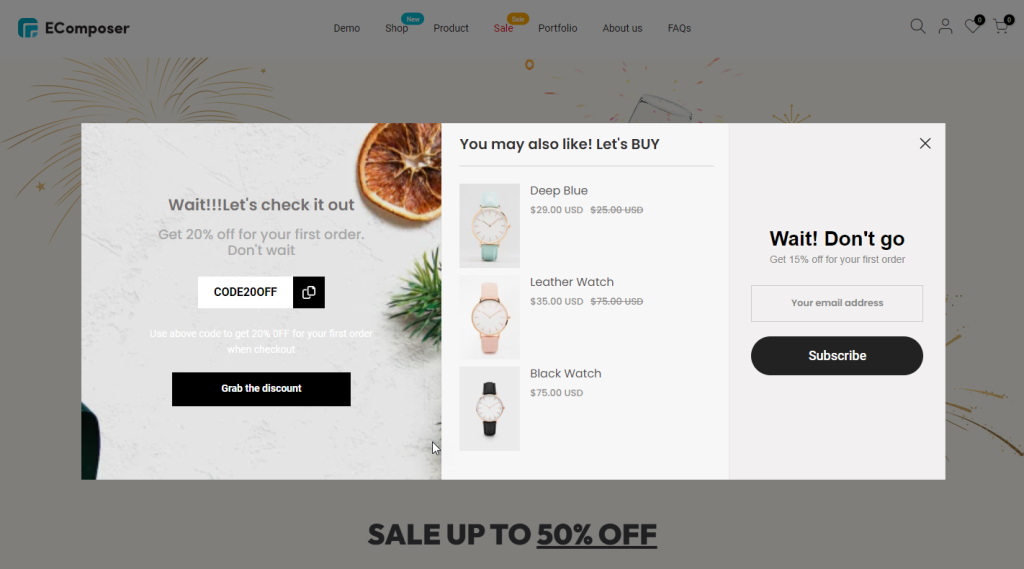
Most EComposer users are seeking an exit popup, such as the first impression for the user when they visit your store’s homepage or any pages. And there are several reasons why multiple stores might use a popup with a banner on their websites:
- Marketing and Promotion
- Increase brand awareness
- Promote specific products or offers
- Collect leads
- Announce events or sales
- Improving User Experience
Follow me as I’ll demonstrate how to set it up and use each option in the settings.
1. Install the Exit Popup extension
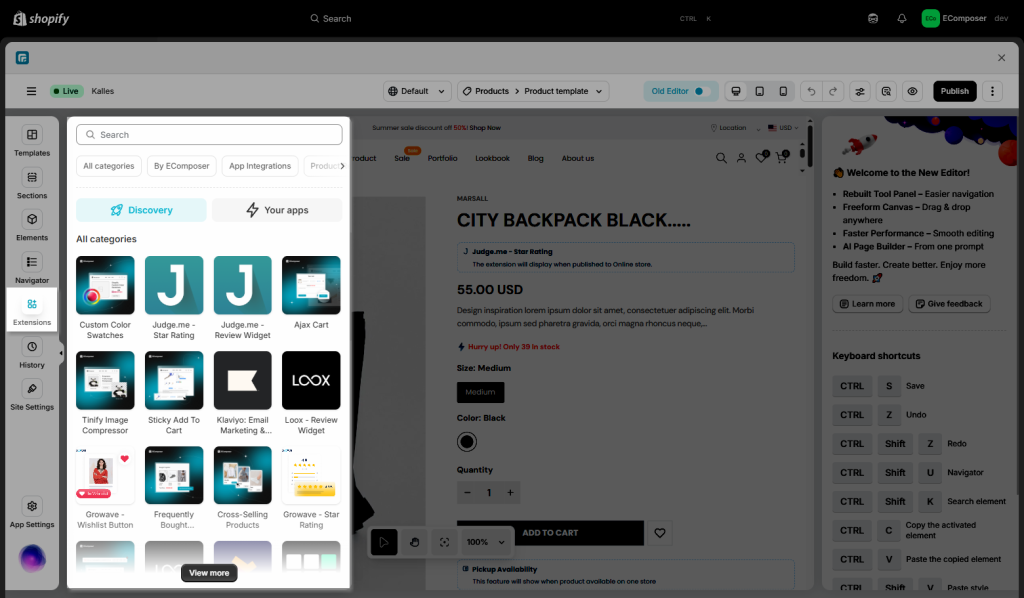
To open the Extension popup: From the left sidebar, go to Extensions → search for the extension name and click to install, or click View more to browse all available extensions in the app.
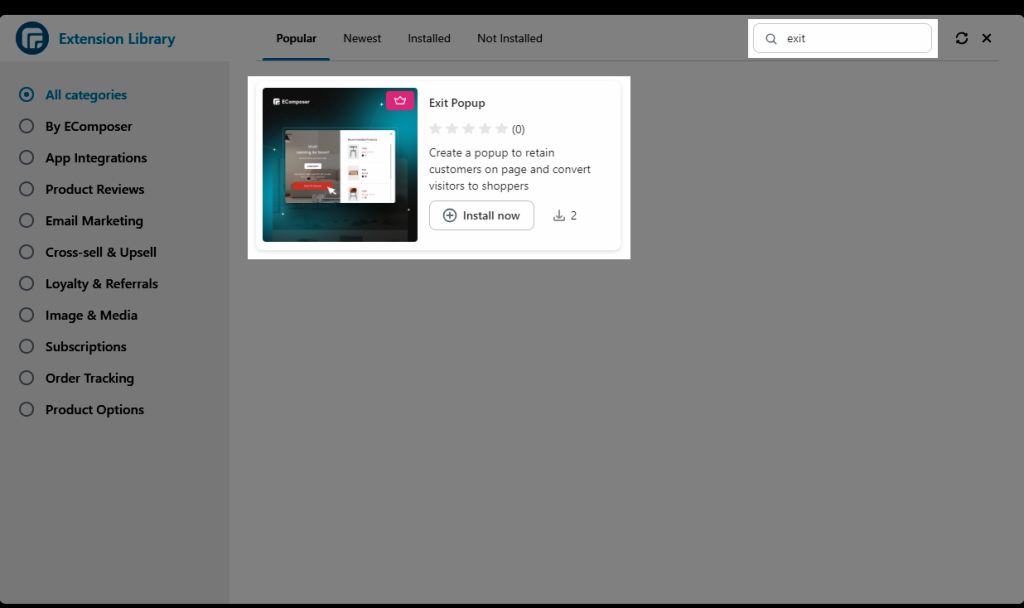
On the Extension popup, you can see the Exit Popup extension. Click Install now to install it to your Extensions.
2. Setting
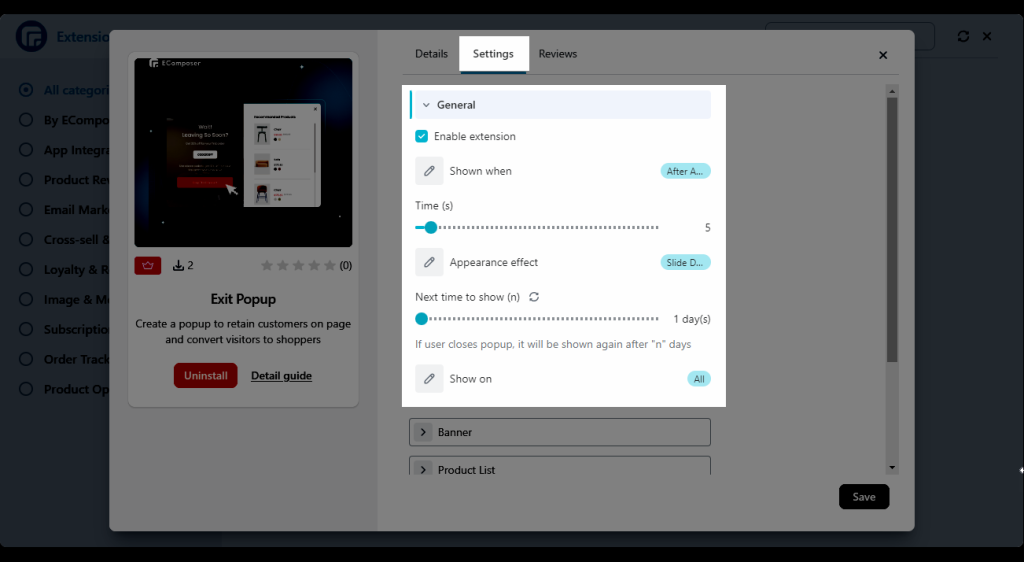
General
- Enable extension: You can choose whether or not to utilize the extension by checking this box. So uninstalling is not required if you do not want to utilize this extension.
- Show when: This allows you to choose the condition to show the exit popup such as > Move the cursor out screen, Scroll to the end of the page or After an amount of time.
- Appearance effect: You can specify whether the exit popup should show in Fade, Slide up, Slide down, Slide to left, or Slide to right.
- Next time to show (n): It will allow you to indicate when the popup should appear again, such as after 4 days, less, or more.
- Show on: You can show the popup on specific sites or all pages if you want to do so.
Banner
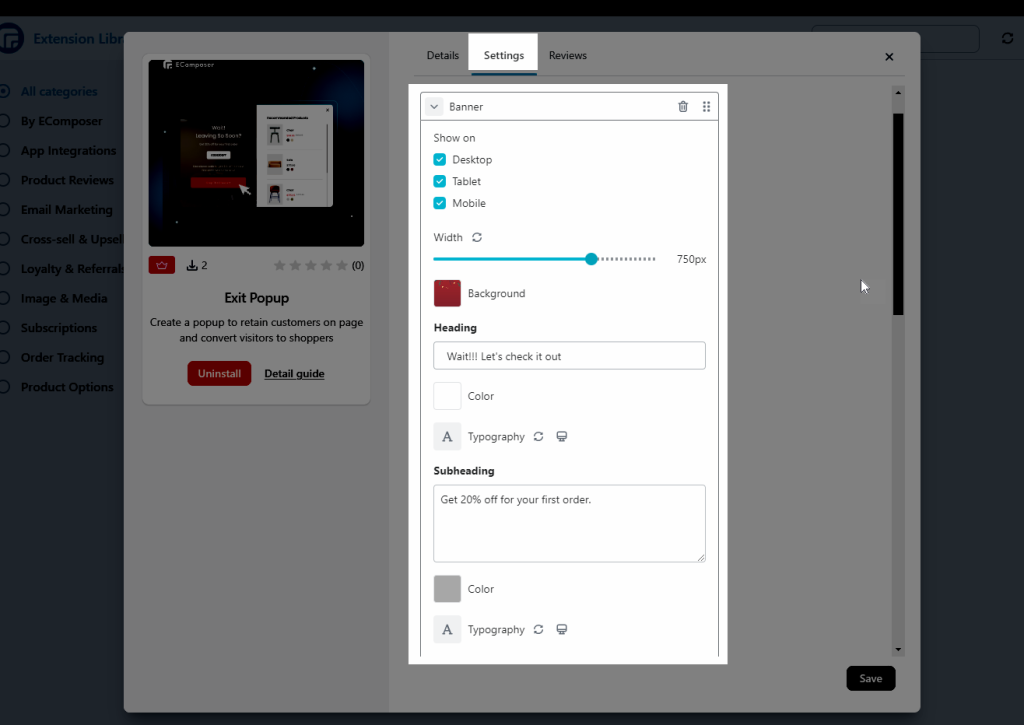
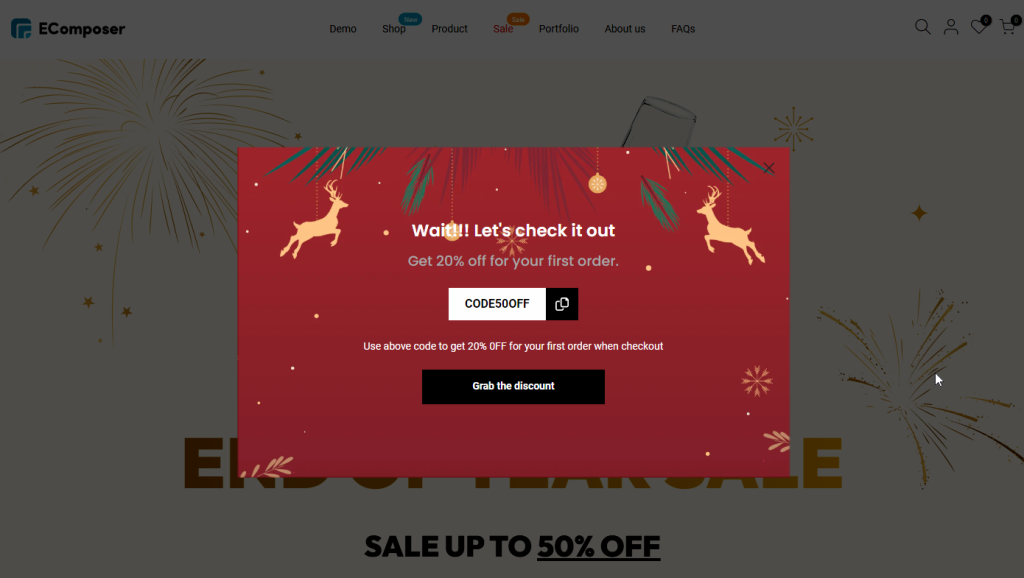
The Banner will show up a banner as a popup on your page with some heading, a discount code box, and a button. You can use this to give your customer a discount code on a sale promo. There are some options to configure for it.
- Show on: You can select a specific device as the Desktop, Tablet, Mobile, or all devices to display this Banner in the popup.
- Width + Background: This option allows you to change the width/background of the banner simply. In addition, if there is no backdrop image, you can use a color background instead. and continue altering the background image there.
- Heading + Subheading + Discount code + Description + Button: All of them will allow you to quickly design the font settings such as color and typography. Only the Code discount will allow you to select the feature, if required copy the code. And the Button link can be set if desired. The discount code should be the same as your discount code in Shopify -> Discounts.
Here is the result of the Banner on the live page:
Product List
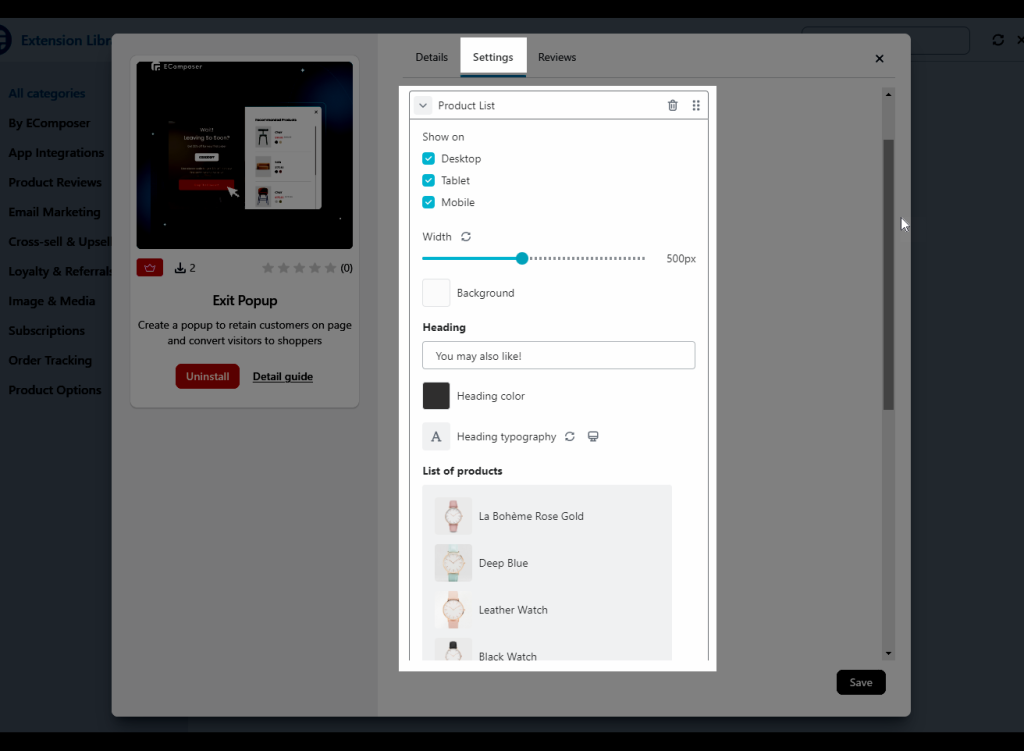
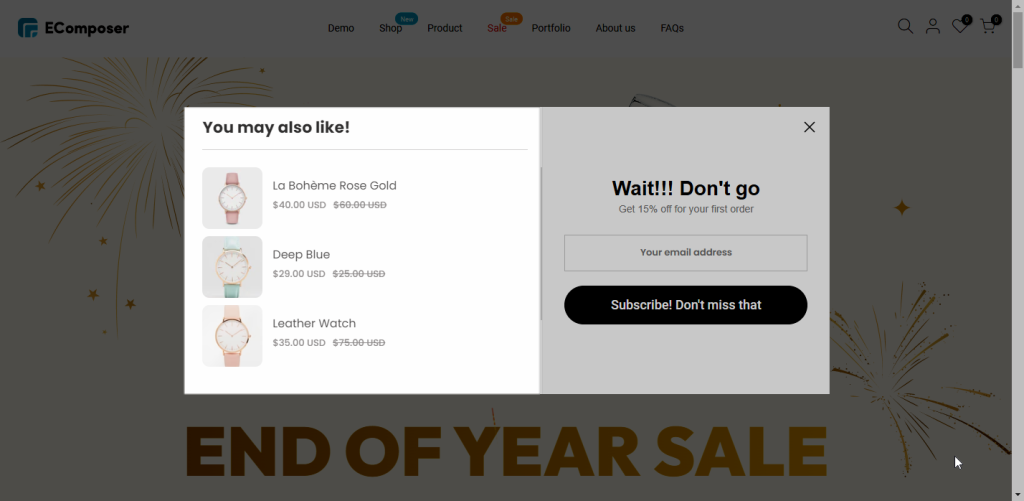
In the Product list, you can select some products to show as a popup on your site. It is often used to show featured products that you want your customers to pay attention to.
- Show on + Width + Background: Kindly check in the Banner setting for more details.
- Heading + Product title + Product Price: All of them will allow you to rapidly design font parameters such as color and typography.
- List of the products: Allow you to select which products to display on the exit popup.
Here is where the Product List setting will be applied.
Newsletter
The Newsletter will show a subscribe form as a popup, it enables you to collect customer email addresses that you can use for email marketing campaigns.
- Show on + Width + Background: Kindly check in the Banner setting for more details.
- Heading + Subheading + Submit button + Email input box + Alert when subscribing success: They will all enable you to quickly design font properties such as color and typography. Including the wording that is added to each setting
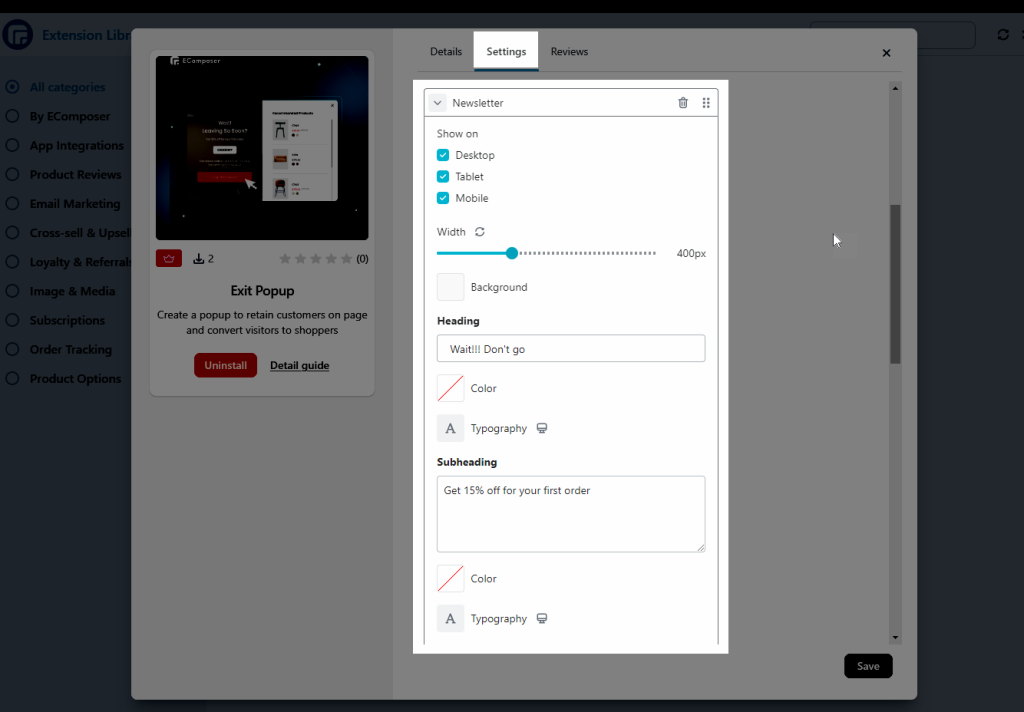
Here is where the Newsletter setting will be applied.
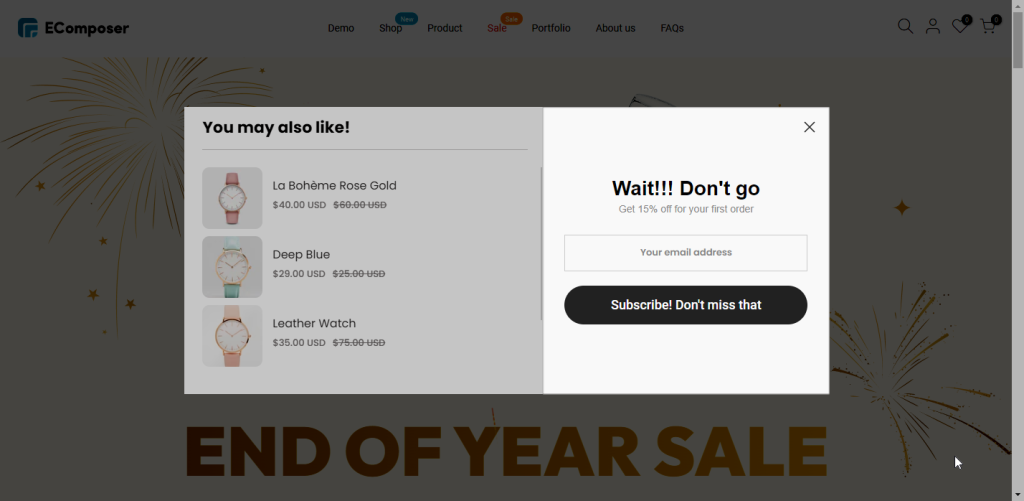
Following the last video to view more details in this Exit popup:

