Page Actions
As you know when you finish with your Page, you are going to click on Publish, Save, Save as Draft, or Save in the Library or event you want to Preview the page that you are creating. Let’s follow up on our stages below to get more details on how it works and what it is for.
1. How to Publish your page
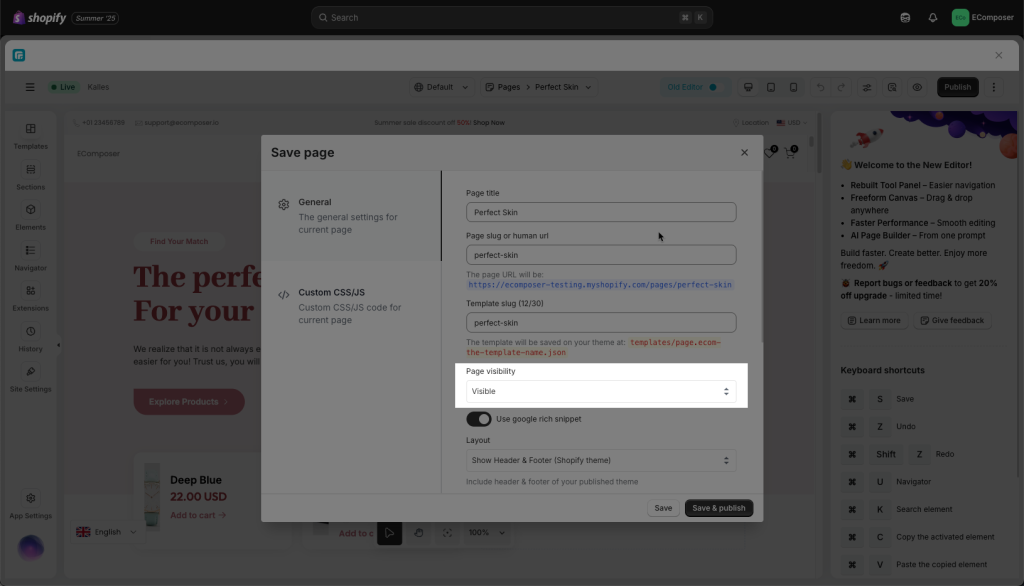
- Publish mode with (Visible): This option will let the customer view your page anytime since you set this option.
- Click Publish button
- And then turn Page visibility to Visible mode
- The last step, click Save & publish
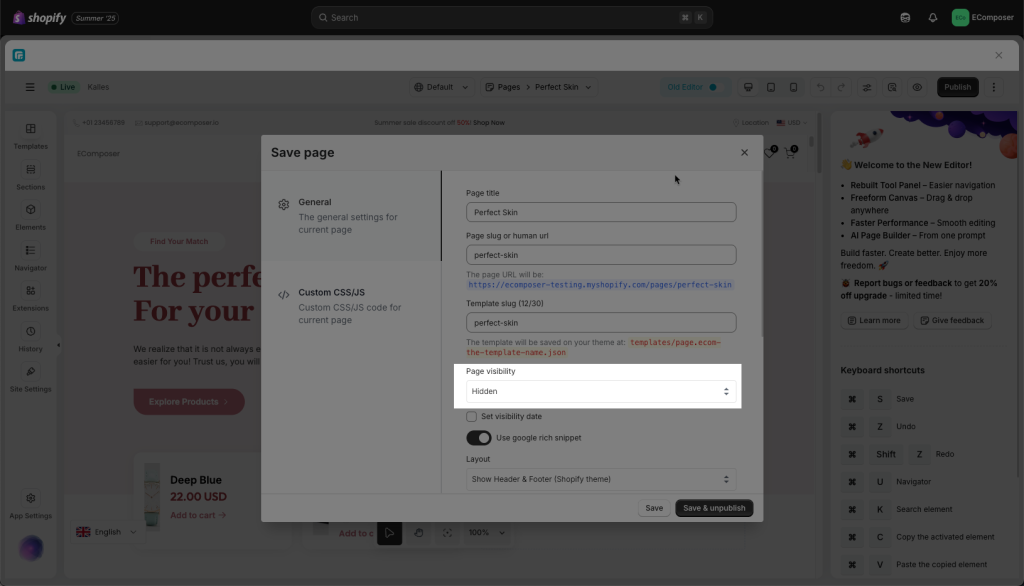
- Save without Publish with (Hidden): No customer can view it and you just can see this page via the preview link.
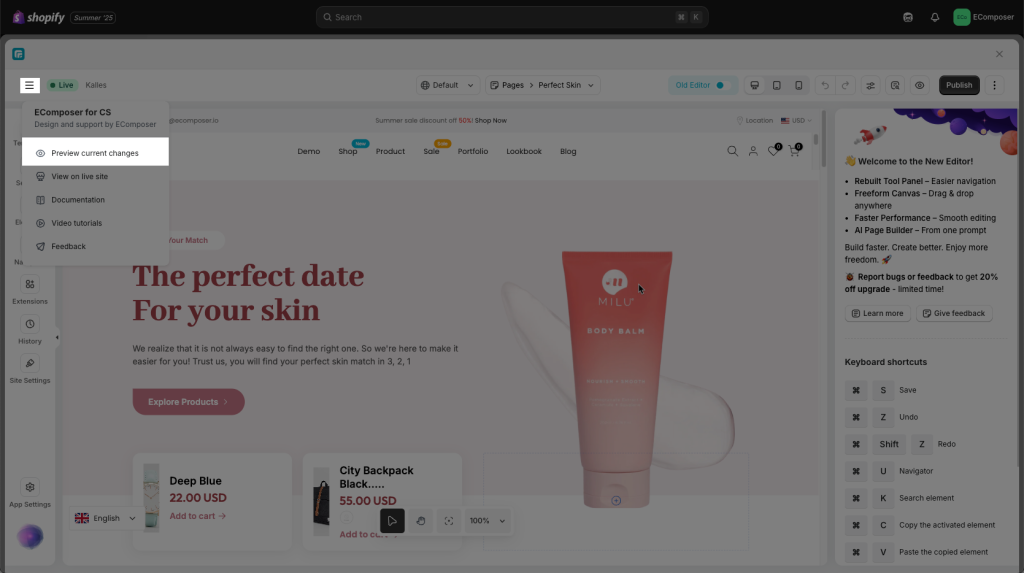
- Where to get to the Preview Link
Click More Actions –> And then choose Preview current changes
2. How to Save as draft (Manual save)
Save should be used to keep your work and many more for you to review later. For instance, when you want to try some new designs on an existing page but are not sure if the designs might have a better look compared to the original one, then you can use Save to keep it.
2.1. Save as draft (without Publish before)
When you initially develop a page without performing a publish action, by selecting Save for the first time
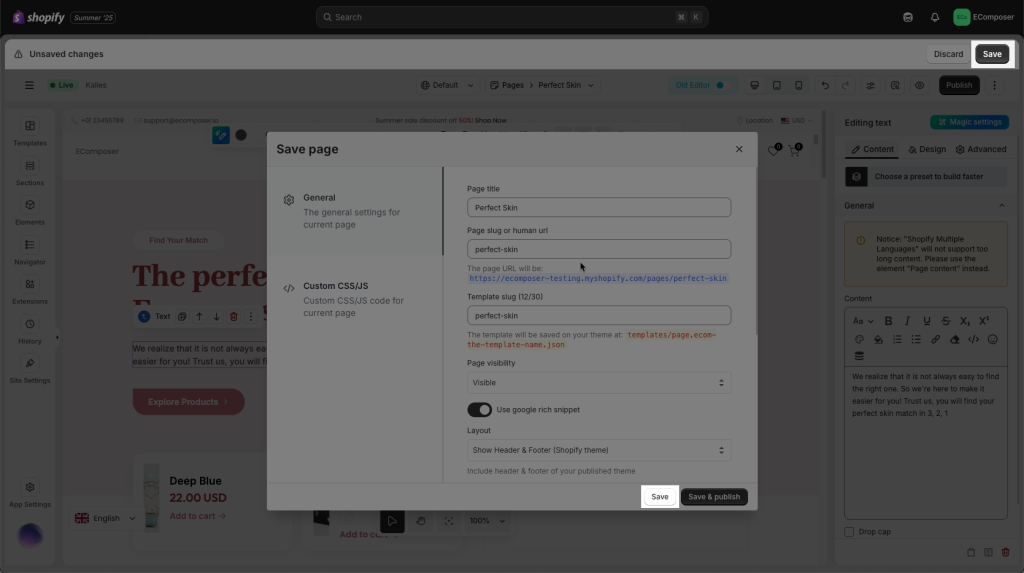
You can save it as a Draft Page and view it from the EComposer Dashboard.
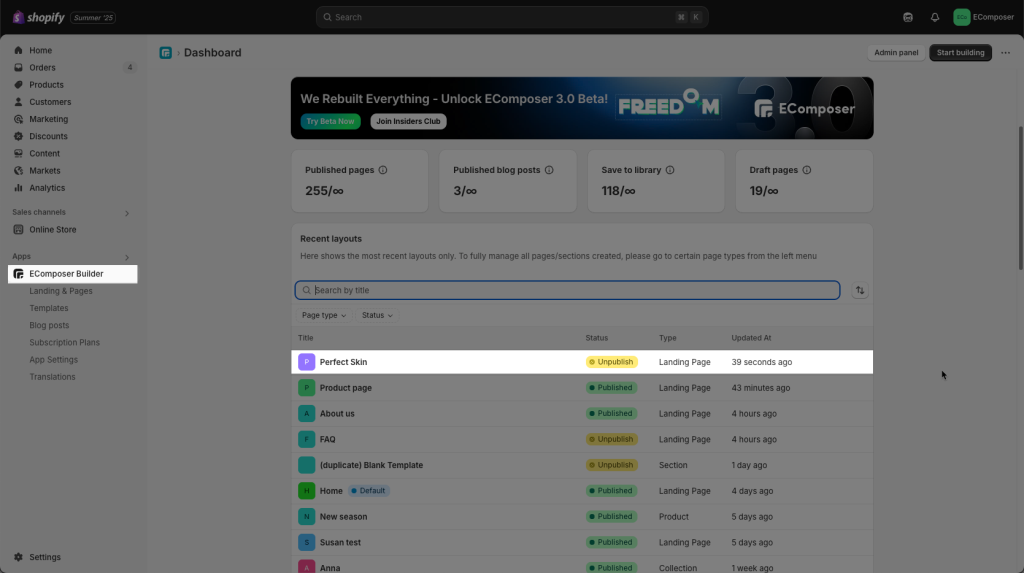
2.2. Save as draft (with the Published page)
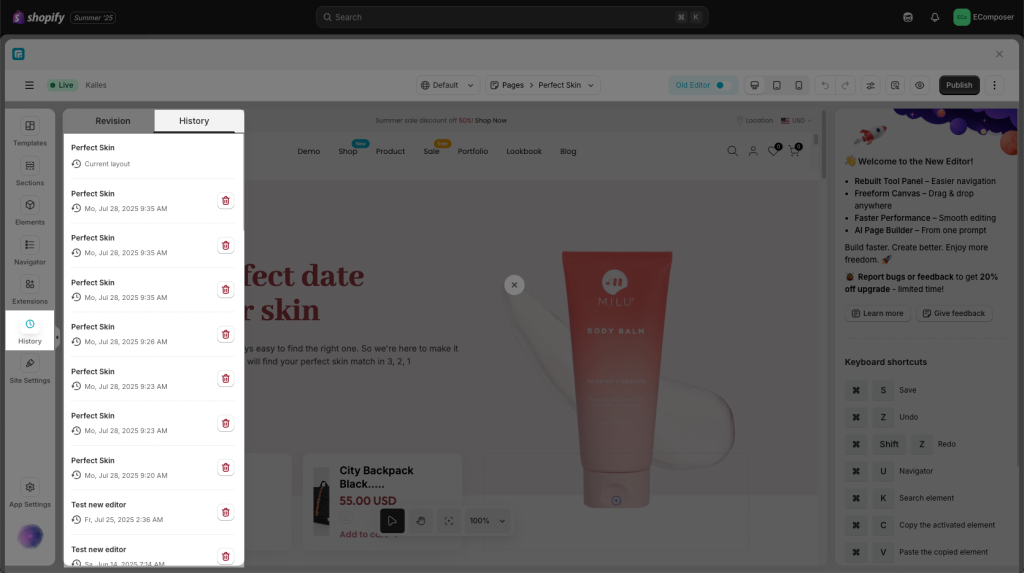
With the page that is already Published, you may hit the Save button. And then, if you want to use it again just need to get it in the History icon above to get it.
You can save more than 1 draft for a page and review it any time you want. Save as draft function will remain 20 latest versions of your page.
3. How to Duplicate a Page
If you want to create multiple pages with the same layout and change the content, follow these steps to save time:
- Open the editor of the page you want to duplicate.
- In the top Page Navigator, go to Page → hover over the page name → select “Duplicate”.
- A new page will be created with the status Unpublished and “Copy of” added to the name. It will show at the end of list. You can open it to edit and publish.
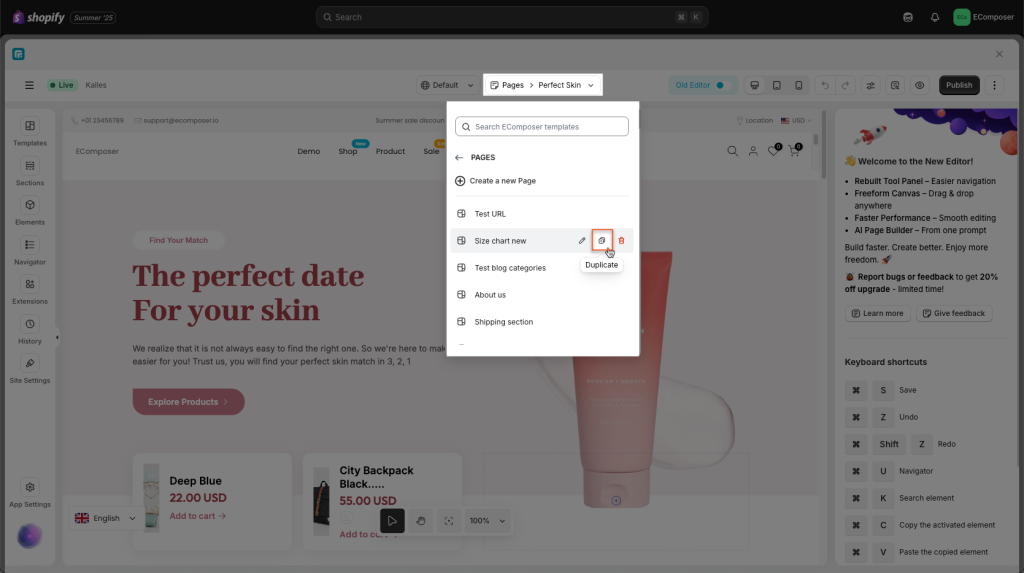
Note: You cannot duplicate templates that are currently set as Default (when the “Overwrite the Shopify default page” option is enabled) such as a Homepage, Product, Collection…
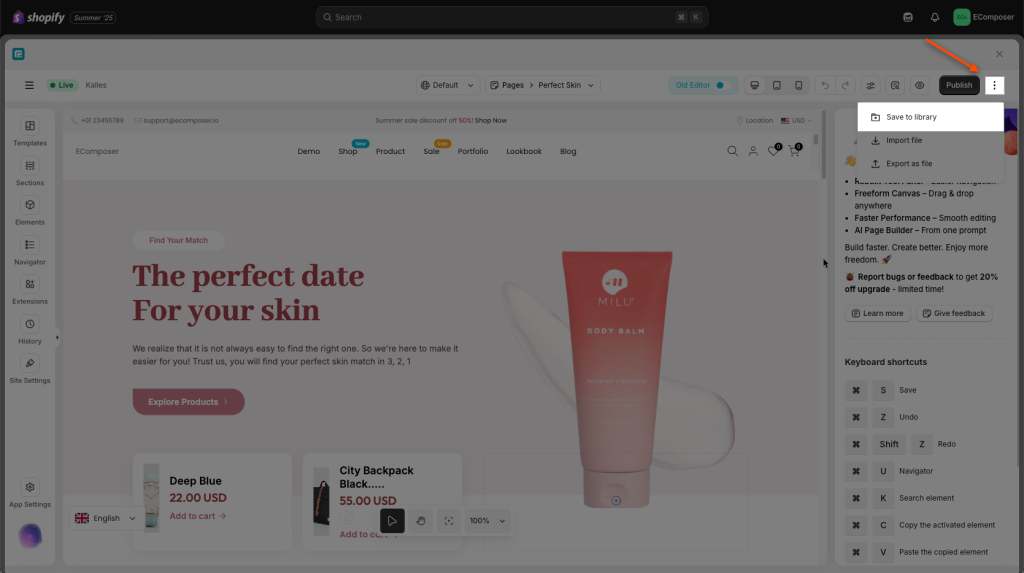
4. How to Save to a library
The “Save to Library” features allow you to save any page, and you can insert or edit it whenever you want to use it again.
- Save page: Choose Save to library feature in the bottom-left corner > Enter page’s name and click save.
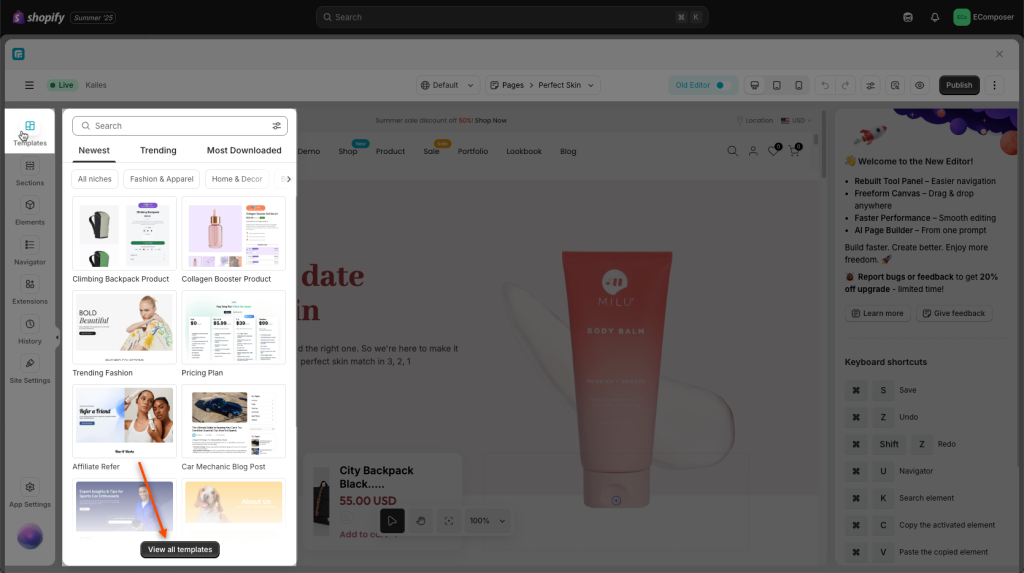
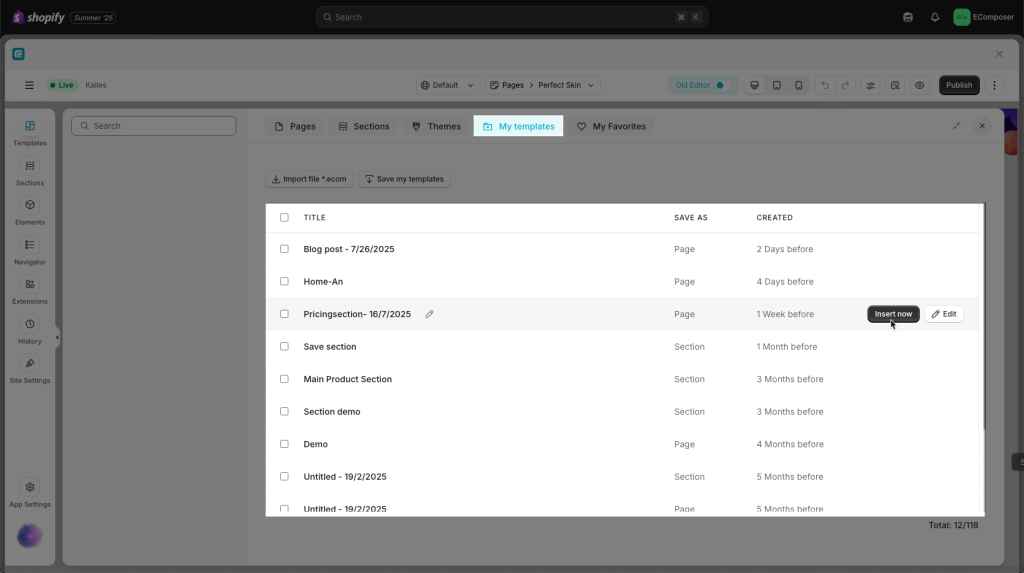
- Access Library: Click Templates -> View all templates choose My Templates tab to show all saved pages and sections.
You can easily reuse these saved sections on any other page without having to rebuild them from scratch. It’s a convenient way to speed up your website development process.
5. How to Preview/View your page from EComposer
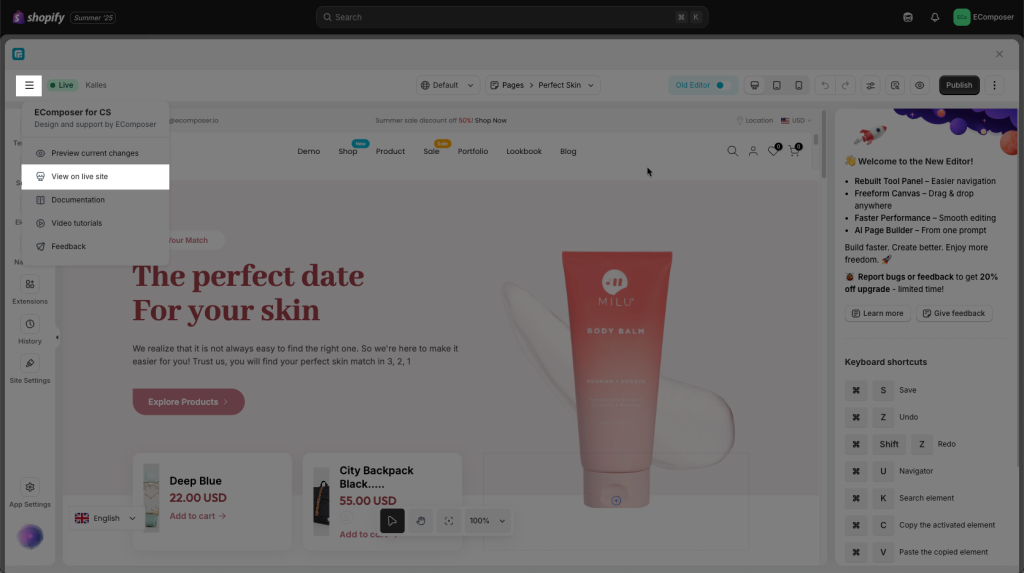
- Preview current changes: If you are designing a page but you haven’t Saved or Published the page, the Preview button allows you to view all the changes without Saving/Publishing the page. For another instance, even if you already Saved/Published it and then you are going to change the color or font for the page again. After that, you don’t want to press Save or Publish, but you still can view the result from the Preview button.
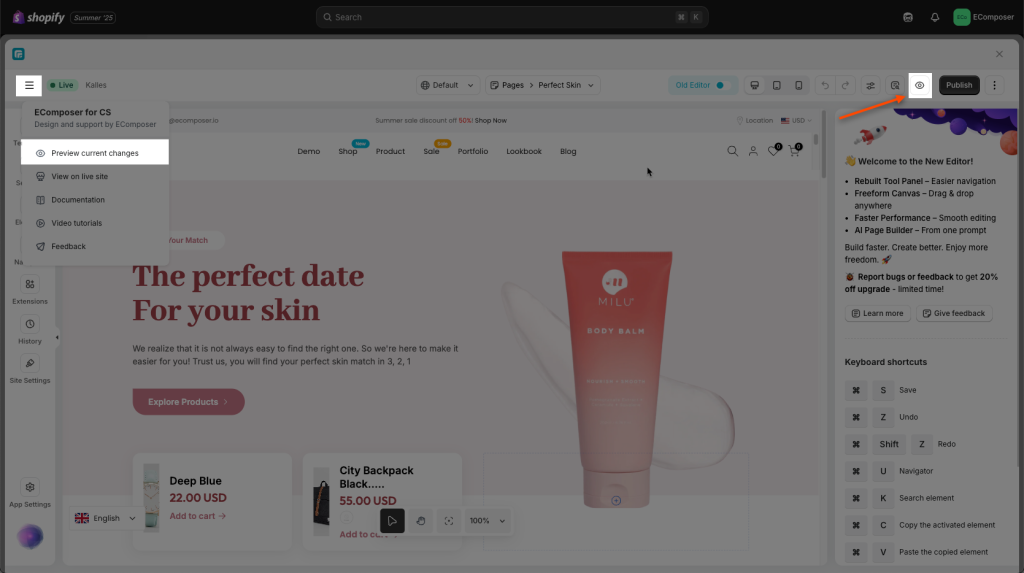
- View Page: Also, when you come to the View on live site button, then the result that you can view is the one that you already Saved or Published before.
6. How to determine the page’s current status
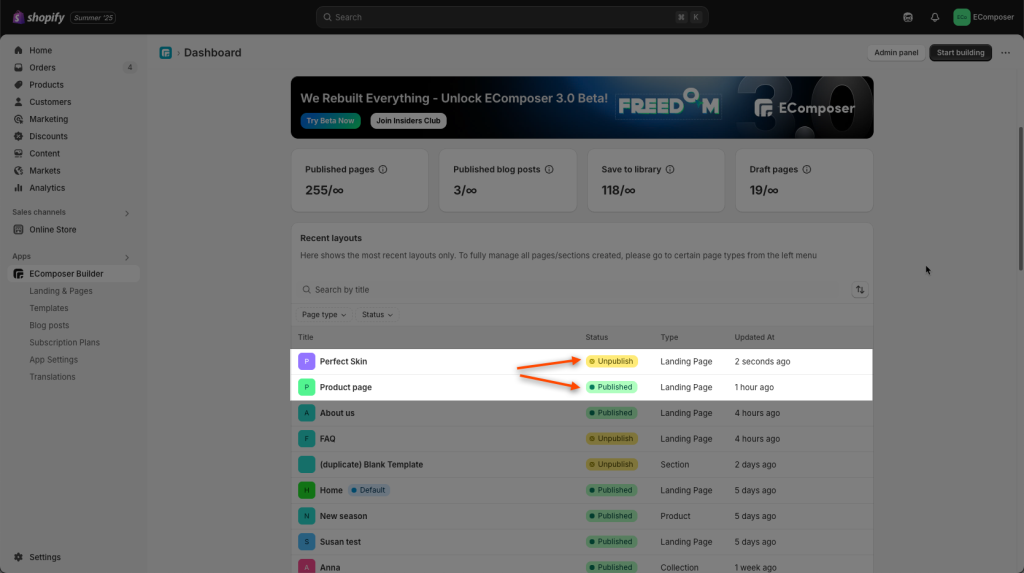
You may occasionally need to know the status of a page after saving; for example, whether it has been Published, withdrawn from publication as Unpublish, or is being saved as a Draft. Let me fully explain how to identify the page’s status.
- Draft/Unpublish: This allows you to save the design without publishing it and viewing it solely from the Preview button rather than the Live site.
- Publish: Let you share the result link with other staff members while viewing from the live site. Don’t worry, this option will just allow you to preserve the design and view it as if you were using it for your store, not overwrite yet.
- Overwrite Shopify default: The old layout from the theme will be replaced by the one from our app. If you do not have the Storefront Password, anyone can view it.
Landing Page/Standard Page: You will have two status like Unpublish or Publish.
