

Tabs
A tab layout on a website is a UI pattern that lets users switch between different content sections in the same area without leaving the page. It contains:
- Tab titles = the labels users click
- Tab panels = the content shown for each label
- Active state = the currently selected tab
From the left side (Elements tab), you will see the Tabs element in the list of elements. Drag and drop it to any position on the page.
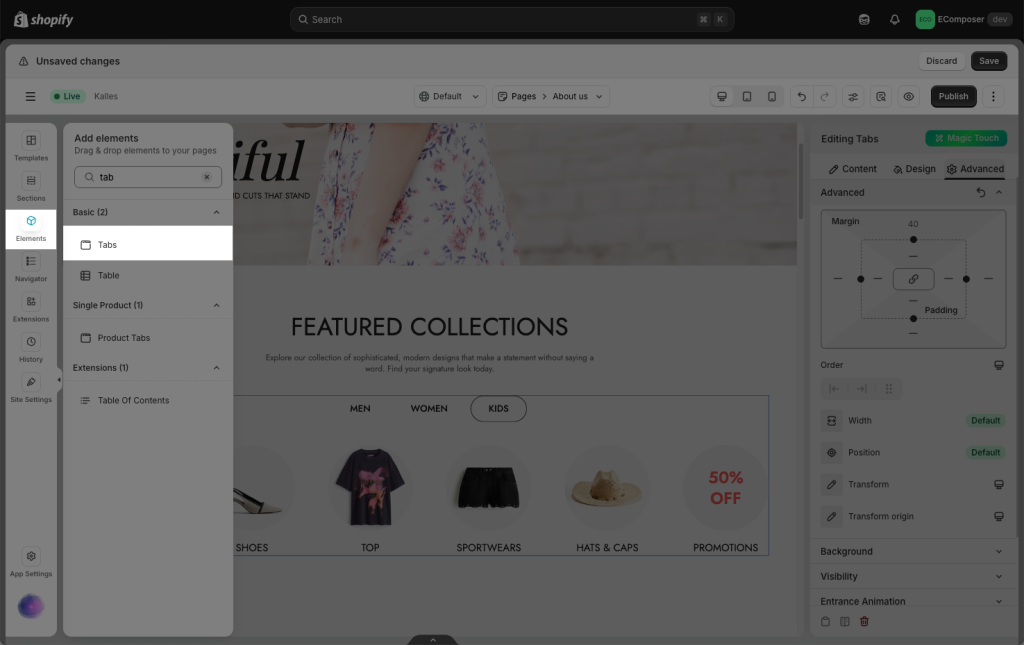
On the right sidebar, you will see all options to adjust this Tab element.

1. How to change the content of the tab
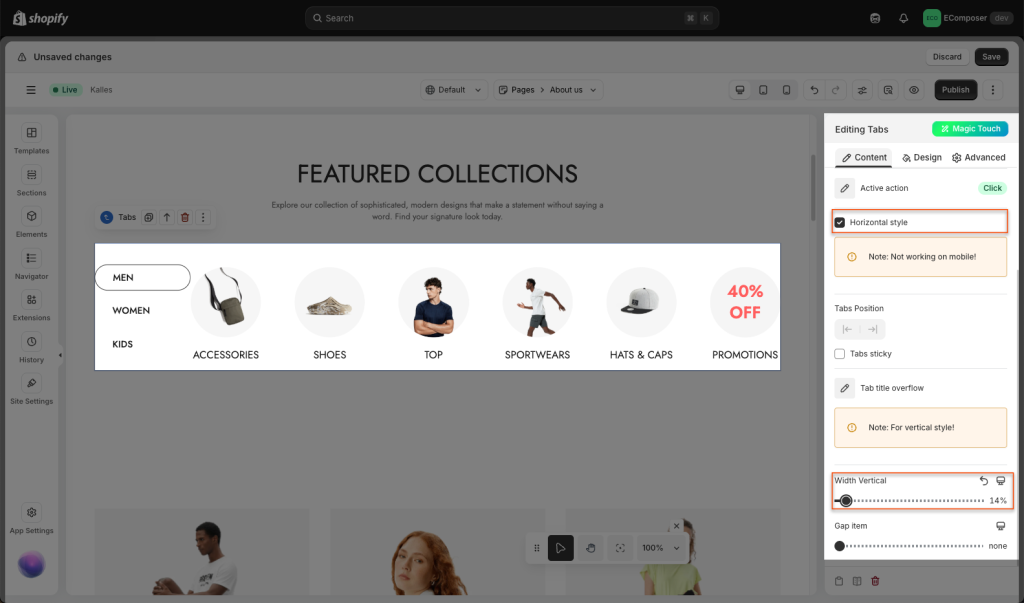
Women, Men, and Kids are tab buttons that you can edit/add/delete/move between them. When the user clicks Men, the Men content appears, and the other content is hidden. You can drag additional elements for each tab as well. Please follow the video below to learn how to set them up:
Horizontal style: You can choose this option to change the layout of the tab to horizontal style instead of the vertical mode as the default.
Note: This “Horizontal style” option doesn’t work on mobile.
2. How to change the design of the tab
You can change the borders, color of tab buttons, adjust the spacing of tab titles, etc. Please follow the video below to learn more about it.
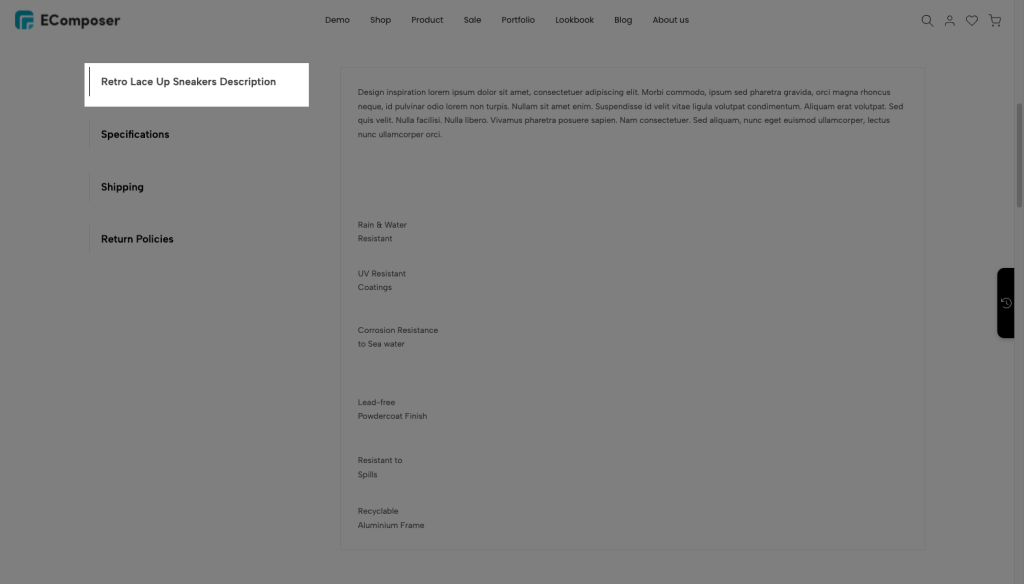
3. How to display Tab titles using Metafield
Normally, this setup is used when you want to build a Tab layout on the Product page, where each product can have different tab titles and content. In this case, Metafields are used to store and display dynamic content for each tab, instead of using static content.

Step 1: Create Product metafield
You can follow this detailed document to create a new Metafield.
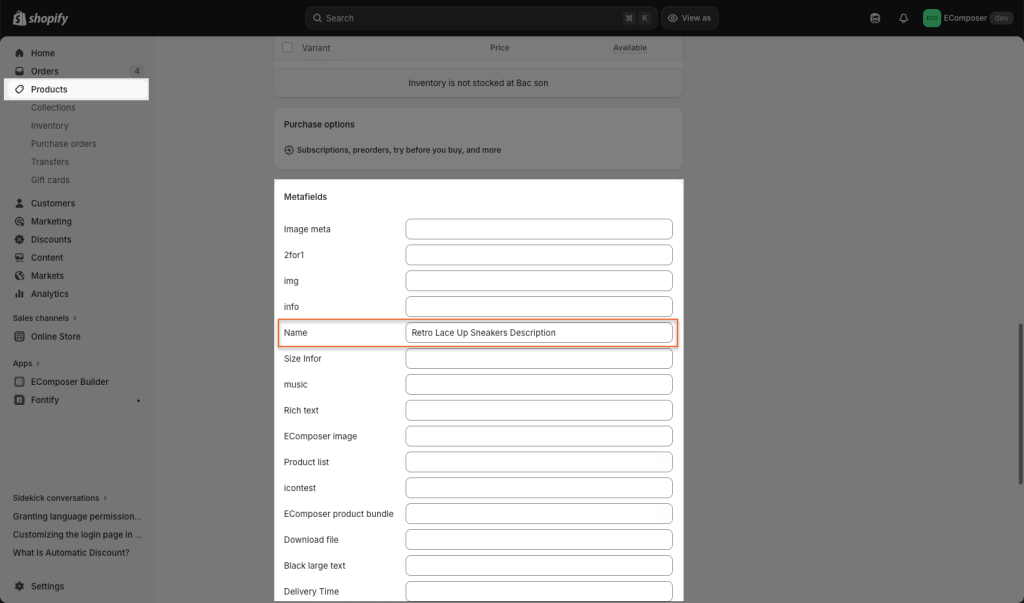
Step 2: Fill in these metafield values
After creating the metafield, go to each product in Shopify Admin and fill in the values.
- Example tab titles:
- “Description”
- “Specifications”
- “Shipping”
These values will be used as tab titles and can vary per product.
Step 3: Copy the metafield source code and paste it into the Tab element’s Title field.
{{product.metafields.custom.name | metafield_tag }}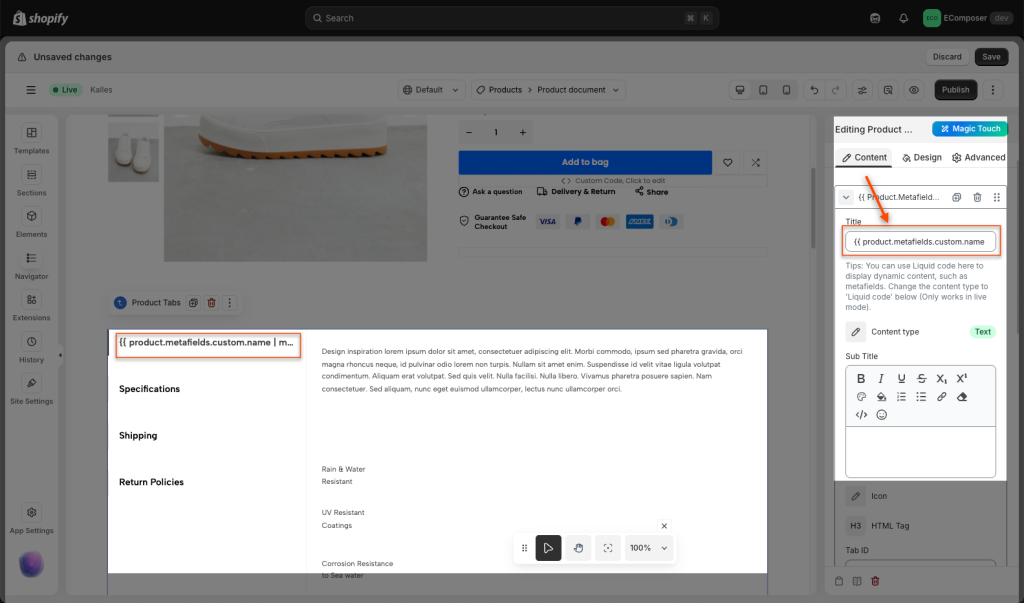
Step 4: Publish the Product page to check the live page.
You can follow this video to understand all steps above:
4. How to use Tab ID
You have an external button where clicking a button opens a specific tab without redirecting to a new page. To achieve the behavior, you need to Assign an ID to each tab content.
These identifiers act as references that allow the system to know which content belongs to which tab. For example, you might define tab IDs as “at-a-glance”, “what-in-the-box”, and “compatibility”. This naming does not need to follow a strict format, but it must be consistent and unique for each tab.
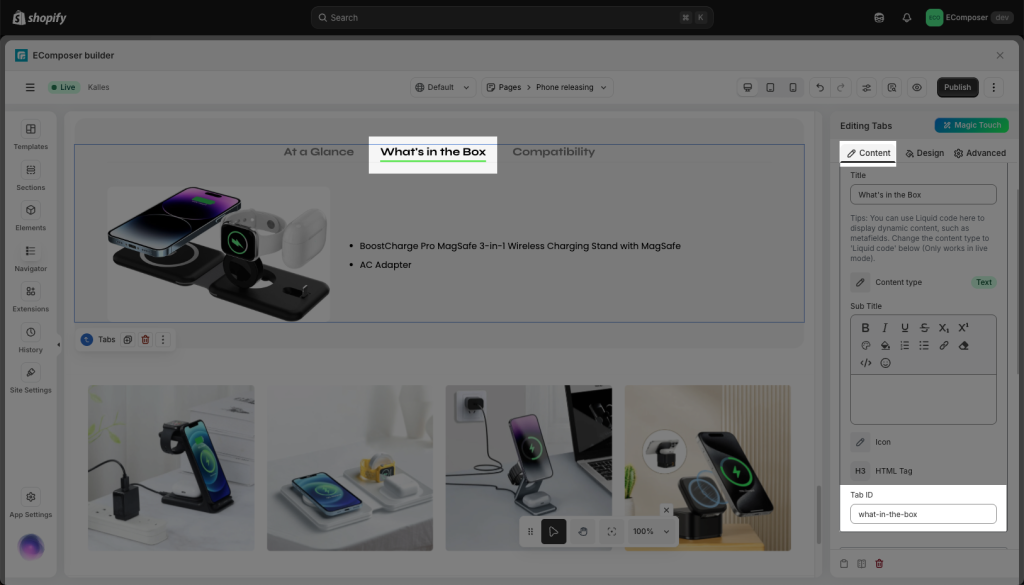
Next, setting up an URL for your external button:
If your store domain is mystore.com, the URL you can put to external button is #what-in-the-box or mystore.com/#what-in-the-box. When the page loads, the system reads this value, identifies the corresponding what-in-the-box tab, and automatically activates it.
You can follow this video for detailed steps:


