CRO Fixed Bundle
1. How to install the CRO Fixed Bundle extension
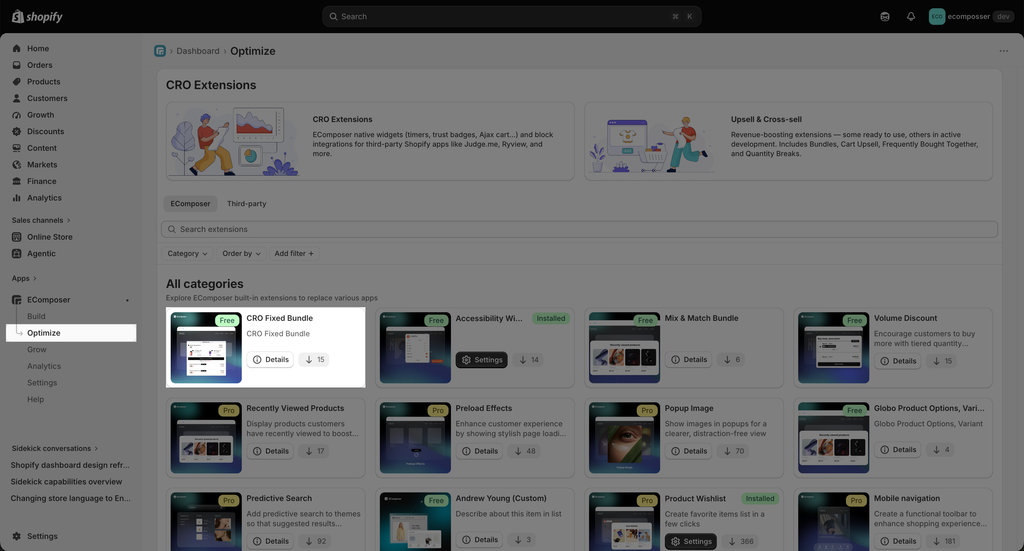
Step 1: From your EComposer dashboard, go to Optimize from the left sidebar menu.
Step 2: Search for the CRO Fixed Bundle extension.
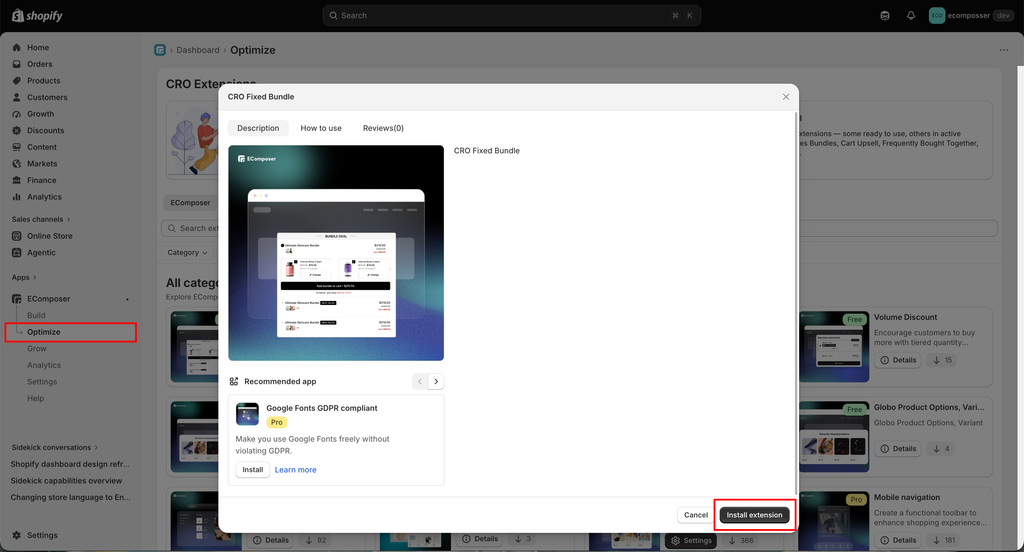
Step 3: Click Details and install the extension on your store.
2. Create and customize CRO Fixed Bundle extension
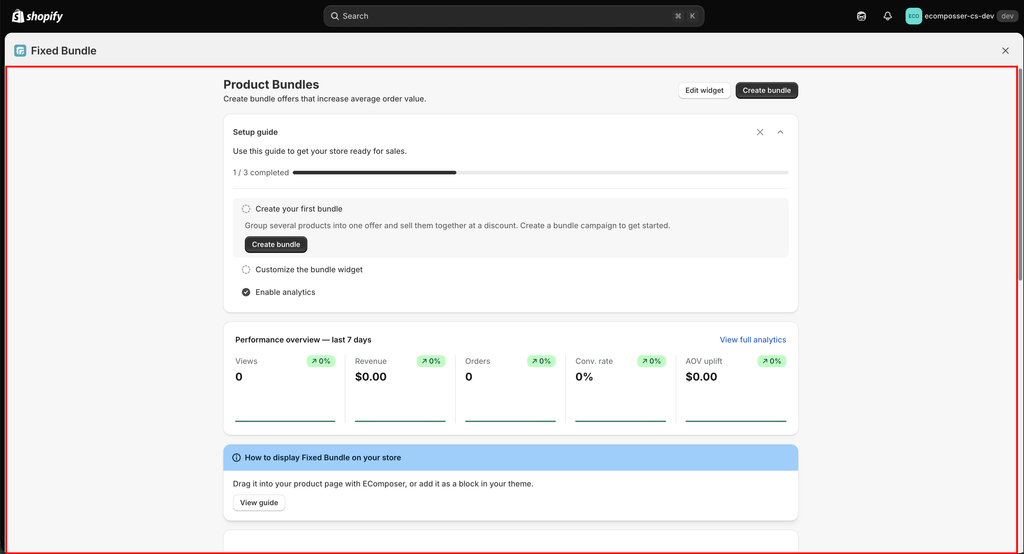
After clicking Install extension on the step above, the popup will be shown to let you create and customize the CRO Fixed Bundle extension.
2.1 Create a CRO Fixed Bundle
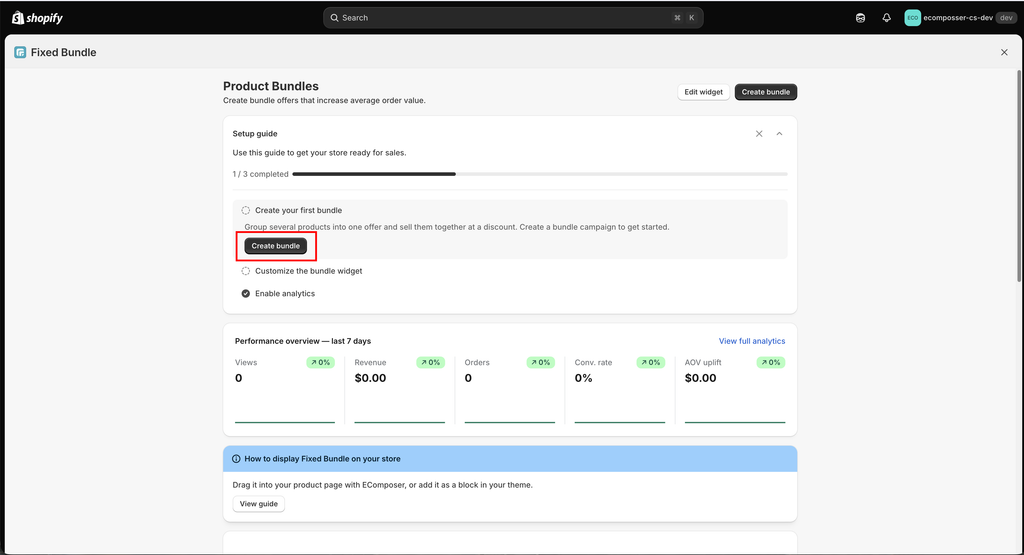
Step 1: Clicking Create bundle to start creating a bundle
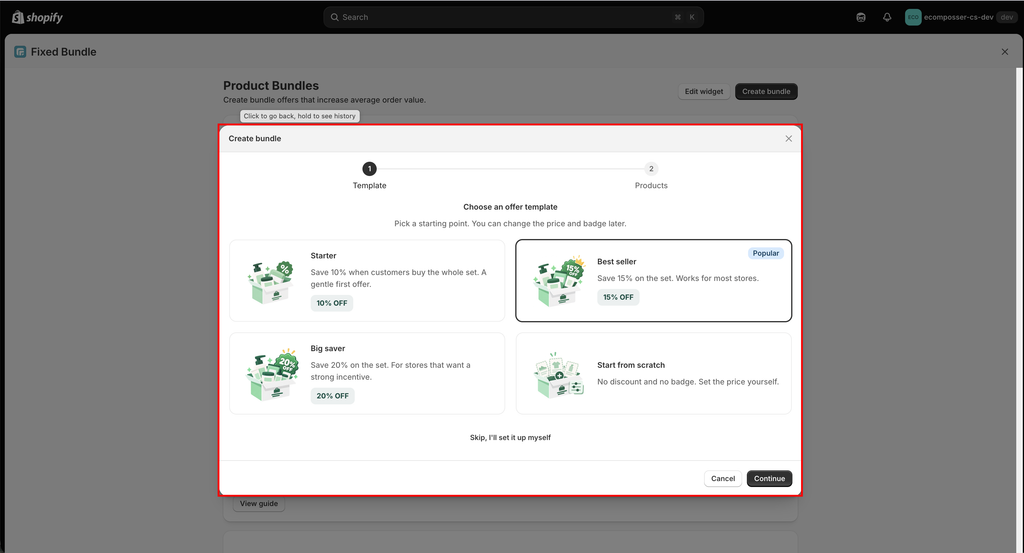
Step 2: Choose an offer template or skip to set it up manually by yourself. In this document, I will choose Best Seller template as an example
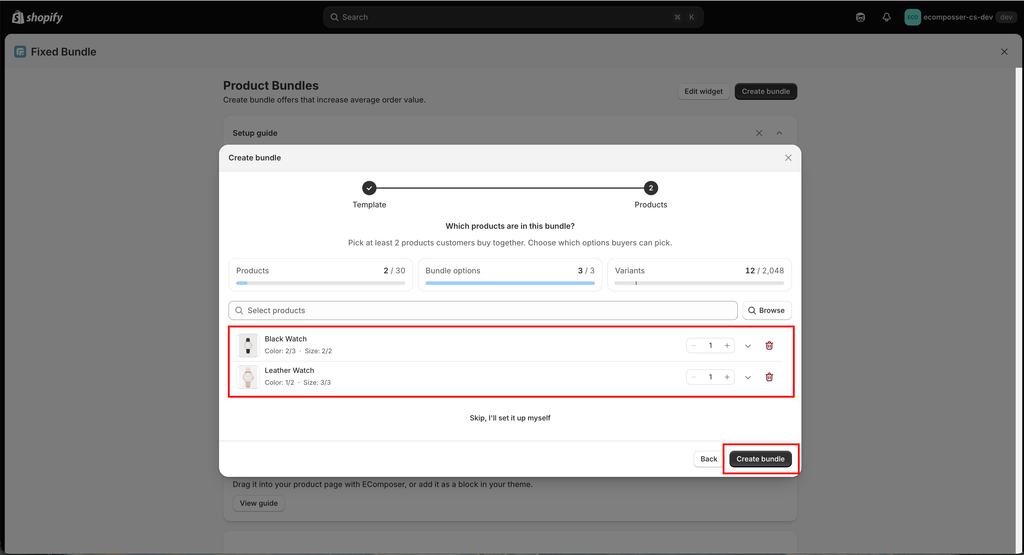
Step 3: Select product you want to show in the bundle. Then hit Create bundle
Note: You need to select at least 2 products to let customer buy together
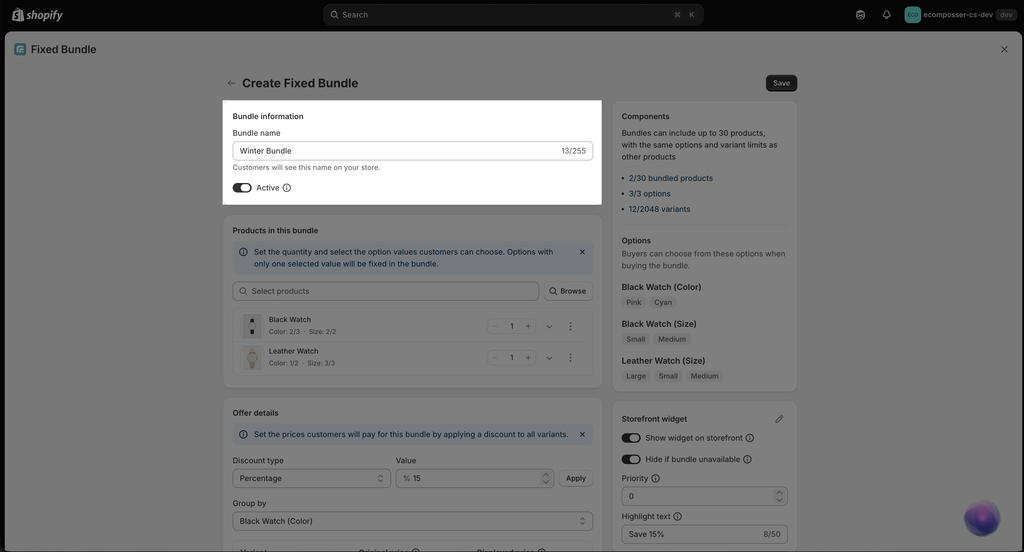
2.2 Customize the Fixed Bundle setting
- Set up Bundle information such as Bundle name and Status for the bundle.
2.3. Add CRO Fixed Bundle extension to the product page
Inside the EComposer editor, open the Extensions tab from the left sidebar, then find the CRO Fixed Bundle extension from the installed extensions list and drag it into your desired position on the page. After adding it successfully, you can edit it anytime you want by clicking here: